2010 FORD F250 SUPER DUTY transmission
[x] Cancel search: transmissionPage 278 of 408
Do not rock the vehicle for more than a minute or damage to the
transmission and tires may occur, or the engine may overheat.
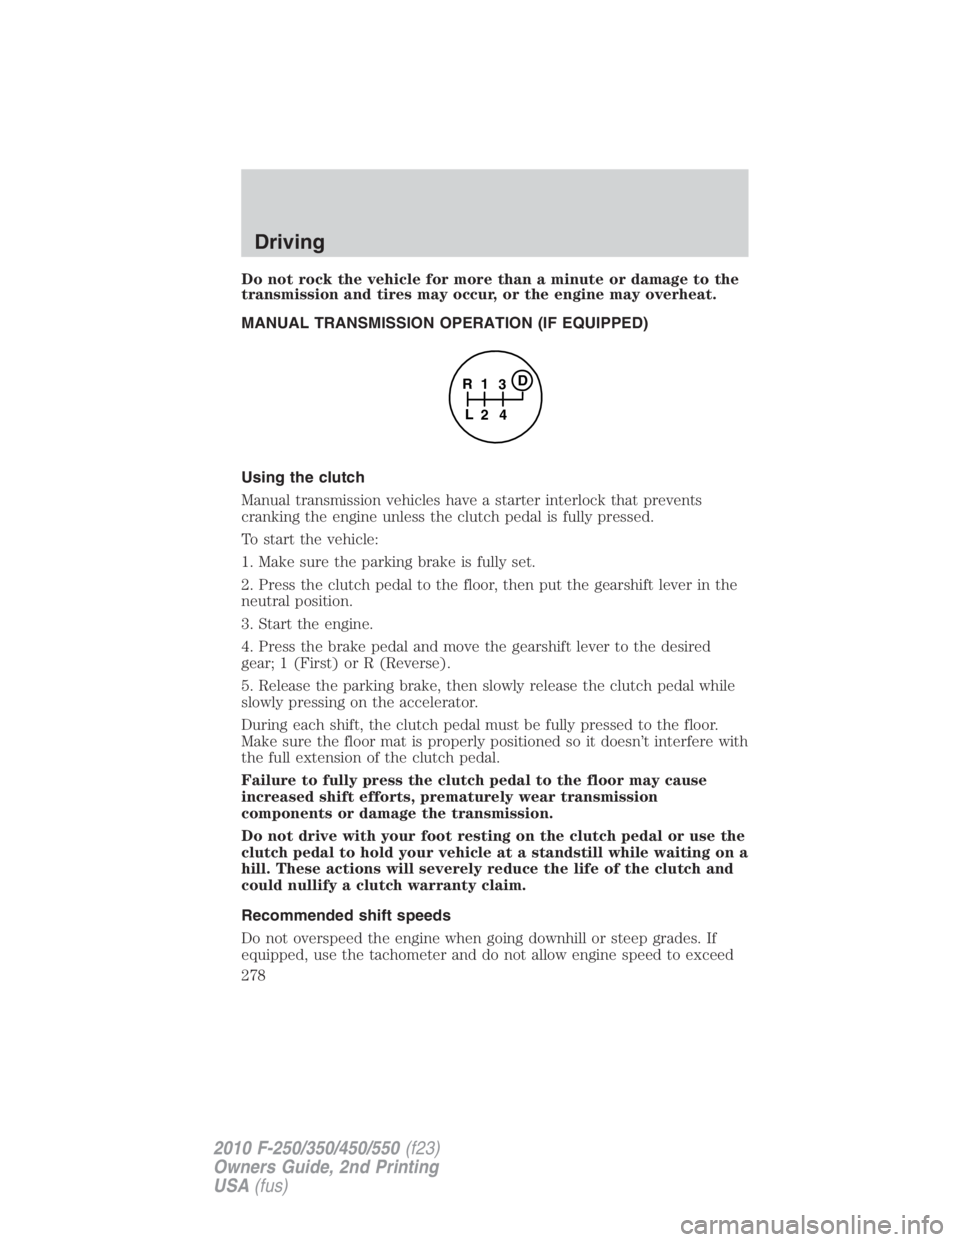
MANUAL TRANSMISSION OPERATION (IF EQUIPPED)
Using the clutch
Manual transmission vehicles have a starter interlock that prevents
cranking the engine unless the clutch pedal is fully pressed.
To start the vehicle:
1. Make sure the parking brake is fully set.
2. Press the clutch pedal to the floor, then put the gearshift lever in the
neutral position.
3. Start the engine.
4. Press the brake pedal and move the gearshift lever to the desired
gear; 1 (First) or R (Reverse).
5. Release the parking brake, then slowly release the clutch pedal while
slowly pressing on the accelerator.
During each shift, the clutch pedal must be fully pressed to the floor.
Make sure the floor mat is properly positioned so it doesn’t interfere with
the full extension of the clutch pedal.
Failure to fully press the clutch pedal to the floor may cause
increased shift efforts, prematurely wear transmission
components or damage the transmission.
Do not drive with your foot resting on the clutch pedal or use the
clutch pedal to hold your vehicle at a standstill while waiting on a
hill. These actions will severely reduce the life of the clutch and
could nullify a clutch warranty claim.
Recommended shift speeds
Do not overspeed the engine when going downhill or steep grades. If
equipped, use the tachometer and do not allow engine speed to exceed 1
24R
L 3 D
Driving
278
2010 F-250/350/450/550 (f23)
Owners Guide, 2nd Printing
USA (fus)
Page 279 of 408
the redline area. Operating the engine beyond the recommended speeds
can cause severe engine damage.
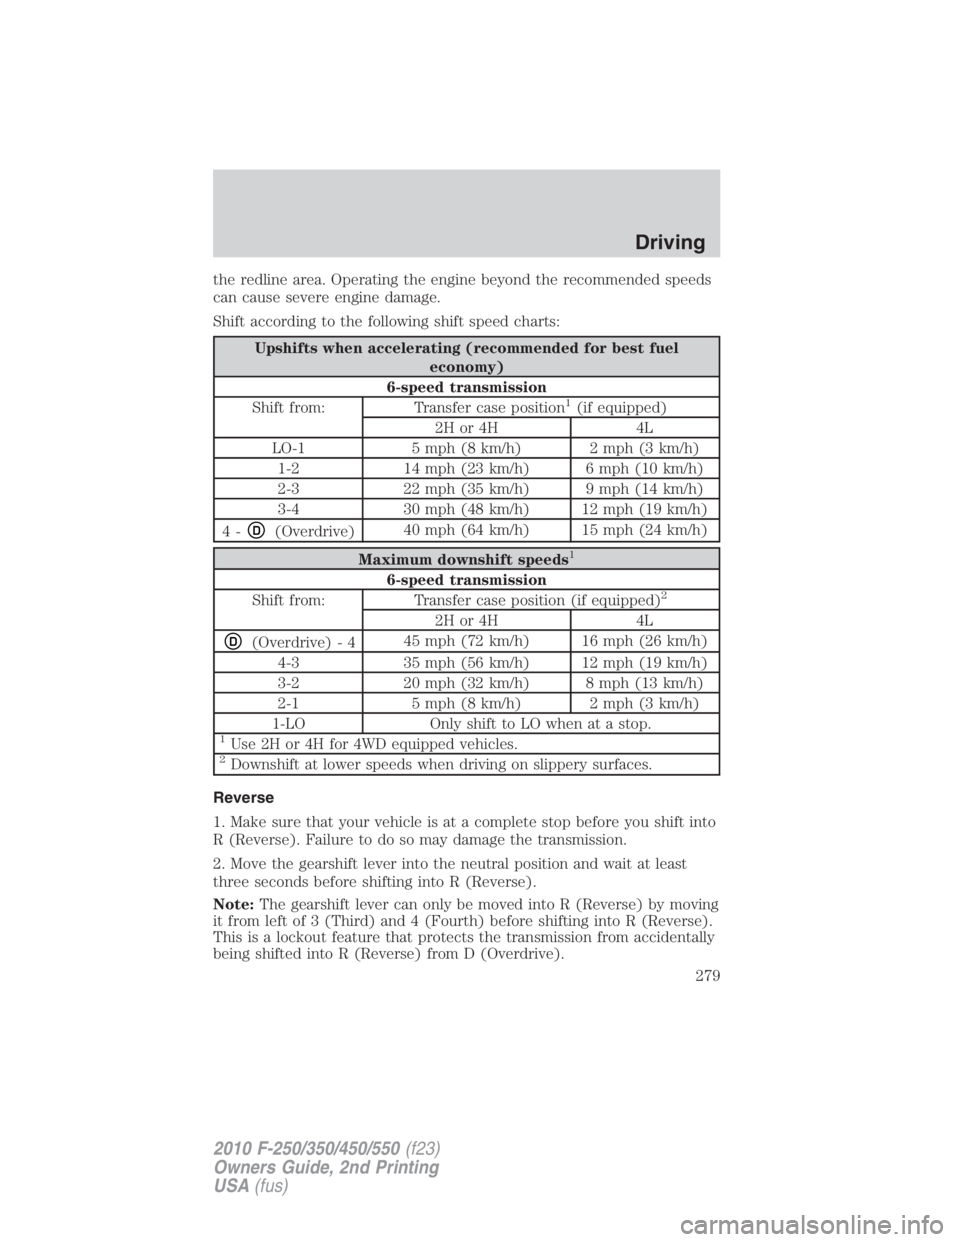
Shift according to the following shift speed charts:
Upshifts when accelerating (recommended for best fuel
economy)
6-speed transmission
Shift from: Transfer case position 1
(if equipped)
2H or 4H 4L
LO-1 5 mph (8 km/h) 2 mph (3 km/h)
1-2 14 mph (23 km/h) 6 mph (10 km/h)
2-3 22 mph (35 km/h) 9 mph (14 km/h)
3-4 30 mph (48 km/h) 12 mph (19 km/h)
4- D
(Overdrive) 40 mph (64 km/h) 15 mph (24 km/h)
Maximum downshift speeds 1
6-speed transmission
Shift from: Transfer case position (if equipped) 2
2H or 4H 4LD
(Overdrive) - 4 45 mph (72 km/h) 16 mph (26 km/h)
4-3 35 mph (56 km/h) 12 mph (19 km/h)
3-2 20 mph (32 km/h) 8 mph (13 km/h)
2-1 5 mph (8 km/h) 2 mph (3 km/h)
1-LO Only shift to LO when at a stop. 1
Use 2H or 4H for 4WD equipped vehicles. 2
Downshift at lower speeds when driving on slippery surfaces.
Reverse
1. Make sure that your vehicle is at a complete stop before you shift into
R (Reverse). Failure to do so may damage the transmission.
2. Move the gearshift lever into the neutral position and wait at least
three seconds before shifting into R (Reverse).
Note: The gearshift lever can only be moved into R (Reverse) by moving
it from left of 3 (Third) and 4 (Fourth) before shifting into R (Reverse).
This is a lockout feature that protects the transmission from accidentally
being shifted into R (Reverse) from D (Overdrive). Driving
279
2010 F-250/350/450/550 (f23)
Owners Guide, 2nd Printing
USA (fus)
Page 282 of 408
REARVIEW CAMERA SYSTEM (IF EQUIPPED)
The rearview camera system,
located on the tailgate, provides a
video image, which appears in the
rearview mirror or on the navigation
screen (if equipped), of the area
behind the vehicle. It adds
assistance to the driver while
reversing or reverse parking the
vehicle.
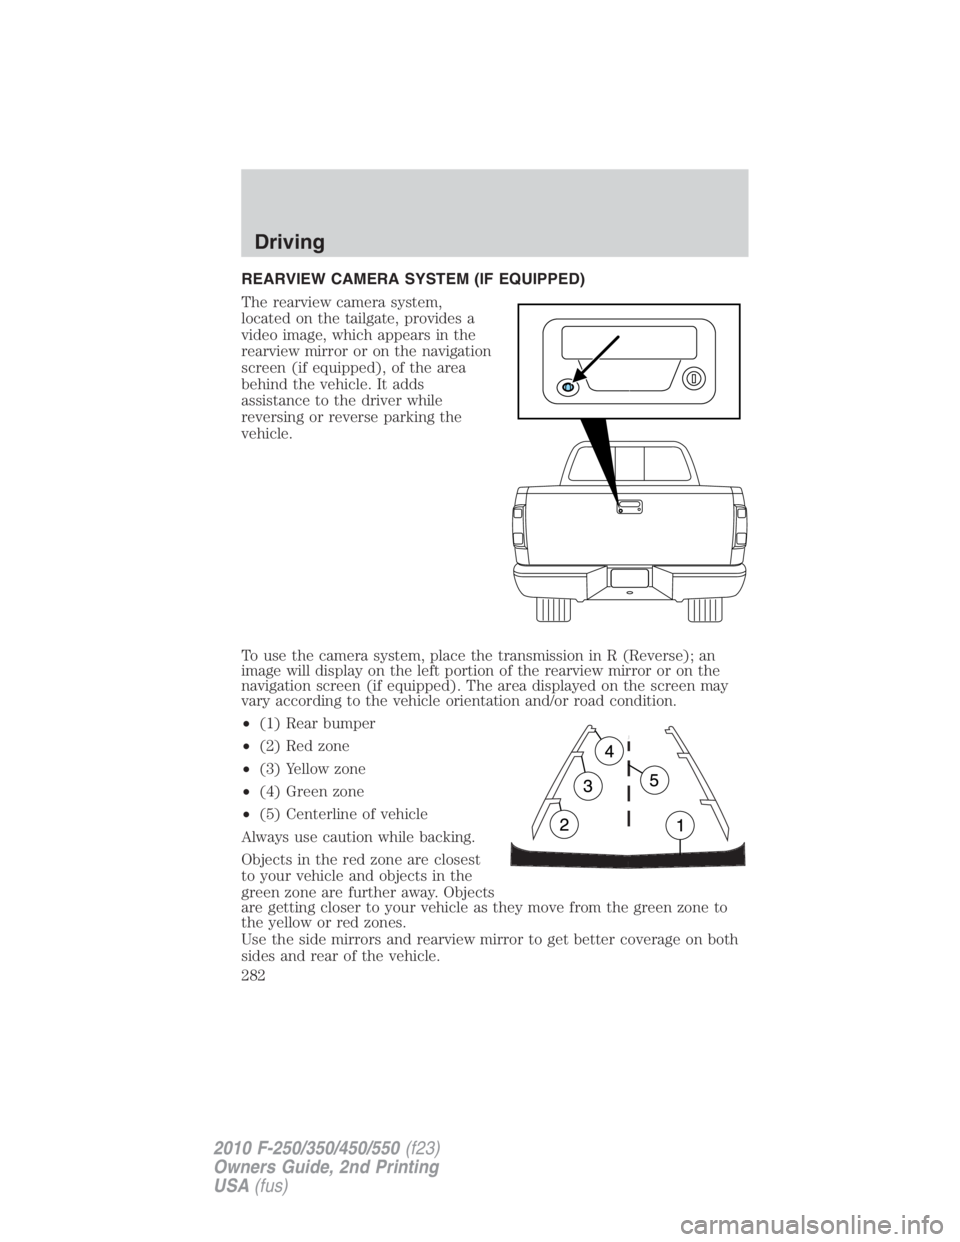
To use the camera system, place the transmission in R (Reverse); an
image will display on the left portion of the rearview mirror or on the
navigation screen (if equipped). The area displayed on the screen may
vary according to the vehicle orientation and/or road condition.
• (1) Rear bumper
• (2) Red zone
• (3) Yellow zone
• (4) Green zone
• (5) Centerline of vehicle
Always use caution while backing.
Objects in the red zone are closest
to your vehicle and objects in the
green zone are further away. Objects
are getting closer to your vehicle as they move from the green zone to
the yellow or red zones.
Use the side mirrors and rearview mirror to get better coverage on both
sides and rear of the vehicle.Driving
282
2010 F-250/350/450/550 (f23)
Owners Guide, 2nd Printing
USA (fus)
Page 285 of 408
• For proper operation, make sure that each hub is fully engaged
and that both hub locks are set to the same position (both set
to LOCK or both set to FREE). To engage LOCK, turn the hub
locks completely clockwise; to disengage the hubs (FREE),
turn the hub locks completely counterclockwise.
• The vehicle should not be driven in 4X4 High or 4X4 Low
modes with the hub locks set to FREE as this condition may
damage driveline system components.
• Some vehicles may be equipped with wheel ornaments that cover the
4x4 manual hub lock. These ornaments must be removed to access
the manual hub locks.
Electronic Shift On the Fly (ESOF) 4x4 system (if equipped)
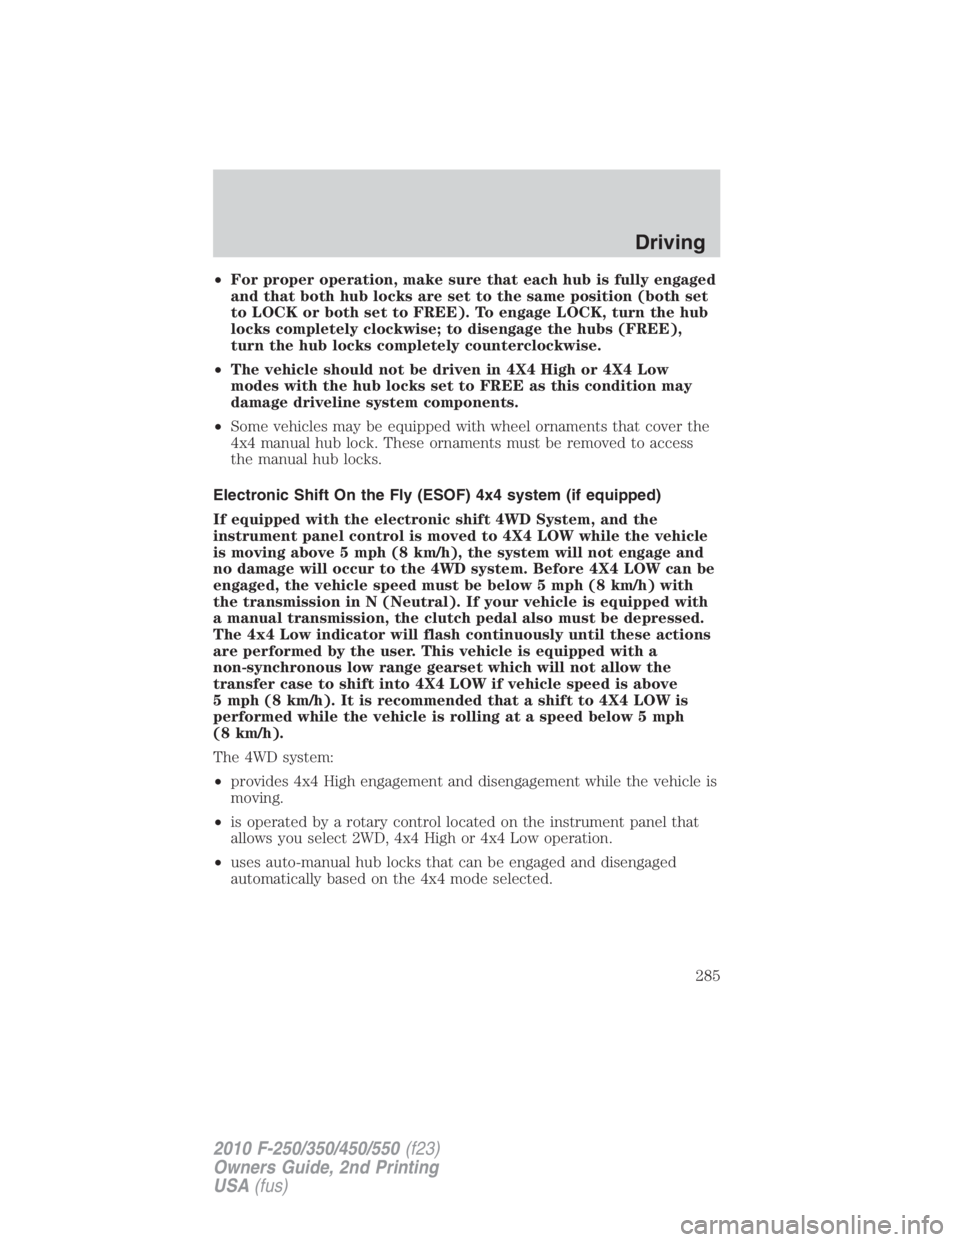
If equipped with the electronic shift 4WD System, and the
instrument panel control is moved to 4X4 LOW while the vehicle
is moving above 5 mph (8 km/h), the system will not engage and
no damage will occur to the 4WD system. Before 4X4 LOW can be
engaged, the vehicle speed must be below 5 mph (8 km/h) with
the transmission in N (Neutral). If your vehicle is equipped with
a manual transmission, the clutch pedal also must be depressed.
The 4x4 Low indicator will flash continuously until these actions
are performed by the user. This vehicle is equipped with a
non-synchronous low range gearset which will not allow the
transfer case to shift into 4X4 LOW if vehicle speed is above
5 mph (8 km/h). It is recommended that a shift to 4X4 LOW is
performed while the vehicle is rolling at a speed below 5 mph
(8 km/h).
The 4WD system:
• provides 4x4 High engagement and disengagement while the vehicle is
moving.
• is operated by a rotary control located on the instrument panel that
allows you select 2WD, 4x4 High or 4x4 Low operation.
• uses auto-manual hub locks that can be engaged and disengaged
automatically based on the 4x4 mode selected. Driving
285
2010 F-250/350/450/550 (f23)
Owners Guide, 2nd Printing
USA (fus)
Page 288 of 408
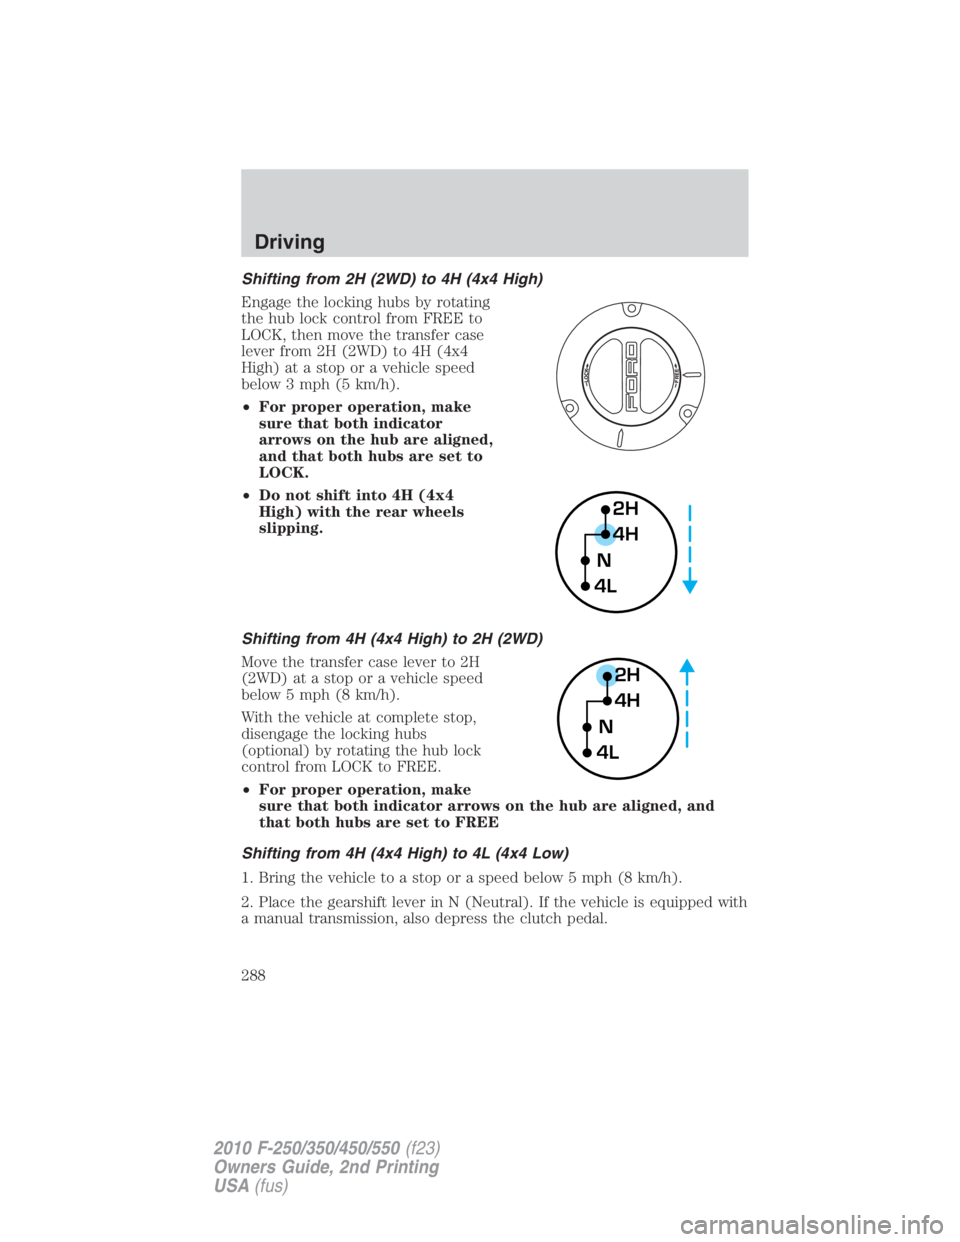
Shifting from 2H (2WD) to 4H (4x4 High)
Engage the locking hubs by rotating
the hub lock control from FREE to
LOCK, then move the transfer case
lever from 2H (2WD) to 4H (4x4
High) at a stop or a vehicle speed
below 3 mph (5 km/h).
• For proper operation, make
sure that both indicator
arrows on the hub are aligned,
and that both hubs are set to
LOCK.
• Do not shift into 4H (4x4
High) with the rear wheels
slipping.
Shifting from 4H (4x4 High) to 2H (2WD)
Move the transfer case lever to 2H
(2WD) at a stop or a vehicle speed
below 5 mph (8 km/h).
With the vehicle at complete stop,
disengage the locking hubs
(optional) by rotating the hub lock
control from LOCK to FREE.
• For proper operation, make
sure that both indicator arrows on the hub are aligned, and
that both hubs are set to FREE
Shifting from 4H (4x4 High) to 4L (4x4 Low)
1. Bring the vehicle to a stop or a speed below 5 mph (8 km/h).
2. Place the gearshift lever in N (Neutral). If the vehicle is equipped with
a manual transmission, also depress the clutch pedal. 2H
4H
4L N
2H
4H
4L NDriving
288
2010 F-250/350/450/550 (f23)
Owners Guide, 2nd Printing
USA (fus)
Page 289 of 408
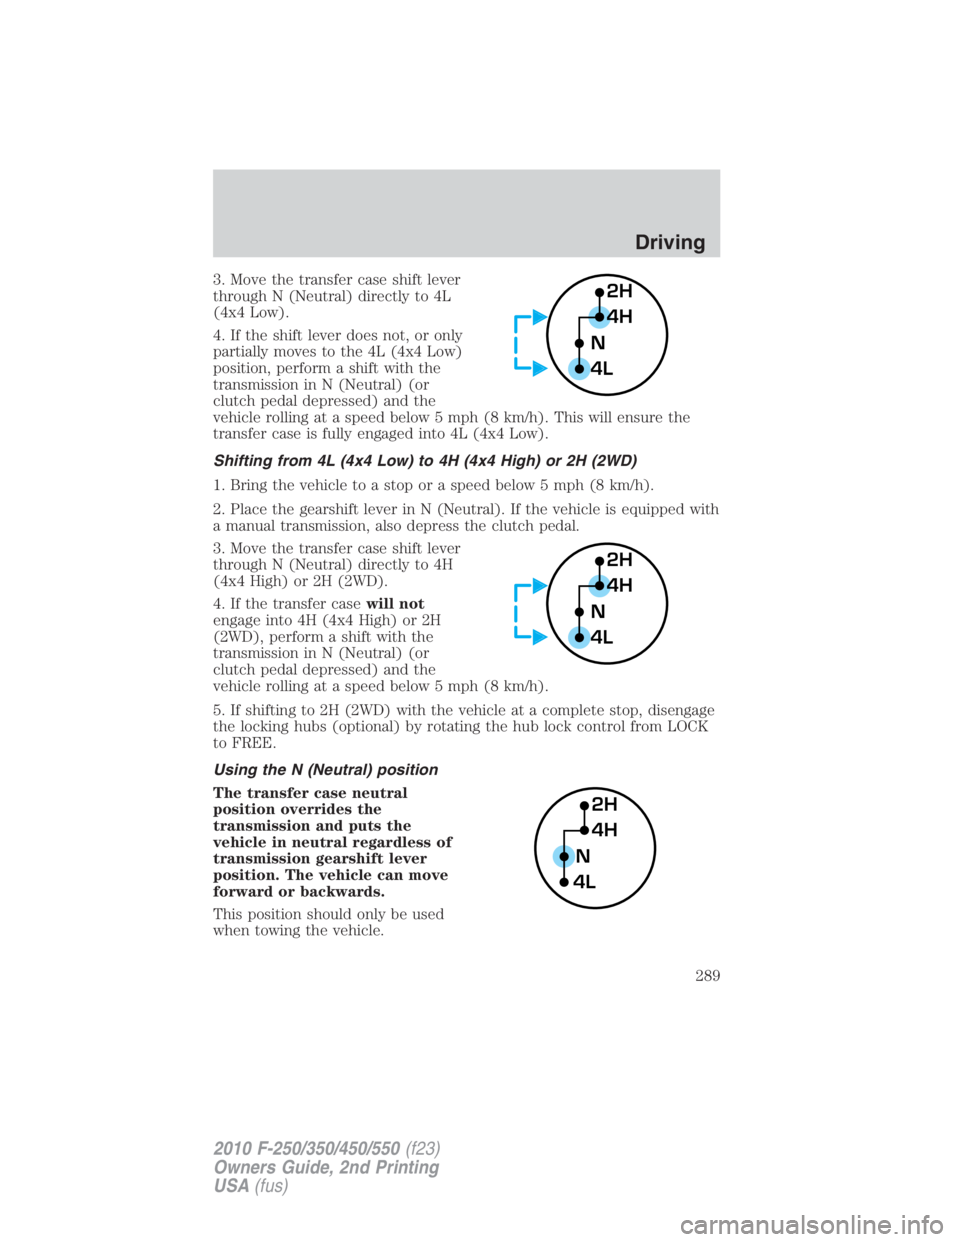
3. Move the transfer case shift lever
through N (Neutral) directly to 4L
(4x4 Low).
4. If the shift lever does not, or only
partially moves to the 4L (4x4 Low)
position, perform a shift with the
transmission in N (Neutral) (or
clutch pedal depressed) and the
vehicle rolling at a speed below 5 mph (8 km/h). This will ensure the
transfer case is fully engaged into 4L (4x4 Low).
Shifting from 4L (4x4 Low) to 4H (4x4 High) or 2H (2WD)
1. Bring the vehicle to a stop or a speed below 5 mph (8 km/h).
2. Place the gearshift lever in N (Neutral). If the vehicle is equipped with
a manual transmission, also depress the clutch pedal.
3. Move the transfer case shift lever
through N (Neutral) directly to 4H
(4x4 High) or 2H (2WD).
4. If the transfer case will not
engage into 4H (4x4 High) or 2H
(2WD), perform a shift with the
transmission in N (Neutral) (or
clutch pedal depressed) and the
vehicle rolling at a speed below 5 mph (8 km/h).
5. If shifting to 2H (2WD) with the vehicle at a complete stop, disengage
the locking hubs (optional) by rotating the hub lock control from LOCK
to FREE.
Using the N (Neutral) position
The transfer case neutral
position overrides the
transmission and puts the
vehicle in neutral regardless of
transmission gearshift lever
position. The vehicle can move
forward or backwards.
This position should only be used
when towing the vehicle. 2H
4H
4L N
2H
4H
4L N
2H
4H
4L NDriving
289
2010 F-250/350/450/550 (f23)
Owners Guide, 2nd Printing
USA (fus)
Page 291 of 408
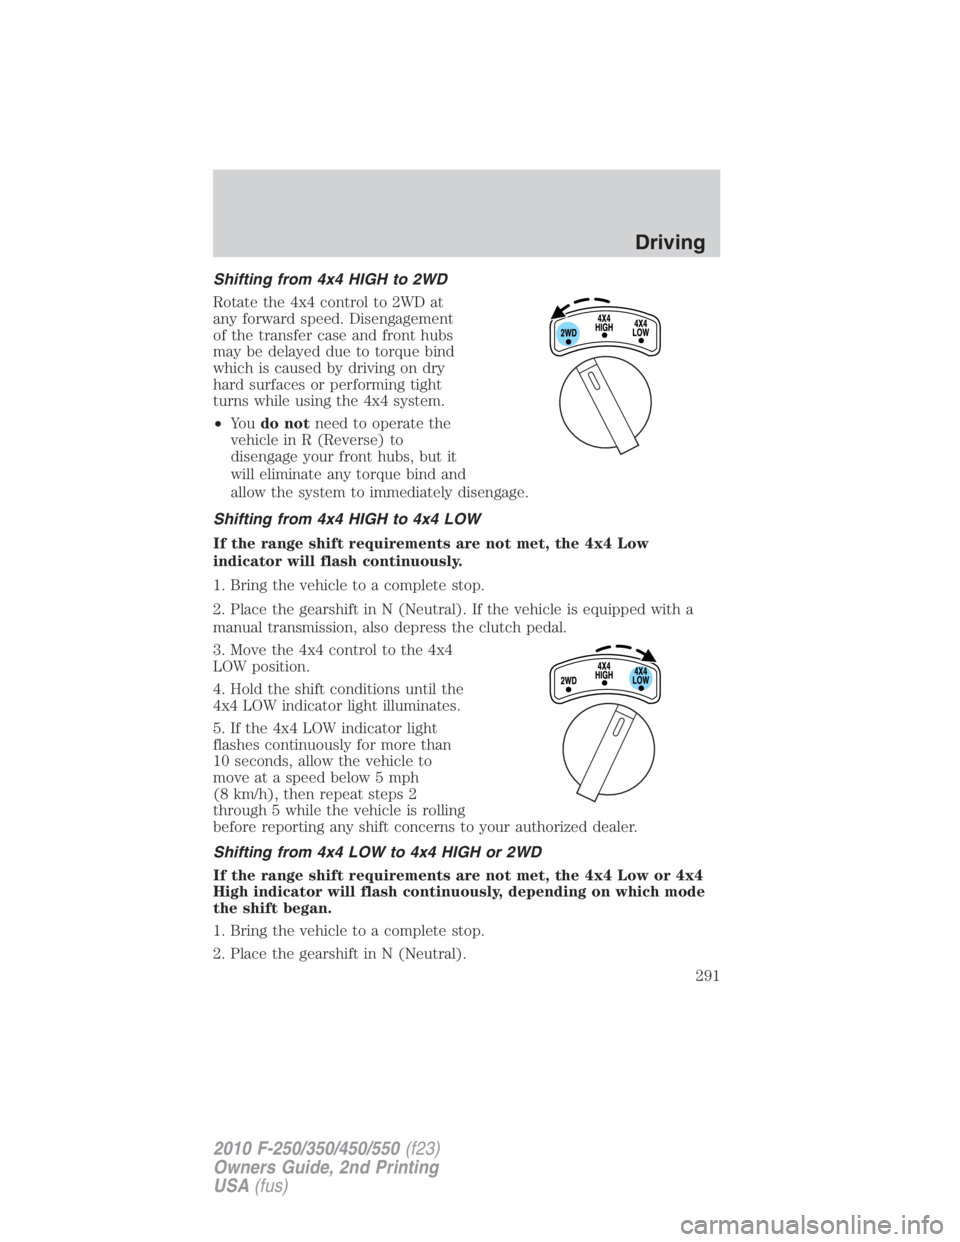
Shifting from 4x4 HIGH to 2WD
Rotate the 4x4 control to 2WD at
any forward speed. Disengagement
of the transfer case and front hubs
may be delayed due to torque bind
which is caused by driving on dry
hard surfaces or performing tight
turns while using the 4x4 system.
• Yo u do not need to operate the
vehicle in R (Reverse) to
disengage your front hubs, but it
will eliminate any torque bind and
allow the system to immediately disengage.
Shifting from 4x4 HIGH to 4x4 LOW
If the range shift requirements are not met, the 4x4 Low
indicator will flash continuously.
1. Bring the vehicle to a complete stop.
2. Place the gearshift in N (Neutral). If the vehicle is equipped with a
manual transmission, also depress the clutch pedal.
3. Move the 4x4 control to the 4x4
LOW position.
4. Hold the shift conditions until the
4x4 LOW indicator light illuminates.
5. If the 4x4 LOW indicator light
flashes continuously for more than
10 seconds, allow the vehicle to
move at a speed below 5 mph
(8 km/h), then repeat steps 2
through 5 while the vehicle is rolling
before reporting any shift concerns to your authorized dealer.
Shifting from 4x4 LOW to 4x4 HIGH or 2WD
If the range shift requirements are not met, the 4x4 Low or 4x4
High indicator will flash continuously, depending on which mode
the shift began.
1. Bring the vehicle to a complete stop.
2. Place the gearshift in N (Neutral). Driving
291
2010 F-250/350/450/550 (f23)
Owners Guide, 2nd Printing
USA (fus)
Page 293 of 408
Basic operating principles
• Do not use 4WD on dry, hard surfaced roads. Doing so will produce
excessive noise, increase tire wear and may damage drive components.
4WD modes are only intended for consistently slippery or loose
surfaces.
• Drive slower in strong crosswinds which can affect the normal steering
characteristics of your vehicle.
• Be extremely careful when driving on pavement made slippery by
loose sand, water, gravel, snow or ice.
If your vehicle goes off the edge of the pavement
• If your vehicle goes off the edge of the pavement, slow down, but
avoid severe brake application, ease the vehicle back onto the
pavement only after reducing your speed. Do not turn the steering
wheel too sharply while returning to the road surface.
• It may be safer to stay on the apron or shoulder of the road and slow
down gradually before returning to the pavement. You may lose
control if you do not slow down or if you turn the steering wheel too
sharply or abruptly.
• It often may be less risky to strike small objects, such as highway
reflectors, with minor damage to your vehicle rather than attempt a
sudden return to the pavement which could cause the vehicle to slide
sideways out of control or roll over. Remember, your safety and the
safety of others should be your primary concern.
WARNING: Vehicles with a higher center of gravity such as
utility and four-wheel drive vehicles handle differently than
vehicles with a lower center of gravity. Utility and four-wheel drive
vehicles are not designed for cornering at speeds as high as passenger
cars any more than low-slung sports cars are designed to perform
satisfactorily under off-road conditions. Avoid sharp turns, excessive
speed and abrupt maneuvers in these vehicles. Failure to drive
cautiously could result in an increased risk of loss of vehicle control,
vehicle rollover, personal injury and death.
If your vehicle gets stuck
If your vehicle gets stuck in mud or snow it may be rocked out by
shifting between forward and reverse gears, stopping between shifts, in a
steady pattern. Press lightly on the accelerator in each gear.
Do not rock the vehicle if the engine is not at normal operating
temperature or damage to the transmission may occur. Driving
293
2010 F-250/350/450/550 (f23)
Owners Guide, 2nd Printing
USA (fus)