2010 FORD F250 SUPER DUTY change wheel
[x] Cancel search: change wheelPage 294 of 408
Do not rock the vehicle for more than a few minutes or damage
to the transmission and tires may occur or the engine may
overheat.
WARNING: Do not spin the wheels at over 35 mph (56 km/h).
The tires may fail and injure a passenger or bystander.
Refer to Transmission fluid temperature gauge in the Instrument
Cluster chapter for transmission fluid temperature information.
Emergency maneuvers
• In an unavoidable emergency situation where a sudden sharp turn
must be made, remember to avoid “over-driving” your vehicle, i.e.,
turn the steering wheel only as rapidly and as far as required to avoid
the emergency. Excessive steering will result in less vehicle control,
not more. Additionally, smooth variations of the accelerator and/or
brake pedal pressure should be utilized if changes in vehicle speed are
called for. Avoid abrupt steering, acceleration or braking which could
result in an increased risk of loss of vehicle control, vehicle rollover
and/or personal injury. Use all available road surface to return the
vehicle to a safe direction of travel.
• In the event of an emergency stop, avoid skidding the tires and do not
attempt any sharp steering wheel movements.
WARNING: Vehicles with a higher center of gravity such as
utility and four-wheel drive vehicles handle differently than
vehicles with a lower center of gravity. Utility and four-wheel drive
vehicles are not designed for cornering at speeds as high as passenger
cars any more than low-slung sports cars are designed to perform
satisfactorily under off-road conditions. Avoid sharp turns, excessive
speed and abrupt maneuvers in these vehicles. Failure to drive
cautiously could result in an increased risk of loss of vehicle control,
vehicle rollover, personal injury and death.
• If the vehicle goes from one type of surface to another (i.e., from
concrete to gravel) there will be a change in the way the vehicle
responds to a maneuver (steering, acceleration or braking). Again,
avoid these abrupt inputs.
Parking
On some 4WD vehicles, when the transfer case is in the N (Neutral)
position, the engine and transmission are disconnected from the rest ofDriving
294
2010 F-250/350/450/550 (f23)
Owners Guide, 2nd Printing
USA (fus)
Page 296 of 408

Note: If air is released from your tires, the Tire Pressure Monitoring
System (TPMS) indicator light may illuminate (if equipped).
Mud and water
If you must drive through high
water, drive slowly. Traction or
brake capability may be limited.
When driving through water,
determine the depth; avoid water
higher than the bottom of the hubs
(if possible) and proceed slowly. If
the ignition system gets wet, the
vehicle may stall.
Once through water, always try the brakes. Wet brakes do not stop the
vehicle as effectively as dry brakes. Drying can be improved by moving
your vehicle slowly while applying light pressure on the brake pedal.
Be cautious of sudden changes in vehicle speed or direction when you
are driving in mud. Even 4WD vehicles can lose traction in slick mud. As
when you are driving over sand, apply the accelerator slowly and avoid
spinning your wheels. If the vehicle does slide, steer in the direction of
the slide until you regain control of the vehicle.
If the transmission, transfer case or front axle are submerged in water,
their fluids should be checked and changed, if necessary.
Driving through deep water may damage the transmission.
Refer to Transmission temperature gauge in the Instrument Cluster
chapter for transmission fluid temperature information.
If the front or rear axle is submerged in water, the axle lubricant should
be replaced.
After driving through mud, clean off residue stuck to rotating driveshafts
and tires. Excess mud stuck on tires and rotating driveshafts causes an
imbalance that could damage drive components.
“Tread Lightly” is an educational
program designed to increase public
awareness of land-use regulations
and responsibilities in our nations
wilderness areas. Ford Motor
Company joins the U.S. Forest Service and the Bureau of Land
Management in encouraging you to help preserve our national forest and
other public and private lands by “treading lightly.”Driving
296
2010 F-250/350/450/550 (f23)
Owners Guide, 2nd Printing
USA (fus)
Page 298 of 408
Should you start to slide while driving on snowy or icy roads, turn the
steering wheel in the direction of the slide until you regain control.
Avoid sudden applications of power and quick changes of direction on
snow and ice. Apply the accelerator slowly and steadily when starting
from a full stop.
Avoid sudden braking as well. Although a 4WD vehicle may accelerate
better than a two-wheel drive vehicle in snow and ice, it won’t stop any
faster, because as in other vehicles, braking occurs at all four wheels. Do
not become overconfident as to road conditions.
Make sure you allow sufficient distance between you and other vehicles
for stopping. Drive slower than usual and consider using one of the lower
gears. In emergency stopping situations, avoid locking of the wheels. Use
a “squeeze” technique, push on the brake pedal with a steadily increasing
force which allows the wheels to brake yet continue to roll so that you
may steer in the direction you want to travel. If you lock the wheels,
release the brake pedal and repeat the squeeze technique. If your vehicle
is equipped with a Four Wheel Anti-Lock Brake System (ABS), apply the
brake steadily. Do not “pump” the brakes. Refer to the Brakes section of
this chapter for additional information on the operation of the anti-lock
brake system.
WARNING: If you are driving in slippery conditions that require
tire cables, then it is critical that you drive cautiously. Keep
speeds down, allow for longer stopping distances and avoid aggressive
steering to reduce the chances of a loss of vehicle control which can
lead to serious injury or death. If the rear end of the vehicle slides
while cornering, steer in the direction of the slide until you regain
control of the vehicle.
Maintenance and Modifications
The suspension and steering systems on your vehicle have been designed
and tested to provide predictable performance whether loaded or empty
and durable load carrying capability. For this reason, Ford Motor
Company strongly recommends that you do not make modifications such
as adding or removing parts (such as lift kits or stabilizer bars) or by
using replacement parts not equivalent to the original factory equipment.
Any modifications to a vehicle that raise the center of gravity can make
it more likely the vehicle will roll over as a result of a loss of control.
Ford Motor Company recommends that caution be used with any vehicle
equipped with a high load or device (such as ladder racks or pickup box
cover).Driving
298
2010 F-250/350/450/550 (f23)
Owners Guide, 2nd Printing
USA (fus)
Page 318 of 408
Stopping and securing the vehicle
WARNING: To help prevent the vehicle from moving when you
change a tire, be sure the parking brake is set, then block (in
both directions) the wheel that is diagonally opposite to the tire being
changed.
Refer to the instruction sheet (located in the glove box) for detailed tire
change instructions.
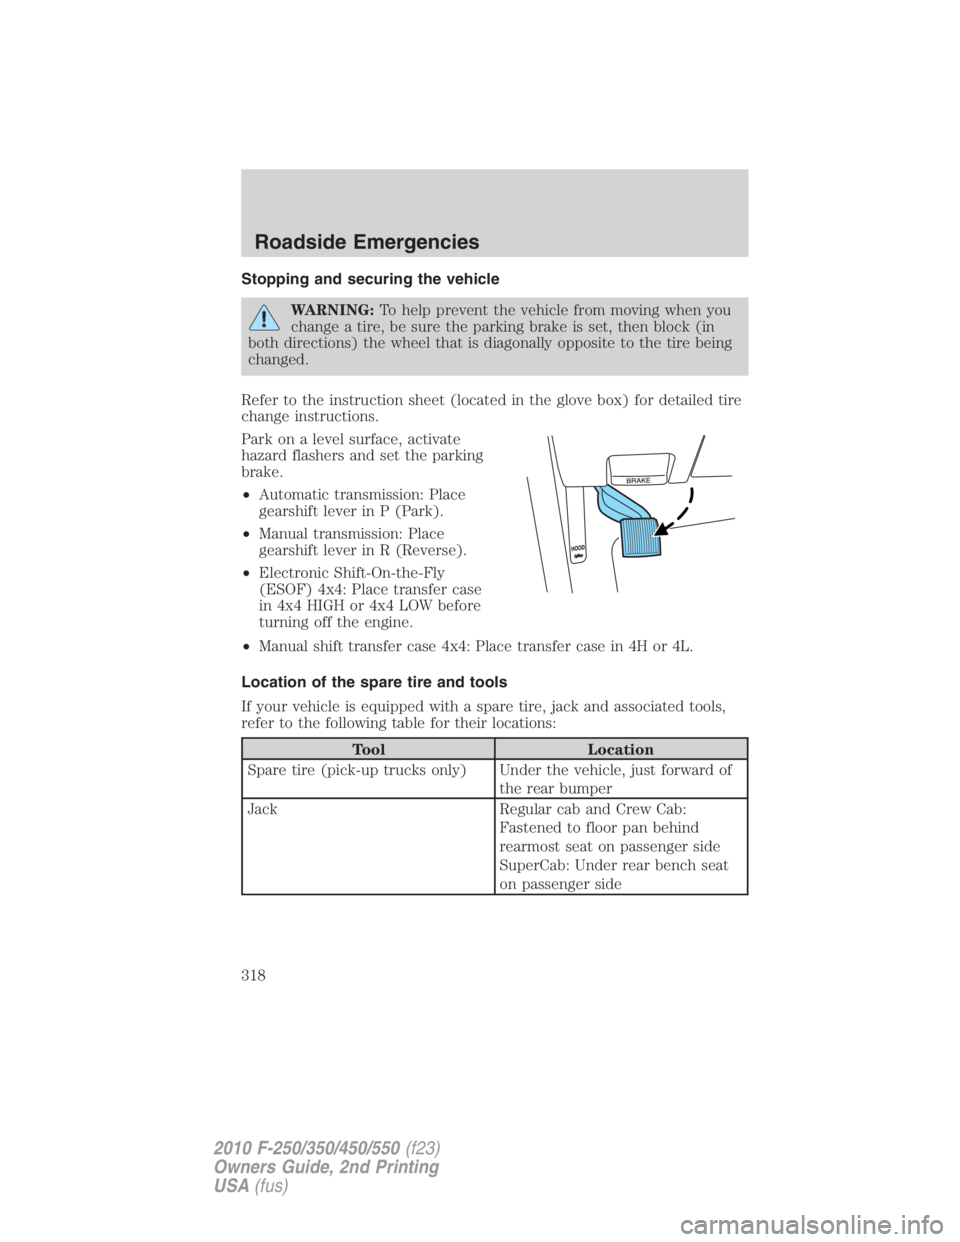
Park on a level surface, activate
hazard flashers and set the parking
brake.
• Automatic transmission: Place
gearshift lever in P (Park).
• Manual transmission: Place
gearshift lever in R (Reverse).
• Electronic Shift-On-the-Fly
(ESOF) 4x4: Place transfer case
in 4x4 HIGH or 4x4 LOW before
turning off the engine.
• Manual shift transfer case 4x4: Place transfer case in 4H or 4L.
Location of the spare tire and tools
If your vehicle is equipped with a spare tire, jack and associated tools,
refer to the following table for their locations:
Tool Location
Spare tire (pick-up trucks only) Under the vehicle, just forward of
the rear bumper
Jack Regular cab and Crew Cab:
Fastened to floor pan behind
rearmost seat on passenger side
SuperCab: Under rear bench seat
on passenger sideRoadside Emergencies
318
2010 F-250/350/450/550 (f23)
Owners Guide, 2nd Printing
USA (fus)
Page 320 of 408
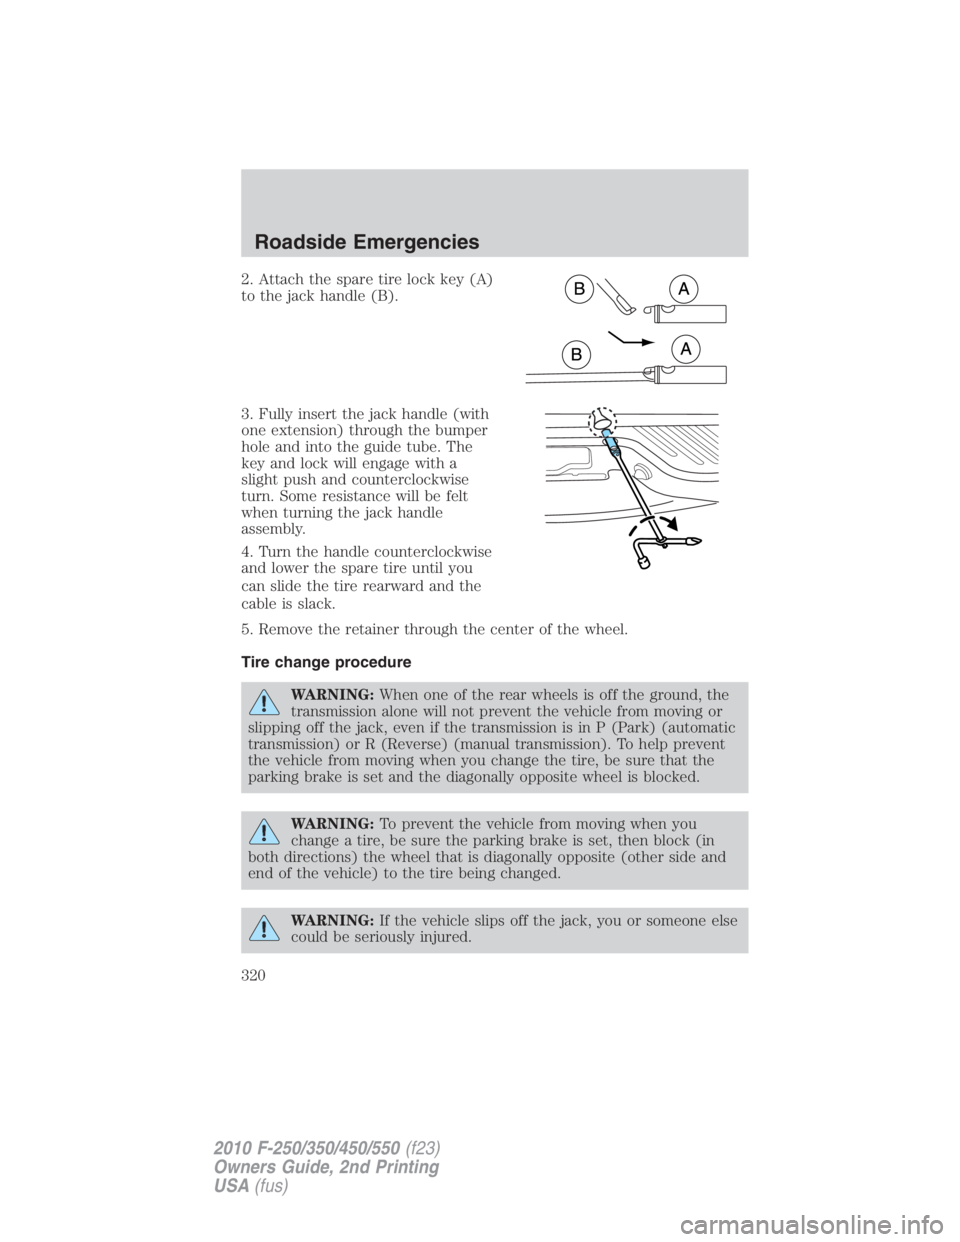
2. Attach the spare tire lock key (A)
to the jack handle (B).
3. Fully insert the jack handle (with
one extension) through the bumper
hole and into the guide tube. The
key and lock will engage with a
slight push and counterclockwise
turn. Some resistance will be felt
when turning the jack handle
assembly.
4. Turn the handle counterclockwise
and lower the spare tire until you
can slide the tire rearward and the
cable is slack.
5. Remove the retainer through the center of the wheel.
Tire change procedure
WARNING: When one of the rear wheels is off the ground, the
transmission alone will not prevent the vehicle from moving or
slipping off the jack, even if the transmission is in P (Park) (automatic
transmission) or R (Reverse) (manual transmission). To help prevent
the vehicle from moving when you change the tire, be sure that the
parking brake is set and the diagonally opposite wheel is blocked.
WARNING: To prevent the vehicle from moving when you
change a tire, be sure the parking brake is set, then block (in
both directions) the wheel that is diagonally opposite (other side and
end of the vehicle) to the tire being changed.
WARNING: If the vehicle slips off the jack, you or someone else
could be seriously injured.Roadside Emergencies
320
2010 F-250/350/450/550 (f23)
Owners Guide, 2nd Printing
USA (fus)
Page 321 of 408
WARNING: Do not attempt to change a tire on the side of the
vehicle close to moving traffic. Pull far enough off the road to
avoid the danger of being hit when operating the jack or changing the
wheel.
Note: Passengers should not remain in the vehicle when the vehicle is
being jacked.
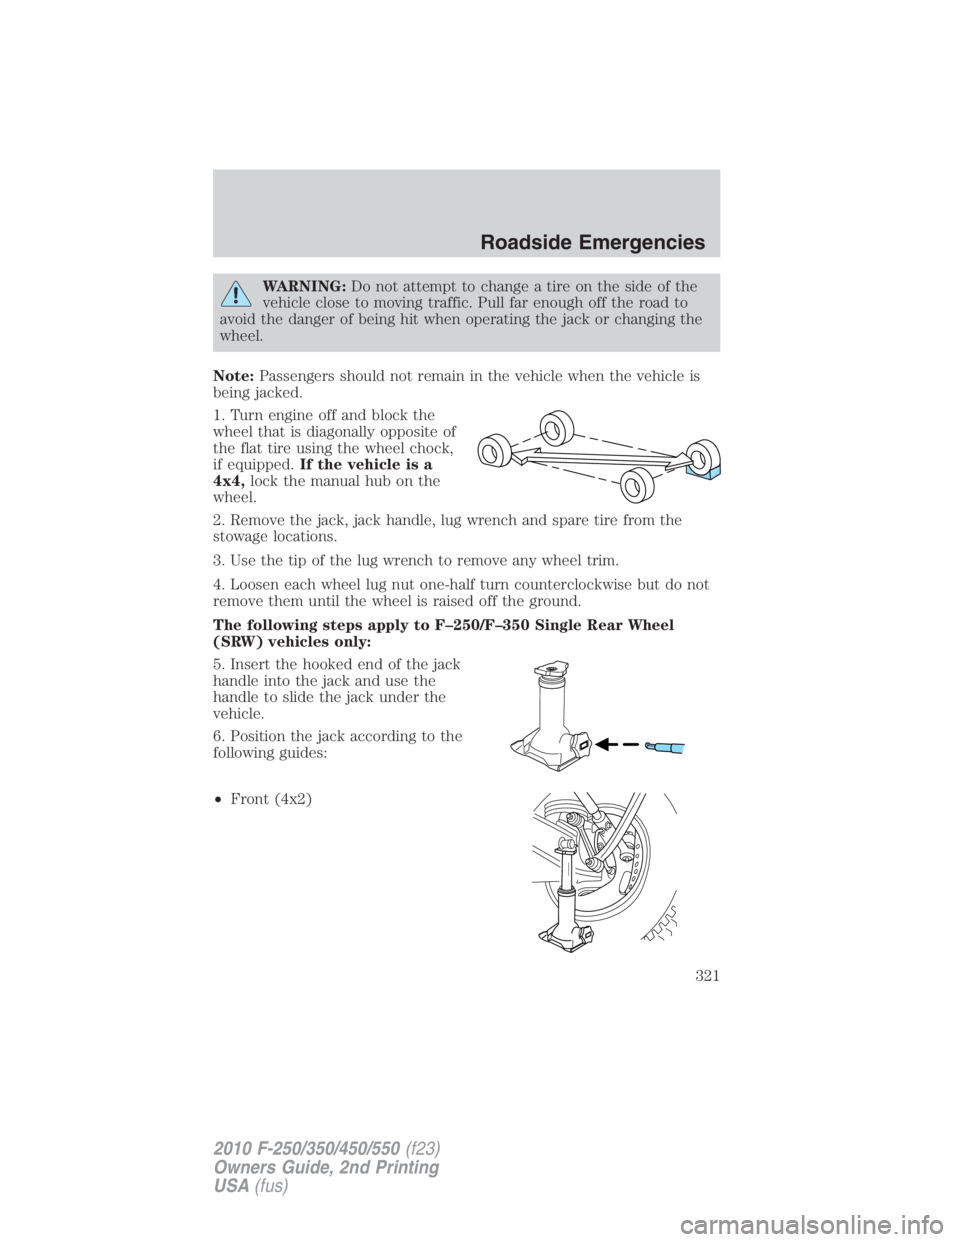
1. Turn engine off and block the
wheel that is diagonally opposite of
the flat tire using the wheel chock,
if equipped. If the vehicle is a
4x4, lock the manual hub on the
wheel.
2. Remove the jack, jack handle, lug wrench and spare tire from the
stowage locations.
3. Use the tip of the lug wrench to remove any wheel trim.
4. Loosen each wheel lug nut one-half turn counterclockwise but do not
remove them until the wheel is raised off the ground.
The following steps apply to F–250/F–350 Single Rear Wheel
(SRW) vehicles only:
5. Insert the hooked end of the jack
handle into the jack and use the
handle to slide the jack under the
vehicle.
6. Position the jack according to the
following guides:
• Front (4x2) Roadside Emergencies
321
2010 F-250/350/450/550 (f23)
Owners Guide, 2nd Printing
USA (fus)