Page 224 of 344
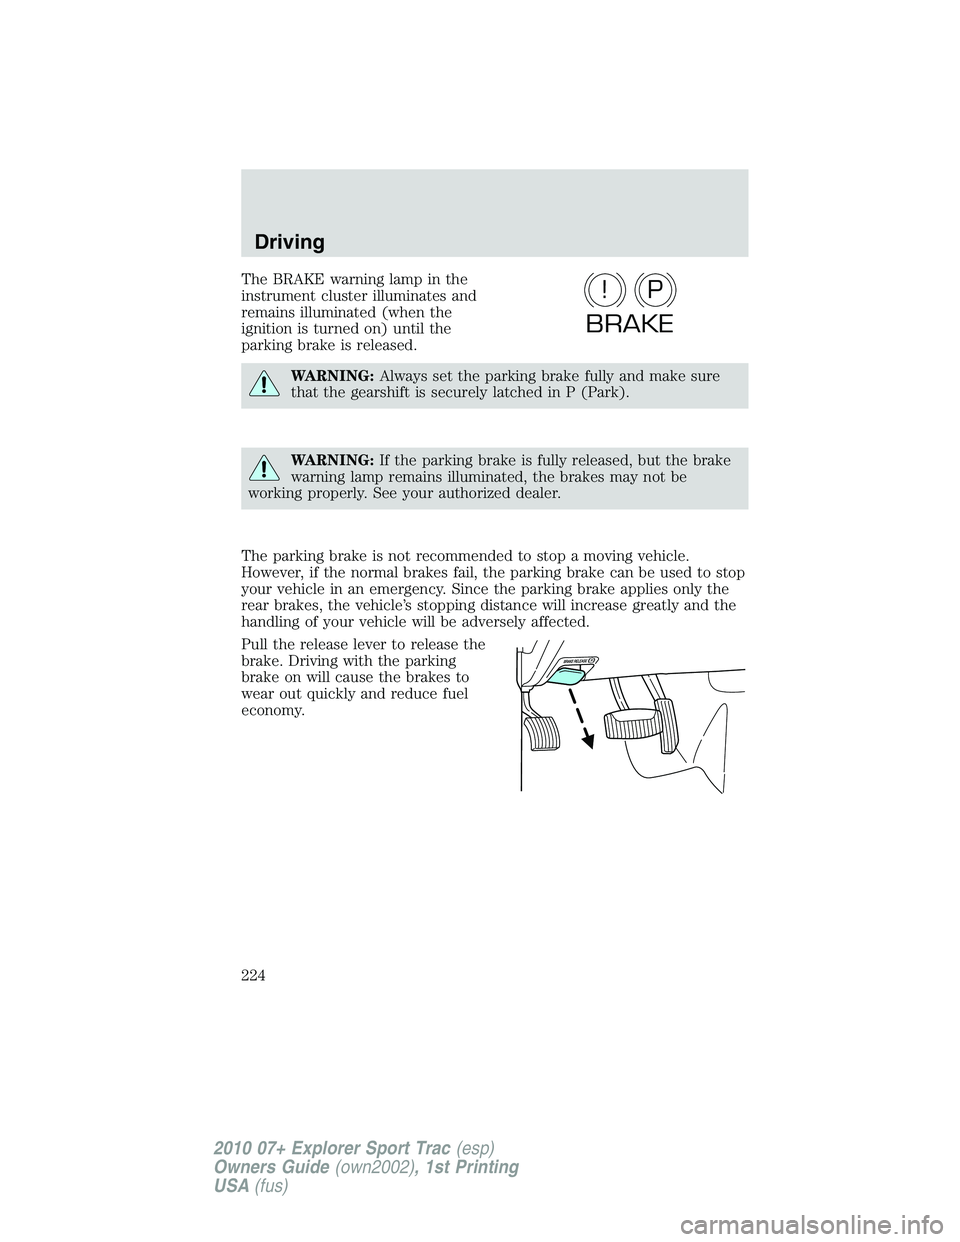
The BRAKE warning lamp in the
instrument cluster illuminates and
remains illuminated (when the
ignition is turned on) until the
parking brake is released.
WARNING:Always set the parking brake fully and make sure
that the gearshift is securely latched in P (Park).
WARNING:If the parking brake is fully released, but the brake
warning lamp remains illuminated, the brakes may not be
working properly. See your authorized dealer.
The parking brake is not recommended to stop a moving vehicle.
However, if the normal brakes fail, the parking brake can be used to stop
your vehicle in an emergency. Since the parking brake applies only the
rear brakes, the vehicle’s stopping distance will increase greatly and the
handling of your vehicle will be adversely affected.
Pull the release lever to release the
brake. Driving with the parking
brake on will cause the brakes to
wear out quickly and reduce fuel
economy.
P!
BRAKE
Driving
224
2010 07+ Explorer Sport Trac(esp)
Owners Guide(own2002), 1st Printing
USA(fus)
Page 234 of 344
N (Neutral)
With the gearshift lever in N (Neutral), the vehicle can be started and is
free to roll. Hold the brake pedal down while in this position.
D (Drive) with Overdrive
The normal driving position for the best fuel economy. Transmission
operates in gears one through five.
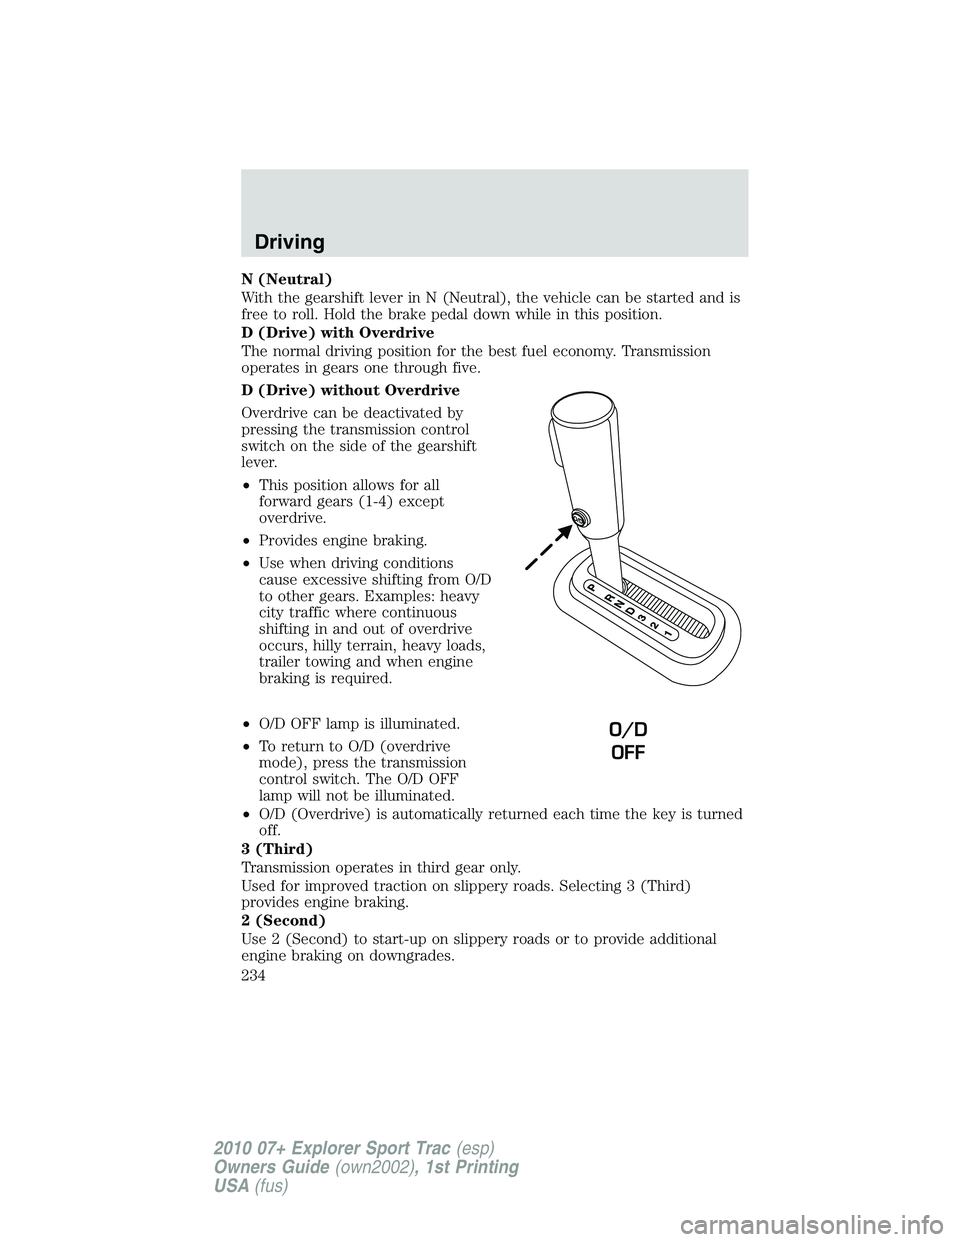
D (Drive) without Overdrive
Overdrive can be deactivated by
pressing the transmission control
switch on the side of the gearshift
lever.
•This position allows for all
forward gears (1-4) except
overdrive.
•Provides engine braking.
•Use when driving conditions
cause excessive shifting from O/D
to other gears. Examples: heavy
city traffic where continuous
shifting in and out of overdrive
occurs, hilly terrain, heavy loads,
trailer towing and when engine
braking is required.
•O/D OFF lamp is illuminated.
•To return to O/D (overdrive
mode), press the transmission
control switch. The O/D OFF
lamp will not be illuminated.
•O/D (Overdrive) is automatically returned each time the key is turned
off.
3 (Third)
Transmission operates in third gear only.
Used for improved traction on slippery roads. Selecting 3 (Third)
provides engine braking.
2 (Second)
Use 2 (Second) to start-up on slippery roads or to provide additional
engine braking on downgrades.
O/D
OFF
Driving
234
2010 07+ Explorer Sport Trac(esp)
Owners Guide(own2002), 1st Printing
USA(fus)
Page 236 of 344
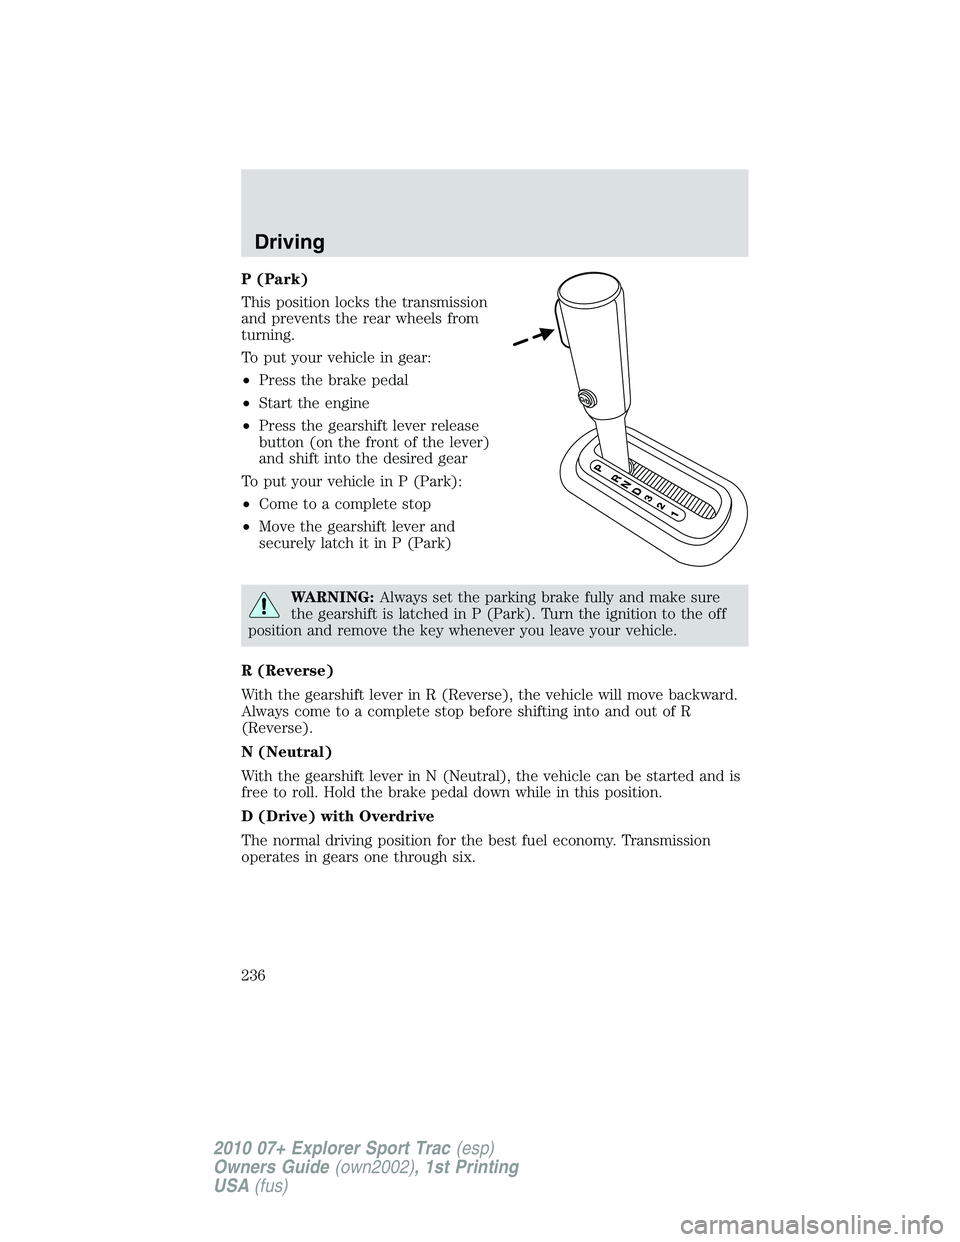
P (Park)
This position locks the transmission
and prevents the rear wheels from
turning.
To put your vehicle in gear:
•Press the brake pedal
•Start the engine
•Press the gearshift lever release
button (on the front of the lever)
and shift into the desired gear
To put your vehicle in P (Park):
•Come to a complete stop
•Move the gearshift lever and
securely latch it in P (Park)
WARNING:Always set the parking brake fully and make sure
the gearshift is latched in P (Park). Turn the ignition to the off
position and remove the key whenever you leave your vehicle.
R (Reverse)
With the gearshift lever in R (Reverse), the vehicle will move backward.
Always come to a complete stop before shifting into and out of R
(Reverse).
N (Neutral)
With the gearshift lever in N (Neutral), the vehicle can be started and is
free to roll. Hold the brake pedal down while in this position.
D (Drive) with Overdrive
The normal driving position for the best fuel economy. Transmission
operates in gears one through six.
Driving
236
2010 07+ Explorer Sport Trac(esp)
Owners Guide(own2002), 1st Printing
USA(fus)
Page 243 of 344
How your vehicle differs from other vehicles
Truck and utility vehicles can differ from some other vehicles. Your
vehicle may be higher to allow it to travel over rough terrain without
getting hung up or damaging underbody components.
The differences that make your vehicle so versatile also make it handle
differently than an ordinary passenger car.
Maintain steering wheel control at all times, especially in rough terrain.
Since sudden changes in terrain can result in abrupt steering wheel
motion, make sure you grip the steering wheel from the outside. Do not
grip the spokes.
Drive cautiously to avoid vehicle damage from concealed objects such as
rocks and stumps.
You should either know the terrain or examine maps of the area before
driving. Map out your route before driving in the area. To maintain
steering and braking control of your vehicle, you must have all four
wheels on the ground and they must be rolling, not sliding or spinning.
Basic operating principles
•Do not use 4WD High or 4WD Low on dry, hard surfaced roads. Doing
so will produce excessive noise, increase tire wear, reduce fuel
economy and may damage drive components. 4WD modes are only
intended for consistently slippery or loose surfaces.
•Drive slower in strong crosswinds which can affect the normal steering
characteristics of your vehicle.
•Be extremely careful when driving on pavement made slippery by
loose sand, water, gravel, snow or ice.
If your vehicle goes off the edge of the pavement
•If your vehicle goes off the edge of the pavement, slow down, but
avoid severe brake application, ease the vehicle back onto the
pavement only after reducing your speed. Do not turn the steering
wheel too sharply while returning to the road surface.
•It may be safer to stay on the apron or shoulder of the road and slow
down gradually before returning to the pavement. You may lose
control if you do not slow down or if you turn the steering wheel too
sharply or abruptly.
Driving
243
2010 07+ Explorer Sport Trac(esp)
Owners Guide(own2002), 1st Printing
USA(fus)
Page 251 of 344
ROADSIDE ASSISTANCE
Getting roadside assistance
To fully assist you should you have a vehicle concern, Ford Motor
Company offers a complimentary roadside assistance program. This
program is separate from the New Vehicle Limited Warranty. The service
is available:
•24–hours, seven days a week
•for the coverage period listed on the Roadside Assistance Card
included in your Owner Guide portfolio.
Roadside assistance will cover:
•a flat tire change with a good spare (except vehicles that have been
supplied with a tire inflation kit)
•battery jump start
•lock-out assistance (key replacement cost is the customer’s
responsibility)
•fuel delivery – Independent Service Contractors, if not prohibited by
state, local or municipal law shall deliver up to 2.0 gallons (7.5L) of
gasoline or 5 gallons (18.9L) of diesel fuel to a disabled vehicle. Fuel
delivery service is limited to two no-charge occurrences within a
12-month period.
•winch out – available within 100 feet (30.5 meters) of a paved or
county maintained road, no recoveries.
•towing – Ford/Mercury/Lincoln eligible vehicle towed to an authorized
dealer within 35 miles (56.3 km) of the disablement location or to the
nearest authorized dealer. If a member requests to be towed to an
authorized dealer more than 35 miles (56.3 km) from the disablement
location, the member shall be responsible for any mileage costs in
excess of 35 miles (56.3 km).
Trailers shall be covered up to $200 if the disabled eligible vehicle
requires service at the nearest authorized dealer. If the trailer is disabled,
but the towing vehicle is operational, the trailer does not qualify for any
roadside services.
Canadian customers refer to your Customer Information Guide
for information on:
•coverage period
•exact fuel amounts
Roadside Emergencies
251
2010 07+ Explorer Sport Trac(esp)
Owners Guide(own2002), 1st Printing
USA(fus)
Page 253 of 344
FUEL PUMP SHUT-OFF SWITCHFUEL
RESET
The fuel pump shut-off switch is a device intended to stop the electric
fuel pump when your vehicle has been involved in a substantial jolt.
After a collision, if the engine cranks but does not start, the fuel pump
shut-off switch may have been activated.
The fuel pump shut-off switch is
located in the passenger’s foot well,
by the kick panel.
Use the following procedure to reset the fuel pump shut-off switch.
1. Turn the ignition to the off position.
2. Check the fuel system for leaks.
3. If no fuel leak is apparent, reset the fuel pump shut-off switch by
pressing in on the reset button.
4. Turn the ignition to the on position. Pause for a few seconds and
return the key to the off position.
5. Make a further check for leaks in the fuel system.
Roadside Emergencies
253
2010 07+ Explorer Sport Trac(esp)
Owners Guide(own2002), 1st Printing
USA(fus)
Page 256 of 344
Fuse/Relay
LocationFuse Amp
RatingProtected Circuits
5 5A Moon roof, Power down back
window, Door lock switch
illumination, Auto dimming rear
view mirror
6 20A Door unlock/lock
7 15A Trailer tow stop/turn lamps
8 15A Ignition switch power, Passive
anti-theft system (PATS), Cluster
9 2A 6-speed Transmission control
module/Powertrain control
module (Ignition RUN/START),
Fuel pump relay
10 5A Front wiper RUN/ACC relay in
power distribution box (PDB)
11 5A Radio start
12 5A Radio, Trailer tow battery charge
(relay in PDB)
13 15A Heated mirror
14 20A Horn
15 10A Reverse lamps
16 10A Trailer tow reverse lamps
17 10A Restraints control module,
Passenger occupancy
18 10A Roll Stability Control™ (RSC�)
switch, RSC�, 4x4 module, 4x4
switch, Heated seat switches,
Reverse park aid
19 — Not used
20 10A Climate control system, Brake
shift
21 — Not used
Roadside Emergencies
256
2010 07+ Explorer Sport Trac(esp)
Owners Guide(own2002), 1st Printing
USA(fus)
Page 258 of 344
The high-current fuses are coded as follows:
Fuse/Relay
LocationFuse Amp
RatingProtected Circuits
1 50A** Battery feed 2 (passenger
compartment fuse panel)
2 50A** Battery feed 3 (passenger
compartment fuse panel)
3 50A** Battery feed 1 (passenger
compartment fuse panel)
4 30A** Fuel pump, Fuel injectors
5 — Not used
6 40A** Anti-lock brake system (ABS) pump
7 40A** Powertrain control module (PCM)
8 — Not used
9 — Not used
10 20A** Power down back window
11 30A** Starter
12 — Not used
Roadside Emergencies
258
2010 07+ Explorer Sport Trac(esp)
Owners Guide(own2002), 1st Printing
USA(fus)