2010 FORD E-350 ECU
[x] Cancel search: ECUPage 119 of 327
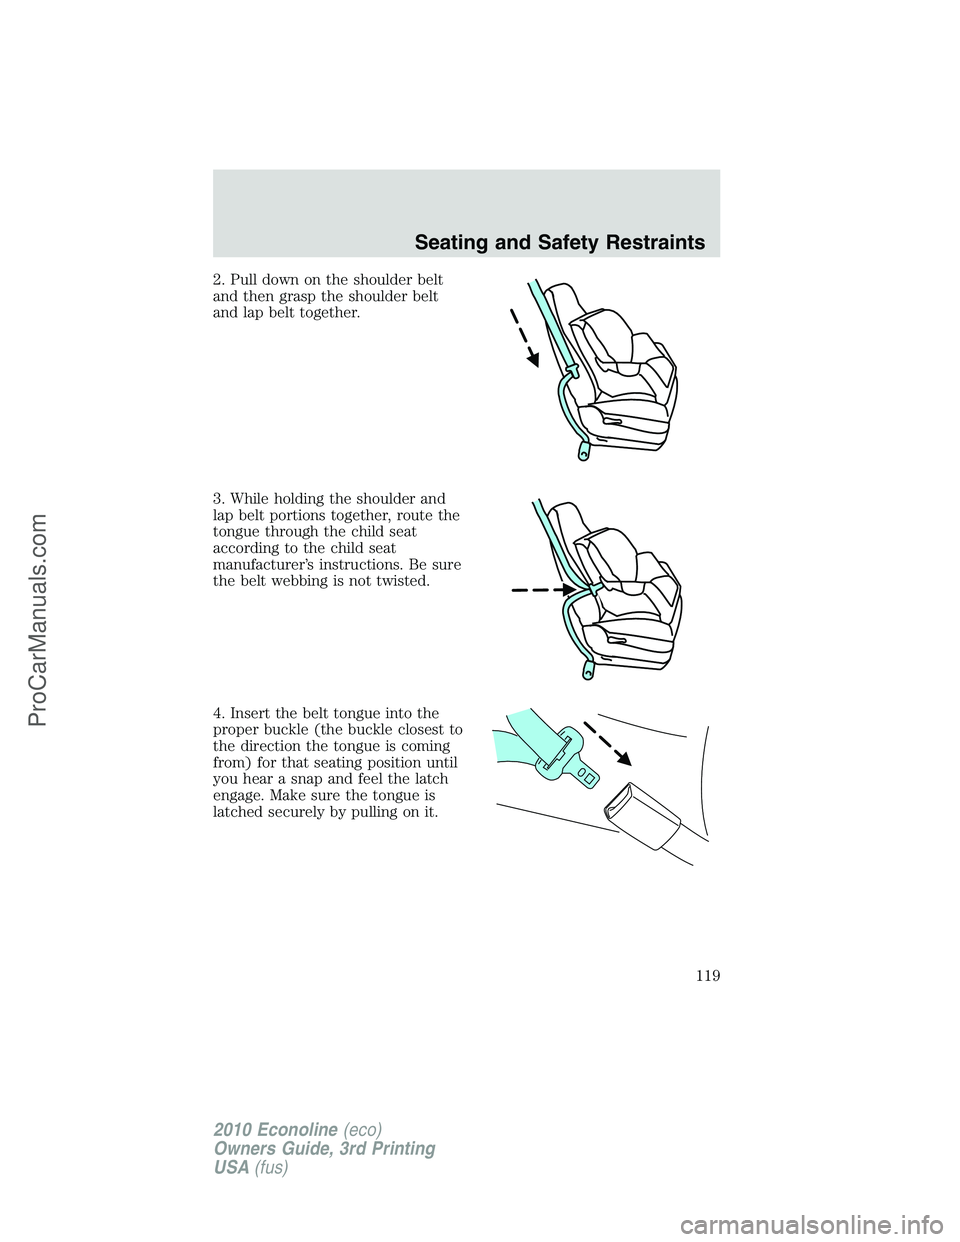
2. Pull down on the shoulder belt
and then grasp the shoulder belt
and lap belt together.
3. While holding the shoulder and
lap belt portions together, route the
tongue through the child seat
according to the child seat
manufacturer’s instructions. Be sure
the belt webbing is not twisted.
4. Insert the belt tongue into the
proper buckle (the buckle closest to
the direction the tongue is coming
from) for that seating position until
you hear a snap and feel the latch
engage. Make sure the tongue is
latched securely by pulling on it.
Seating and Safety Restraints
119
2010 Econoline(eco)
Owners Guide, 3rd Printing
USA(fus)
ProCarManuals.com
Page 121 of 327
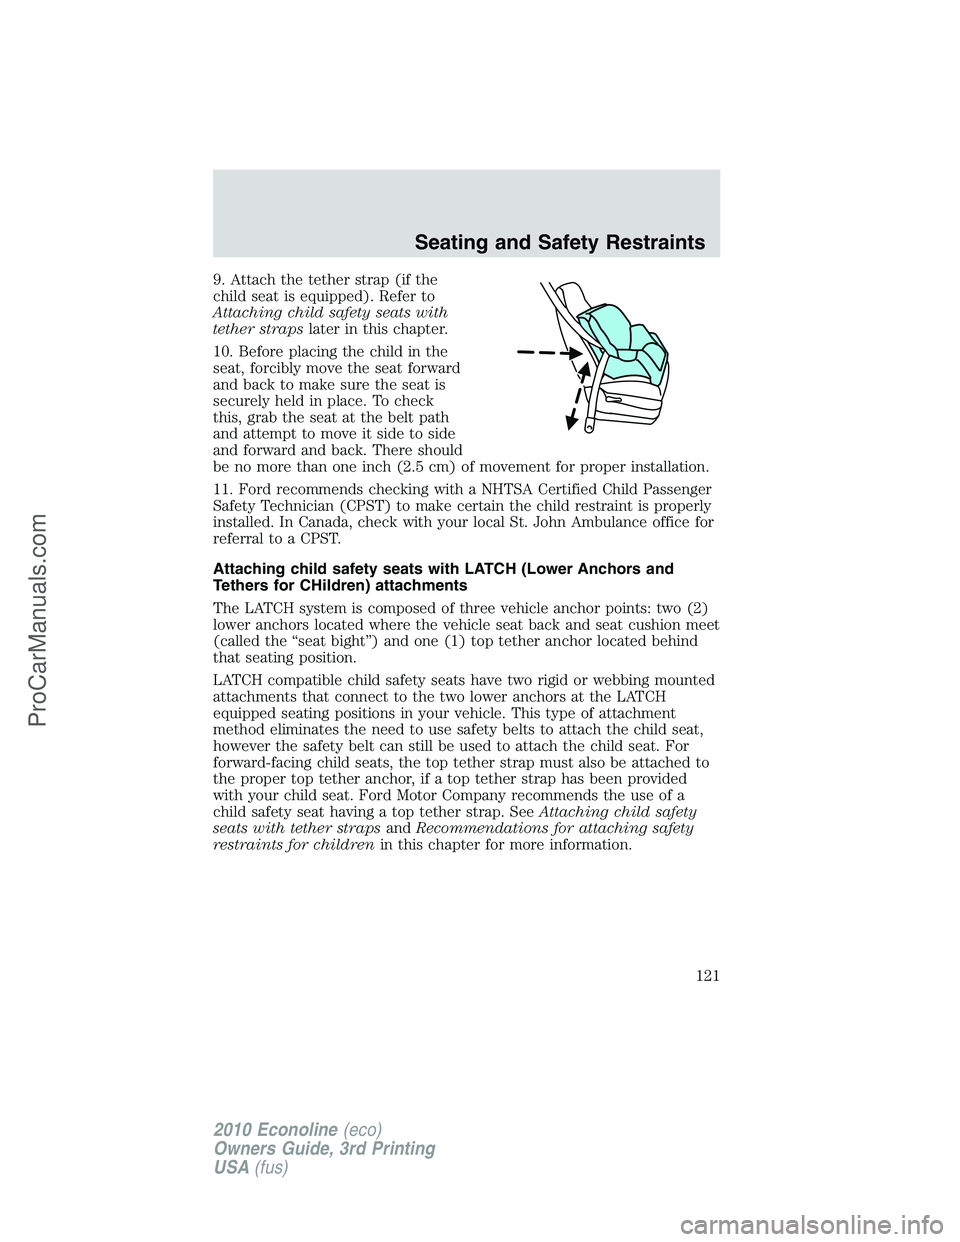
9. Attach the tether strap (if the
child seat is equipped). Refer to
Attaching child safety seats with
tether strapslater in this chapter.
10. Before placing the child in the
seat, forcibly move the seat forward
and back to make sure the seat is
securely held in place. To check
this, grab the seat at the belt path
and attempt to move it side to side
and forward and back. There should
be no more than one inch (2.5 cm) of movement for proper installation.
11. Ford recommends checking with a NHTSA Certified Child Passenger
Safety Technician (CPST) to make certain the child restraint is properly
installed. In Canada, check with your local St. John Ambulance office for
referral to a CPST.
Attaching child safety seats with LATCH (Lower Anchors and
Tethers for CHildren) attachments
The LATCH system is composed of three vehicle anchor points: two (2)
lower anchors located where the vehicle seat back and seat cushion meet
(called the “seat bight”) and one (1) top tether anchor located behind
that seating position.
LATCH compatible child safety seats have two rigid or webbing mounted
attachments that connect to the two lower anchors at the LATCH
equipped seating positions in your vehicle. This type of attachment
method eliminates the need to use safety belts to attach the child seat,
however the safety belt can still be used to attach the child seat. For
forward-facing child seats, the top tether strap must also be attached to
the proper top tether anchor, if a top tether strap has been provided
with your child seat. Ford Motor Company recommends the use of a
child safety seat having a top tether strap. SeeAttaching child safety
seats with tether strapsandRecommendations for attaching safety
restraints for childrenin this chapter for more information.
Seating and Safety Restraints
121
2010 Econoline(eco)
Owners Guide, 3rd Printing
USA(fus)
ProCarManuals.com
Page 123 of 327
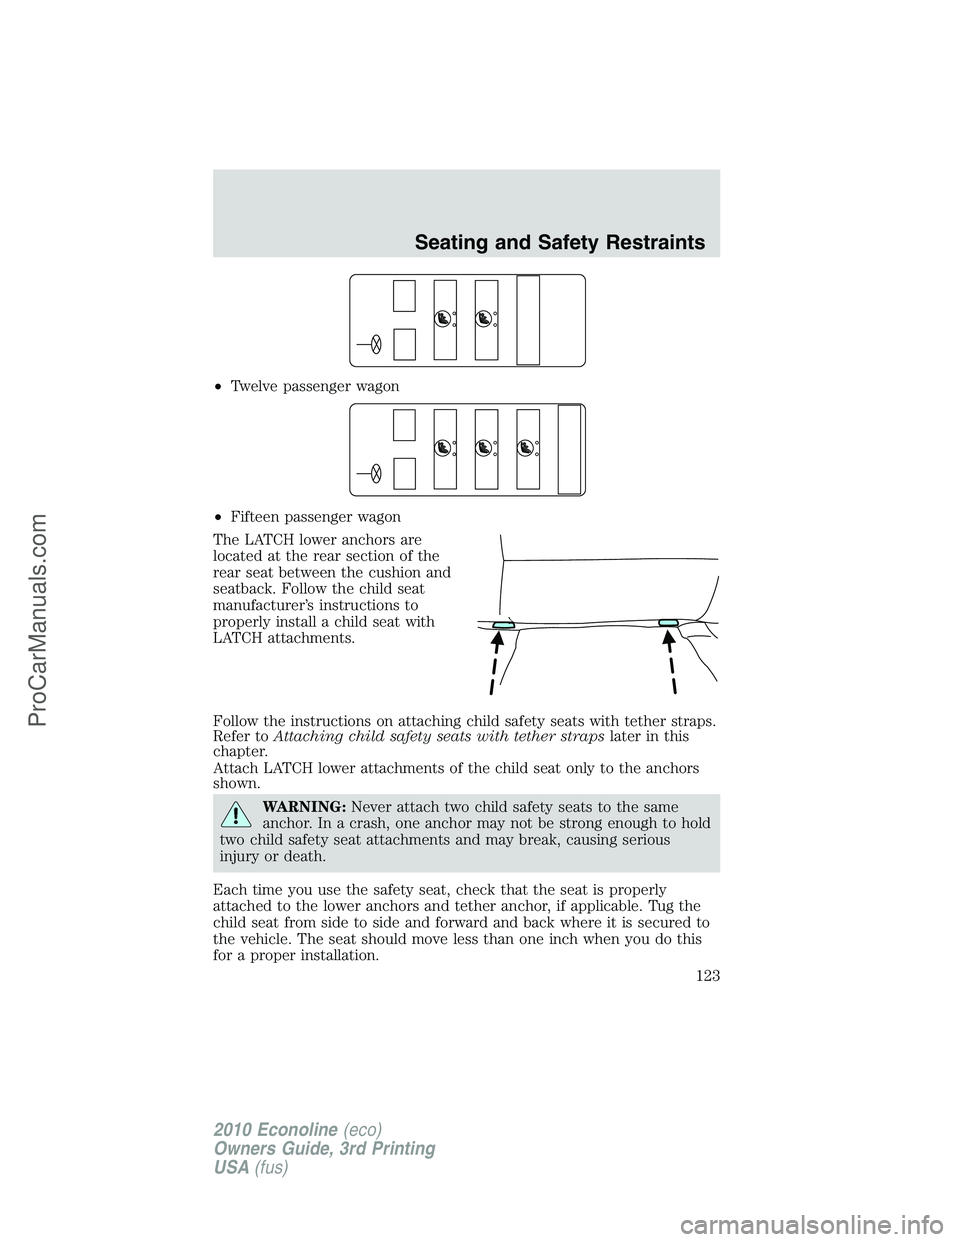
•Twelve passenger wagon
•Fifteen passenger wagon
The LATCH lower anchors are
located at the rear section of the
rear seat between the cushion and
seatback. Follow the child seat
manufacturer’s instructions to
properly install a child seat with
LATCH attachments.
Follow the instructions on attaching child safety seats with tether straps.
Refer toAttaching child safety seats with tether strapslater in this
chapter.
Attach LATCH lower attachments of the child seat only to the anchors
shown.
WARNING:Never attach two child safety seats to the same
anchor. In a crash, one anchor may not be strong enough to hold
two child safety seat attachments and may break, causing serious
injury or death.
Each time you use the safety seat, check that the seat is properly
attached to the lower anchors and tether anchor, if applicable. Tug the
child seat from side to side and forward and back where it is secured to
the vehicle. The seat should move less than one inch when you do this
for a proper installation.
Seating and Safety Restraints
123
2010 Econoline(eco)
Owners Guide, 3rd Printing
USA(fus)
ProCarManuals.com
Page 129 of 327
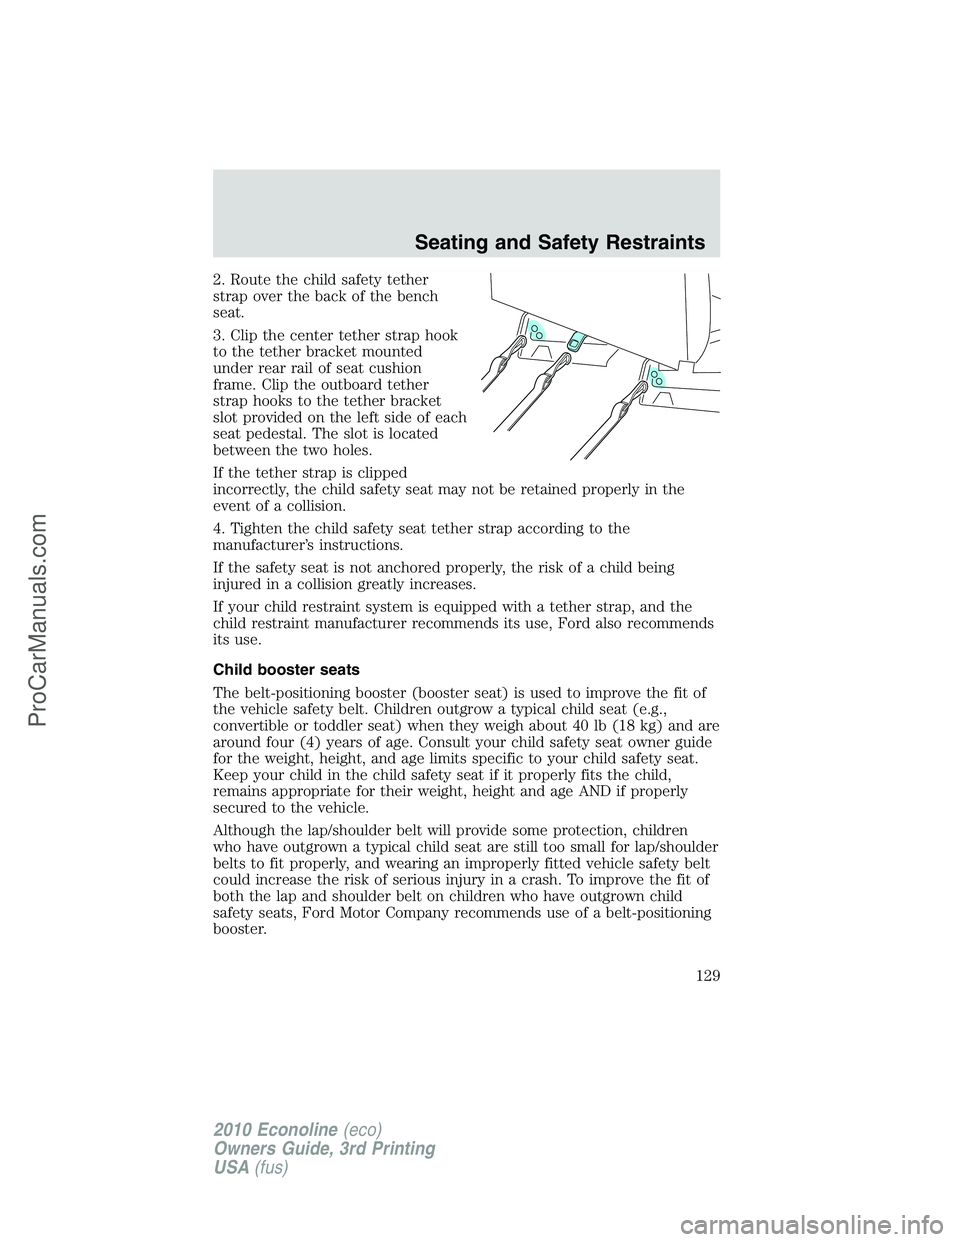
2. Route the child safety tether
strap over the back of the bench
seat.
3. Clip the center tether strap hook
to the tether bracket mounted
under rear rail of seat cushion
frame. Clip the outboard tether
strap hooks to the tether bracket
slot provided on the left side of each
seat pedestal. The slot is located
between the two holes.
If the tether strap is clipped
incorrectly, the child safety seat may not be retained properly in the
event of a collision.
4. Tighten the child safety seat tether strap according to the
manufacturer’s instructions.
If the safety seat is not anchored properly, the risk of a child being
injured in a collision greatly increases.
If your child restraint system is equipped with a tether strap, and the
child restraint manufacturer recommends its use, Ford also recommends
its use.
Child booster seats
The belt-positioning booster (booster seat) is used to improve the fit of
the vehicle safety belt. Children outgrow a typical child seat (e.g.,
convertible or toddler seat) when they weigh about 40 lb (18 kg) and are
around four (4) years of age. Consult your child safety seat owner guide
for the weight, height, and age limits specific to your child safety seat.
Keep your child in the child safety seat if it properly fits the child,
remains appropriate for their weight, height and age AND if properly
secured to the vehicle.
Although the lap/shoulder belt will provide some protection, children
who have outgrown a typical child seat are still too small for lap/shoulder
belts to fit properly, and wearing an improperly fitted vehicle safety belt
could increase the risk of serious injury in a crash. To improve the fit of
both the lap and shoulder belt on children who have outgrown child
safety seats, Ford Motor Company recommends use of a belt-positioning
booster.
Seating and Safety Restraints
129
2010 Econoline(eco)
Owners Guide, 3rd Printing
USA(fus)
ProCarManuals.com
Page 158 of 327

When you believe your system is not operating properly
The main function of the tire pressure monitoring system is to warn you
when your tires need air. It can also warn you in the event the system is no
longer capable of functioning as intended. Please refer to the following
chart for information concerning your tire pressure monitoring system:
Low tire
pressure warning
lightPossible
causeCustomer action required
Solid warning light Tire(s)
under-inflated1. Check your tire pressure to
ensure tires are properly inflated;
refer toInflating your tiresin
this chapter.
2. After inflating your tires to the
manufacturer’s recommended
inflation pressure as shown on
the Tire Label (located on the
edge of driver’s door or the
B-Pillar), the vehicle must be
driven for at least two minutes
over 20 mph (32 km/h) before
the light will turn off.
Spare tire in
useYour temporary spare tire is in
use. Repair the damaged road
wheel/tire and reinstall it on the
vehicle to restore system
functionality. For a description on
how the system functions, refer
toWhen your temporary spare
tire is installedin this section.
TPMS
malfunctionIf your tires are properly inflated
and your spare tire is not in use
and the light remains on, contact
your authorized dealer as soon as
possible.
Tire rotation
without sensor
trainingOn vehicles with different front
and rear tire pressures, the
TPMS system must be retrained
following every tire rotation.
Refer toTire rotationin this
chapter.
Tires, Wheels and Loading
158
2010 Econoline(eco)
Owners Guide, 3rd Printing
USA(fus)
ProCarManuals.com
Page 159 of 327
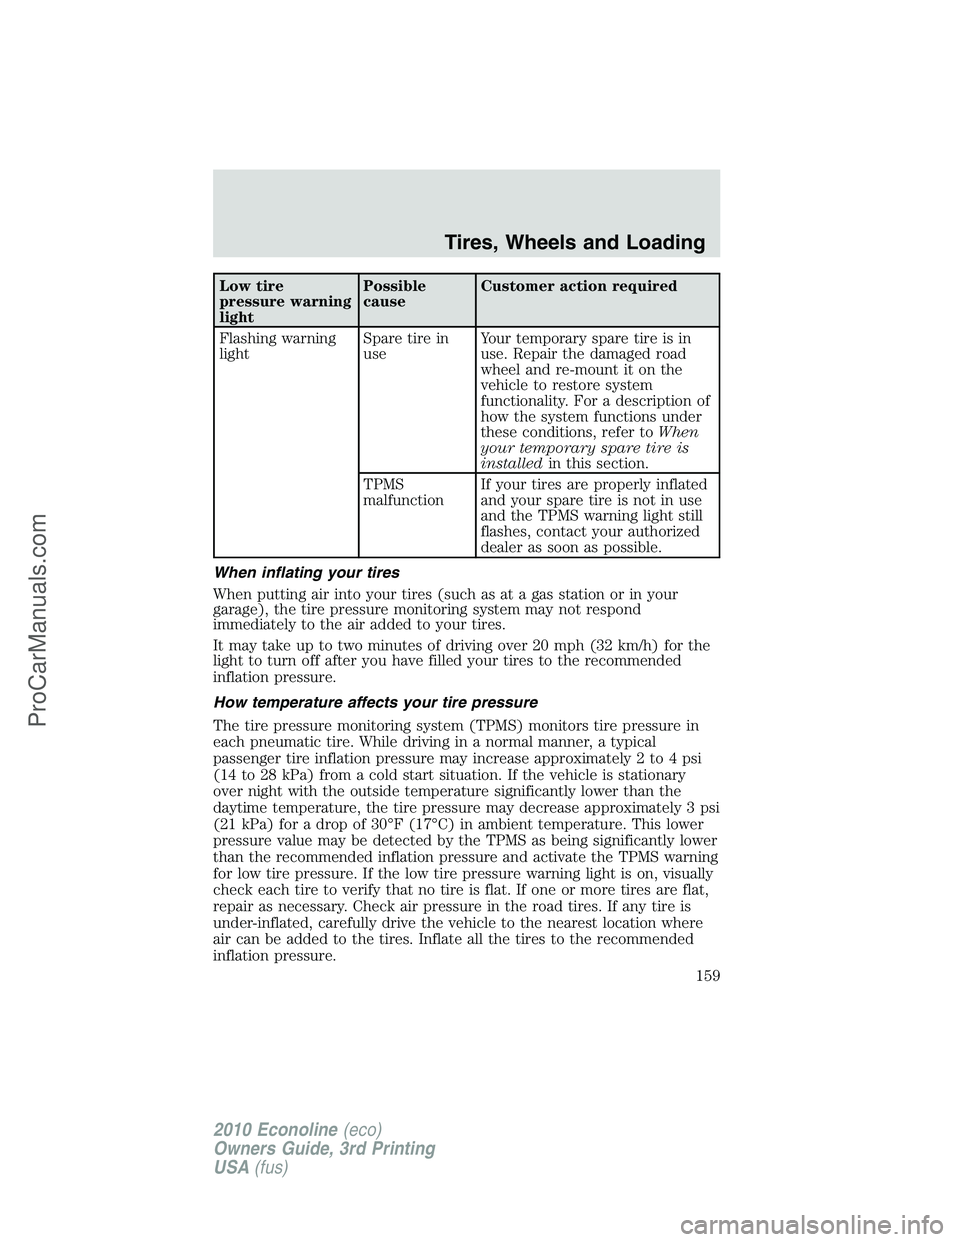
Low tire
pressure warning
lightPossible
causeCustomer action required
Flashing warning
lightSpare tire in
useYour temporary spare tire is in
use. Repair the damaged road
wheel and re-mount it on the
vehicle to restore system
functionality. For a description of
how the system functions under
these conditions, refer toWhen
your temporary spare tire is
installedin this section.
TPMS
malfunctionIf your tires are properly inflated
and your spare tire is not in use
and the TPMS warning light still
flashes, contact your authorized
dealer as soon as possible.
When inflating your tires
When putting air into your tires (such as at a gas station or in your
garage), the tire pressure monitoring system may not respond
immediately to the air added to your tires.
It may take up to two minutes of driving over 20 mph (32 km/h) for the
light to turn off after you have filled your tires to the recommended
inflation pressure.
How temperature affects your tire pressure
The tire pressure monitoring system (TPMS) monitors tire pressure in
each pneumatic tire. While driving in a normal manner, a typical
passenger tire inflation pressure may increase approximately 2 to 4 psi
(14 to 28 kPa) from a cold start situation. If the vehicle is stationary
over night with the outside temperature significantly lower than the
daytime temperature, the tire pressure may decrease approximately 3 psi
(21 kPa) for a drop of 30°F (17°C) in ambient temperature. This lower
pressure value may be detected by the TPMS as being significantly lower
than the recommended inflation pressure and activate the TPMS warning
for low tire pressure. If the low tire pressure warning light is on, visually
check each tire to verify that no tire is flat. If one or more tires are flat,
repair as necessary. Check air pressure in the road tires. If any tire is
under-inflated, carefully drive the vehicle to the nearest location where
air can be added to the tires. Inflate all the tires to the recommended
inflation pressure.
Tires, Wheels and Loading
159
2010 Econoline(eco)
Owners Guide, 3rd Printing
USA(fus)
ProCarManuals.com
Page 166 of 327
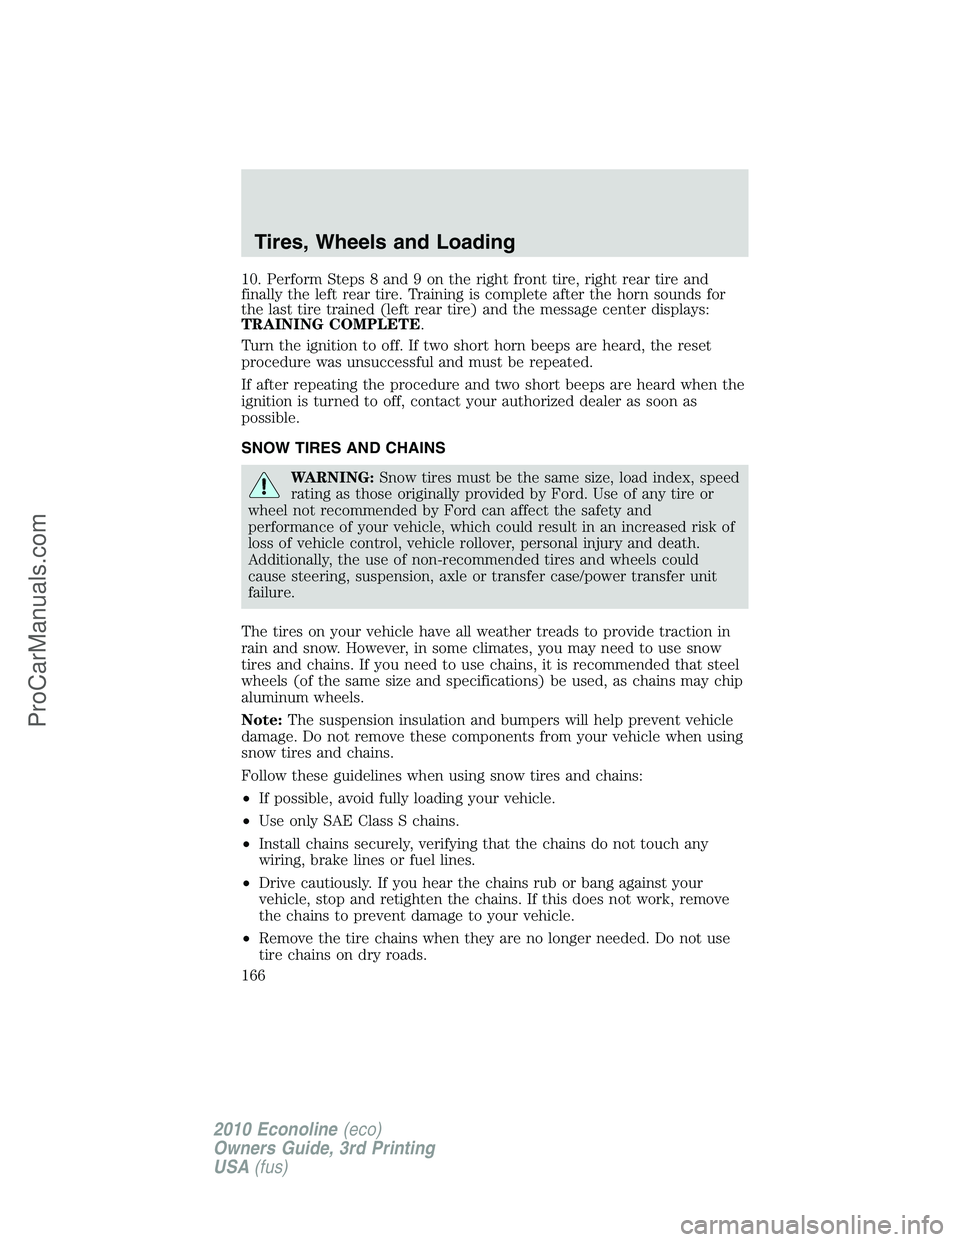
10. Perform Steps 8 and 9 on the right front tire, right rear tire and
finally the left rear tire. Training is complete after the horn sounds for
the last tire trained (left rear tire) and the message center displays:
TRAINING COMPLETE.
Turn the ignition to off. If two short horn beeps are heard, the reset
procedure was unsuccessful and must be repeated.
If after repeating the procedure and two short beeps are heard when the
ignition is turned to off, contact your authorized dealer as soon as
possible.
SNOW TIRES AND CHAINS
WARNING:Snow tires must be the same size, load index, speed
rating as those originally provided by Ford. Use of any tire or
wheel not recommended by Ford can affect the safety and
performance of your vehicle, which could result in an increased risk of
loss of vehicle control, vehicle rollover, personal injury and death.
Additionally, the use of non-recommended tires and wheels could
cause steering, suspension, axle or transfer case/power transfer unit
failure.
The tires on your vehicle have all weather treads to provide traction in
rain and snow. However, in some climates, you may need to use snow
tires and chains. If you need to use chains, it is recommended that steel
wheels (of the same size and specifications) be used, as chains may chip
aluminum wheels.
Note:The suspension insulation and bumpers will help prevent vehicle
damage. Do not remove these components from your vehicle when using
snow tires and chains.
Follow these guidelines when using snow tires and chains:
•If possible, avoid fully loading your vehicle.
•Use only SAE Class S chains.
•Install chains securely, verifying that the chains do not touch any
wiring, brake lines or fuel lines.
•Drive cautiously. If you hear the chains rub or bang against your
vehicle, stop and retighten the chains. If this does not work, remove
the chains to prevent damage to your vehicle.
•Remove the tire chains when they are no longer needed. Do not use
tire chains on dry roads.
Tires, Wheels and Loading
166
2010 Econoline(eco)
Owners Guide, 3rd Printing
USA(fus)
ProCarManuals.com
Page 199 of 327
Using ABS
When hard braking is required, apply continuous force on the brake
pedal. Do not pump the brake pedal since this will reduce the
effectiveness of the ABS and will increase your vehicle’s stopping
distance. The ABS will be activated immediately, allowing you to retain
steering control during hard braking and on slippery surfaces. However,
the ABS does not decrease stopping distance.
ABS warning lamp
The ABS lamp in the instrument
cluster momentarily illuminates
when the ignition is turned on. If
the light does not illuminate during
start up, remains on or flashes, the
ABS may be disabled and may need to be serviced.
Even when the ABS is disabled,
normal braking is still effective. If
your BRAKE warning lamp
illuminates with the parking brake
released, have your brake system
serviced immediately by an authorized dealer.
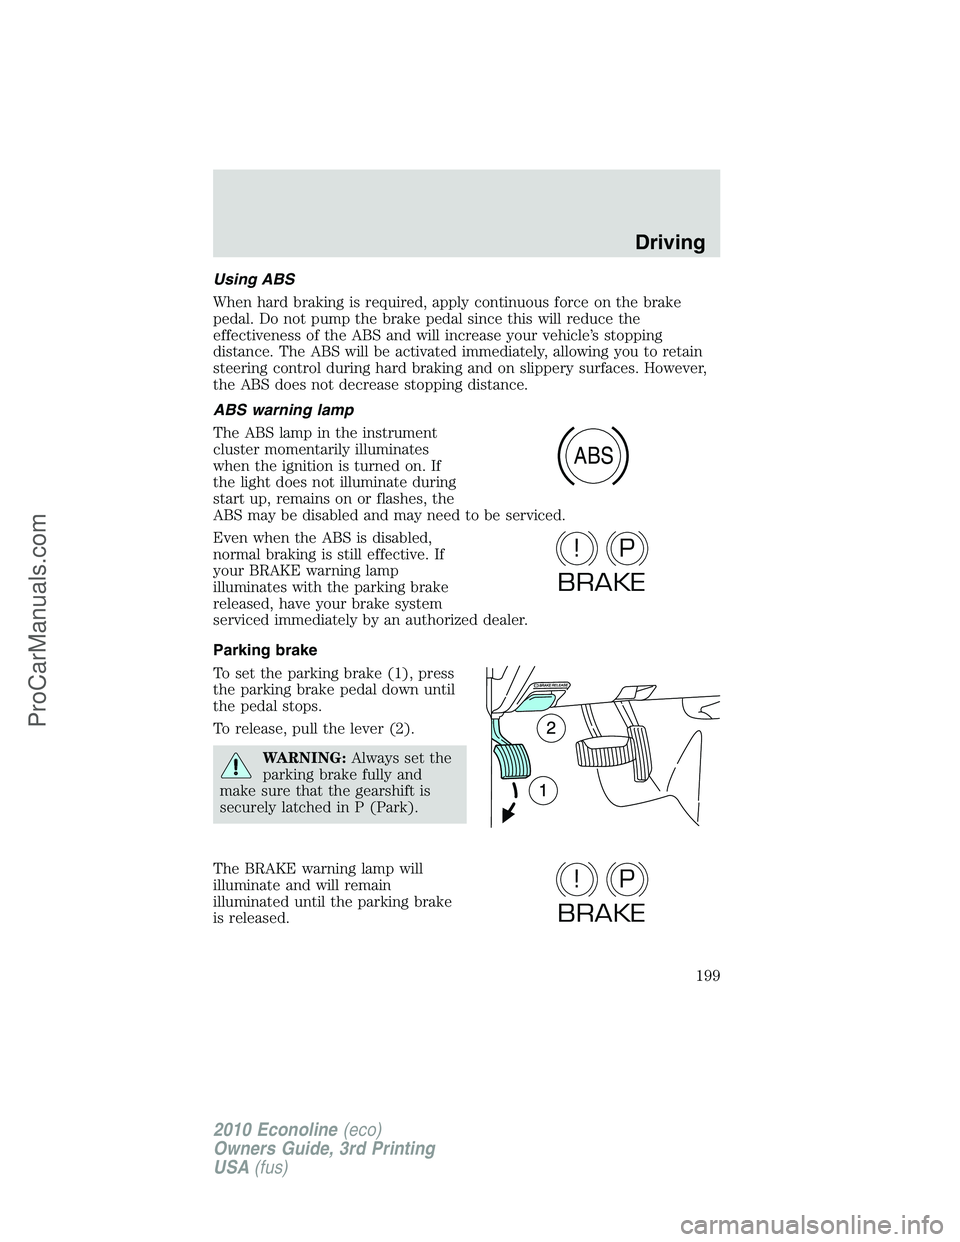
Parking brake
To set the parking brake (1), press
the parking brake pedal down until
the pedal stops.
To release, pull the lever (2).
WARNING:Always set the
parking brake fully and
make sure that the gearshift is
securely latched in P (Park).
The BRAKE warning lamp will
illuminate and will remain
illuminated until the parking brake
is released.
ABS
P!
BRAKE
P!
BRAKE
Driving
199
2010 Econoline(eco)
Owners Guide, 3rd Printing
USA(fus)
ProCarManuals.com