Page 161 of 327

Performing the TPMS reset procedure (Vehicles that have wheels
with snap-in pressure sensors)
It is recommended that you read the entire procedure before attempting.
1. Drive the vehicle above 20 mph (32 km/h) for at least two minutes
and then park in a safe location where you can easily get to all four tires
and have access to an air pump.
2. Place the ignition in the off position and keep the key in the ignition.
3. Cycle the ignition to the on
position with the engine off.
4. Turn the hazard flashers on then
off three times. This must be
accomplished within 10 seconds.
If the reset mode has been entered successfully, the horn will sound
once, the TPMS indicator
will flash and the message center (if
equipped) will displayTRAIN LEFT FRONT TIRE. If this does not
occur, please try again starting at Step 2.
If after repeated attempts to enter the reset mode, the horn does not
sound, the TPMS indicator
does not flash and the message center (if
equipped) does not displayTRAIN LEFT FRONT TIRE, seek service
from your authorized dealer.
Tires, Wheels and Loading
161
2010 Econoline(eco)
Owners Guide, 3rd Printing
USA(fus)
ProCarManuals.com
Page 163 of 327

Performing the TPMS reset procedure (Vehicles that have wheels
with banded pressure sensors)
TPMS reset tool
A special TPMS reset tool to reset your TPMS after tire rotation is
provided with vehicles that have different front and rear tire pressures.
The tool is located with your Owner’s Guide materials.
Please take the tool with the
provided Velcro�strip on the back
and mount it in the bottom right
corner of your Owner’s Guide case
(as shown) for safe keeping.
If you find that the reset tool was not provided when delivered, has been
lost or no longer functions (the battery is not replaceable), please contact
your authorized dealer as soon as possible to obtain a replacement.
To verify that your TPMS reset tool is working, press and release the
button on the center of the TPMS tool. The red light should illuminate
and remain on for approximately five (5) seconds. If the light does not
illuminate, the tool needs to be replaced.
It is recommended that you read the entire procedure before attempting.
Note:To enter the reset mode, Steps 1–6 MUST be completed within
60 seconds.
1. Place the ignition in the off position and keep the key in the ignition.
2. Press and release the brake
pedal.
Tires, Wheels and Loading
163
2010 Econoline(eco)
Owners Guide, 3rd Printing
USA(fus)
ProCarManuals.com
Page 164 of 327
3. Cycle the ignition from off to on
three (3) times ending in the on
position—DO NOTstart the engine.
4. Press and hold the brake pedal
for two (2) seconds, then release.
5. Turn the ignition to off—DO
NOTremove the key.
6. Cycle the ignition from off to on three (3) times ending in on.DO
NOTstart the engine.
If the reset mode has been entered successfully, the horn will sound
once, the TPMS indicator
will flash and the message center will
displayTRAIN LEFT FRONT TIRE.
If after repeated attempts to enter the reset mode, the horn does not
sound, the TPMS indicator
does not flash and the message center
does not displayTRAIN LEFT FRONT TIRE, contact your authorized
dealer as soon as possible.
Tires, Wheels and Loading
164
2010 Econoline(eco)
Owners Guide, 3rd Printing
USA(fus)
ProCarManuals.com
Page 191 of 327

When descending long, steep downhill grades, always use a lower gear to
provide engine braking to save wear on brakes. Use D (Overdrive OFF)
on moderately steep hills, 2 (Second) on steep hills, and 1 (First) on
very steep hills.Do not apply your brakes continuously, as they
may overheat and become less effective.
Servicing after towing
If you tow a trailer for long distances, your vehicle will require more
frequent service intervals. Refer to yourscheduled maintenance
informationfor more information.
Trailer towing tips
•The trailer tongue weight should be 10–15% of the loaded trailer
weight.
•Practice turning, stopping and backing-up before starting on a trip to
get the feel of the vehicle-trailer combination. When turning, make
wider turns so the trailer wheels will clear curbs and other obstacles.
•To aid in engine/transmission cooling and A/C efficiency during hot
weather while stopped in traffic, place the gearshift lever in P (Park).
•After you have traveled 50 miles (80 km), thoroughly check your
hitch, electrical connections and trailer wheel lug nuts.
•If you will be towing a trailer frequently in hot weather, hilly
conditions, at GCWR, or any combination of these factors, consider
refilling your rear axle with synthetic gear lube if not already so
equipped. Refer to theMaintenance and Specificationschapter for
the lubricant specification. Remember that regardless of the rear axle
lube used, do not tow a trailer for the first 1,000 miles (1,600 km) of a
new vehicle, and that the first 500 miles (800 km) of towing be done
at no faster than 70 mph (113 km/h) with no full throttle starts.
•Do not tow a trailer for the first 500 miles (800 km) after changing
the rear axle lube.
•Vehicles with trailers should not be parked on a grade. If you must
park on a grade, place wheel chocks under the trailer’s wheels.
Tires, Wheels and Loading
191
2010 Econoline(eco)
Owners Guide, 3rd Printing
USA(fus)
ProCarManuals.com
Page 214 of 327

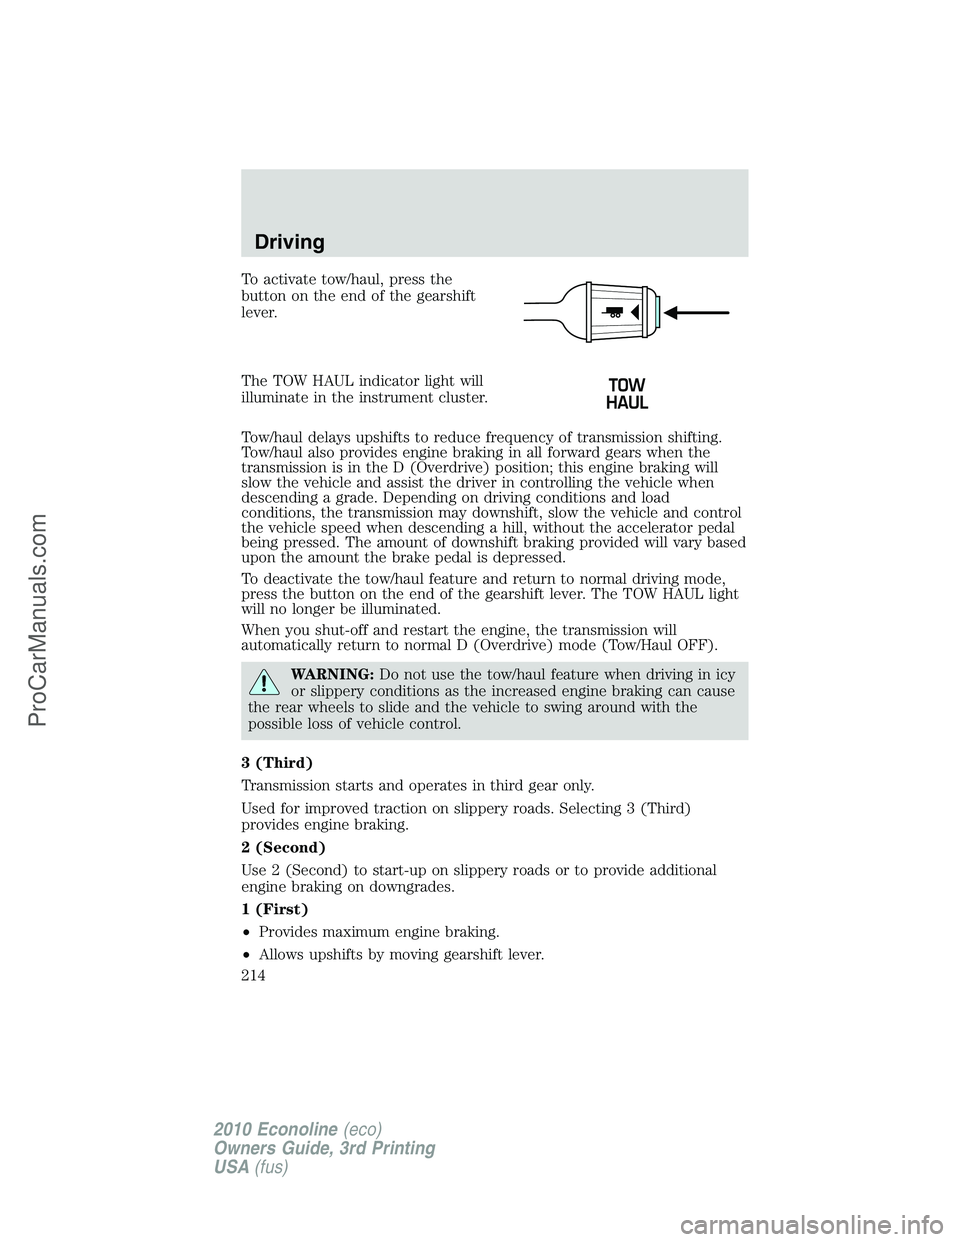
To activate tow/haul, press the
button on the end of the gearshift
lever.
The TOW HAUL indicator light will
illuminate in the instrument cluster.
Tow/haul delays upshifts to reduce frequency of transmission shifting.
Tow/haul also provides engine braking in all forward gears when the
transmission is in the D (Overdrive) position; this engine braking will
slow the vehicle and assist the driver in controlling the vehicle when
descending a grade. Depending on driving conditions and load
conditions, the transmission may downshift, slow the vehicle and control
the vehicle speed when descending a hill, without the accelerator pedal
being pressed. The amount of downshift braking provided will vary based
upon the amount the brake pedal is depressed.
To deactivate the tow/haul feature and return to normal driving mode,
press the button on the end of the gearshift lever. The TOW HAUL light
will no longer be illuminated.
When you shut-off and restart the engine, the transmission will
automatically return to normal D (Overdrive) mode (Tow/Haul OFF).
WARNING:Do not use the tow/haul feature when driving in icy
or slippery conditions as the increased engine braking can cause
the rear wheels to slide and the vehicle to swing around with the
possible loss of vehicle control.
3 (Third)
Transmission starts and operates in third gear only.
Used for improved traction on slippery roads. Selecting 3 (Third)
provides engine braking.
2 (Second)
Use 2 (Second) to start-up on slippery roads or to provide additional
engine braking on downgrades.
1 (First)
•Provides maximum engine braking.
•Allows upshifts by moving gearshift lever.
Driving
214
2010 Econoline(eco)
Owners Guide, 3rd Printing
USA(fus)
ProCarManuals.com
Page 228 of 327

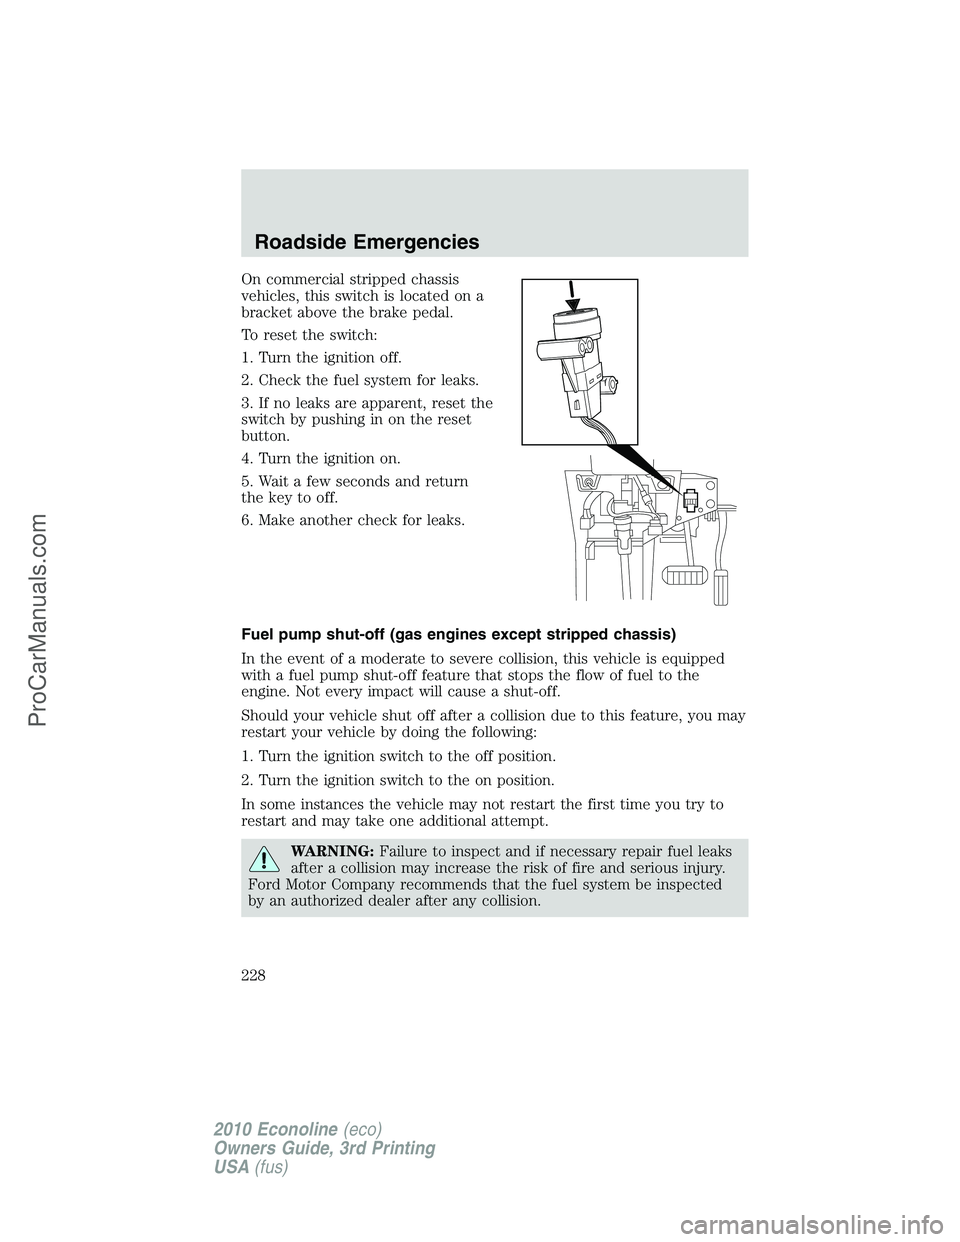
On commercial stripped chassis
vehicles, this switch is located on a
bracket above the brake pedal.
To reset the switch:
1. Turn the ignition off.
2. Check the fuel system for leaks.
3. If no leaks are apparent, reset the
switch by pushing in on the reset
button.
4. Turn the ignition on.
5. Wait a few seconds and return
the key to off.
6. Make another check for leaks.
Fuel pump shut-off (gas engines except stripped chassis)
In the event of a moderate to severe collision, this vehicle is equipped
with a fuel pump shut-off feature that stops the flow of fuel to the
engine. Not every impact will cause a shut-off.
Should your vehicle shut off after a collision due to this feature, you may
restart your vehicle by doing the following:
1. Turn the ignition switch to the off position.
2. Turn the ignition switch to the on position.
In some instances the vehicle may not restart the first time you try to
restart and may take one additional attempt.
WARNING:Failure to inspect and if necessary repair fuel leaks
after a collision may increase the risk of fire and serious injury.
Ford Motor Company recommends that the fuel system be inspected
by an authorized dealer after any collision.
Roadside Emergencies
228
2010 Econoline(eco)
Owners Guide, 3rd Printing
USA(fus)
ProCarManuals.com
Page 240 of 327
4. Apply the parking brake and turn
the engine off.
Spare tire information
The spare tire for your vehicle is stowed under the rear of your vehicle
(except cutaway and stripped chassis models).
To remove the spare tire:
1. Open the rear doors and remove
the thumb screw and anti-theft
bracket. If finger pressure will not
remove the thumb screw, use the
lug wrench to loosen the screw.
2. Remove the access plug under
the left door.
3. Remove the jack handle from the
right side compartment and insert
the tip of the jack handle through
the access hole and into the tube.
4. Turn the jack handle
counterclockwise until the cable is
slack and the tire can be slid from
under the vehicle.
5. Remove the retainer from the
spare tire.
To stow the cable retainer with the spare removed, turn the jack handle
clockwise until all slack is removed.
Roadside Emergencies
240
2010 Econoline(eco)
Owners Guide, 3rd Printing
USA(fus)
ProCarManuals.com
Page 243 of 327
•Never use the front or rear
differential as a jacking point.
Rear axle jacking points - All
models except E-350 Dual Rear
Wheel (DRW) and E-450:
Rear axle jacking points - E-350
Dual Rear Wheel (DRW) and
E-450:
Roadside Emergencies
243
2010 Econoline(eco)
Owners Guide, 3rd Printing
USA(fus)
ProCarManuals.com