Page 73 of 315
UNDERSTANDING THE FEATURES OF YOUR VEHICLE
CONTENTS
�Convertible Top Operation — If Equipped ..... 71
▫ To Lower The Top ..................... 71
▫ To Raise The Top ..................... 73
▫ Convertible Top Boot Cover Installation —
If Equipped ......................... 75
▫ Convertible Top Boot Cover Removal And
Storage ............................ 79
� Mirrors .............................. 82
▫ Inside Day/Night Mirror ................ 82
▫ Outside Mirrors ...................... 83 ▫
Power Mirrors ....................... 84
� Seats ............................... 85
▫ Manual Seat Adjustments ............... 85
� To Open And Close The Hood ............. 86
� Lights .............................. 88
▫ Exterior And Interior Lighting Control ...... 88
▫ Headlights And Parking Lights ........... 88
▫ Headlight Time Delay .................. 89
▫ Daytime Running Lights ................ 89
3
Page 92 of 315
CAUTION!
•Do not leave the hood open in areas where strong
gusts of wind are likely. Such a place might be by
the side of the road where large trucks pass by.
Strong gusts of wind may damage your hood.
Always close the hood in such situations.
•To prevent possible damage, do not slam the hood
to close it. Simply lower the hood until it is open
approximately 6 in (15 cm) and then drop it. This
should secure both latches. Never drive your ve-
hicle unless the hood is fully closed with both
latches engaged.
WARNING!
Be sure the hood is fully latched before driving your
vehicle. If the hood is not fully latched, it could open
when the vehicle is in motion and block your vision.
Failure to follow this warning could result in serious
injury or death.
LIGHTS
Exterior and Interior Lighting Control
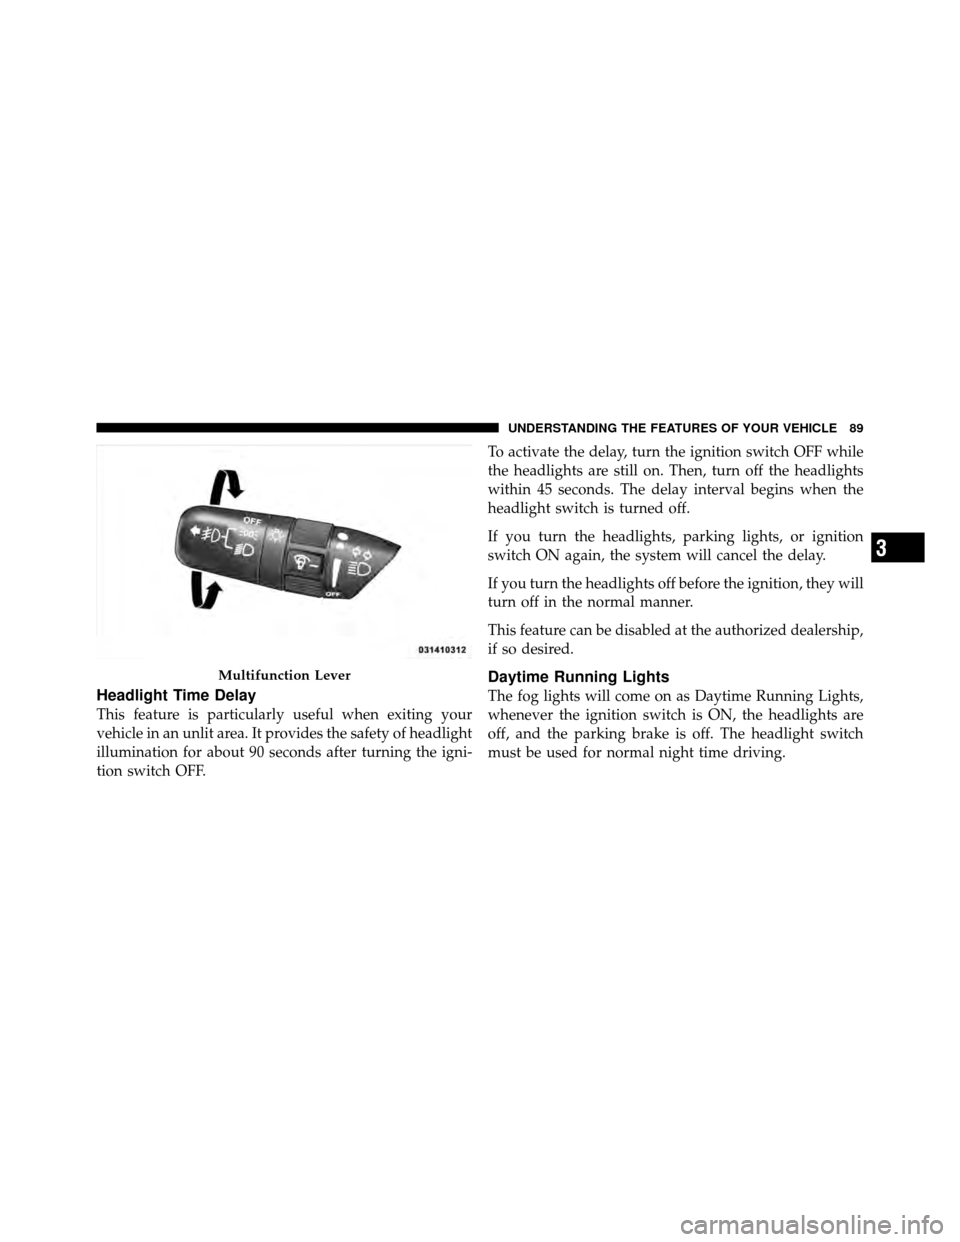
The multifunction lever on the left side of the
steering column controls the operation of the
headlights, parking lights, turn signal lights, front
fog lights, instrument panel lights and interior lights.
Headlights and Parking Lights
Turn the end of the multifunction lever to the first detent
for parking light operation. Turn the end of the lever to
the second detent for headlight operation.
88 UNDERSTANDING THE FEATURES OF YOUR VEHICLE
Page 93 of 315
Headlight Time Delay
This feature is particularly useful when exiting your
vehicle in an unlit area. It provides the safety of headlight
illumination for about 90 seconds after turning the igni-
tion switch OFF.To activate the delay, turn the ignition switch OFF while
the headlights are still on. Then, turn off the headlights
within 45 seconds. The delay interval begins when the
headlight switch is turned off.
If you turn the headlights, parking lights, or ignition
switch ON again, the system will cancel the delay.
If you turn the headlights off before the ignition, they will
turn off in the normal manner.
This feature can be disabled at the authorized dealership,
if so desired.
Daytime Running Lights
The fog lights will come on as Daytime Running Lights,
whenever the ignition switch is ON, the headlights are
off, and the parking brake is off. The headlight switch
must be used for normal night time driving.
Multifunction Lever
3
UNDERSTANDING THE FEATURES OF YOUR VEHICLE 89
Page 94 of 315
NOTE:This feature is standard on all Canadian vehicles
and cannot be disabled. For U.S. vehicles, this feature is
shipped disabled and can be enabled or disabled at a
authorized dealership, if so desired.
Lights-On Reminder
If the headlights or parking lights are on and the ignition
switch is turned OFF, a chime will sound when the
driver’s door is opened to alert the driver.
Battery Saver Feature — Exterior Lights
To protect the battery, the exterior lights will turn off
automatically three minutes after the ignition switch is
turned OFF. To restore exterior light operation, either
turn the ignition switch ON or cycle the headlight switch.
Fog Lights
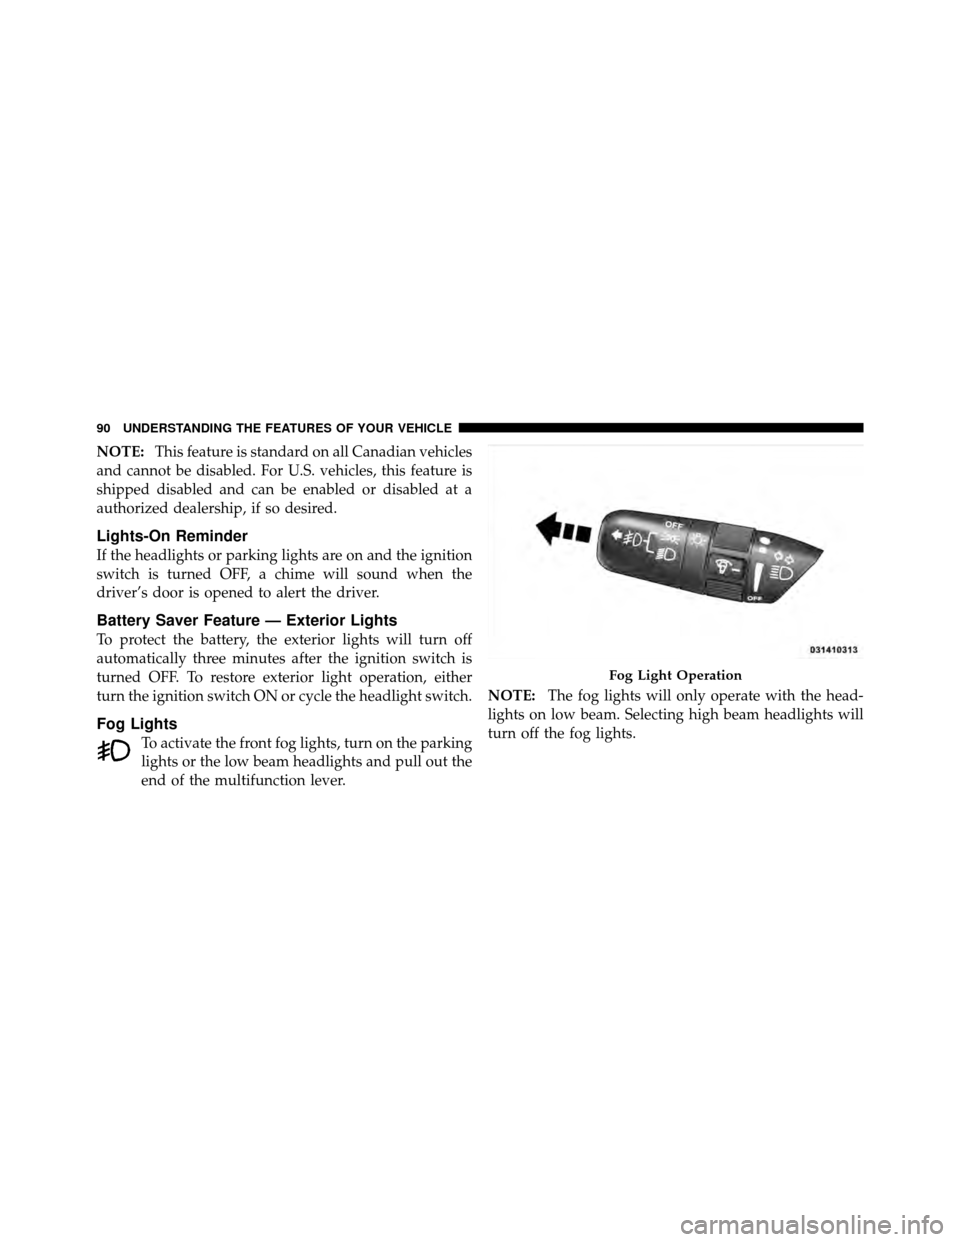
To activate the front fog lights, turn on the parking
lights or the low beam headlights and pull out the
end of the multifunction lever. NOTE:
The fog lights will only operate with the head-
lights on low beam. Selecting high beam headlights will
turn off the fog lights.
Fog Light Operation
90 UNDERSTANDING THE FEATURES OF YOUR VEHICLE
Page 95 of 315
Turn Signals
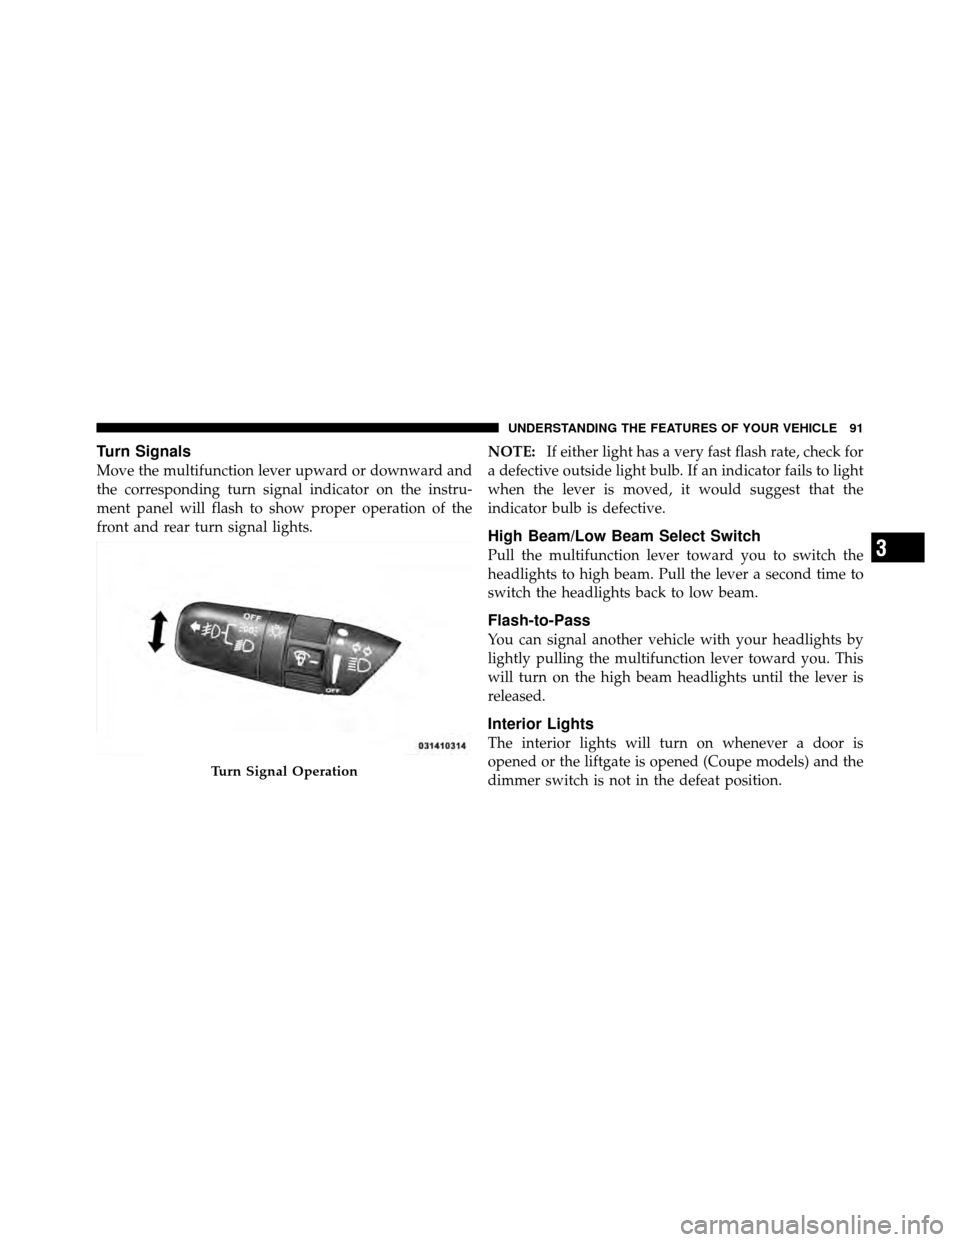
Move the multifunction lever upward or downward and
the corresponding turn signal indicator on the instru-
ment panel will flash to show proper operation of the
front and rear turn signal lights.NOTE:
If either light has a very fast flash rate, check for
a defective outside light bulb. If an indicator fails to light
when the lever is moved, it would suggest that the
indicator bulb is defective.
High Beam/Low Beam Select Switch
Pull the multifunction lever toward you to switch the
headlights to high beam. Pull the lever a second time to
switch the headlights back to low beam.
Flash-to-Pass
You can signal another vehicle with your headlights by
lightly pulling the multifunction lever toward you. This
will turn on the high beam headlights until the lever is
released.
Interior Lights
The interior lights will turn on whenever a door is
opened or the liftgate is opened (Coupe models) and the
dimmer switch is not in the defeat position.
Turn Signal Operation
3
UNDERSTANDING THE FEATURES OF YOUR VEHICLE 91
Page 97 of 315
dimmer control in the multifunction lever. This light is
also controlled automatically by the Illuminated Entry
system.
Battery Saver Feature — Interior Lights
To protect the battery, the interior lights will turn off
automatically 15 minutes after the ignition switch is
moved to the OFF/LOCK position. This will occur if the
interior lights were switched on manually or are on
because a door is open or the liftgate is open (Coupe
models). To restore interior light operation, turn the
ignition switch to the ON/RUN position or cycle the
light switch.
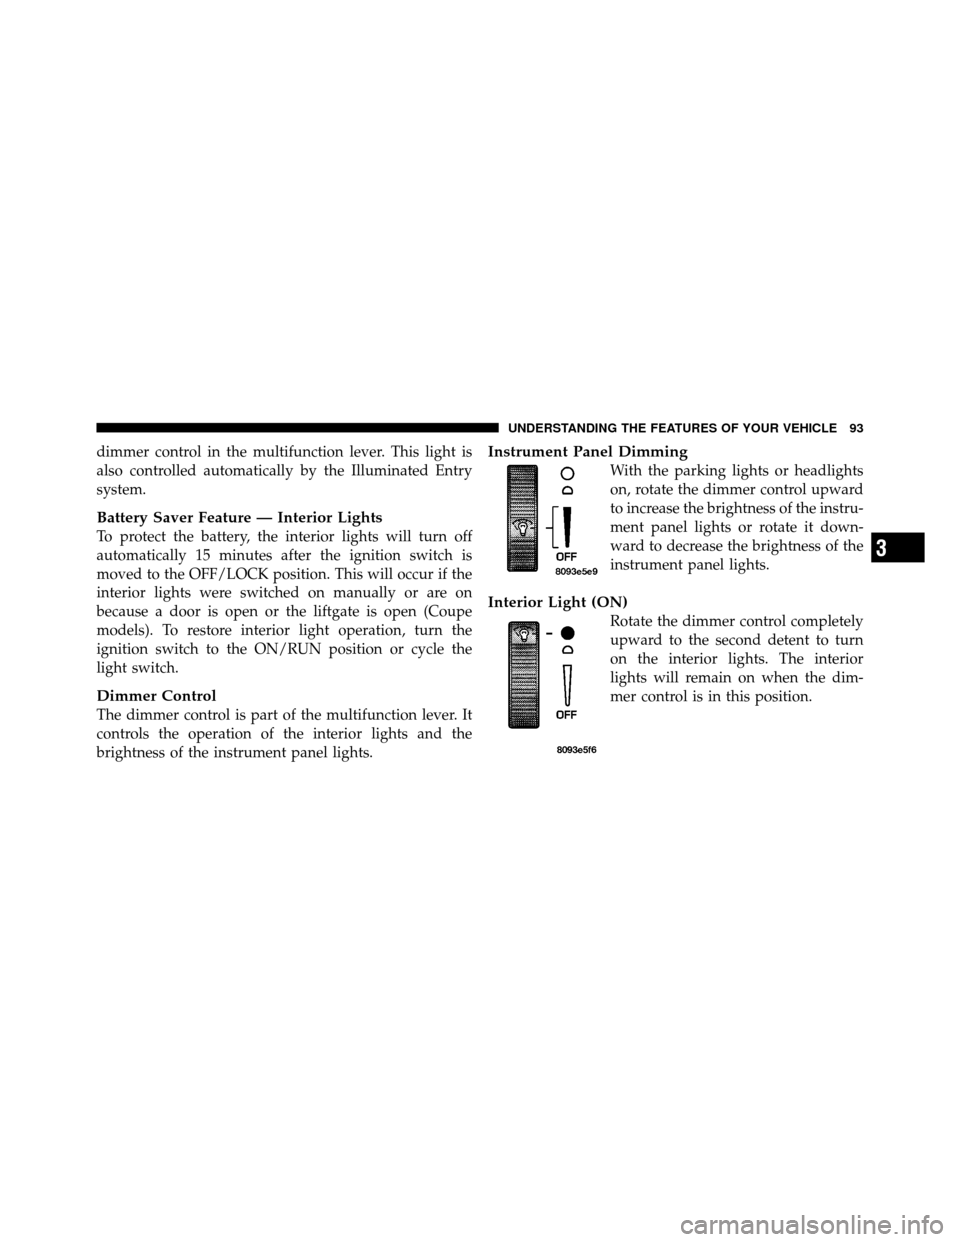
Dimmer Control
The dimmer control is part of the multifunction lever. It
controls the operation of the interior lights and the
brightness of the instrument panel lights.
Instrument Panel Dimming
With the parking lights or headlights
on, rotate the dimmer control upward
to increase the brightness of the instru-
ment panel lights or rotate it down-
ward to decrease the brightness of the
instrument panel lights.
Interior Light (ON)
Rotate the dimmer control completely
upward to the second detent to turn
on the interior lights. The interior
lights will remain on when the dim-
mer control is in this position.
3
UNDERSTANDING THE FEATURES OF YOUR VEHICLE 93
Page 113 of 315

Liquid Crystal Display (LCD) Panel
The LCD panel at the bottom of the speedometer displays
specific messages for given conditions. These messages
are as follows:
•The words “DOOR AJAR” will display if a door is not
closed completely. In addition, a single chime will
sound if you move the vehicle when a door is not
closed completely.
•The words “DOOR UNLOCKED” will flash in the
display if one door is unlocked and will remain on
steady if both doors are unlocked.
•The word “DECK” will flash in the display if the
trunk/liftgate is open.
•The words “LOW TIRE” will flash slowly in the
display and a chime will sound if the tire pressure is
low.
•The words “FLAT TIRE” will flash rapidly in the
display and a chime will sound if critically low tire
pressure is detected.
Message Center
When the appropriate conditions ex-
ist, the Message Center displays the
following indicators and warnings:
High Beam Light
This light will turn on when the high beam
headlights are on. Pull the Multifunction Lever on
the left side of the steering column toward you to switch
the headlights from low beam to high beam. Pull the
lever a second time to switch the headlights back to low
beam.
4
UNDERSTANDING YOUR INSTRUMENT PANEL 109
Page 249 of 315
Cavity Car-tridge
Fuse Mini-
Fuse
Description
8 30 Amp Pink — Ignition Switch Run/
Accessory Feed
9 40 Amp Green — Headlights
10 30 Amp Pink — Ignition Switch Run Feed
11 — 20 Amp YellowAuto Shutdown Relay
(ASD)
12 — 20 Amp YellowCigar Lighter
13 — 15 Amp BlueHazard Flasher
14 — 20 Amp YellowAuto Shutdown Relay
(ASD)
15 — 25 Amp ClearRear Window Defogger
(EBL)Cavity Car-
tridge
Fuse Mini-
Fuse
Description
16, 17 — 20 Amp YellowPower Outlet
18 — 15 Amp BlueIgnition Off Draw (IOD)
19 — 15 Amp BlueHorn
20 — 15 Amp BlueAir Conditioning (A/C)
Clutch Relay
21 — 15 Amp BlueStop Light Switch
22 — 25 Amp ClearFuel Pump/Powertrain
Control Module (PCM)
23, 24 — 10 Amp RedAirbag
60, 61 — 15 Amp BlueIgnition Run/Start Relay
Feed
7
MAINTAINING YOUR VEHICLE 245