2010 DODGE JOURNEY warning
[x] Cancel search: warningPage 30 of 88

SYNC Temperature Button
• Push the SYNC button once to control driver and passenger temperaturessimultaneously. Push the SYNC button a second time to control the temperatures
individually.
Air Recirculation
• Use recirculation for maximum A/C operation.
• For window defogging, turn the recirculation button off.
• If the Recirculation button is pushed while in the AUTO mode, the indicator light may flash three times to indicate the cabin air is being controlled automatically.
Rear Passenger Climate Controls
PARKVIEW®REAR BACK-UP CAMERA
• You can see an on-screen image of the rear of your vehicle whenever the shift lever isput into REVERSE. The ParkView®Rear Back-Up Camera image will be displayed on the
radio display screen, located on the center stack of the instrument panel.
WARNING!
Drivers must be careful when backing up even when using the ParkView®Rear
Back-Up Camera. Always check carefully behind your vehicle, and be sure to check for
pedestrians, animals, other vehicles, obstruction s, or blind spots before backing up.
You are responsible for the safety of your surroundings and must continue to pay
attention while backing up. Failure to do so can result in serious injury or death.
OPERATING YOUR VEHICLE
28
Page 31 of 88

POWER SUNROOF
• The power sunroof switch is located on the overhead console.
WARNING!
• Never leave children in a vehicle with the key in the ignition switch. Occupants,particularly unattended children, can become entrapped by the power sunroof
while operating the power sunroof switch. Such entrapment may result in serious
injury or death.
• In an accident, there is a greater risk of being thrown from a vehicle with an open sunroof. You could also be seriously injured or killed. Always fasten your seat belt
properly and make sure all passengers are properly secured too.
• Do not allow small children to operate the sunroof. Never allow your fingers, other
body parts, or any object to project through the sunroof opening. Injury may result.
Opening Sunroof
Express
• Press the switch rearward and release. The sunroof will fully open and stop
automatically.
Closing Sunroof
Express
• Press the switch forward and release. The sunroof will close automatically from anyposition.
Manual Open/Close
• Press and hold the switch rearward to open or forward to close the sunroof. Anyrelease of the switch will stop the movement, and the sunroof will remain in a partially
open or closed position until the switch is pressed again.
Venting Sunroof
• Press and release the "V" button, and the sunroof will open to the vent position. This
is called “Express Vent” and will occur regardless of sunroof position. During Express
Vent operation, any movement of the switch will stop the sunroof.
Pinch Protection Feature
• This feature will detect an obstruction in the opening of the sunroof during Express Close operation. If an obstruction in the path of the sunroof is detected, the sunroof
will automatically return to the open position.
NOTE: Pinch protection is disabled while the switch is pressed and held during manual
opening and closing of the sunroof.
29
OPERATING YOUR VEHICLE
Page 44 of 88

•SIRIUS Backseat TV™
• To view SIRIUS Backseat TV™ set the remote control channel selector switch to channel 1. Press the MODE button, then using the arrow buttons select TV and press
enter.
Auxiliary Audio/Video Input Jacks
• The Aux jacks are located on the rear of the center console.
• Connect the video game or other external media devices to the AUX jacks following the color coding for VES™ jacks.
• Using either the touch-screen radio or remote control, select AUX from the Rear VES™ Control or Mode Selection screen.
• Refer to “Uconnect™ Multimedia – Video Entertainment System (VES)™” in the Uconnect™ User's Manual on the DVD for further details.
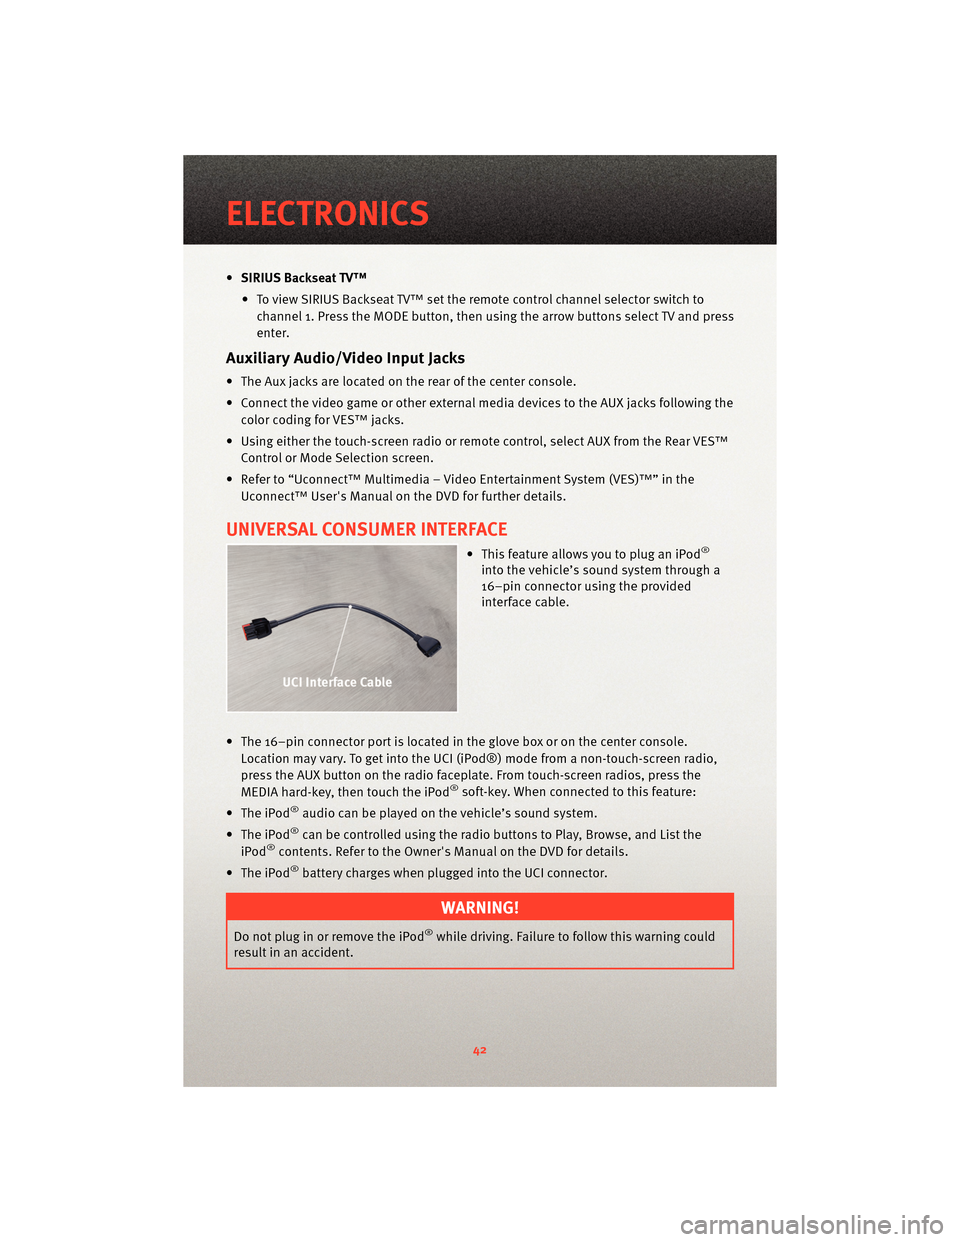
UNIVERSAL CONSUMER INTERFACE
• This feature allows you to plug an iPod®
into the vehicle’s sound system through a
16–pin connector using the provided
interface cable.
• The 16–pin connector port is located in the glove box or on the center console. Location may vary. To get into the UCI (iPod®) mode from a non-touch-screen radio,
press the AUX button on the radio faceplat e. From touch-screenradios, press the
MEDIA hard-key, then touch the iPod
®soft-key. When connected to this feature:
• The iPod
®audio can be played on the vehicle’s sound system.
• The iPod
®can be controlled using the radio buttons to Play, Browse, and List the
iPod®contents. Refer to the Owner's Manual on the DVD for details.
• The iPod
®battery charges when plug ged into the UCI connector.
WARNING!
Do not plug in or remove the iPod®while driving. Failure to follow this warning could
result in an accident.
ELECTRONICS
42
Page 46 of 88

• Press and hold the just-trained HomeLink®button; if the indicator light stays on
constantly, programming is complete and the garage door should open.
WARNING!
• Your motorized door or gate will open and close while you are training the universal transceiver. Do not train the transceiver if people or pets are in the path of the door
or gate. Only use this transceiver with a garage door opener that has a “stop and
reverse” feature as required by Federal sa fety standards. This includes most garage
door opener models manufactured after 1982. Do not use a garage door opener
without these safety features. Call toll-free 1–800–355–3515 or, on the Internet, at
www.HomeLink.com for safety inf ormation orassistance.
• Vehicle exhaust contains Carbon Monoxide (CO), a dangerous gas. Do not run your vehicle in the garage while training the transceiver. Exhaust gas can cause serious
injury or death.
NOTE: If you are having difficulty training your HomeLink
®and your garage door opener
was manufactured after 1995, you may have a rolling code. Follow the steps below for
Programming A Rolling Code System.
Programming A Rolling Code System
• At the garage door opener motor (in the garage), locate the “learn” or “training” button. This can usually be found where the hanging antenna wire is attached to the
garage door opener motor (it is NOT the button normally used to open and close the
door).
• Firmly press and release the “learn” or “training” button. The name and color of the
button may vary by manufacturer. Within 30 seconds, return to the vehicle and press
the programmed HomeLink
®button twice (holding the button for two seconds each
time). If the device is plugged in and activates, programming is complete.
• If the device does not activate, press the button a third time (for two seconds) to
complete the training.
Using HomeLink®
• To operate, simply press and release the programmed HomeLink®button and the
trained device will operate.
• Refer to your Owner’s Manual on the DVD for further details. If you have any problems programming HomeLink
®, or require assistance, please call toll-free 1–800–355–3515
or, on the Internet, at www.HomeLink.com.
ELECTRONICS
44
Page 47 of 88

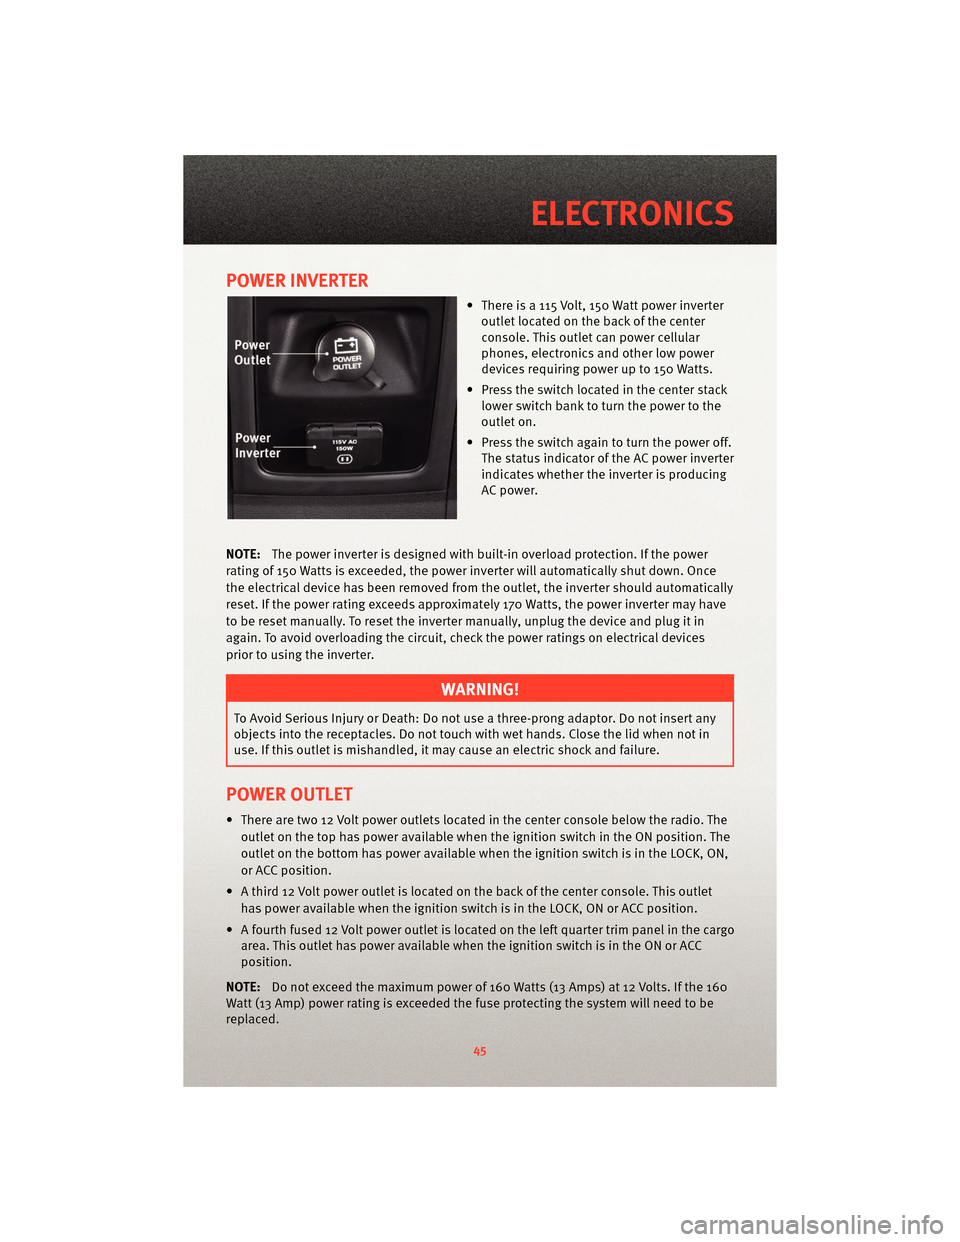
POWER INVERTER
• There is a 115 Volt, 150 Watt power inverteroutlet located on the back of the center
console. This outlet can power cellular
phones, electronics and other low power
devices requiring power up to 150 Watts.
• Press the switch located in the center stack lower switch bank to turn the power to the
outlet on.
• Press the switch again to turn the power off. The status indicator of the AC power inverter
indicates whether the inverter is producing
AC power.
NOTE: The power inverter is designed with built-in overload protection. If the power
rating of 150 Watts is exceeded, the power inverter will automatically shut down. Once
the electrical device has been removed from the outlet, the inverter should automatically
reset. If the power rating exceeds approximately 170 Watts, the power inverter may have
to be reset manually. To reset the inverter manually, unplug the device and plug it in
again. To avoid overloading the circuit, check the power ratings on electrical devices
prior to using the inverter.
WARNING!
To Avoid Serious Injury or Death: Do not use a three-prong adaptor. Do not insert any
objects into the receptacles. Do not touch with wet hands. Close the lid when not in
use. If this outlet is mishandled, it ma y cause an electric shock and failure.
POWER OUTLET
• There are two 12 Volt power outlets located in the center console below the radio. The
outlet on the top has power available when the ignition switch in the ON position. The
outlet on the bottom has power available when the ignition switch is in the LOCK, ON,
or ACC position.
• A third 12 Volt power outlet is located on the back of the center console. This outlet has power available when the ignition switch is in the LOCK, ON or ACC position.
• A fourth fused 12 Volt power outlet is located on the left quarter trim panel in the cargo area. This outlet has power available when the ignition switch is in the ON or ACC
position.
NOTE: Do not exceed the maximum power of 160 Watts (13 Amps) at 12 Volts. If the 160
Watt (13 Amp) power rating is exceeded the fuse protecting the system will need to be
replaced.
45
ELECTRONICS
Page 48 of 88

Uconnect™ Phone
• The Uconnect™ Phone is a voice-activated, hands-free, in-vehicle communicationssystem.
• The Uconnect™ Phone allows you to dial a phone number with your cellular phone using simple voice commands.
• For vehicles equipped with Video Entertainment System (VES)™, refer to the Uconnect™ Phone section of the Uconnect™ User's Manual on the DVD for further
details.
• For vehicles not equipped with VES™, refer to your vehicle Owner's Manual on the DVD for further details.
WARNING!
• Any voice commanded system should be used only in safe driving conditionsfollowing local laws and phone use. All attention should be kept on the roadway
ahead. Failure to do so may result in an accident causing serious injury or death.
• Your phone must be turned on and paired to the Uconnect™ Phone to allow use of this vehicle feature in emergency situations, when the cellular phone has network
coverage and stays paired to the Uconnect™ Phone.
NOTE: The Uconnect™ Phone requires a cellular phone equipped with the Bluetooth
®
Hands-Free Profile, Version 0.96 or higher. For Uconnect™ customer support, call
1–877–855–8400.
Phone Pairing
NOTE:Pairing is a one-time initial setup before using the phone. You will also need to
follow the Bluetooth®instructions in your cell phone user guide to complete the phone
pairing setup.
• Press the Phone button
to begin.
• Wait for the “ready” prompt and beep.
• (After the BEEP), say “Uconnect setup”.
• (After the BEEP), say “phone pairing”.
• (After the BEEP), say “pair a phone”.
• Follow the audible prompts.
• You will be asked to create a four-digit PIN which you will later need to enter into your phone (typically...settings, Bluetooth
®, device, list, new).
• You will then be prompted to give the phone pairing a name (each phone paired
should have a unique name).
• Next you will be asked to give this new pairing a priority of 1 thru 7 (up to seven phones may be paired).
ELECTRONICS
46
Page 50 of 88

• For vehicles equipped with Video Entertainment System (VES)™, refer to the VoiceCommand section of the Uconnect™ User's Manual on the DVD for further details.
• For vehicles not equipped with VES™, refer to your vehicle Owner's Manual on the DVD for Voice Command information.
Changing The Volume
• Start a dialogue by pressing the Voice Command button, then say a command
(e.g., “tutorial”).
• Use the radio ON/OFF VOLUME rotary knob to adjust the volume to a comfortable level while the Voice Command system is speaking. Please note the volume setting for
Voice Command is different than the audio system.
WARNING!
Any voice commanded system should be used only in safe driving conditions and all
attention should be kept on the roadway ahead. Failure to do so may result in an
accident causing serious injury or death.
NOTE: To access the tutorial, press the Voice Command button
. After the BEEP,
say “tutorial”. Press any hard-key or touch the display to cancel the tutorial.
ELECTRONICS
48
Page 53 of 88

24 HOUR TOWING ASSISTANCE - U.S. ONLY
• Dial toll-free 1-800-521-2779 or 1-800-363-4869 for Canadian residents.
• Provide your name, vehicle identification number and license plate number.
• Provide your location, including telephone number, from which you are calling.
• Briefly describe the nature of the problem and answer a few simple questions.
• You will be given the name of the service provider and an estimated time of arrival. Ifyou feel you are in an “unsafe situation”, please let us know. With your consent, we
will contact local police or safety authorities.
INSTRUMENT CLUSTER WARNING LIGHTS
- Electronic Stability Program (ESP) Indicator Light
• If this indicator light flashes during acceleration, apply as little throttle as possible.While driving, ease up on the accelerator. Adapt your speed and driving to the
prevailing road conditions. To improve the vehicle's traction when starting off in deep
snow, sand or gravel, it may be desirable to switch the ESP system off.
- Tire Pressure Monitoring System (TPMS) Light
• A Tire Pressure Monitoring Light and a “low tire” message will display in your instrument cluster along with an audible chime if one or more of your vehicle’s four
road tires are significantly under-inflated.
• Check the inflation pressure of each tire and inflate to the recommended pressure for your vehicle. The tire pressures recommended for your vehicle are found on the “Tire
and Loading Information” label located on the driver’s side door opening. The TPMS
light should not be used as a tire pressure gauge when adjusting your tire pressure.
• It is recommended that you check the tire pressure in the morning when tires are cool; inflate each tire to the recommended pressure for your vehicle. The light will turn off
after your vehicle’s tire pressures are properly inflated and the pressure has been
recognized. The vehicle may need to be driven for up to 20 minutes above 15 mph
(25 km/h) before the light will turn off.
• Temperature changes can affect tire pressure, causing the TPMS light to turn on. Tire pressures will also increase as the vehicle is driven – this is normal and you should
not adjust for this in creased pressure.
• Driving on under-inflated tires reduces your vehicle’s fuel efficiency and tire tread life.
If a spare tire is in use on the vehicle, the TPMS light may turn on.
- Engine Temperature Warning Light
• This light warns of an overheated engine condition.
• If the light turns on and a warning chime sounds while driving, safely pull over and stop the vehicle. If the A/C system is on, t urn it off. Also, shiftthe transmission into
NEUTRAL and idle the vehicle. If the temperat ure reading does not return to normal,
turn the engine off immediately.
51
WHAT TO DO IN EMERGENCIES