2010 DODGE DAKOTA ECO mode
[x] Cancel search: ECO modePage 22 of 76

CLIMATE CONTROLS
Air Recirculation
• Use recirculation for maximum A/C operation.
• For window defogging, turn the recirculation off.
• Recirculation is not allowed in defrost, floor, defrost/floor (mix) modes.
POWER SUNROOF
• The power sunroof switch is located on the overhead console.
WARNING!
• Never leave children in a vehicle with the key in the ignition switch. Occupants,particularly unattended children, can become entrapped by the power sunroof
while operating the power sunroof switch. Such entrapment may result in serious
injury or death.
• In an accident, there is a greater risk of being thrown from a vehicle with an open sunroof. You could also be seriously injured or killed. Always fasten your seat belt
properly and make sure all passengers are properly secured too.
• Do not allow small children to operate the sunroof. Never allow your fingers, other
body parts, or any object to project through the sunroof opening. Injury may result.
Opening Sunroof
Express
• Press the switch rearward and release. The sunroof will fully open and stop
automatically.
OPERATING YOUR VEHICLE
20
Page 26 of 76

Auxiliary Mode
• The auxiliary (AUX) jack allows a portable device, such as an MP3 player or a cassetteplayer, to be plugged into the radio and uti lize the vehicle’s audio system to amplify
the source and play through the vehicle speakers.
• Pressing the AUX button will change the mode to auxiliary device if the AUX jack is connected.
• The control of the external device cannot be provided by the radio; use the device controls instead.
Clock Setting
• Press and hold the TIME button until the hours blink; turn the TUNE/SCROLL controlknob to set the hours.
• Press the TUNE/SCROLL control knob until the minutes begin to blink; turn the TUNE/SCROLL control knob to set the minutes.
• Press the TUNE/SCROLL control knob to save the time change.
• To exit, press any button/knob or wait five seconds.
Station Presets
• Press the SET/RND button once and SET 1 will show in the display. Then select the button (1–6).
• A second station may be added to each push button. Press the SET/RND button twice and SET 2 will show in the display, then select button (1–6).
How To Load Multiple CDs/DVDs
REQ Radio Only
• Press the LOAD button and then press the button with the corresponding number
(1–6) where the CD is being loaded. The radio will display PLEASE WAIT and prompt
when to INSERT DISC.
• After the radio displays INSERT DISC, insert the CD into the player. The radio display will show LOADING DISC when the disc is loading and “READING DISC” when the radio
is reading the disc.
• Press the eject button and then the cor responding number (1–6) to eject the desired
disc.
ELECTRONICS
24
Page 30 of 76

Guide Me Home
• Press the NAV hard-key to access the Navigation Main Menu.
• Touch the GUIDE ME HOME soft-key to route you back to your home destination fromyour current location. Touch the GO soft-key to start your trip.
Map
• Press the NAV hard-key to access the Navigation Main Menu.
• Touch the MAP soft-key to display a map of your current position.
STEERING WHEEL AUDIO CONTROLS
• The steering wheel audio controls arelocated on the rear surface of the steering
wheel.
Right Switch
• Press the switch up or down to increase ordecrease the volume.
• Press the button in the center to change modes AM/FM/CD/SAT.
Left Switch
• Press the switch up or down to search forthe next listenable station or select the next
or previous CD track.
• Press the button in the center to select the next preset station (radio) or to change CDs if equipped with a CD Changer.
UNIVERSAL GARAGE DOOR OPENER (HomeLink®)
Programming HomeLink®
Begin Programming
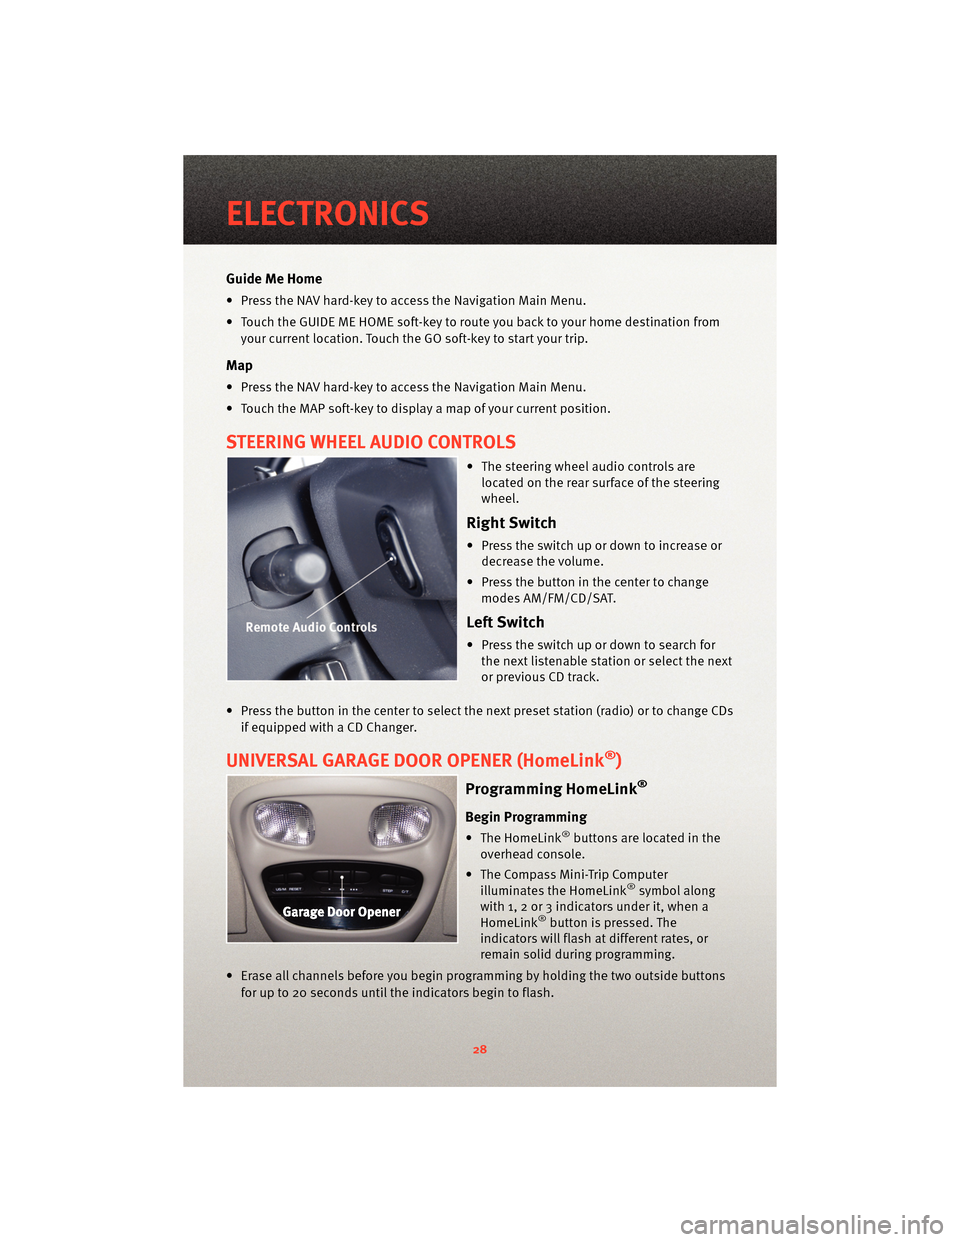
• The HomeLink®buttons are located in the
overhead console.
• The Compass Mini-Trip Computer illuminates the HomeLink
®symbol along
with 1, 2 or 3 indicators under it, when a
HomeLink
®button is pressed. The
indicators will flash at different rates, or
remain solid during programming.
• Erase all channels before you begin progr amming by holding the two outside buttons
for up to 20 seconds until the indicators begin to flash.
ELECTRONICS
28
Page 31 of 76

• Park your vehicle outside of the garage and turn the ignition switch to the ON/RUNposition.
• Place the hand-held transmitter 1 to 3 in (3 to 8 cm) from the HomeLink
®buttons
while keeping the indicator light in view.
• Simultaneously, press and hold both the chosen HomeLink
®button and the
hand-held transmitter button until the HomeLink®indicator flash rate changes from a
slow to a rapidly blinking light, then release both the HomeLink®and the hand-held
transmitter buttons. This may take up to 30 seconds, or longer in rare cases.
• Press and hold the just-programmed HomeLink
®button; if the indicator light stays on
constantly, programming is complete and the garage door should open.
WARNING!
• Your motorized door or gate will open and close while you are programming the universal transceiver. Do not program the transceiver if people or pets are in the
path of the door or gate. Only use this transceiver with a garage door opener that
has a “stop and reverse” feature as required by Federal safety standards. This
includes most garage door opener models manufactured after 1982. Do not use a
garage door opener without these safety features. Call toll-free 1–800–355–3515 or,
on the Internet, at www.HomeLink.com for s afety informationor assistance.
• Do not run your vehicle in a closed garage or confined area while programming the transceiver. Exhaust gas from your vehicle contains Carbon Monoxide (CO) which is
odorless and colorless. Carbon Monoxide is poisonous and can cause serious
injury or death when inhaled.
NOTE: If you are having difficulty programming your HomeLink
®and your garage door
opener was manufactured after 1995, you may have a rolling code. Follow the steps
below for Programming A Rolling Code System.
Programming A Rolling Code System
• At the garage door opener motor (in the gara ge), locate the “learn” or “programming”
button. This can usually be found where the hanging antenna wire is attached to the
garage door opener motor (it is NOT the button normally used to open and close the
door).
• Firmly press and release the “learn” or “programming” button. The name and color of
the button may vary by manufacturer. Within 30 seconds, return to the vehicle and
press the programmed HomeLink
®button twice (holding the button for two seconds
each time). If the device is plugged in and activates, programming is complete.
• If the device does not activate, press the button a third time (for two seconds) to
complete the programming.
Using HomeLink®
• To operate, simply press and release the programmed HomeLink®button and the
programmed device will operate.
29
ELECTRONICS
Page 37 of 76

Two–Position Tailgate/Upper
Load Platform
• Your tailgate can be opened to thefull-open or the partial-open position.
The partial-open position is for
loading objects longer than the length
of the bed (sheets of plywood, etc.)
by creating an upper load platform:
Installing Lumber
• Place lumber across the box in theindentations provided above the
wheel housings and in the bulkhead
dividers, to form the floor. There are
indents in the sheet metal (or bed
liner if equipped) on the inner side of
the box in front (Crew Cab
®only) and
behind both wheel housings.
• Secure the tailgate in the partially-open position.
• Open the tailgate slightly.
• Snap the tailgate support cable between the cable guide and the
tailgate bumper. Do this on both
sides of the tailgate.
• To return the tailgate to the full-open position:
• Lift up on the tailgate.
• Remove both cables from between the cable guides and the tailgate
bumpers, and lower the tailgate.
CAUTION!
• Care should always be exercisedwhen operating a vehicle with
cargo. Vehicle speeds may need to
be reduced. Severe turns or rough
roads may cause shifting or
bouncing of the cargo that may
result in vehicle damage.
(Continued)
CAUTION!(Continued)
• Ensure the load is securely tieddown and is properly identified
according to local laws if it extends
beyond the tail lights.
• Loading should not exceed 400 lbs (181 kg) of material suspended
above the wheelhouse and
partially open tailgate or vehicle
damage may result.
TRAILER TOWING WEIGHTS
(MAXIMUM TRAILER WEIGHT
RATINGS)
NOTE: For trailer towing information
(maximum trailer weight ratings) refer to
the following website addresses:
• http:// www.dodge.com/towing
• http:// www.dodge.ca (Canada)
RECREATIONAL TOWING
(BEHIND MOTORHOME,
ETC.)
Two-Wheel Drive Models
• Recreational towing of two-wheel
drive models is not allowable. Towing
the vehicle with the transmission in
NEUTRAL can cause severe
transmission damage. Removal of the
driveshaft for towing is not
recommended, since this would allow
fluid to drain from the transmission.
35
UTILITY
Page 38 of 76

Four-Wheel Drive Models
CAUTION!
• Internal damage to the transfercase will occur if a front or rear
wheel lift is used when
recreational towing.
• The transfer case must be shifted into NEUTRAL for recreational
towing. The NEUTRAL button is
located on the lower left hand
corner of the 4WD Control Switch.
Shifts into and out of transfer case
NEUTRAL can take place with the
selector switch in any mode
position.
• Automatic tran smissions must be
placed in PARK position for
recreational towing.
• Manual transm issions must be
placed in gear (for example, fourth
gear) for recreational towing.
Failure to follow these procedures
can cause severe transmission
and/or transfer case damage.
Recreational Towing Procedure
• Use the following procedure to prepare your vehicle for recreational
towing.
• Bring the vehicle to a complete stop, shut the engine OFF and turn
the Key Fob to the ON position (do
not start the engine).
• Press the brake pedal and shift the automatic tran smission into
NEUTRAL, or press the clutch pedal
to the floor on a manual
transmission. • Using a ballpoint pen or similar
object, press the transfer case
NEUTRAL button for four seconds.
• After the shift is completed and the NEUTRAL light comes on, release
the NEUTRAL button.
• Start the engine and shift the automatic tran smission into
REVERSE.
• Release the brake pedal for five seconds and ensure that there is
no vehicle movement.
• Repeat the previous step with the transmission in DRIVE.
• Shut the engine OFF, and place the Key Fob in the unlocked OFF
position.
• Shift the autom atic transmission
into PARK. Shift manual
transmissions into fourth gear.
• Attach the vehicle to the tow vehicle with a tow bar and
disconnect the negative battery
cable.
• Refer to your Owner's Manual on the DVD for further details.CAUTION!
It is necessary to follow these steps to
be certain that the transfer case is
fully in NEUTRAL before recreational
towing to prevent damage to internal
parts.
UTILITY
36
Page 43 of 76

- Transmission Temperature Warning Light
• This light indicates that there is excessive transmission fluid temperat ure that might
occur with severe usage such as trailer towing. If this light turns on, stop the vehicle
and run the engine at idle, w ith the transmission inNEUTRAL, until the light turns off.
Once the light turns off, you may continue to drive normally.
Fuel Cap/Loose Gas Cap Message
• If a “gas cap” message (shown as gASCAP) appears, tighten the gas cap until a “clicking” sound is heard.
• Press the odometer reset button to turn the message off.
• If the message continues to appear for mor e than three days after tightening the gas
cap, see your authorized dealer.
Oil Change Indicator
Message
• If an “oil change” message (shown as CHAngE OIL) appears and a single chime
sounds, it is time for your next required oil change.
Resetting The Light After Servicing
• Turn the ignition switch to the ON/RUN position (do not start engine).
• Fully depress the accelerator pedal three times within 10 seconds.
• Turn the ignition switch to the OFF/LOCK position.
IF YOUR ENGINE OVERHEATS
• In any of the following situations, you c an reduce the potential for overheating by
taking the appropriate action.
• On the highways — slow down.
• In city traffic — while stopped, shift tran smission intoNEUTRAL, but do not increase
engine idle speed.
NOTE: There are steps that you can take to slow down an impending overheat
condition:
• If your air conditioner (A/C) is on, turn it off. The A/C system adds heat to the engine cooling system and turning the A/C off can help remove this heat.
• You can also turn the Temperature Control to maximum heat, the Mode Control to floor and the Fan Control to high. This allows the heater core to act as a supplement to the
radiator and aids in removing heat from the engine cooling system.
• If the temperature reading does not re turn to normal, turn the engine off immediately.
• We recommend that you do not operate the vehicle or engine damage will occur. Have the vehicle serviced immediately.
41
WHAT TO DO IN EMERGENCIES
Page 54 of 76

TOWING A DISABLED VEHICLEModelFlat Towing (all four
wheels on the ground)Flatbed Towing (all four
wheels suspended OFF
the ground)Front Wheels Raised,
Rear Wheels on the
GroundRear Wheels Raised,
Front Wheels on the
Ground
Two-Wheel Drive NOT Permitted
Recommended Method Shift lever must be In
NEUTRAL, the speed
less then 30 mph
(48 km/h) and the
distance traveled less
than 15 mi (24 km).May be used
Four-Wheel Drive NOT Permitted
Recommended Method NOT Permitted without a
towing dolly NOT Permitted without a
towing dolly
52
WHAT TO DO IN EMERGENCIES