Page 143 of 484

Headlights On with Wipers (Available with
Automatic Headlights Only)
When this feature is active, the headlights will turn on
approximately 10 seconds after the wipers are turned on
if the headlight switch is placed in the AUTO position. In
addition, the headlights will turn off when the wipers are
turned off if they were turned on by this feature.
The “Headlights On with Wipers” feature can be turned
on or off through the Electronic Vehicle Information
Center (EVIC) (if equipped). Refer to “Electronic Vehicle
Information Center (EVIC)/Personal Settings (Customer-
Programmable Features)” in “Understanding Your In-
strument Panel” for further information.
TILT/TELESCOPING STEERING COLUMN
This feature allows you to tilt the steering column
upward or downward. It also allows you to lengthen or
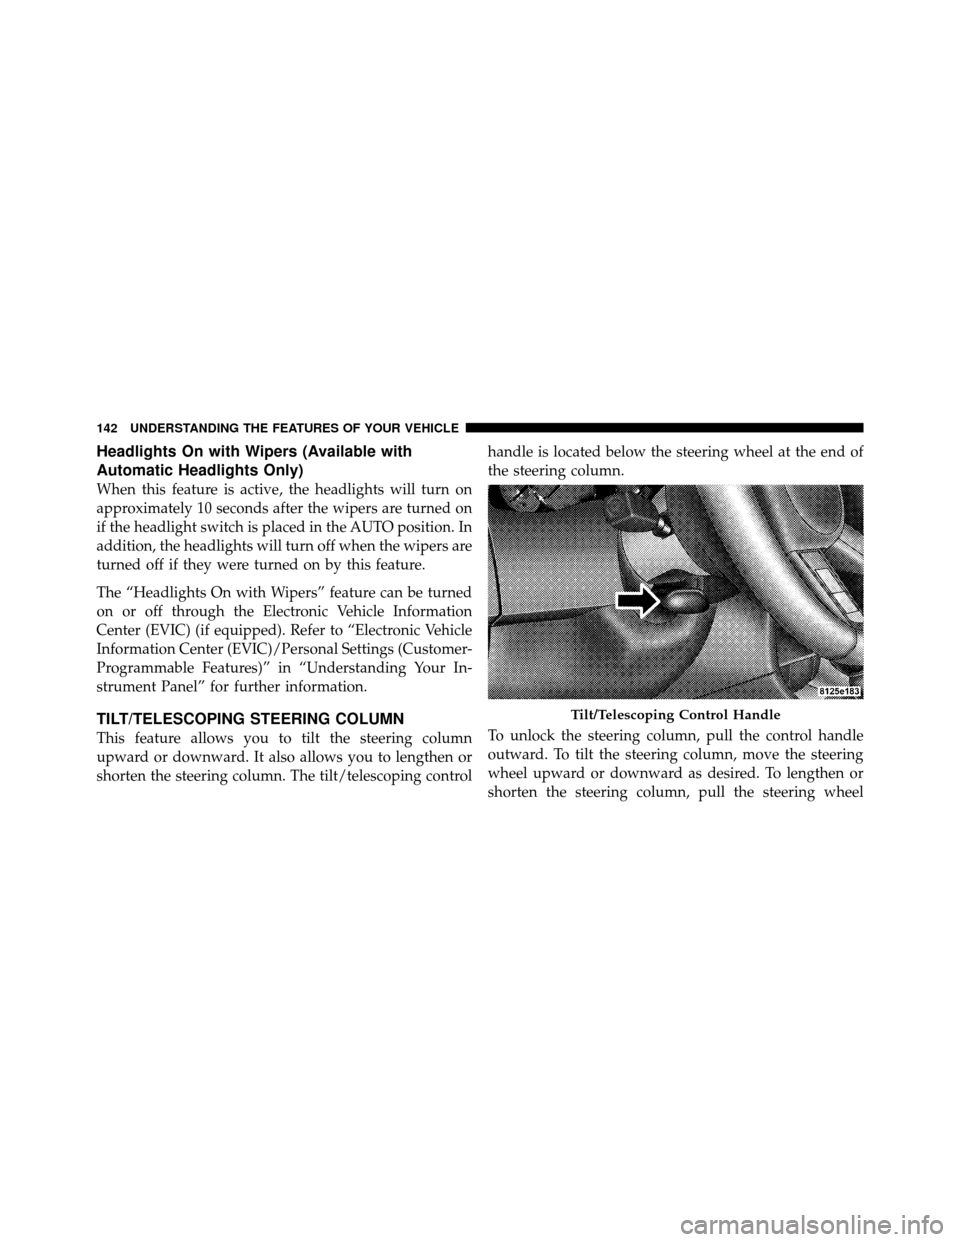
shorten the steering column. The tilt/telescoping controlhandle is located below the steering wheel at the end of
the steering column.
To unlock the steering column, pull the control handle
outward. To tilt the steering column, move the steering
wheel upward or downward as desired. To lengthen or
shorten the steering column, pull the steering wheel
Tilt/Telescoping Control Handle
142 UNDERSTANDING THE FEATURES OF YOUR VEHICLE
Page 144 of 484

outward or push it inward as desired. To lock the steering
column in position, push the control handle inward until
fully engaged.
WARNING!
Do not adjust the steering column while driving.
Adjusting the steering column while driving or driv-
ing with the steering column unlocked, could cause
the driver to lose control of the vehicle. Be sure the
steering column is locked before driving your ve-
hicle. Failure to follow this warning may result in
serious injury or death.
ADJUSTABLE PEDALS — IF EQUIPPED
The adjustable pedals system is designed to allow a
greater range of driver comfort for steering wheel tilt and
seat position. This feature allows both the brake and
accelerator pedal to move toward or away from the
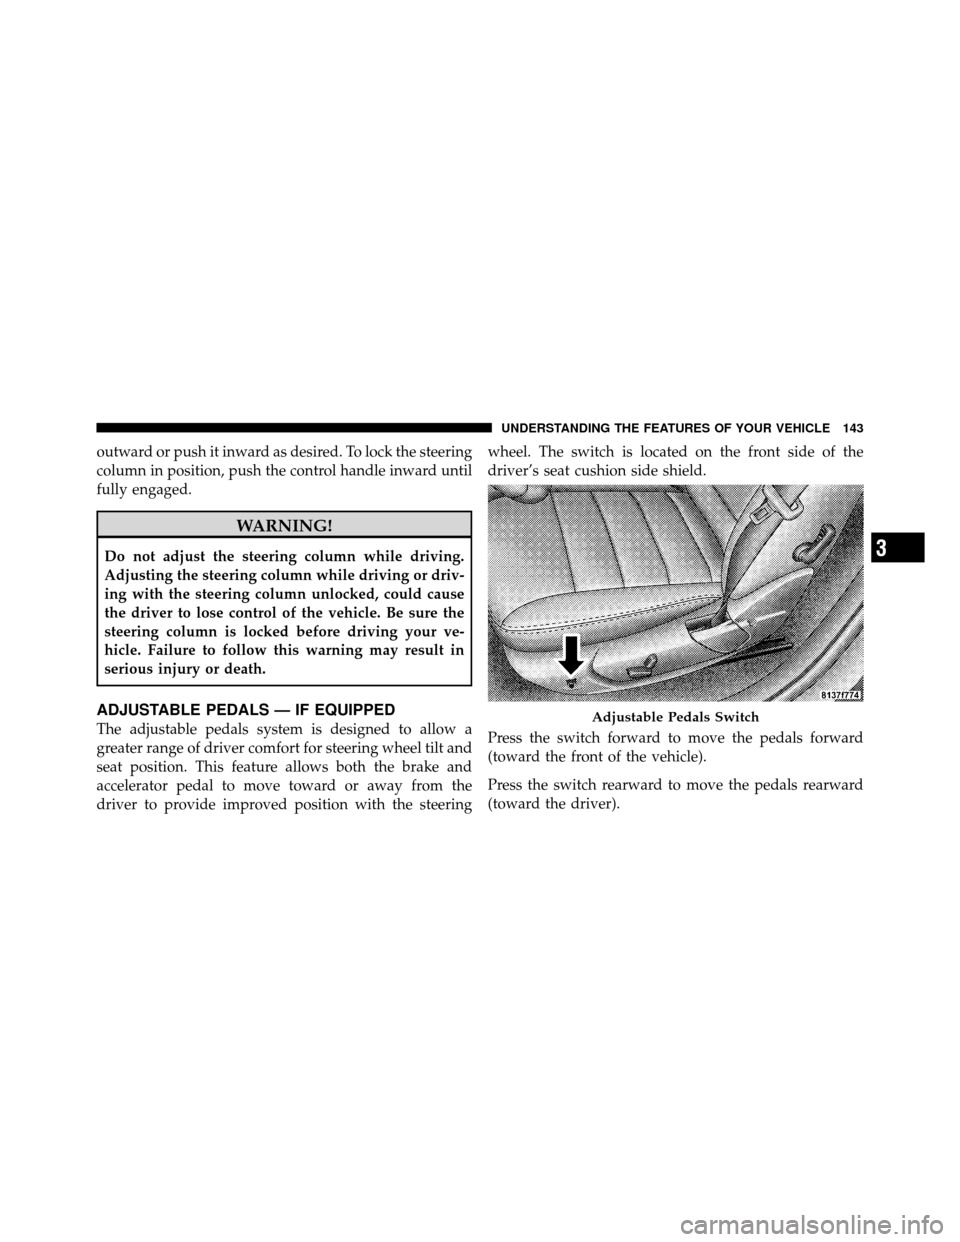
driver to provide improved position with the steeringwheel. The switch is located on the front side of the
driver’s seat cushion side shield.
Press the switch forward to move the pedals forward
(toward the front of the vehicle).
Press the switch rearward to move the pedals rearward
(toward the driver).Adjustable Pedals Switch
3
UNDERSTANDING THE FEATURES OF YOUR VEHICLE 143
Page 145 of 484
•The pedals can be adjusted with the ignition OFF.
•The pedals can be adjusted while driving.
•The pedalscannotbe adjusted when the transmission
is in REVERSE or when the Electronic Speed Control is
on.
CAUTION!
Do not place any article under the adjustable pedals
or impede its ability to move as it may cause damage
to the pedal controls. Pedal travel may become lim-
ited if movement is stopped by an obstruction in the
adjustable pedal’s path.
WARNING!
Do not adjust the pedals while the vehicle is moving.
You could lose control and have an accident. Always
adjust the pedals while the vehicle is parked.
ELECTRONIC SPEED CONTROL
When engaged, Electronic Speed Control takes over the
accelerator operation at speeds greater than 25 mph
(40 km/h).
The Electronic Speed Control lever, located on the right-
side of the steering wheel, operates the system.
144 UNDERSTANDING THE FEATURES OF YOUR VEHICLE
Page 178 of 484

WARNING!
If a warning light remains on the system may not be
working and you will not have the benefit of ESP or
BAS. Under certain driving conditions, where ESP or
BAS would be beneficial, you - if you have not
adjusted your driving speeds and stopping in or to
account for the lack of the feature, may be in acci-
dent.
14. Oil Pressure Warning Light This light indicates low engine oil pressure. The
light should turn on momentarily when the engine
is started. If the light turns on while driving, stop the
vehicle and shut off the engine as soon as possible. A
chime will sound for four minutes when this light turns
on. Do not operate the vehicle until the cause is corrected.
This light does not indicate how much oil is in the engine.
The engine oil level must be checked under the hood.
15. High Beam Indicator
This indicator will turn on when the high beam
headlights are on. Push the multifunction lever
away from the steering wheel to switch the headlights to
high beam.
16. Seat Belt Reminder Light This light will turn on for five to eight seconds as
a bulb check when the ignition switch is first
turned ON. A chime will sound if the driver’s seat
belt is unbuckled during the bulb check. The Seat Belt
Warning Light will flash or remain on continuously if the
driver’s seat belt remains unbuckled after the bulb check
or when driving. Refer to “Occupant Restraints” in
“Things To Know Before Starting Your Vehicle” for
further information.
4
UNDERSTANDING YOUR INSTRUMENT PANEL 177
Page 187 of 484
26. Door Ajar IndicatorThis light will turn on to indicate that one or more
door may be ajar.
27. Decklid Ajar Indicator This light will turn on to indicate that the
decklid may be ajar.
28. Windshield Washer Fluid Low Indicator This light will turn on to indicate the windshield
washer fluid is low.
ELECTRONIC VEHICLE INFORMATION CENTER
(EVIC) – IF EQUIPPED
The Electronic Vehicle Information Center (EVIC) fea-
tures a driver-interactive display that is located in the
instrument cluster. This system allows the driver to select a variety of useful
information by pressing the switches mounted on the
steering wheel. The EVIC consists of the following:
•System status
•Vehicle information warning message displays
Electronic Vehicle Information Center (EVIC)
186 UNDERSTANDING YOUR INSTRUMENT PANEL
Page 188 of 484

•Personal Settings (Customer-Programmable Features)
•Compass display
•Outside temperature display
•Trip computer functions
•Uconnect™ hands-free communication system dis-
plays (if equipped)
•Navigation system screens (if equipped)
•Audio mode display
•Surround Sound modes (if equipped with Driver-
Selectable Surround [DSS])
The system allows the driver to select information by
pressing the following buttons mounted on the steering
wheel. Press and release the MENU button and the
mode displayed will change between Trip
Functions, Navigation (if equipped), System
Status, and Personal Settings.
Press the FUNCTION SELECT button to
accept a selection. The FUNCTION SE-
LECT button also functions as a remote
sound system control. Refer to “Remote
Sound System Controls”.
Press the SCROLL button to scroll through Trip
Functions, Navigation (if equipped), System
Status Messages, and Personal Settings
(Customer-Programmable Features). The
SCROLL button also functions as a remote
sound system control. Refer to “Remote Sound
System Controls”.
MENU
Button
FUNCTION SELECTButton
SCROLL Button
4
UNDERSTANDING YOUR INSTRUMENT PANEL 187
Page 198 of 484

3. Press the SCROLL button until “Compass Variance”
message and the last variance zone number displays in
the EVIC.
4. Press and release FUNCTION SELECT button until
the proper variance zone is selected according to the
map.
5. Press and release the HOME button to exit.
Navigation — If Equipped
Navigation Display Control
Press and release the MENU button until Navigation
displays in the EVIC. When the Navigation System is On,
the steering wheel buttons can be used to select the Map
or Menu display on the Navigation Unit. When the Menu
display is active, the SCROLL button can be used to scroll
through the list, the FUNCTION SELECT button can be
used to select an item, and the AUDIO MODE button can
be used to return to the previous menu. When the Mapdisplay is active, pressing the FUNCTION SELECT but-
ton will change the Navigation Unit Display to the Menu.
Turn-by-Turn Directions
The EVIC displays turn-by-turn directions to a pro-
grammed destination when Turn-by-Turn Navigation is
enabled through Personal Settings. When enabled, the
EVIC displays the name of the approaching road at the
top of the screen, followed by an arrow to indicate the
direction to turn the vehicle, and a count down to
indicate the distance to the turn.
NOTE:
Refer to your “Navigation User’s Manual” for
detailed operating instructions.
Personal Settings (Customer-Programmable
Features)
Personal Settings allows the driver to set and recall
features when the transmission is in PARK.
4
UNDERSTANDING YOUR INSTRUMENT PANEL 197
Page 245 of 484
•Two wireless infrared headsets allow rear seat passen-
gers to listen to the same or individual audio sources.Audio/Video RCA Jacks (AUX Jacks)
on the rear of the center console enable
the monitor to display video directly
from a video camera, connect video
games for display on the screen, or
play music directly from an MP3
player.
1. Video in (yellow)
2. Left audio in (white)
3. Right audio in (red)
NOTE: Refer to the “Uconnect™ Multimedia” section of
Uconnect™ User Manual located on the DVD for further
details.REMOTE SOUND SYSTEM CONTROLS
The remote sound system controls are located on the
surface of the steering wheel at the three and nine o’clock
positions.
Vehicles equipped with steering wheel-mounted buttons
are also equipped with the Electronic Vehicle Information
Remote Sound System Controls
244 UNDERSTANDING YOUR INSTRUMENT PANEL