Page 141 of 368
INSTRUMENT PANEL FEATURES
1 — Air Vent5 — Glove Compartment9 — Storage Cubby
2 — Instrument Cluster 6 — Power Windows10 — Lower Switch Bank
3 — Analog Clock 7 — Radio11 — Side Mirror Control *
4 — Assist Handle 8 — Climate Controls* If Equipped
140 UNDERSTANDING YOUR INSTRUMENT PANEL
Page 155 of 368

24. High Beam IndicatorThis indicator shows that the high beam head-
lights are on. Push the multifunction lever forward
to switch the headlights to high beam, and pull toward
yourself (normal position) to return to low beam.
25. Compass Mini-Trip Computer (CMTC) or Electronic
Vehicle Information Center (EVIC) Button—If Equipped
Pushing this button will switch between the different
EVIC functions.
Press the CMTC reset button to scroll through sub-menus
(i.e., Trip Functions: AVG Fuel Economy, DTE Elapsed
Time, and Units). 26. Compass Mini-Trip Computer (CMTC) or Electronic
Vehicle Information Center (EVIC) Display — If
Equipped
On vehicles equipped with Electronic Vehicle Informa-
tion Center (EVIC), when the appropriate conditions
exist, this display shows the EVIC messages. Refer to
“Electronic Vehicle Information Center”.
On vehicles equipped with Compass Mini-Trip Com-
puter (CMTC) the display provides the outside tempera-
ture, one of eight compass headings to indicate the
direction the vehicle is facing and the current radio
station. Refer to “Compass Mini-Trip Computer”.
154 UNDERSTANDING YOUR INSTRUMENT PANEL
Page 162 of 368
•Tire Pressure Monitor (TPM)
•Personal Settings
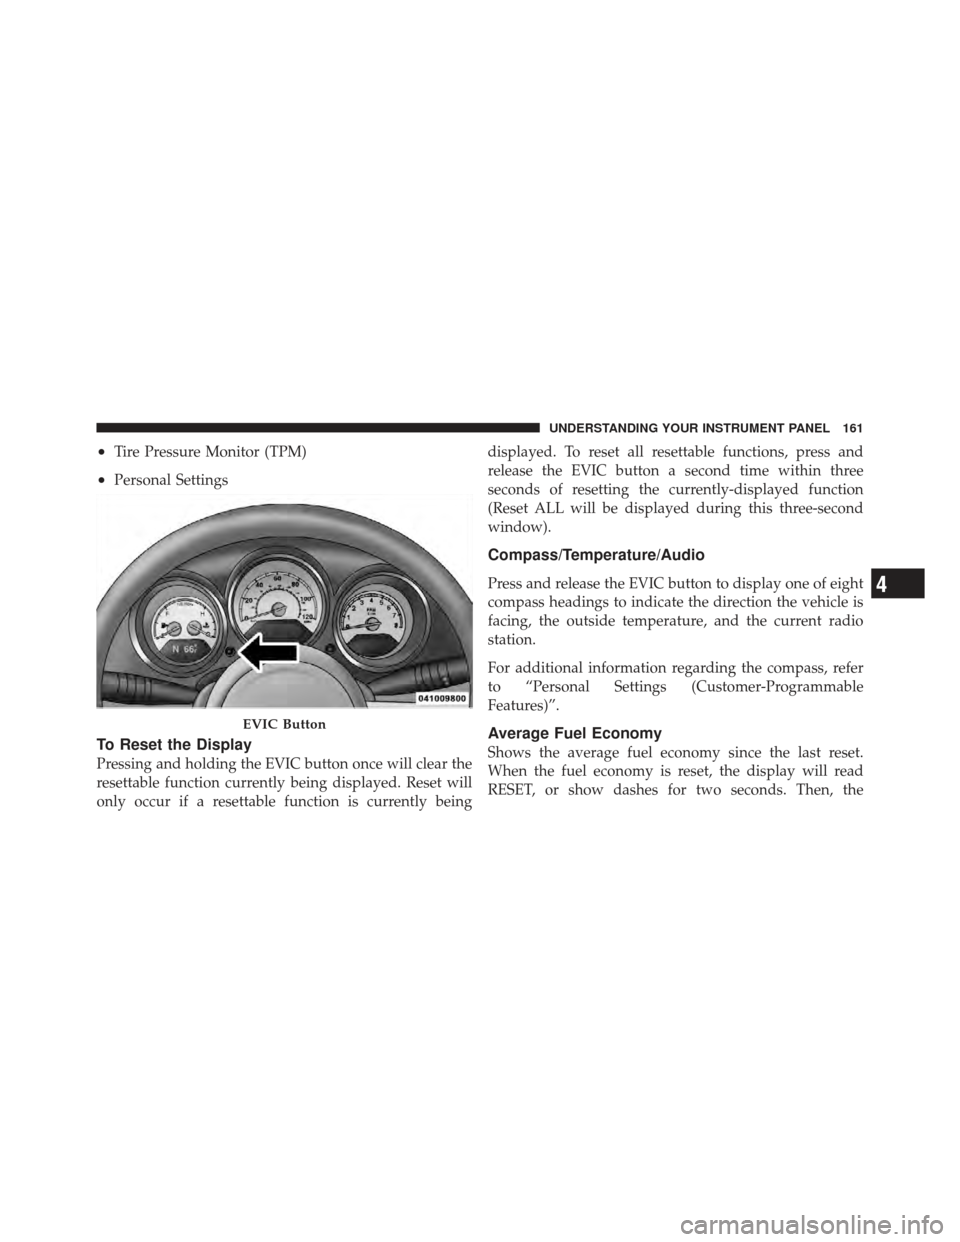
To Reset the Display
Pressing and holding the EVIC button once will clear the
resettable function currently being displayed. Reset will
only occur if a resettable function is currently beingdisplayed. To reset all resettable functions, press and
release the EVIC button a second time within three
seconds of resetting the currently-displayed function
(Reset ALL will be displayed during this three-second
window).
Compass/Temperature/Audio
Press and release the EVIC button to display one of eight
compass headings to indicate the direction the vehicle is
facing, the outside temperature, and the current radio
station.
For additional information regarding the compass, refer
to “Personal Settings (Customer-Programmable
Features)”.
Average Fuel Economy
Shows the average fuel economy since the last reset.
When the fuel economy is reset, the display will read
RESET, or show dashes for two seconds. Then, the
EVIC Button
4
UNDERSTANDING YOUR INSTRUMENT PANEL 161
Page 166 of 368

Remote Unlock Driver’s Door 1st
When Driver’s Door 1st is selected, only the driver’s door
will unlock on the first press of the Remote Keyless Entry
(RKE) transmitter UNLOCK button. A second press is
required to unlock the remaining locked doors. When
Remote Unlock All Doors is selected, all doors will
unlock at the first press of the RKE transmitter UNLOCK
button. Press and hold the EVIC button when in this
display until Driver’s Door 1st or All Doors appears, to
make your selection.
Sound Horn On Lock
When ON is selected, a short horn sound will occur when
the RKE transmitter LOCK button is pressed. This feature
may be selected with or without the Flash Lights On
Lock/Unlock feature. Press and hold the EVIC button
when in this display until ON or OFF appears, to make
your selection.
Flash Lights On Lock
When ON is selected, the front and rear turn signals will
flash when the doors are locked or unlocked using the
RKE transmitter. This feature may be selected with or
without the Sound Horn On Lock feature activated. Press
and hold the EVIC button when in this display until ON
or OFF appears, to make your selection.
Delay Turning Headlights Off
When this feature is selected the driver can choose to
have the headlights remain on for 0, 30, 60, or 90 seconds
when exiting the vehicle. Press and hold the EVIC button
when in this display until 0, 30, 60, or 90 appears to make
your selection.
Delay Power Off to Accessories Until Exit
When this feature is selected, the power window
switches, radio, hands–free system, DVD video system,
power sunroof, and power outlets will remain active for
up to 60 minutes after the ignition switch has been turned
4
UNDERSTANDING YOUR INSTRUMENT PANEL 165
Page 169 of 368
SETTING THE ANALOG CLOCK
To set the analog clock at the top center of the instrument
panel, press and hold the button until the setting is
correct. The clock will adjust slowly at first, and then
more quickly the longer the button is held.
SALES CODE REF — AM/FM/CD (SINGLE-DISC)
RADIO WITH OPTIONAL Uconnect™ Multimedia
(SATELLITE RADIO) AND Uconnect™ Phone
CAPABILITY
NOTE:The radio sales code is located on the lower right
side of your radio faceplate.
Setting The Analog Clock
REF Radio
168 UNDERSTANDING YOUR INSTRUMENT PANEL
Page 170 of 368
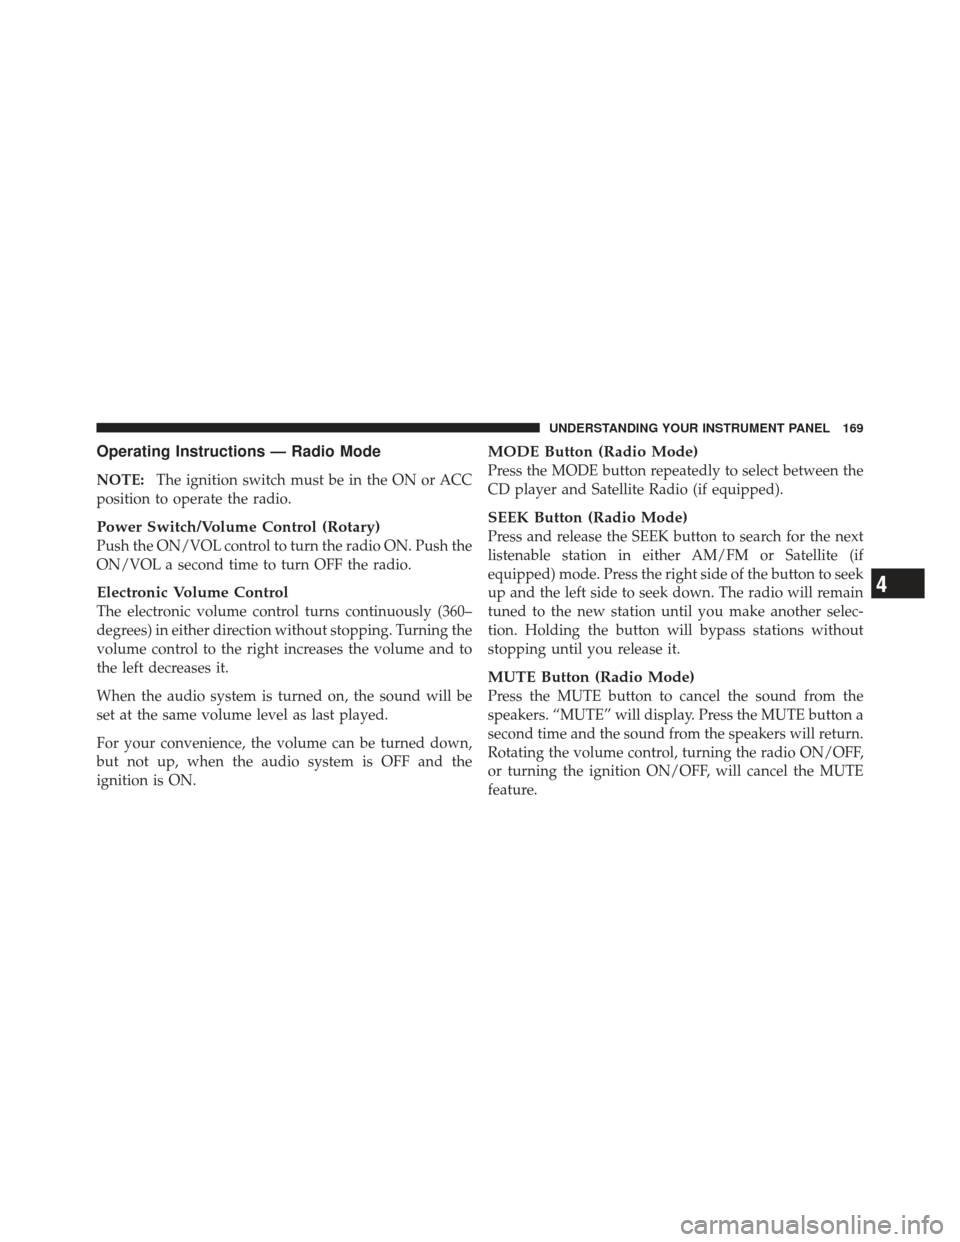
Operating Instructions — Radio Mode
NOTE:The ignition switch must be in the ON or ACC
position to operate the radio.
Power Switch/Volume Control (Rotary)
Push the ON/VOL control to turn the radio ON. Push the
ON/VOL a second time to turn OFF the radio.
Electronic Volume Control
The electronic volume control turns continuously (360–
degrees) in either direction without stopping. Turning the
volume control to the right increases the volume and to
the left decreases it.
When the audio system is turned on, the sound will be
set at the same volume level as last played.
For your convenience, the volume can be turned down,
but not up, when the audio system is OFF and the
ignition is ON.
MODE Button (Radio Mode)
Press the MODE button repeatedly to select between the
CD player and Satellite Radio (if equipped).
SEEK Button (Radio Mode)
Press and release the SEEK button to search for the next
listenable station in either AM/FM or Satellite (if
equipped) mode. Press the right side of the button to seek
up and the left side to seek down. The radio will remain
tuned to the new station until you make another selec-
tion. Holding the button will bypass stations without
stopping until you release it.
MUTE Button (Radio Mode)
Press the MUTE button to cancel the sound from the
speakers. “MUTE” will display. Press the MUTE button a
second time and the sound from the speakers will return.
Rotating the volume control, turning the radio ON/OFF,
or turning the ignition ON/OFF, will cancel the MUTE
feature.
4
UNDERSTANDING YOUR INSTRUMENT PANEL 169
Page 171 of 368

NOTE:In Hands-Free Phone (if equipped) mode, the
MUTE button mutes the microphone.
SCAN Button (Radio Mode)
Pressing the SCAN button causes the tuner to search for
the next listenable station in either, AM, FM, or Satellite
(if equipped) frequencies, pausing for five seconds at
each listenable station before continuing to the next. To
stop the search, press SCAN a second time.
PSCAN Button (Radio Mode)
Pressing the PSCAN button causes the tuner to scan
through preset stations in either AM, FM, or Satellite (if
equipped) frequencies, pausing for five seconds at each
preset station before continuing to the next. To stop the
search, press PSCAN a second time.
TIME Button
Press the TIME button and the time of day will display
for five seconds.
Clock Setting Procedure
1. Press and hold the TIME button until the hours blink.
2. Adjust the hours by turning the TUNE/AUDIO con-
trol.
3. After the hours are adjusted, press the TUNE/AUDIO
control to set the minutes. The minutes will begin to
blink.
4. Adjust the minutes using the TUNE/AUDIO control.
5. To exit, press any button/knob or wait five seconds.
RW/FF (Radio Mode)
Pressing the Rewind/Fast Forward button causes the
tuner to search for the next frequency in the direction of
the arrows. This feature operates in either AM, FM or
Satellite (if equipped) frequencies.
170 UNDERSTANDING YOUR INSTRUMENT PANEL
Page 172 of 368

TUNE Control (Radio Mode)
Turn the rotary TUNE control clockwise to increase or
counterclockwise to decrease the frequency.
AM/FM Button (Radio Mode)
Press the button to select AM or FM modes.
Setting the Tone, Balance, and Fade
Press the rotary TUNE control, and “BASS” will display.
Turn the TUNE control to the right or left to increase or
decrease the Bass tones.
Press the rotary TUNE control a second time and “MID”
will display. Turn the TUNE control to the right or left to
increase or decrease the Mid-Range tones.
Press the rotary TUNE control a third time and “TREB”
will display. Turn the TUNE control to the right or left to
increase or decrease the Treble tones.Press the rotary TUNE control a fourth time and “BAL”
will display. Turn the TUNE control to the right or left to
adjust the sound level from the right or left side speakers.
Press the rotary TUNE control a fifth time and “FADE”
will display. Turn the TUNE control to the left or right to
adjust the sound level between the front and rear speak-
ers.
Press the TUNE control again or wait five seconds to exit
setting tone, balance, and fade.
RND/SET Button (Radio Mode) To Set The
Pushbutton Memory
When you are receiving a station that you wish to
commit to pushbutton memory, press the SET button.
The symbol SET 1 will now show in the display window.
Select the button (1-6) you wish to lock onto this station
and press and release that button. If a button is not
4
UNDERSTANDING YOUR INSTRUMENT PANEL 171

