2010 CHRYSLER 300 change time
[x] Cancel search: change timePage 4 of 88

WELCOME FROM CHRYSLER GROUP LLC
Congratulations on selecting your new Chrysler Group LLC vehicle. Be assured that it
represents precision workmanship, distinctive styling, and high quality -all essentials
that are traditional to our vehicles.
This guide illustrates and describes the operation of features and equipment that are
either standard or optional on this vehicle. This guide may also include a description
of features and equipment that are no longer available or were not ordered on this
vehicle. Please disregard any features and equipment described in this guide that are
not available on this vehicle. Chrysler Group LLC reserves the right to make changes
in design and specifications and/or make additions to or improvements to its
products without imposing any obligation upon itself to install them on products
previously manufactured.
For complete owner information, refer to the DVD in the owner’s kit provided at the
time of new vehicle purchase. For your convenience, the information contained on
the DVD may also be printed and saved for future reference.
Chrysler Group LLC is committed to protecting our environment and natural
resources. By converting from paper to electronic delivery for the majority of the
user information for your vehicle, together we greatly reduce the demand for
tree-based products and lessen the stress on our environment.
Vehicles Sold In Canada
With respect to any Vehicles Sold in Canada, the name Chrysler Group LLC shall be
deemed to be deleted and the name Chrysler Canada Inc. used in substitution
therefore.
Driving And Alcohol
Drunken driving is one of the most frequent causes of accidents.
Your driving ability can be seriously impaired with blood alcohol levels far below the
legal minimum. If you are drinking, don’t drive. Ride with a designated non-drinking
driver, call a cab, a friend, or use public transportation.
WARNING!
Driving after drinking can lead to an accident. Your perceptions are less sharp,
your reflexes are slower, and your judgment is impaired when you have been
drinking. Never drink and then drive.
INTRODUCTION/WELCOME
2
Page 13 of 88

KEYLESS GO™
Engine Starting/Stopping
Starting
• Place the shift lever in PARK or NEUTRAL.
• While pressing the brake pedal, press theENGINE START/STOP button once. If the
engine fails to start, the starter will
disengage automatically after 10 seconds.
• To stop the cranking of the engine prior to the engine starting, press the button again.
Stopping
• Place the shift lever in PARK.
• Press the ENGINE START/STOP button once. The ignition switch will return to the
OFF position.
• If the shift lever is not in PARK, the ENGINE START/STOP button must be held for two seconds and vehicle speed must be above 5 mph (8 km/h) before the engine
will shut off.
NOTE: If the ignition switch is left in the ACC or RUN (engine not running) position
and the transmission is in PARK, the system will automatically time out after
60 minutes of inactivity and the ignition will switch to the OFF position.
Keyless Go™ Functions
NOTE: The following functions are with the driver’s foot OFF the Brake Pedal
(Transmission in PARK or NEUTRAL Position).
Starting With The Ignition Switch In The OFF Position:
• Press the ENGINE START/STOP button once to change the ignition switch to the ACC position.
• Press the ENGINE START/STOP button a second time to change the ignition switch to the RUN position.
• Press the ENGINE START/STOP button a third time to return the ignition switch to the OFF position.
OFF RUN
ACCPress
Press
Press
11
GETTING STARTED
Page 22 of 88

PROGRAMMABLE FEATURES
Electronic Vehicle Information Center (EVIC) – If Equipped
• The EVIC can be used to program the following Personal Settings. Press andrelease the MENU button
until Personal Settings displays, then press the
SCROLL button
to scroll through the settings. Press the FUNCTION SELECT
button
to change the setting.
• Language • Key-Off Power Delay
• Auto Door Locks • AWD System Displays
• Auto UNLK On Exit • Display ECO
• RKE Unlock • Turn-by-Turn Navigation
• RKE Linked To Memory • Confirmation of Voice Commands
• Sound Horn With RKE Lock • Park ASST. System
• Flash Lamp Lock • Display Units of Measure
• Headlamp Off Delay • Automatic High Beams
• Easy Exit Seat • Rain Sensing Intermittent Wipers
• Tilt MIRR. In Reverse • Turn Headlamps On With Wipers
• Turn Headlamps On With Remote Key Unlock • Passive Entry
Key Fob Programmable Features
• The following features may also be programmed by using the Key Fob transmitter
or the ignition switch and driver’s door lock switch.
NOTE: Pressing the LOCK button while you are inside the vehicle will activate the
Vehicle Security Alarm. Opening a door with the Vehicle Security Alarm activated will
cause the alarm to sound. Press the UNLOCK button to deactivate the Vehicle
Security Alarm.
Unlock On First Press
• To unlock either the driver’s side, or all doors, on the first press of the UNLOCK button:
• Press and hold the LOCK button for at least 4 seconds, but no longer than 10 seconds. Then, press and hold the UNLOCK button while still holding the
LOCK button.
• Release both buttons at the same time.
Auto Unlock Doors On Exit
• To have all of the vehicle doors unlock when any door is opened: • Enter your vehicle and close all the doors.
• Within 15 seconds, cycle the ignition switch between LOCK and ON and then backto LOCK four times, ending up in the LOCK position (do not start the engine).
• Within 30 seconds, press the power door UNLOCK switch to unlock the doors. A single chime will indicate that programming is complete.
GETTING STARTED
20
Page 24 of 88

TURN SIGNAL/WIPER/WASHER/HIGH BEAM LEVER
Turn Signal/Lane Change Assist
• Tap the lever up or down once and the turn signal (right or left) will flash threetimes and automatically turn off.
Front Wipers
Intermittent, Low And High Operation
• Rotate the end of the lever to the first detent position for one of five intermittentsettings, the second detent for low wiper operation and the third detent for high
wiper operation.
Rain Sensing Wipers
• This feature senses moisture on the vehicle’s windshield and automaticallyactivates the wipers for the driver when the switch is in the intermittent positions.
Refer to Programmable Features in Getting Started for further details.
Mist
• Push the end of the lever inward to the first detent when a single wipe is desired.
Washer Operation
• Push the end of the lever inward to the second detent and hold for as long as sprayis desired.
High Beam Operation
• Push the lever forward to activate the high beams. Pull the lever toward you forflash to pass.
NOTE: For safe driving, turn off high beams when oncoming traffic is present to
prevent headlight glare and as a courtesy to other motorists.
OPERATING YOUR VEHICLE
22
Page 33 of 88

NOTE:Uconnect™ Phone and Voice Command are vehicle options which must be
ordered separately. The buttons on the radio will only be active if the vehicle has
been equipped with the option.
• The radio sales code is located on the lower right side of the radio faceplate.
• Unless otherwise noted, the information provided on the operation and functionality of the radios in this section is common to all non-touch-screen radios.
Seek Up/Down Buttons
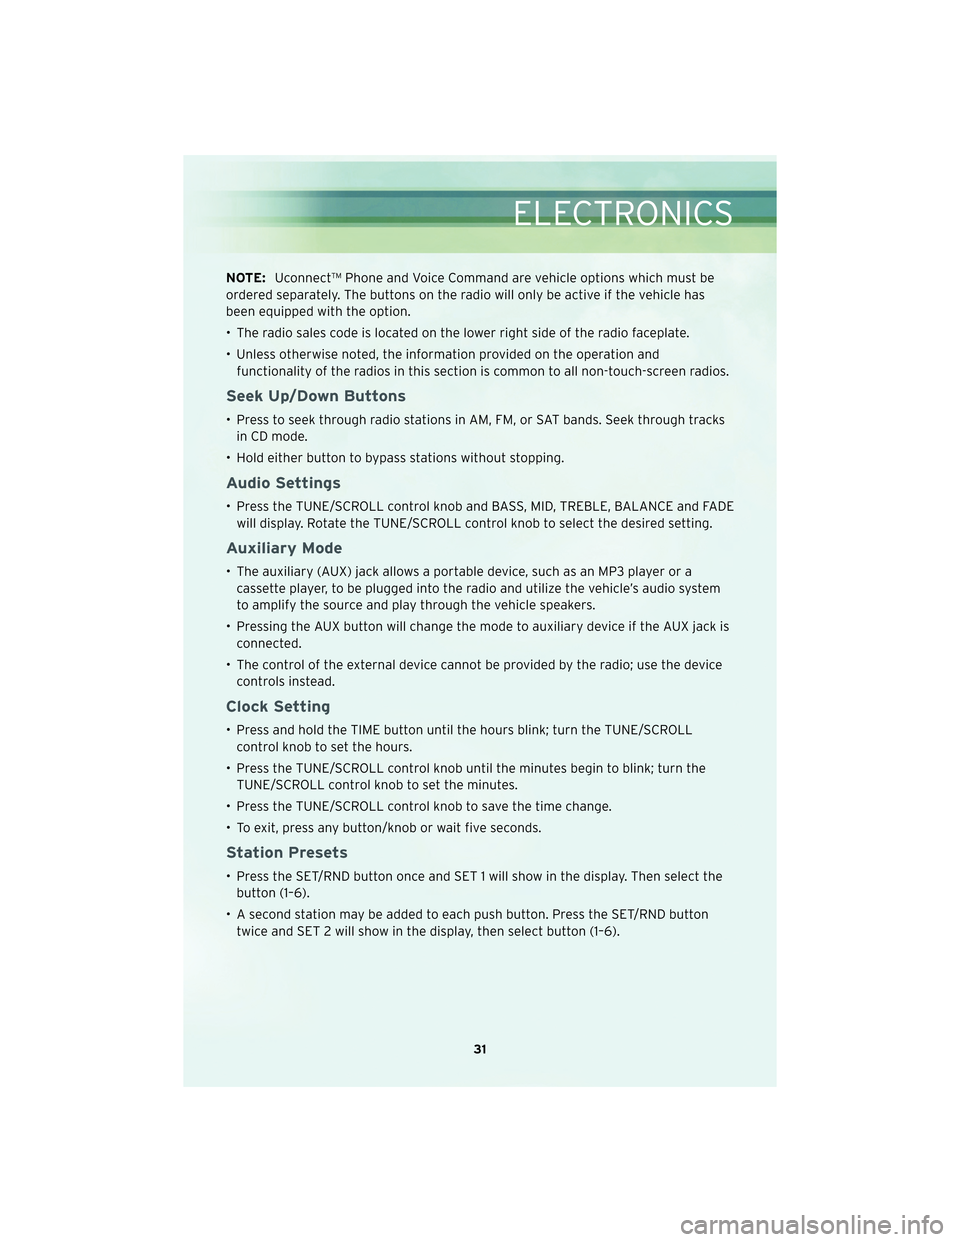
• Press to seek through radio stations in AM, FM, or SAT bands. Seek through tracksin CD mode.
• Hold either button to bypass stations without stopping.
Audio Settings
• Press the TUNE/SCROLL control knob and BASS, MID, TREBLE, BALANCE and FADE will display. Rotate the TUNE/SCROLL control knob to select the desired setting.
Auxiliary Mode
• The auxiliary (AUX) jack allows a portable device, such as an MP3 player or acassette player, to be plugged into the radio and utilize the vehicle’s audio system
to amplify the source and play through the vehicle speakers.
• Pressing the AUX button will change the mode to auxiliary device if the AUX jack is connected.
• The control of the external device cannot be provided by the radio; use the device controls instead.
Clock Setting
• Press and hold the TIME button until the hours blink; turn the TUNE/SCROLLcontrol knob to set the hours.
• Press the TUNE/SCROLL control knob until the minutes begin to blink; turn the TUNE/SCROLL control knob to set the minutes.
• Press the TUNE/SCROLL control knob to save the time change.
• To exit, press any button/knob or wait five seconds.
Station Presets
• Press the SET/RND button once and SET 1 will show in the display. Then select the button (1–6).
• A second station may be added to each push button. Press the SET/RND button twice and SET 2 will show in the display, then select button (1–6).
31
ELECTRONICS
Page 35 of 88

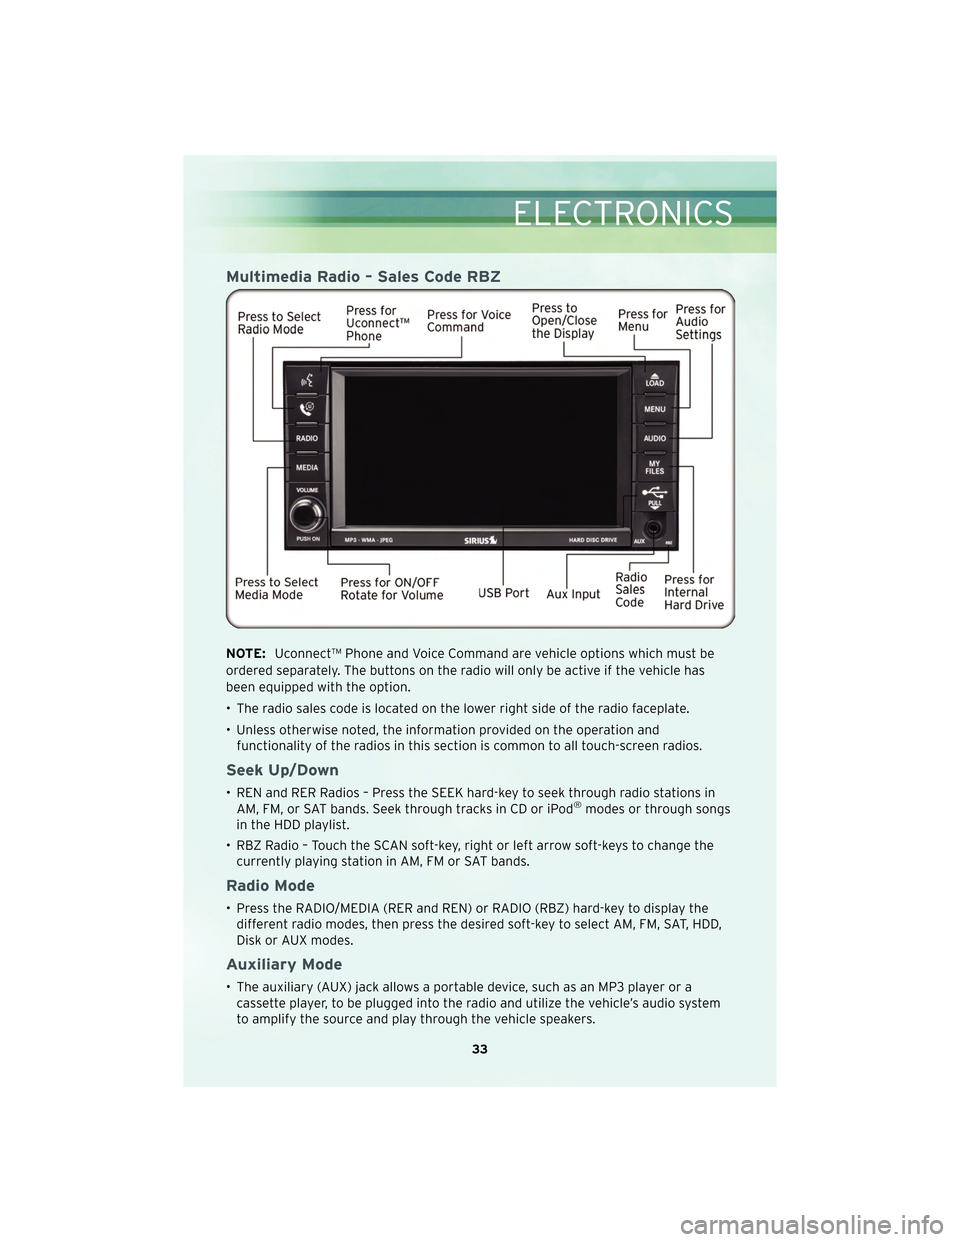
Multimedia Radio – Sales Code RBZ
NOTE:Uconnect™ Phone and Voice Command are vehicle options which must be
ordered separately. The buttons on the radio will only be active if the vehicle has
been equipped with the option.
• The radio sales code is located on the lower right side of the radio faceplate.
• Unless otherwise noted, the information provided on the operation and functionality of the radios in this section is common to all touch-screen radios.
Seek Up/Down
• REN and RER Radios – Press the SEEK hard-key to seek through radio stations inAM, FM, or SAT bands. Seek through tracks in CD or iPod®modes or through songs
in the HDD playlist.
• RBZ Radio – Touch the SCAN soft-key, right or left arrow soft-keys to change the currently playing station in AM, FM or SAT bands.
Radio Mode
• Press the RADIO/MEDIA (RER and REN) or RADIO (RBZ) hard-key to display thedifferent radio modes, then press the desired soft-key to select AM, FM, SAT, HDD,
Disk or AUX modes.
Auxiliary Mode
• The auxiliary (AUX) jack allows a portable device, such as an MP3 player or acassette player, to be plugged into the radio and utilize the vehicle’s audio system
to amplify the source and play through the vehicle speakers.
33
ELECTRONICS
Page 36 of 88

• The display will switch automatically to the AUX mode when a 3.5 mm stereomini-jack cable has been connected.
• To change radio modes while the cable is connected to the unit, press the RADIO/MEDIA (RER and REN) or MEDIA (RBZ) hard-key until the AUX tab is
displayed on the top of the screen. Touch the AUX tab to return to the AUX mode.
• The control of the external device cannot be provided by the radio; use the device controls instead.
Clock Setting
• Turn the radio on, then touch the screen where the time is displayed.
• Touch the USER CLOCK soft-key (Navigation radio only).
• To adjust the hours, touch either the HOUR FORWARD or HOUR BACKWARDsoft-key.
• To adjust the minutes, touch either the MINUTE FORWARD or MINUTE BACKWARD soft-key.
• To save the new time setting, touch the screen where the word “Save” is displayed.
Store Radio Presets
• For REN and RER: Press the RADIO/MEDIA hard-key repeatedly until AM FM SAT is displayed in the upper left corner of the screen.
• For RBZ: Press the RADIO hard-key to display AM FM SAT in the upper left corner of the screen.
• Select the radio band by touching either the AM, FM, or SAT soft-key.
• Find the station to store by either pressing the SEEK UP/DOWN hard-key (REN and RER), touching the right and left arrow soft-keys (RBZ), touching the SCAN
soft-key, or by using the DIRECT TUNE soft-key.
• Once the station is found, touch and hold one of the PRESET soft-keys in the list to the right, until you hear a confirmation beep.
Hard Disc Drive Operation
Copy Complete Audio Disc To Hard-Drive
• Press the OPEN/CLOSE hard-key (REN and RER) or LOAD hard-key (RBZ) andinsert a disc, then press the MENU hard-key.
• Touch the MY FILES soft-key, then select MY MUSIC.
• Touch the IMPORT MUSIC soft-key, then touch the FROM DISC soft-key in the next screen to start the process.
Copying From USB
• Insert a USB device, then select MY MUSIC.
• Touch the IMPORT MUSIC FILES soft-key, then touch the FROM USB soft-key in thenext screen.
ELECTRONICS
34
Page 48 of 88

24 HOUR TOWING ASSISTANCE - U.S. ONLY
• Dial toll-free 1-800-521-2779 or 1-800-363-4869 for Canadian residents.
• Provide your name, vehicle identification number and license plate number.
• Provide your location, including telephone number, from which you are calling.
• Briefly describe the nature of the problem and answer a few simple questions.
• You will be given the name of the service provider and an estimated time of arrival.If you feel you are in an “unsafe situation”, please let us know. With your consent,
we will contact local police or safety authorities.
INSTRUMENT CLUSTER WARNING LIGHTS
- Electronic Stability Program (ESP) Indicator Light
• If this indicator light flashes during acceleration, apply as little throttle as possible.While driving, ease up on the accelerator. Adapt your speed and driving to the
prevailing road conditions. To improve the vehicle’s traction when starting off in
deep snow, sand or gravel, it may be desirable to switch the ESP system off.
- Tire Pressure Monitoring System (TPMS) Light
• A Tire Pressure Monitoring Light and a “low tire” message will display in yourinstrument cluster along with an audible chime if one or more of your vehicle’s four
road tires are significantly under-inflated.
• Check the inflation pressure of each tire and inflate to the recommended pressure for your vehicle. The tire pressures recommended for your vehicle are found on the
“Tire and Loading Information” label located on the driver’s side door opening. The
TPMS light should not be used as a tire pressure gauge when adjusting your tire
pressure.
• It is recommended that you check the tire pressure in the morning when tires are cool; inflate each tire to the recommended pressure for your vehicle. The light will
turn off after your vehicle’s tire pressures are properly inflated and the pressure
has been recognized. The vehicle may need to be driven for up to 20 minutes
above 15 mph (25 km/h) before the light will turn off.
• Temperature changes can affect tire pressure, causing the TPMS light to turn on. Tire pressures will also increase as the vehicle is driven – this is normal and you
should not adjust for this increased pressure.
• Driving on under-inflated tires reduces your vehicle’s fuel efficiency and tire tread life. If a spare tire is in use on the vehicle, the TPMS light may turn on.
- Engine Temperature Warning Light
• This light warns of an overheated engine condition.
• If the light turns on or flashes continuously while driving, safely pull over and stopthe vehicle. If the A/C system is on, turn it off. Also, shift the transmission into
NEUTRAL and idle the vehicle. If the temperature reading does not return to
normal, turn the engine off immediately.
WHAT TO DO IN EMERGENCIES
46