Page 160 of 465
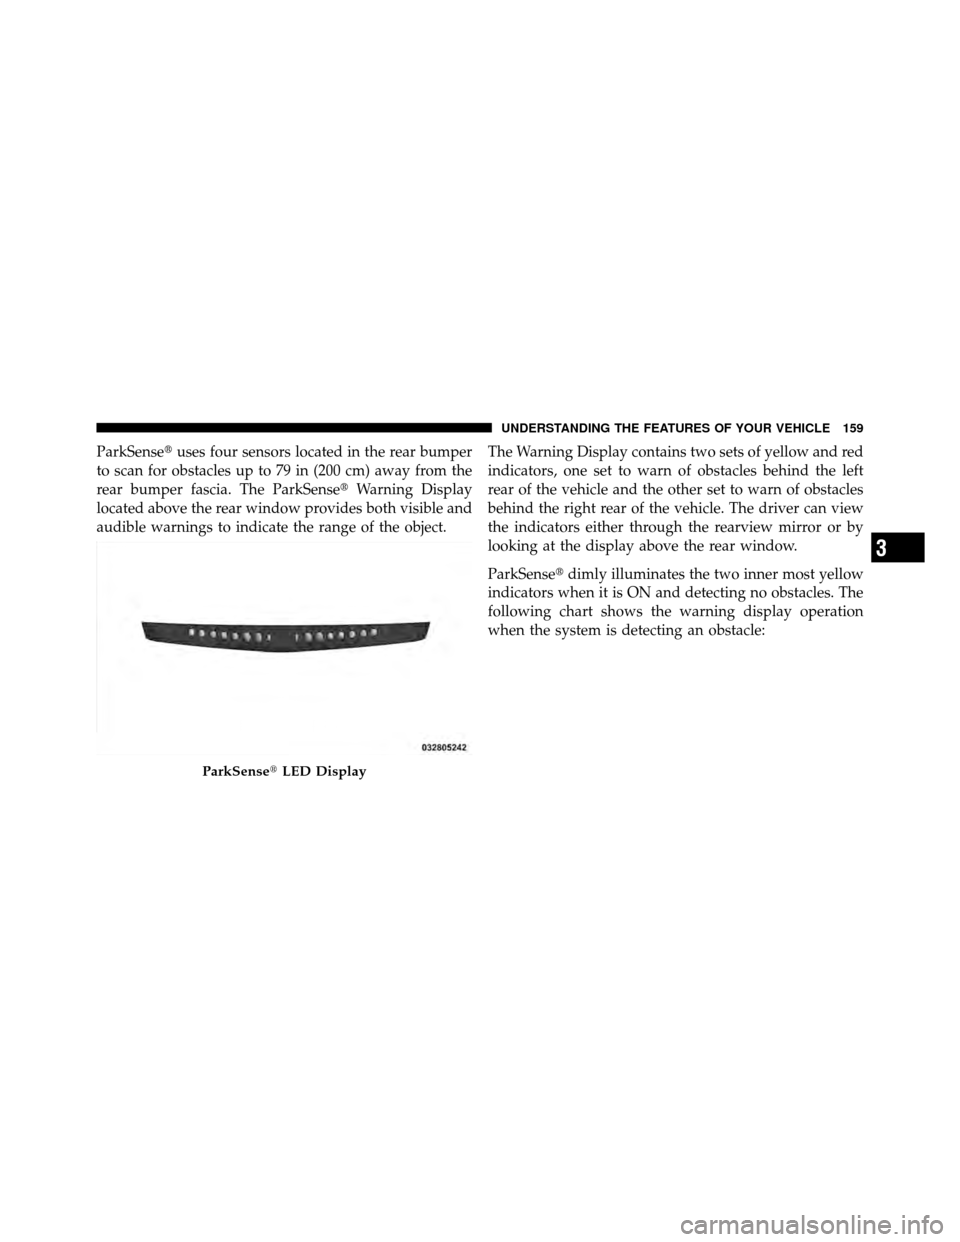
ParkSense�uses four sensors located in the rear bumper
to scan for obstacles up to 79 in (200 cm) away from the
rear bumper fascia. The ParkSense� Warning Display
located above the rear window provides both visible and
audible warnings to indicate the range of the object. The Warning Display contains two sets of yellow and red
indicators, one set to warn of obstacles behind the left
rear of the vehicle and the other set to warn of obstacles
behind the right rear of the vehicle. The driver can view
the indicators either through the rearview mirror or by
looking at the display above the rear window.
ParkSense�
dimly illuminates the two inner most yellow
indicators when it is ON and detecting no obstacles. The
following chart shows the warning display operation
when the system is detecting an obstacle:
ParkSense� LED Display
3
UNDERSTANDING THE FEATURES OF YOUR VEHICLE 159
Page 161 of 465
WARNING DISPLAY DISTANCES
DISPLAY INDICA-TOR OBSTACLE DISTANCE FROM: INDICATOR
COLORAUDIBLE SIGNAL
REAR CORNERS REAR CENTER
Inner LED 79 in (200 cm)YellowYes, Half Second
1st LED 51.2 in (130 cm)YellowNo
2nd LED 45.3 in (115 cm)YellowNo
3rd LED 31.5 in (80 cm) 39.3 in (100 cm) YellowNo
4th LED 25.5 in (65 cm) 33.5 in (85 cm) YellowNo
5th LED 20 in (50 cm) 27.6 in (70 cm) YellowNo
6th LED 16 in (40 cm) 19.7 in (50 cm) RedYes, Intermittent
7th LED 6 in (15 cm) 11.8 in (30 cm) RedYes, Continuous
ParkSense�System Usage Precautions
NOTE:
•Ensure that the rear bumper is free of snow, ice, mud,
dirt and debris to keep the ParkSense� Rear Park
Assist system operating properly.
•Jackhammers, large trucks, and other vibrations could
affect the performance of the ParkSense� Rear Park
Assist system.
160 UNDERSTANDING THE FEATURES OF YOUR VEHICLE
Page 162 of 465

•When you turn ParkSense�off, the instrument cluster
will display “PARK ASSIST DISABLED.” Further-
more, once you turn ParkSense� off, it remains off
until you turn it on again, even if you cycle the ignition
key.
•When you move the shift lever to the REVERSE
position and ParkSense� is turned off, the instrument
cluster will display “PARK ASSIST DISABLED” mes-
sage for as long as the vehicle is in REVERSE.
•ParkSense�, when on, will MUTE the radio when it is
sounding a tone.
•If a ParkSense� system malfunction occurs, a single
chime will sound once per ignition cycle. In addition,
the Electronic Vehicle Information Center (EVIC) will
display “SERVICE PARK ASSIST SYSTEM” and the
LED in the ParkSense� switch will illuminate. If this
occurs after making sure the rear fascia/bumper is clean and clear of snow, ice, mud, dirt, or other
obstruction, see your authorized dealer for service.
•Clean the ParkSense�
sensors regularly, taking care
not to scratch or damage them. The sensors must not
be covered with ice, snow, slush, mud, dirt, or debris.
Failure to do so can result in ParkSense� not working
properly. The ParkSense� system might not detect an
obstacle behind the fascia/bumper, or it could provide
a false indication that an obstacle is behind the fascia/
bumper.
•Objects must not be within 12 in (30 cm) from the rear
fascia/bumper while driving the vehicle. Failure to do
so can result in the system misinterpreting a close
object as a sensor problem, causing the “SERVICE
PARK ASSIST SYSTEM” message to be displayed in
the instrument cluster.
3
UNDERSTANDING THE FEATURES OF YOUR VEHICLE 161
Page 164 of 465
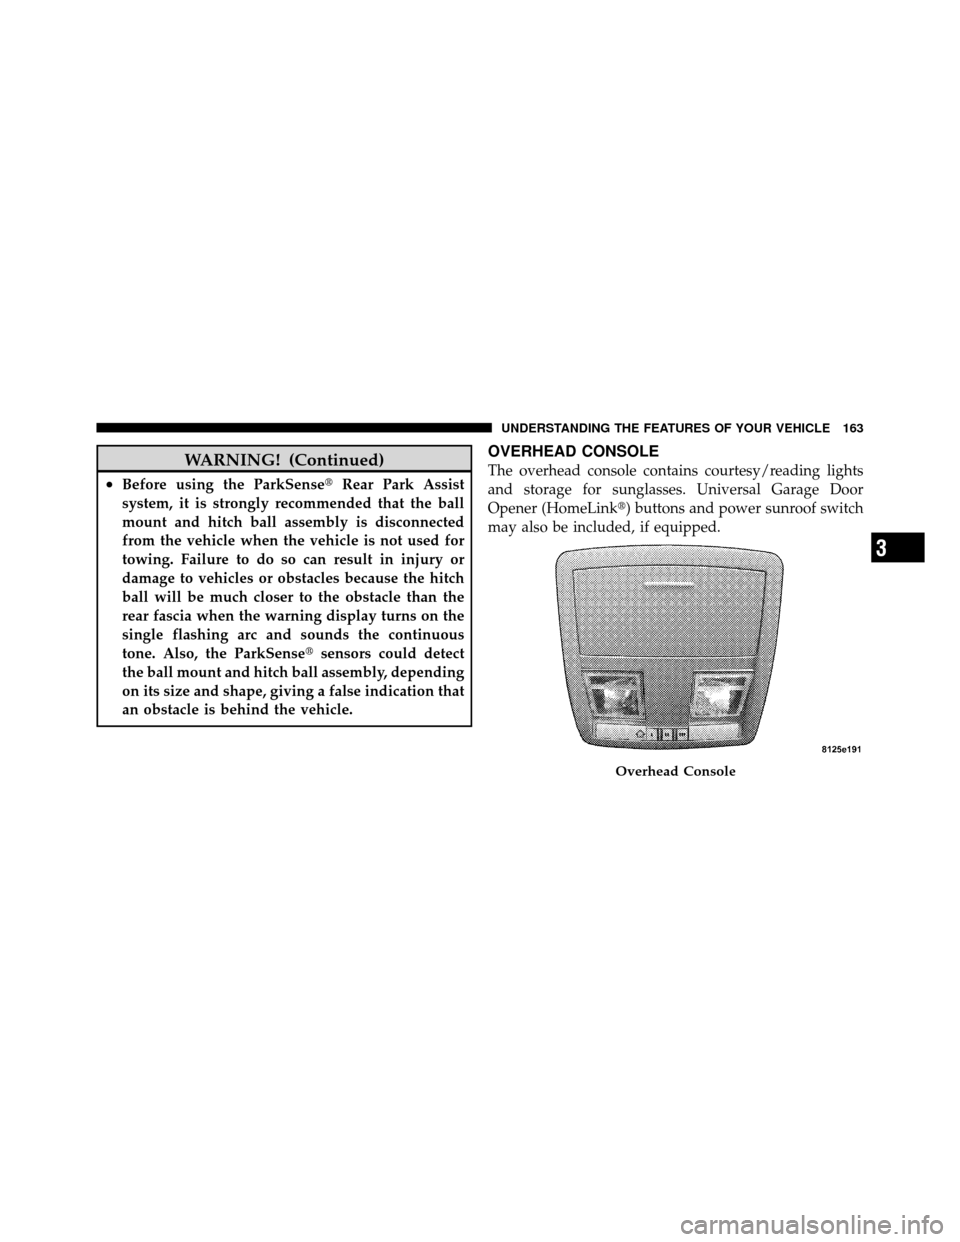
WARNING! (Continued)
•Before using the ParkSense�Rear Park Assist
system, it is strongly recommended that the ball
mount and hitch ball assembly is disconnected
from the vehicle when the vehicle is not used for
towing. Failure to do so can result in injury or
damage to vehicles or obstacles because the hitch
ball will be much closer to the obstacle than the
rear fascia when the warning display turns on the
single flashing arc and sounds the continuous
tone. Also, the ParkSense� sensors could detect
the ball mount and hitch ball assembly, depending
on its size and shape, giving a false indication that
an obstacle is behind the vehicle.
OVERHEAD CONSOLE
The overhead console contains courtesy/reading lights
and storage for sunglasses. Universal Garage Door
Opener (HomeLink�) buttons and power sunroof switch
may also be included, if equipped.
Overhead Console
3
UNDERSTANDING THE FEATURES OF YOUR VEHICLE 163
Page 167 of 465

Programming HomeLink�
Before You Begin
If you have not trained any of the HomeLink�buttons,
erase all channels before you begin training.
To do this, press and hold the two outside buttons for up
to 20 seconds. The EVIC will display “CLEARING
CHANNELS.” Release the buttons when the EVIC mes-
sage states “CHANNELS CLEARED.”
It is recommended that a new battery be placed in the
handheld transmitter of the device that is being copied to
HomeLink� for more efficient training and accurate
transmission of the radio-frequency signal.
Your vehicle should be parked outside of the garage
while training.
1. Place the ignition in the RUN position. 2. Place the handheld transmitter 1 to 3 in (3 to 8 cm)
from the HomeLink�
buttons while keeping the EVIC
display in view.
For optimal training, point the battery end of the hand-
held transmitter away from the HomeLink�.
3. Simultaneously, press and hold both the chosen
HomeLink� button and the handheld transmitter button
until the EVIC display changes from “CHANNEL #
TRAINING” to “CHANNEL # TRAINED.”
Then release both the HomeLink� and handheld trans-
mitter buttons.
If the EVIC display states “DID NOT TRAIN” repeat
Step 3. If the signal is too weak, replace the battery in the
handheld transmitter.
It may take up to 30 seconds or longer in rare cases. The
garage door may open and close while you train.
166 UNDERSTANDING THE FEATURES OF YOUR VEHICLE
Page 168 of 465

NOTE:Some gate operators and garage door openers
may require you to replace Step 3 with procedures noted
in the “Gate Operator/Canadian Programming” section.
4. Press and hold the just-trained HomeLink� button. If
the channel has been trained, the EVIC display will now
state “CHANNEL # TRANSMIT.”
If the EVIC display still states “CHANNEL # TRAIN-
ING” repeat Step 3.
NOTE: After training a HomeLink� channel, if the
garage door does not operate with HomeLink� and the
garage door opener was manufactured after 1995, the
garage door opener may have rolling code. If so, proceed
to the heading “Programming A Rolling Code System.”
5. PROGRAMMING A ROLLING CODE SYSTEM
At the garage door opener motor (in the garage), locate
the “Learn” or “Training” button. This can usually be found where the hanging antenna
wire is attached to the garage door opener motor (it is
NOT the button normally used to open and close the
door).
1 — Garage Door Opener
2 — Training Button
3
UNDERSTANDING THE FEATURES OF YOUR VEHICLE 167
Page 170 of 465

successfully accepted the frequency signal. The EVIC
display will change from “CHANNEL # TRAINING” to
“CHANNEL # TRAINED.”
If you unplugged the device for training, plug it back in
at this time.
Then proceed with Step 4 under “Programming
HomeLink�” earlier in this section.
Using HomeLink�
To operate, press and release the programmed
HomeLink�button. Activation will now occur for the
trained device (i.e., garage door opener, gate operator,
security system, entry door lock, home/office lighting,
etc.,). The handheld transmitter of the device may also be
used at any time.
Reprogramming A Single HomeLink� Button
To reprogram a channel that has been previously trained,
follow these steps: 1. Place the ignition in the RUN position.
2. Press and hold the desired HomeLink
�button for
20 seconds until the EVIC display states “CHANNEL #
TRAINING.” Do not release the button.
3. Without releasing the button, proceed with Program-
ming HomeLink� Step 2 and follow all remaining steps.
Security
It is advised to erase all channels before you sell or turn
in your vehicle.
To do this, press and hold the two outside buttons for
20 seconds until the EVIC message states “CHANNELS
CLEARED.” Note that all channels will be erased. Indi-
vidual channels cannot be erased.
The HomeLink�Universal Transceiver is disabled when
the Vehicle Security Alarm is active.
3
UNDERSTANDING THE FEATURES OF YOUR VEHICLE 169
Page 184 of 465
UNDERSTANDING YOUR INSTRUMENT PANEL
CONTENTS
�Instrument Panel Features ............... 187
� Instrument Cluster .................... 188
� Instrument Cluster Descriptions ........... 189
� Electronic Vehicle Information Center (EVIC) . . 199
▫ Electronic Vehicle Information Center (EVIC)
Displays ........................... 202
▫ Engine Oil Change Indicator System ....... 206
▫ Trip Functions ...................... 206
▫ Performance Pages — If Equipped ........ 208▫
Keyless Go Display — If Equipped ........ 212
▫ Driver-Selectable Surround Sound (DSS)
– If Equipped ....................... 212
▫ Compass Display .................... 213
▫ Uconnect™ GPS — If Equipped .......... 215
▫ System Warnings (Customer Information
Features) .......................... 216
▫ Personal Settings (Customer-Programmable
Features) .......................... 216
� Setting The Analog Clock ................ 221
4
YellowYes, Half Second
1st LED 51.2 in (130 cm)Yello")