2010 CHRYSLER 300 brake light
[x] Cancel search: brake lightPage 72 of 538

3. Requested by police under a legal warrant.
4. Otherwise required by law.
Data parameters that are recorded:
•Diagnostic trouble code(s) and warning light status for
electronically-controlled safety systems, including the
airbag system
•Vehicle speed
•Engine RPM
•Brake switch status
•Pedal position
•And other parameters depending on vehicle
configuration
Child Restraints
Everyone in your vehicle needs to be buckled up all the
time, including babies and children. Every state in theUnited States and all Canadian provinces require that
small children ride in proper restraint systems. This is the
law, and you can be prosecuted for ignoring it.
Children 12 years and younger should ride properly
buckled up in a rear seat, if available. According to crash
statistics, children are safer when properly restrained in
the rear seats rather than in the front.
WARNING!
In a collision, an unrestrained child, even a tiny baby,
can become a projectile inside the vehicle. The force
required to hold even an infant on your lap could
become so great that you could not hold the child, no
matter how strong you are. The child and others
could be badly injured. Any child riding in your
vehicle should be in a proper restraint for the child’s
size.
2
THINGS TO KNOW BEFORE STARTING YOUR VEHICLE 71
Page 85 of 538

WARNING! (Continued)
•Always make sure that objects cannot fall into the
driver foot well while the vehicle is moving.
Objects can become trapped under the brake pedal
and accelerator pedal causing a loss of vehicle
control.
•If required, mounting posts must be properly
installed, if not equipped from the factory.
Failure to properly follow floor mat installation or
mounting can cause interference with the brake
pedal and accelerator pedal operation causing loss
of control of the vehicle.
Periodic Safety Checks You Should Make Outside
the Vehicle
Tires
Examine tires for excessive tread wear and uneven wear
patterns. Check for stones, nails, glass, or other objectslodged in the tread. Inspect the tread and sidewall for
cuts and cracks. Check the wheel nuts for tightness.
Check the tires (including spare) for proper pressure.
Lights
Have someone observe the operation of exterior lights
while you work the controls. Check turn signal and high
beam indicator lights on the instrument panel.
Door Latches
Check for positive closing, latching, and locking.
Fluid Leaks
Check area under vehicle after overnight parking for fuel,
engine coolant, oil, or other fluid leaks. Also, if gasoline
fumes are detected or if fuel, power steering fluid, or
brake fluid leaks are suspected, the cause should be
located and corrected immediately.
84 THINGS TO KNOW BEFORE STARTING YOUR VEHICLE
Page 148 of 538

1. Pull the multifunction lever toward you to switch the
headlights from the high beam to the low beam position.
2. Rotate the headlight switch clockwise from the AUTO
to the on position.
NOTE:Broken, muddy, or obstructed headlights and
taillights of vehicles in the field of view will cause
headlights to remain on longer (closer to the vehicle).
Also, dirt, film, and other obstructions on the windshield
or camera lens will cause the system to function
improperly.
Daytime Running Lights — If Equipped
The high beam headlights will come on as Daytime
Running Lights whenever the ignition is placed in the
RUN position, the headlights are off and the parking
brake is off. The headlight switch must be used for
normal nighttime driving.
Lights-On Reminder
If the headlights or parking lights are on after the ignition
is placed in the OFF position, a chime will sound to alert
the driver when the driver’s door is opened.
Fog Lights — If Equipped
The front fog light switch is built into the head-
light switch. To activate the front fog lights, turn
on the parking lights or the low beam headlights
and press the headlight switch. To turn off the front fog
lights, either press the headlight switch a second time or
turn off the headlight switch.
An indicator light in the instrument cluster illuminates
when the fog lights are turned on.
NOTE: The fog lights will operate with the low beam
headlights or parking lights on. However, selecting the
high beam headlights will turn off the fog lights.3
UNDERSTANDING THE FEATURES OF YOUR VEHICLE 147
Page 163 of 538

ADAPTIVE CRUISE CONTROL (ACC) — IF
EQUIPPED
Adaptive Cruise Control (ACC) increases the driving
convenience provided by cruise control while traveling
on highways and major roadways. However, it is not a
safety system and not designed to prevent collisions.
ACC will allow you to keep cruise control engaged in
light to moderate traffic conditions without the constant
need to reset your cruise control. ACC utilizes an infrared
sensor designed to detect a vehicle directly ahead of you.
NOTE:
•If the sensor does not detect a vehicle ahead of you,
ACC will maintain a fixed set speed.
•If the ACC sensor detects a vehicle ahead, ACC will
apply limited braking or acceleration automatically to
maintain a preset following distance, while matching
the speed of the vehicle ahead.
WARNING!
•Adaptive Cruise Control (ACC) is a convenience
system. It is not a substitute for active driving
involvement. It is always the driver ’s responsibil-
ity to be attentive of road, traffic, and weather
conditions, vehicle speed, distance to the vehicle
ahead; and, most importantly, brake operation to
ensure safe operation of the vehicle under all road
conditions. Your complete attention is always re-
quired while driving to maintain safe control of
your vehicle. Failure to follow these warnings can
result in an accident or serious personal injury.The
ACC system:
•Does not react to pedestrians, oncoming vehicles,
and stationary objects (i.e., a stopped vehicle in a
traffic jam or a disabled vehicle).(Continued)
162 UNDERSTANDING THE FEATURES OF YOUR VEHICLE
Page 170 of 538

While ACC is set, the set speed can be decreased by
pushing and holding the lever down (SET/DECEL). If
the lever is continually held, the set speed will continue
to decrease in 5 mph (10 km/h) increments until the lever
is released. The decrease in set speed is reflected in the
EVIC display.
Tapping the lever down once will result ina1mph
(1 km/h) decrease in set speed. Each subsequent tap of
the lever results in a decrease of 1 mph (1 km/h).
NOTE:
•When you use the lever to decelerate, if the engine’s
braking power does not slow the vehicle sufficiently to
reach the set speed, the brake system will automati-
cally slow the vehicle.
•The ACC system can only apply a maximum of 25% of
the vehicle’s braking capability and will not bring the
vehicle to a complete stop.
•The ACC system maintains set speed when driving up
hill and down hill. However, a slight speed change on
moderate hills is normal. In addition, downshifting
may occur while climbing uphill or descending down-
hill. This is normal operation and necessary to main-
tain set speed.
3
UNDERSTANDING THE FEATURES OF YOUR VEHICLE 169
Page 172 of 538

•The vehicle ahead slows to a speed below 15 mph
(24 km/h) and the system automatically disengages
itself.
•The distance setting is changed.
•The system disengages. (Refer to the information on
ACC Activation).
The maximum braking applied by ACC is limited; how-
ever, the driver can always apply the brakes manually, if
necessary.
NOTE: The brake lights will illuminate whenever the
ACC system applies the brakes.
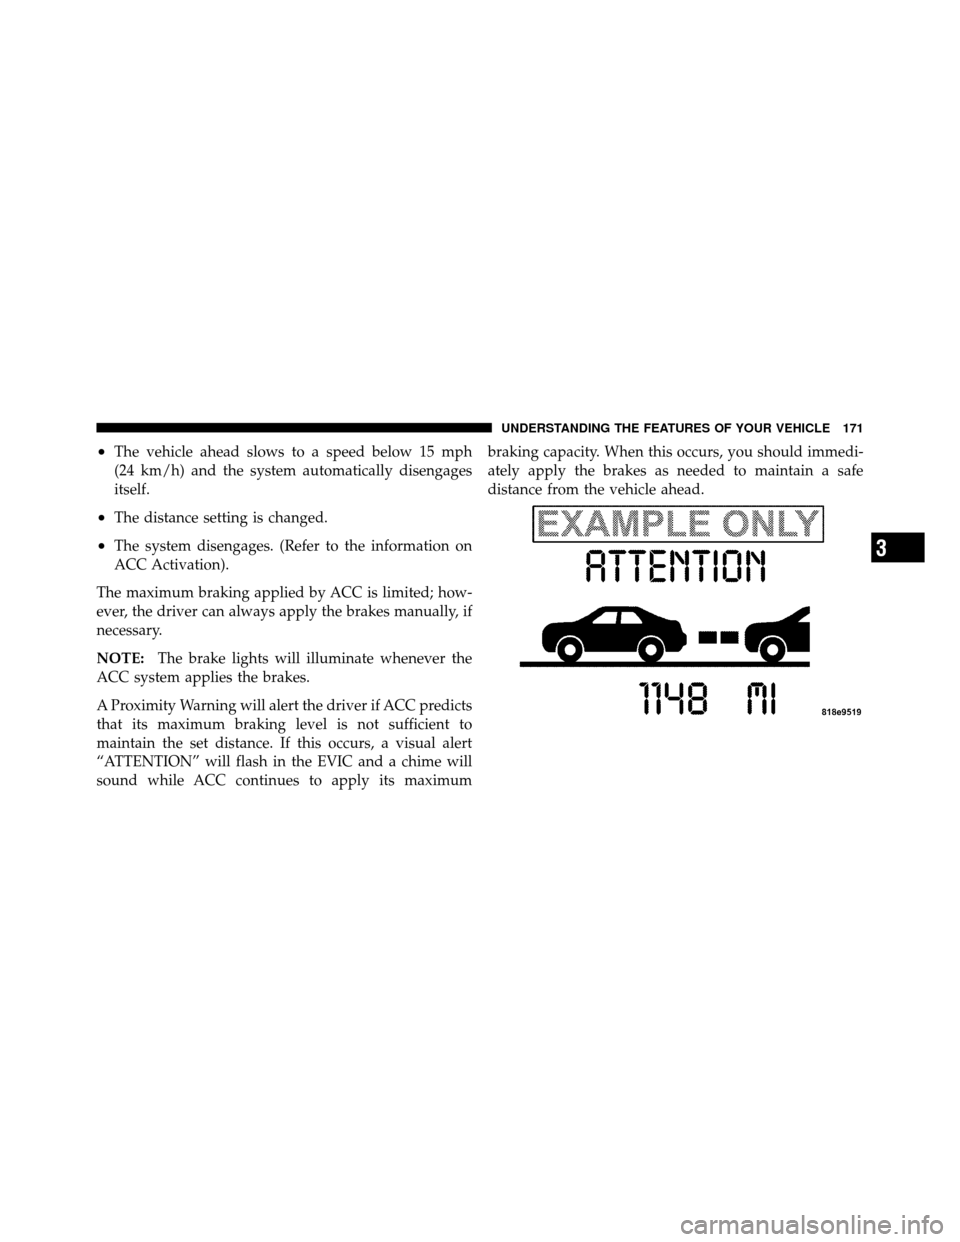
A Proximity Warning will alert the driver if ACC predicts
that its maximum braking level is not sufficient to
maintain the set distance. If this occurs, a visual alert
“ATTENTION” will flash in the EVIC and a chime will
sound while ACC continues to apply its maximum braking capacity. When this occurs, you should immedi-
ately apply the brakes as needed to maintain a safe
distance from the vehicle ahead.3
UNDERSTANDING THE FEATURES OF YOUR VEHICLE 171
Page 221 of 538

7. Tachometer
The red segments indicate the maximum permissible
engine revolutions per minute (RPM x 1000) for each gear
range. Ease up on the accelerator before reaching the red
area.
8. Engine Temperature Warning LightThis light will turn on and a single chime will
sound to warn of an overheated engine condition.
When this light turns on, the engine temperature
is critically hot. If the light turns on while driving, safely
pull over and stop the vehicle. The vehicle should be
turned OFF immediately and serviced as soon as pos-
sible. (Refer to “If Your Engine Overheats” in “What To
Do In Emergencies” for further information). 9. Anti-Lock Brake (ABS) Light — If Equipped
This light monitors the Anti-Lock Brake System
(ABS). The light will turn on when the ignition
switch is placed in the RUN position and may stay on for
as long as four seconds.
If the ABS Light remains on or turns on while driving,
then the Anti-Lock portion of the brake system is not
functioning and service is required. However, the con-
ventional brake system will continue to operate normally
if the Brake Warning Light is not on.
If the ABS Light is on, the brake system should be
serviced as soon as possible to restore the benefits of
Anti-Lock brakes. If the ABS Light does not turn on when
the ignition switch is placed in the RUN position, have
the light inspected by an authorized dealer.
220 UNDERSTANDING YOUR INSTRUMENT PANEL
Page 222 of 538

10. Electronic Stability Program (ESP) / Brake Assist
System (BAS) Malfunction Indicator LightThe yellow Electronic Stability Program (ESP)
/ Brake Assist System (BAS) Malfunction Indi-
cator Light will turn on when the key in the
ignition switch is placed in the RUN position.
The light should go out with the engine running. The
system will turn this light on continuously while the
engine is running if it detects a malfunction in either the
ESP, the BAS or both.WARNING!
If a warning light remains on the system may not be
working and you will not have the benefit of ESP or
BAS. Under certain driving conditions, where ESP or
BAS would be beneficial, you - if you have not
adjusted your driving speeds and stopping in or to
account for the lack of the feature, may be in acci-
dent.
11. Airbag Warning Light This light will turn on for six to eight seconds
as a bulb check when the ignition switch is first
placed in the RUN position. If the light is either
not on during starting, or stays on, or turns on
while driving, then have the system inspected at an
authorized dealer as soon as possible. Refer to “Occupant
Restraints” in “Things To Know Before Starting Your
Vehicle” for further information.
4
UNDERSTANDING YOUR INSTRUMENT PANEL 221