2010 CHEVROLET TAHOE transmission
[x] Cancel search: transmissionPage 402 of 608

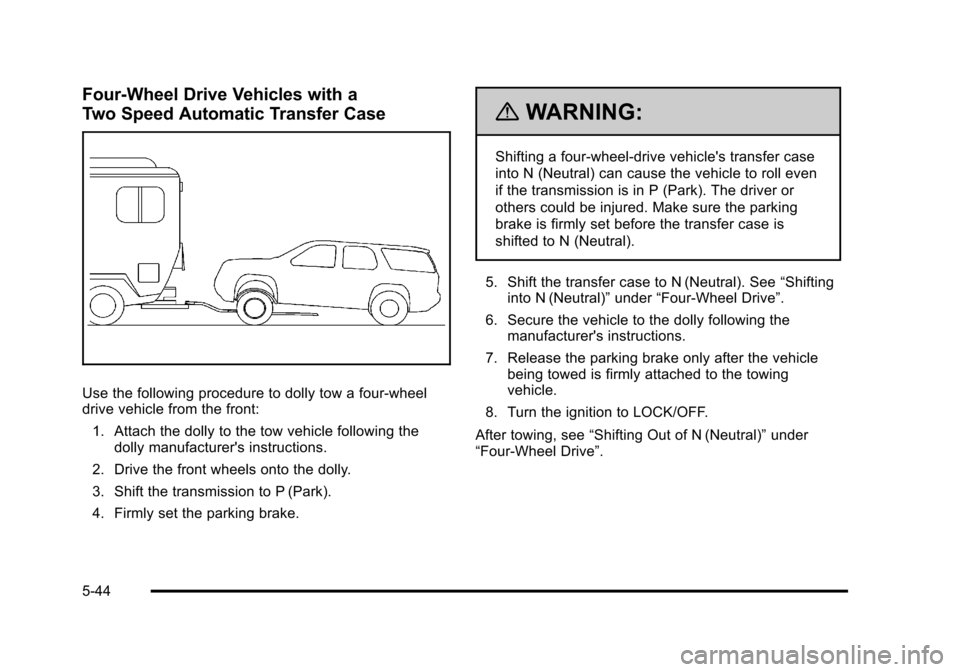
Four-Wheel Drive Vehicles with a
Two Speed Automatic Transfer Case
Use the following procedure to dolly tow a four-wheel
drive vehicle from the front:1. Attach the dolly to the tow vehicle following the dolly manufacturer's instructions.
2. Drive the front wheels onto the dolly.
3. Shift the transmission to P (Park).
4. Firmly set the parking brake.
{WARNING:
Shifting a four-wheel-drive vehicle's transfer case
into N (Neutral) can cause the vehicle to roll even
if the transmission is in P (Park). The driver or
others could be injured. Make sure the parking
brake is firmly set before the transfer case is
shifted to N (Neutral).
5. Shift the transfer case to N (Neutral). See “Shifting
into N (Neutral)” under“Four-Wheel Drive”.
6. Secure the vehicle to the dolly following the manufacturer's instructions.
7. Release the parking brake only after the vehicle being towed is firmly attached to the towing
vehicle.
8. Turn the ignition to LOCK/OFF.
After towing, see “Shifting Out of N (Neutral)” under
“Four-Wheel Drive”.
5-44
Page 403 of 608

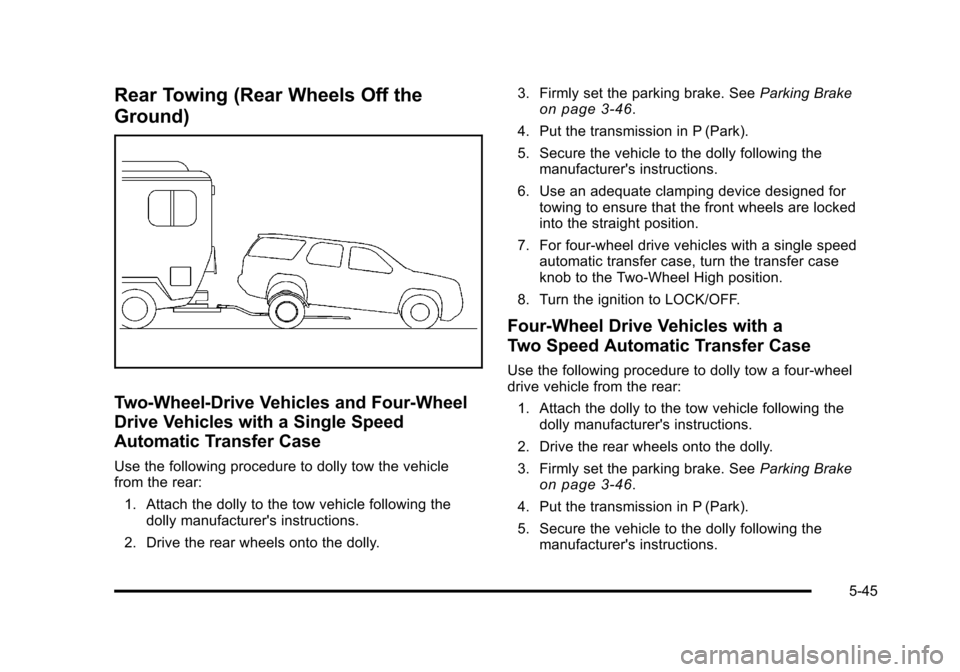
Rear Towing (Rear Wheels Off the
Ground)
Two-Wheel-Drive Vehicles and Four-Wheel
Drive Vehicles with a Single Speed
Automatic Transfer Case
Use the following procedure to dolly tow the vehicle
from the rear:1. Attach the dolly to the tow vehicle following the dolly manufacturer's instructions.
2. Drive the rear wheels onto the dolly. 3. Firmly set the parking brake. See
Parking Brake
on page 3‑46.
4. Put the transmission in P (Park).
5. Secure the vehicle to the dolly following the manufacturer's instructions.
6. Use an adequate clamping device designed for towing to ensure that the front wheels are locked
into the straight position.
7. For four-wheel drive vehicles with a single speed automatic transfer case, turn the transfer case
knob to the Two-Wheel High position.
8. Turn the ignition to LOCK/OFF.
Four-Wheel Drive Vehicles with a
Two Speed Automatic Transfer Case
Use the following procedure to dolly tow a four-wheel
drive vehicle from the rear: 1. Attach the dolly to the tow vehicle following the dolly manufacturer's instructions.
2. Drive the rear wheels onto the dolly.
3. Firmly set the parking brake. See Parking Brake
on page 3‑46.
4. Put the transmission in P (Park).
5. Secure the vehicle to the dolly following the manufacturer's instructions.
5-45
Page 404 of 608

6. Use an adequate clamping device designed fortowing to ensure that the front wheels are locked
into the straight position.
{WARNING:
Shifting a four-wheel-drive vehicle's transfer case
into N (Neutral) can cause the vehicle to roll even
if the transmission is in P (Park). The driver or
others could be injured. Make sure the parking
brake is firmly set before the transfer case is
shifted to N (Neutral).
7. Shift the transfer case to N (Neutral). See “Shifting
into N (Neutral)” under“Four-Wheel Drive”.
8. Turn the ignition to LOCK/OFF.
After towing, see “Shifting Out of N (Neutral)” under
“Four-Wheel Drive”.
Level Control
Automatic Level Control
The automatic level control rear suspension is available
on light‐duty vehicles and comes as a part of the
Autoride
®suspension, if equipped. This type of level control is fully automatic and will
provide a better leveled riding position as well as better
handling under a variety of passenger and loading
conditions. An air compressor connected to the rear
shocks will raise or lower the rear of the vehicle to
maintain proper vehicle height. The system is activated
when the ignition key is turned to ON/RUN and will
automatically adjust vehicle height thereafter. The
system may exhaust (lower vehicle height) for up to
ten minutes after the ignition key has been turned off.
You may hear the air compressor operating when the
height is being adjusted.
If a weight‐distributing hitch is being used, it is
recommended to allow the shocks to inflate, thereby
leveling the vehicle prior to adjusting the hitch.
Autoride®
With this feature, improved vehicle ride and handling is
provided under a variety of passenger and loading
conditions.
The system is fully automatic and uses a computer
controller to continuously monitor vehicle speed, wheel
to body position, lift/dive and steering position of the
vehicle. The controller then sends signals to each shock
absorber to independently adjust the damping level to
provide the optimum vehicle ride.
5-46
Page 406 of 608

Pulling A Trailer
Here are some important points:
.There are many different laws, including speed
limit restrictions, having to do with trailering. Make
sure the rig will be legal, not only where you live
but also where you will be driving. A good source
for this information can be state or provincial
police.
.Consider using a sway control. See“Hitches”later
in this section.
.Do not tow a trailer at all during the first 500 miles
(800 km) the new vehicle is driven. The engine,
axle or other parts could be damaged.
.Then, during the first 500 miles (800 km) that a
trailer is towed, do not drive over 50 mph (80 km/h)
and do not make starts at full throttle. This helps
the engine and other parts of the vehicle wear in at
the heavier loads.
.Vehicles can tow in D (Drive). Shift the
transmission to a lower gear if the transmission
shifts too often under heavy loads and/or hilly
conditions.
.If the vehicle has the Side Blind Zone Alert (SBZA)
system and it doesn't seem to be working properly
while pulling a trailer, turn the system off. See Side
Blind Zone Alert (SBZA)
on page 3‑58for more
information. Important considerations that have to do with weight:
.The weight of the trailer
.The weight of the trailer tongue
.The weight on the vehicle's tires
.And the weight of the trailering combination
Weight of the Trailer
How heavy can a trailer safely be?
It depends on how the rig is used. Speed, altitude, road
grades, outside temperature and how much the vehicle
is used to pull a trailer are all important. It can depend
on any special equipment on the vehicle, and the
amount of tongue weight the vehicle can carry. See
“Weight of the Trailer Tongue”
later in this section for
more information.
Trailer weight rating (TWR) is calculated assuming the
tow vehicle has only the driver but all required trailering
equipment. Weight of additional optional equipment,
passengers and cargo in the tow vehicle must be
subtracted from the trailer weight rating.
5-48
Page 412 of 608

Tow/Haul Mode
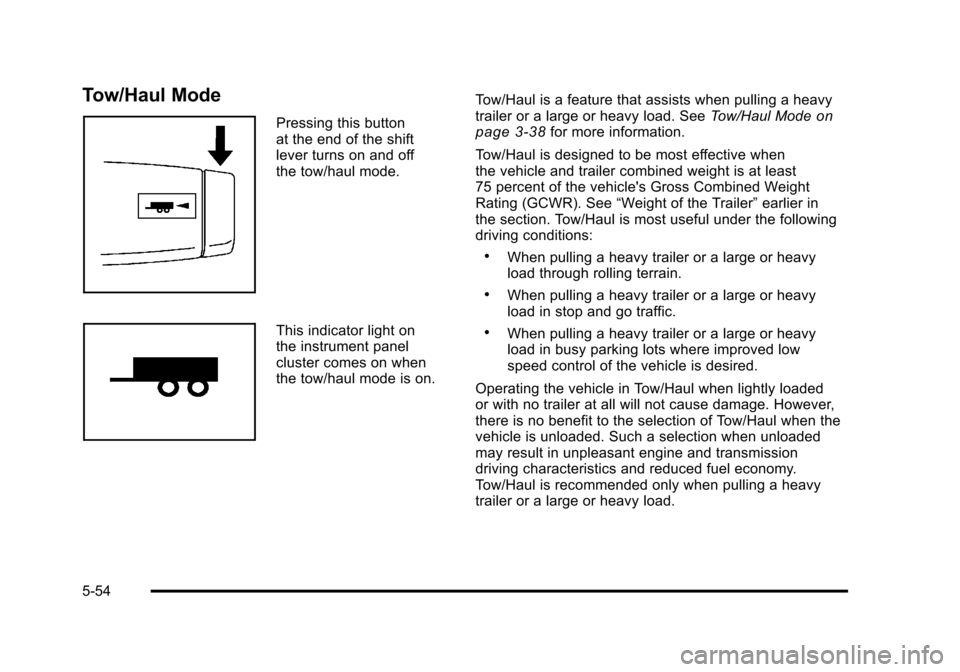
Pressing this button
at the end of the shift
lever turns on and off
the tow/haul mode.
This indicator light on
the instrument panel
cluster comes on when
the tow/haul mode is on.Tow/Haul is a feature that assists when pulling a heavy
trailer or a large or heavy load. See
Tow/Haul Mode
on
page 3‑38for more information.
Tow/Haul is designed to be most effective when
the vehicle and trailer combined weight is at least
75 percent of the vehicle's Gross Combined Weight
Rating (GCWR). See “Weight of the Trailer” earlier in
the section. Tow/Haul is most useful under the following
driving conditions:
.When pulling a heavy trailer or a large or heavy
load through rolling terrain.
.When pulling a heavy trailer or a large or heavy
load in stop and go traffic.
.When pulling a heavy trailer or a large or heavy
load in busy parking lots where improved low
speed control of the vehicle is desired.
Operating the vehicle in Tow/Haul when lightly loaded
or with no trailer at all will not cause damage. However,
there is no benefit to the selection of Tow/Haul when the
vehicle is unloaded. Such a selection when unloaded
may result in unpleasant engine and transmission
driving characteristics and reduced fuel economy.
Tow/Haul is recommended only when pulling a heavy
trailer or a large or heavy load.
5-54
Page 421 of 608

Backing Up
Hold the bottom of the steering wheel with one hand.
Then, to move the trailer to the left, move that hand to
the left. To move the trailer to the right, move your hand
to the right. Always back up slowly and, if possible,
have someone guide you.
Making Turns
Notice:Making very sharp turns while trailering
could cause the trailer to come in contact with the
vehicle. The vehicle could be damaged. Avoid
making very sharp turns while trailering.
When turning with a trailer, make wider turns than
normal. Do this so the trailer will not strike soft
shoulders, curbs, road signs, trees or other objects.
Avoid jerky or sudden maneuvers. Signal well in
advance.
If the trailer turn signal bulbs burn out, the arrows on the
instrument panel will still flash for turns. It is important to
check occasionally to be sure the trailer bulbs are still
working.
Driving On Grades
Reduce speed and shift to a lower gear beforestarting
down a long or steep downgrade. If the transmission
is not shifted down, the brakes might get hot and no
longer work well.
Vehicles can tow in D (Drive). Shift the transmission to
a lower gear if the transmission shifts too often under
heavy loads and/or hilly conditions.
The tow/haul mode may be used if the transmission
shifts too often. See Tow/Haul Mode on page 3‑38.
When towing at high altitude on steep uphill grades,
consider the following: Engine coolant will boil at a
lower temperature than at normal altitudes. If the engine
is turned off immediately after towing at high altitude on
steep uphill grades, the vehicle may show signs similar
to engine overheating. To avoid this, let the engine run
while parked, preferably on level ground, with the
automatic transmission in P (Park) for a few minutes
before turning the engine off. If the overheat warning
comes on, see Engine Overheating on page 6‑36.
5-63
Page 423 of 608

Leaving After Parking on a Hill
1. Apply and hold the brake pedal.
2. Start the engine
3. Shift into a gear
4. Release the parking brake
5. Let up on the brake pedal.
6. Drive slowly until the trailer is clear of the chocks.
7. Stop and have someone pick up and store thechocks.
Maintenance When Trailer Towing
The vehicle needs service more often when pulling a
trailer. See this manual's Maintenance Schedule or
Index for more information. Things that are especially
important in trailer operation are automatic transmission
fluid, engine oil, axle lubricant, belts, cooling system
and brake system. It is a good idea to inspect these
before and during the trip.
Check periodically to see that all hitch nuts and bolts
are tight.
Trailer Wiring Harness
The vehicle is equipped with the following wiring
harnesses for towing a trailer.
Basic Trailer Wiring
The trailer wiring harness, with a seven-pin connector,
is located at the rear of the vehicle and is tied to the
vehicle's frame. The harness connector can be plugged
into a seven-pin universal heavy-duty trailer connector
available through your dealer.
The seven-wire harness contains the following trailer
circuits:
.Yellow: Left Stop/Turn Signal
.Dark Green: Right Stop/Turn Signal
.Brown: Taillamps
.White: Ground
.Light Green: Back-up Lamps
.Red: Battery Feed*
.Dark Blue: Trailer Brake*
*The fuses for these two circuits are installed in the
underhood electrical center, but the wires are not
connected. They should be connected by your dealer or
a qualified service center.
5-65
Page 427 of 608

Section 6 Service and Appearance Care
Service. . . . . . . . . . . . . . . . . . . . . . . . . . . . . . . . . . . . . . . . . . . . . 6-4
Accessories and Modifications . . . . . . . . . . . . . . . . . . 6-4
California Proposition 65 Warning . . . . . . . . . . . . . . . 6-5
California Perchlorate Materials Requirements . . . . . . . . . . . . . . . . . . . . . . . . . . . . . . . . . 6-5
Doing Your Own Service Work . . . . . . . . . . . . . . . . . . 6-5
Adding Equipment to the Outside of the Vehicle . . . . . . . . . . . . . . . . . . . . . . . . . . . . . . . . . . . . . . . . 6-6
Fuel . . . . . . . . . . . . . . . . . . . . . . . . . . . . . . . . . . . . . . . . . . . . . . . . . 6-6
Gasoline Octane . . . . . . . . . . . . . . . . . . . . . . . . . . . . . . . . 6-7
Gasoline Specifications . . . . . . . . . . . . . . . . . . . . . . . . . 6-7
California Fuel . . . . . . . . . . . . . . . . . . . . . . . . . . . . . . . . . . 6-8
Additives . . . . . . . . . . . . . . . . . . . . . . . . . . . . . . . . . . . . . . . . 6-8
Fuel E85 (85% Ethanol) . . . . . . . . . . . . . . . . . . . . . . . . . 6-9
Fuels in Foreign Countries . . . . . . . . . . . . . . . . . . . . . 6-10
Filling the Tank . . . . . . . . . . . . . . . . . . . . . . . . . . . . . . . . . 6-11
Filling a Portable Fuel Container . . . . . . . . . . . . . . . 6-13
Checking Things Under the Hood . . . . . . . . . . . . . . . 6-14
Hood Release . . . . . . . . . . . . . . . . . . . . . . . . . . . . . . . . . 6-14
Engine Compartment Overview . . . . . . . . . . . . . . . . 6-16
Engine Oil . . . . . . . . . . . . . . . . . . . . . . . . . . . . . . . . . . . . . 6-17 Engine Oil Life System . . . . . . . . . . . . . . . . . . . . . . . . 6-20
Engine Air Cleaner/Filter . . . . . . . . . . . . . . . . . . . . . . . 6-21
Automatic Transmission Fluid (4-Speed
Transmission) . . . . . . . . . . . . . . . . . . . . . . . . . . . . . . . 6-23
Automatic Transmission Fluid (6-Speed
Transmission) . . . . . . . . . . . . . . . . . . . . . . . . . . . . . . . 6-26
Cooling System . . . . . . . . . . . . . . . . . . . . . . . . . . . . . . . . 6-30
Engine Coolant . . . . . . . . . . . . . . . . . . . . . . . . . . . . . . . . 6-31
Engine Overheating . . . . . . . . . . . . . . . . . . . . . . . . . . . 6-36
Overheated Engine Protection Operating Mode . . . . . . . . . . . . . . . . . . . . . . . . . . . . . 6-39
Engine Fan Noise . . . . . . . . . . . . . . . . . . . . . . . . . . . . . 6-39
Power Steering Fluid . . . . . . . . . . . . . . . . . . . . . . . . . . 6-40
Windshield Washer Fluid . . . . . . . . . . . . . . . . . . . . . . 6-41
Brakes . . . . . . . . . . . . . . . . . . . . . . . . . . . . . . . . . . . . . . . . . 6-42
Battery . . . . . . . . . . . . . . . . . . . . . . . . . . . . . . . . . . . . . . . . . 6-45
Jump Starting . . . . . . . . . . . . . . . . . . . . . . . . . . . . . . . . . . 6-46
Rear Axle . . . . . . . . . . . . . . . . . . . . . . . . . . . . . . . . . . . . . . . . . 6-51
Four-Wheel Drive . . . . . . . . . . . . . . . . . . . . . . . . . . . . . . . . . 6-53
Front Axle . . . . . . . . . . . . . . . . . . . . . . . . . . . . . . . . . . . . . . . . . 6-54
6-1