2010 CHEVROLET SUBURBAN radio
[x] Cancel search: radioPage 167 of 608
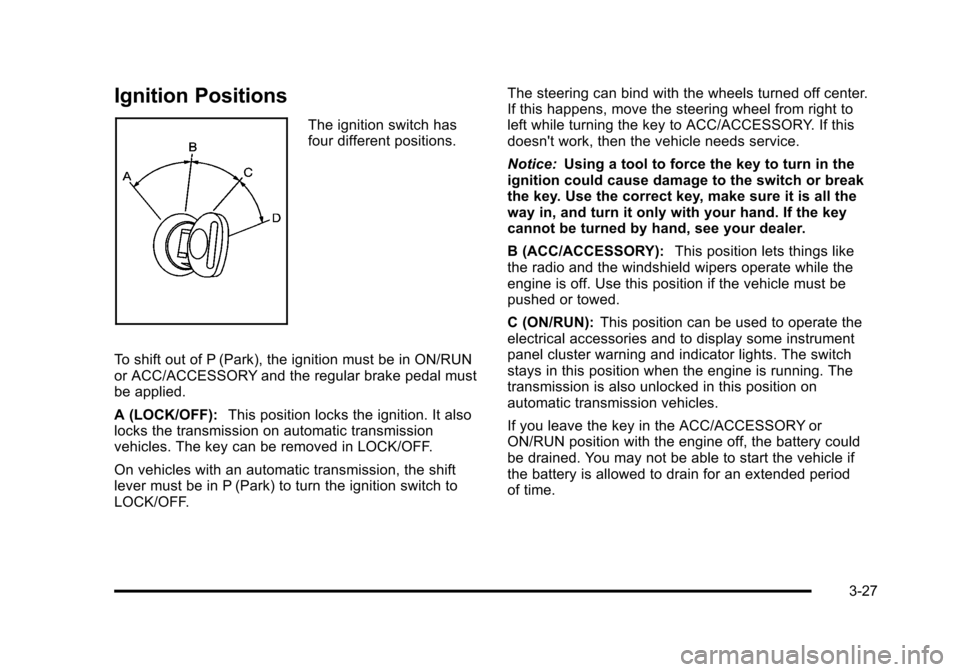
Ignition Positions
The ignition switch has
four different positions.
To shift out of P (Park), the ignition must be in ON/RUN
or ACC/ACCESSORY and the regular brake pedal must
be applied.
A (LOCK/OFF): This position locks the ignition. It also
locks the transmission on automatic transmission
vehicles. The key can be removed in LOCK/OFF.
On vehicles with an automatic transmission, the shift
lever must be in P (Park) to turn the ignition switch to
LOCK/OFF. The steering can bind with the wheels turned off center.
If this happens, move the steering wheel from right to
left while turning the key to ACC/ACCESSORY. If this
doesn't work, then the vehicle needs service.
Notice:
Using a tool to force the key to turn in the
ignition could cause damage to the switch or break
the key. Use the correct key, make sure it is all the
way in, and turn it only with your hand. If the key
cannot be turned by hand, see your dealer.
B (ACC/ACCESSORY): This position lets things like
the radio and the windshield wipers operate while the
engine is off. Use this position if the vehicle must be
pushed or towed.
C (ON/RUN): This position can be used to operate the
electrical accessories and to display some instrument
panel cluster warning and indicator lights. The switch
stays in this position when the engine is running. The
transmission is also unlocked in this position on
automatic transmission vehicles.
If you leave the key in the ACC/ACCESSORY or
ON/RUN position with the engine off, the battery could
be drained. You may not be able to start the vehicle if
the battery is allowed to drain for an extended period
of time.
3-27
Page 168 of 608
D (START):This is the position that starts the engine.
When the engine starts, release the key. The ignition
switch returns to ON/RUN for driving.
A warning tone will sound when the driver door is
opened, the ignition is in ACC/ACCESSORY or
LOCK/OFF and the key is in the ignition.
Retained Accessory Power (RAP)
The following vehicle accessories can be used for up to
10 minutes after the engine is turned off:
.Audio System
.Power Windows
.OnStar®System (if equipped)
.Sunroof (if equipped)
These features work when the key is in ON/RUN or
ACC/ACCESSORY. Once the key is turned from
ON/RUN to LOCK/OFF, the windows and sunroof
continue to work up to 10 minutes until any door is
opened. The radio continues to work for up to
10 minutes or until the driver door is opened.
Starting the Engine
If the vehicle is a Two-mode Hybrid, see the Two-mode
Hybrid manual for more information.
Move the shift lever to P (Park) or N (Neutral). The
engine will not start in any other position. To restart the
engine when the vehicle is are already moving, use
N (Neutral) only.
Notice: Do not try to shift to P (Park) if the vehicle
is moving. If you do, you could damage the
transmission. Shift to P (Park) only when the vehicle
is stopped.
Starting Procedure
1. With your foot off the accelerator pedal, turn the ignition key to START. When the engine starts,
let go of the key. The idle speed will go down as
the engine gets warm. Do not race the engine
immediately after starting it. Operate the engine
and transmission gently to allow the oil to warm up
and lubricate all moving parts.
3-28
Page 197 of 608
WARNING: (Continued)
If you do not use proper care before and while
backing; vehicle damage, injury, or death could
occur. Even with URPA, always check behind the
vehicle before backing up. While backing, be sure
to look for objects and check the vehicle's mirrors.
How the System Works
URPA comes on automatically when the shift lever is
moved into R (Reverse). A single tone sounds to
indicate the system is working.
URPA operates only at speeds less than
5 mph (8 km/h).
An obstacle is indicated by audible beeps. The interval
between the beeps becomes shorter as the vehicle gets
closer to the obstacle. When the distance is less than
30 cm (12 in) the beeps are continuous.
To be detected, objects must be at least 25.4 cm (10 in)
off the ground and below liftgate level. Objects must
also be within 2.5 m (8 ft) from the rear bumper. This
distance may be less during warmer or humid weather.
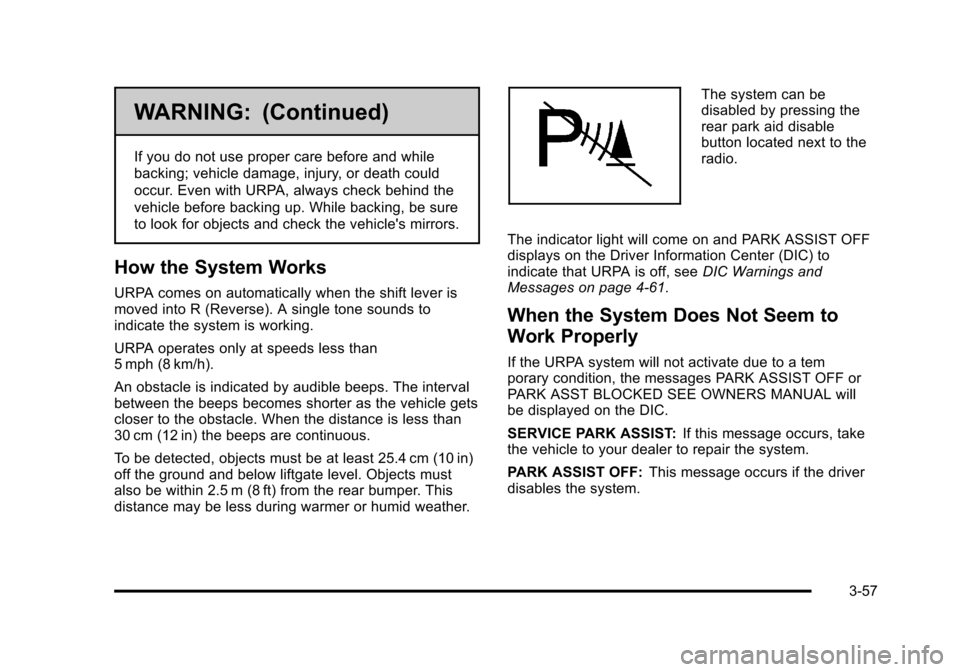
The system can be
disabled by pressing the
rear park aid disable
button located next to the
radio.
The indicator light will come on and PARK ASSIST OFF
displays on the Driver Information Center (DIC) to
indicate that URPA is off, see DIC Warnings and
Messages on page 4‑61.
When the System Does Not Seem to
Work Properly
If the URPA system will not activate due to a tem
porary condition, the messages PARK ASSIST OFF or
PARK ASST BLOCKED SEE OWNERS MANUAL will
be displayed on the DIC.
SERVICE PARK ASSIST: If this message occurs, take
the vehicle to your dealer to repair the system.
PARK ASSIST OFF: This message occurs if the driver
disables the system.
3-57
Page 201 of 608
SERVICE SIDE BLIND ZONE ALERT SYSTEM:If this
message appears, both SBZA displays will remain on
indicating there is a problem with the SBZA system.
If these displays remain on after continued driving, the
system needs service. Take the vehicle to your dealer.
FCC Information
See Radio Frequency Statementon page 8‑19for FCC
information.
Frequency of operation: 24.05GHz –24.25GHz
Field Strength: Not greater than 2.5V/m peak
(0.25V/m average) at a distance of 3m
The manufacturer is not responsible for any radio or TV
interference caused by unauthorized modifications to
this equipment. Such modifications could void the user's
authority to operate the equipment.
Rear Vision Camera (RVC)
This vehicle may have a Rear Vision Camera system.
Read this entire section before using it.
{WARNING:
The Rear Vision Camera (RVC) system does not
replace driver vision. RVC does not:
.Detect objects that are outside the camera's
field of view, below the bumper, or underneath
the vehicle.
.Detect children, pedestrians, bicyclists,
or pets.
Do not back the vehicle by only looking at the
RVC screen, or use the screen during longer,
higher speed backing maneuvers or where there
could be cross-traffic. Your judged distances using
the screen will differ from actual distances.
So if you do not use proper care before backing
up, you could hit a vehicle, child, pedestrian,
bicyclist, or pet, resulting in vehicle damage,
injury, or death. Even though the vehicle has the
RVC system, always check carefully before
backing up by checking behind and around the
vehicle.
3-61
Page 206 of 608
The rear vision camera system display in the rearview
mirror may turn off or not appear as expected due to
one of the following conditions. If this occurs the left
indicator light on the mirror will flash.
.A slow flash may indicate a loss of video signal,
or no video signal present during the reverse cycle.
.A fast flash may indicate that the display has
been on for the maximum allowable time during a
reverse cycle, or the display has reached an Over
Temperature limit.
The fast flash conditions are used to protect the
video device from high temperature conditions.
Once conditions return to normal the device will
reset and the green indicator will stop flashing.
During any of these fault conditions, the display will be
blank and the indicator will continue to flash as long as
the vehicle is in R (Reverse) or until the conditions
return to normal.
Pressing and holding
zwhen the left indicator light is
flashing will turn off the video display along with the left
indicator light.
Universal Home Remote
System
See Radio Frequency Statementon page 8‑19for information regarding Part 15 of the Federal
Communications Commission (FCC) Rules and
RSS-210/211 of Industry Canada.
Universal Home Remote System
Operation (With Three Round LED)
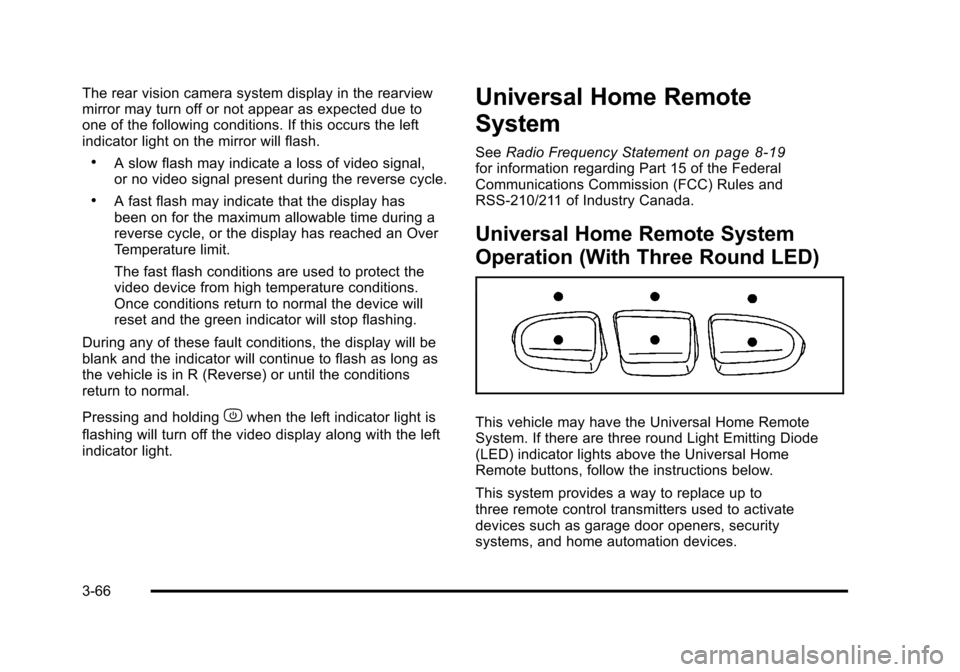
This vehicle may have the Universal Home Remote
System. If there are three round Light Emitting Diode
(LED) indicator lights above the Universal Home
Remote buttons, follow the instructions below.
This system provides a way to replace up to
three remote control transmitters used to activate
devices such as garage door openers, security
systems, and home automation devices.
3-66
Page 220 of 608

Section 4 Instrument Panel
Tire Pressure Light . . . . . . . . . . . . . . . . . . . . . . . . . . . . 4-38
Malfunction Indicator Lamp . . . . . . . . . . . . . . . . . . . . 4-39
Oil Pressure Gauge . . . . . . . . . . . . . . . . . . . . . . . . . . . . 4-42
Oil Pressure Light . . . . . . . . . . . . . . . . . . . . . . . . . . . . . 4-43
Security Light . . . . . . . . . . . . . . . . . . . . . . . . . . . . . . . . . . 4-44
Fog Lamp Light . . . . . . . . . . . . . . . . . . . . . . . . . . . . . . . . 4-44
Cruise Control Light . . . . . . . . . . . . . . . . . . . . . . . . . . . 4-44
Highbeam On Light . . . . . . . . . . . . . . . . . . . . . . . . . . . . 4-44
Tow/Haul Mode Light . . . . . . . . . . . . . . . . . . . . . . . . . . 4-45
Fuel Gauge . . . . . . . . . . . . . . . . . . . . . . . . . . . . . . . . . . . . 4-45
Low Fuel Warning Light . . . . . . . . . . . . . . . . . . . . . . . . 4-46
Driver Information Center (DIC) . . . . . . . . . . . . . . . . . . 4-47
DIC Operation and Displays (With DIC Buttons) . . . . . . . . . . . . . . . . . . . . . . . . . . . . . . . . . . . . . 4-47
DIC Operation and Displays (Without DIC Buttons) . . . . . . . . . . . . . . . . . . . . . . . . . . . . . . . . . . . . . 4-55
DIC Compass . . . . . . . . . . . . . . . . . . . . . . . . . . . . . . . . . . 4-58
DIC Warnings and Messages . . . . . . . . . . . . . . . . . . 4-61
DIC Vehicle Customization (With DIC Buttons) . . . . . . . . . . . . . . . . . . . . . . . . . . . . . . . . . . . . . 4-71 Audio System(s)
. . . . . . . . . . . . . . . . . . . . . . . . . . . . . . . . . . 4-80
Setting the Clock . . . . . . . . . . . . . . . . . . . . . . . . . . . . . . 4-81
Radio(s) . . . . . . . . . . . . . . . . . . . . . . . . . . . . . . . . . . . . . . . 4-82
Using an MP3 (Radios with CD) . . . . . . . . . . . . . . . 4-99
Using an MP3 (Radios with CD and DVD) . . . . 4-106
XM Radio Messages . . . . . . . . . . . . . . . . . . . . . . . . . 4-113
Navigation/Radio System . . . . . . . . . . . . . . . . . . . . . 4-114
Bluetooth
®. . . . . . . . . . . . . . . . . . . . . . . . . . . . . . . . . . . . 4-114
Rear Seat Entertainment (RSE) System . . . . . . 4-125
Rear Seat Audio (RSA) . . . . . . . . . . . . . . . . . . . . . . . 4-134
Theft-Deterrent Feature . . . . . . . . . . . . . . . . . . . . . . 4-135
Audio Steering Wheel Controls . . . . . . . . . . . . . . . 4-136
Radio Reception . . . . . . . . . . . . . . . . . . . . . . . . . . . . . . 4-138
Rear Side Window Antenna . . . . . . . . . . . . . . . . . . 4-139
XM™ Satellite Radio Antenna System . . . . . . . . 4-139
4-2
Page 230 of 608
When the headlamps are turned on while the vehicle is
on, the headlamps will turn off automatically 10 minutes
after the ignition is turned off. When the headlamps are
turned on while the vehicle is off, the headlamps will
stay on for 10 minutes before automatically turning off
to prevent the battery from being drained. Turn the
headlamp control to off and then back to the headlamp
on position to make the headlamps stay on for an
additional 10 minutes.
Headlamps on Reminder
A reminder chime will sound when the headlamps or
parking lamps are manually turned on and the ignition is
off and a door is open. To disable the chime, turn the
light off.
Daytime Running Lamps (DRL)
Daytime Running Lamps (DRL) can make it easier for
others to see the front of your vehicle during the day.
Fully functional daytime running lamps are required on
all vehicles first sold in Canada.
The DRL system comes on when the following
conditions are met:
.The ignition is on.
.The exterior lamps control is in AUTO.
.The engine is running.
.The light sensor determines it is daytime.When the DRL system is on, only the DRL lamps are
on. The taillamps, sidemarker, instrument panel lights,
and other lamps will not be on.
When it begins to get dark, the automatic headlamp
system switches from DRL to the headlamps.
To turn off the DRL lamps, turn the exterior lamps
control to the OFF position and then release. For
vehicles first sold in Canada, the transmission must be
in the P (Park) position, before the DRL lamps can be
turned off.
Automatic Headlamp System
When it is dark enough outside, the automatic
headlamp system turns on the headlamps at the normal
brightness, along with the taillamps, sidemarker, parking
lamps, and the instrument panel lights. The radio lights
will also be dim.
To turn off the automatic headlamp system, turn the
exterior lamps switch to the off position and then
release it. For vehicles first sold in Canada, the
transmission must be in the P (Park) position, before
the automatic headlamp system can be turned off.
The vehicle has a light sensor located on the top of the
instrument panel in the defroster grille that regulates
when the automatic headlamps turn on. Do not cover
the sensor or the headlamps will come on whenever the
ignition is on.
4-12
Page 252 of 608
If, after several seconds, both status indicator lights
remain on, or if there are no lights at all, there may be
a problem with the lights or the passenger sensing
system. See your dealer for service.
{WARNING:
If the airbag readiness light ever comes on and
stays on, it means that something may be wrong
with the airbag system. To help avoid injury to
yourself or others, have the vehicle serviced right
away. SeeAirbag Readiness Light
on page 4‑32
for more information, including important safety
information.
Charging System Light
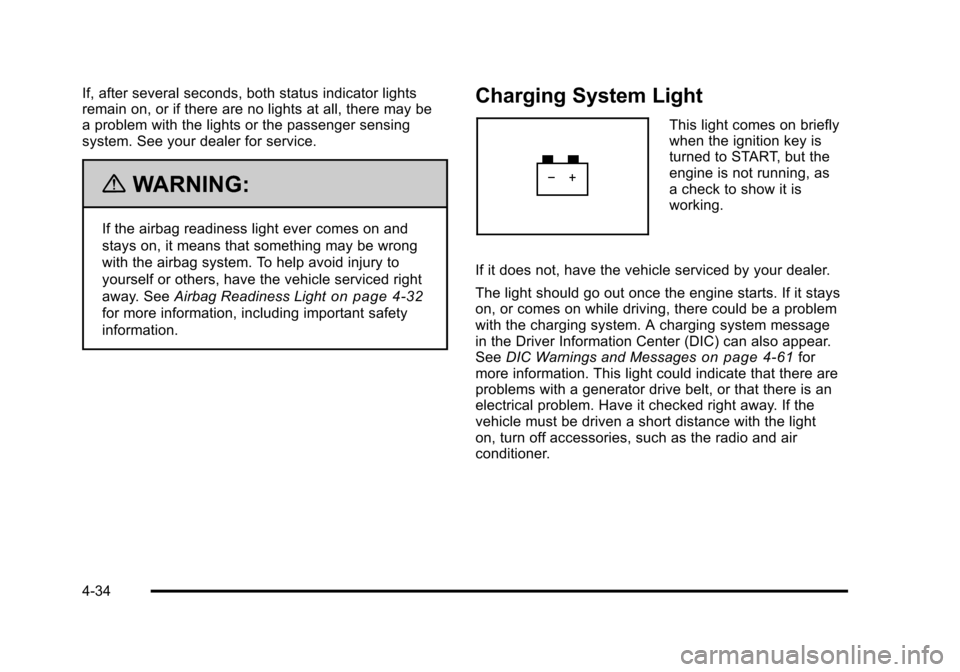
This light comes on briefly
when the ignition key is
turned to START, but the
engine is not running, as
a check to show it is
working.
If it does not, have the vehicle serviced by your dealer.
The light should go out once the engine starts. If it stays
on, or comes on while driving, there could be a problem
with the charging system. A charging system message
in the Driver Information Center (DIC) can also appear.
See DIC Warnings and Messages
on page 4‑61for
more information. This light could indicate that there are
problems with a generator drive belt, or that there is an
electrical problem. Have it checked right away. If the
vehicle must be driven a short distance with the light
on, turn off accessories, such as the radio and air
conditioner.
4-34