2010 CHEVROLET SILVERADO lock
[x] Cancel search: lockPage 216 of 626
Do not exceed the maximum vehicle capacity when
loading the vehicle. For more information on vehicle
capacity and loading, seeLoading the Vehicle
on
page 5‑29.
.If small heavy objects are placed on the roof, cut a
piece of 3/8 inch plywood to fit inside the crossrails
and siderails to spread the load. Tie the plywood to
the siderail supports.
.Tie the load and secure it to the crossrails or the
siderail supports. Use the crossrails only to keep
the load from sliding. To move a crossrail, lift the
release lever up, on both sides of the rail. Then
slide the crossrail to the desired position balancing
the force side to side. Press the release lever
down on both sides of the rail, down to tighten it.
Try to slide the crossrail back and forth slightly to
make sure it is tight.
.To carry long items, move the crossrails as far
apart as possible. Tie the load to the crossrails and
the siderails or siderail supports. Also tie the load
to the bumpers, but do not tie the load so tightly
that the crossrails or siderails are damaged.
.After moving a crossrail, be sure it is securely
locked into the siderail.
A Center High-Mounted Stoplamp (CHMSL) is located
above the rear window glass.
Make sure items loaded on the roof of the vehicle do
not block or damage the CHMSL.
Rear Seat Armrest
Vehicles with a rear seat armrest have two cupholders.
Pull the armrest down from the rear seatback to access
the cupholders.
Sunroof
On vehicles with a power sliding sunroof, the ignition
needs to be turned to RUN, or the Retained Accessory
Power (RAP) must be activated to open or close the
sunroof. When RAP is active, the sunroof will work for
10 minutes after the ignition is turned off, or until the
driver's door is opened. See Retained Accessory Power
(RAP)
on page 3‑23for more information.
Do not leave the sunroof open for long periods of time
while the vehicle is not in use. Debris can collect in the
tracks and damage the sunroof operation and plug the
water draining system.
3-78
Page 217 of 626
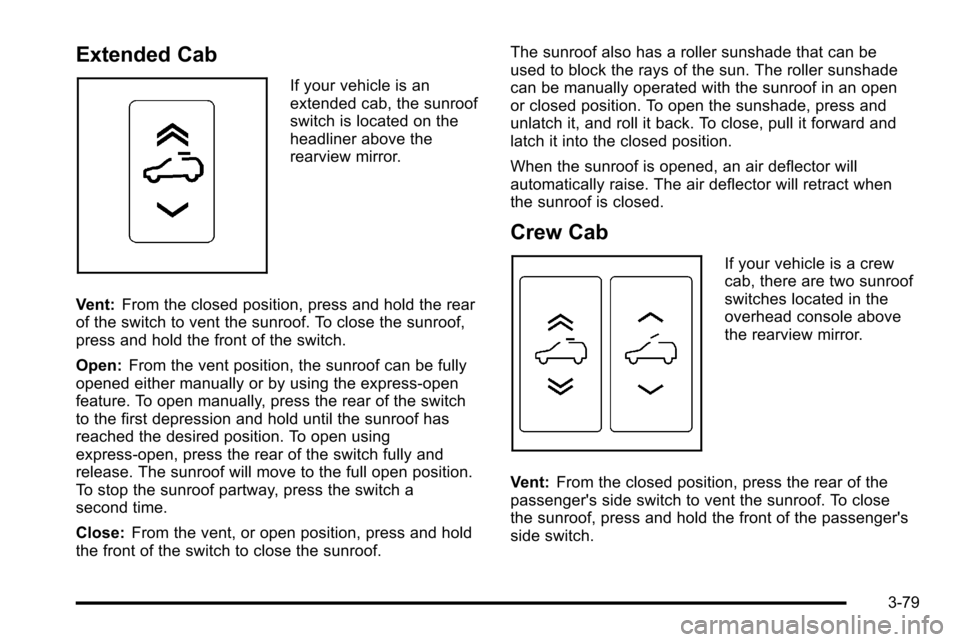
Extended Cab
If your vehicle is an
extended cab, the sunroof
switch is located on the
headliner above the
rearview mirror.
Vent: From the closed position, press and hold the rear
of the switch to vent the sunroof. To close the sunroof,
press and hold the front of the switch.
Open: From the vent position, the sunroof can be fully
opened either manually or by using the express-open
feature. To open manually, press the rear of the switch
to the first depression and hold until the sunroof has
reached the desired position. To open using
express-open, press the rear of the switch fully and
release. The sunroof will move to the full open position.
To stop the sunroof partway, press the switch a
second time.
Close: From the vent, or open position, press and hold
the front of the switch to close the sunroof. The sunroof also has a roller sunshade that can be
used to block the rays of the sun. The roller sunshade
can be manually operated with the sunroof in an open
or closed position. To open the sunshade, press and
unlatch it, and roll it back. To close, pull it forward and
latch it into the closed position.
When the sunroof is opened, an air deflector will
automatically raise. The air deflector will retract when
the sunroof is closed.
Crew Cab
If your vehicle is a crew
cab, there are two sunroof
switches located in the
overhead console above
the rearview mirror.
Vent: From the closed position, press the rear of the
passenger's side switch to vent the sunroof. To close
the sunroof, press and hold the front of the passenger's
side switch.
3-79
Page 218 of 626
Manual-Open/Manual-Close:To open the sunroof
press and hold the rear of the driver's side switch until
the sunroof reaches the desired position. To close the
sunroof, press and hold the front of the driver's side
switch until the sunroof reaches the desired position.
When the sunroof is opened, an air deflector will
automatically raise. The air deflector will retract when
the sunroof is closed.
Express-Open/Express-Close: To express-open the
sunroof, fully press and release the rear of the driver's
side switch. The sunroof will open automatically. To stop
the sunroof partway, press the switch a second time. To
express-close the sunroof, fully press and release the
front of the driver's side switch. The sunroof will close
automatically. To stop the sunroof partway, press the
switch a second time.
The sunroof also has a sunshade which you can pull
forward to block sun rays. The sunshade must be
opened and closed manually. Anti-Pinch Feature (Crew Cab Only):
If an object is in
the path of the sunroof while it is closing, the anti-pinch
feature will detect the object and stop the sunroof from
closing at the point of the obstruction. The sunroof will
then open halfway, and the air deflector will raise. To
close the sunroof once it has re-opened, refer to the
Express-Close or Manual-Close functions described
previously. If the sunroof is in the vent position, and
there is an object in the path of the sunroof when it
closing, the anti-pinch feature will detect the object and
stop the sunroof. To close the sunroof once it has
stopped, refer to the Vent functions described
previously.
Do not leave the sunroof open for long periods of time
while the vehicle is not in use. Debris can collect in the
tracks and damage the sunroof operation and plug the
water draining system.
3-80
Page 219 of 626
Section 4 Instrument Panel
Instrument Panel Overview. . . . . . . . . . . . . . . . . . . . . . . .4-3
Hazard Warning Flashers . . . . . . . . . . . . . . . . . . . . . . . 4-3
Horn . . . . . . . . . . . . . . . . . . . . . . . . . . . . . . . . . . . . . . . . . . . . 4-3
Tilt Wheel . . . . . . . . . . . . . . . . . . . . . . . . . . . . . . . . . . . . . . . 4-3
Turn Signal/Multifunction Lever . . . . . . . . . . . . . . . . . . 4-4
Turn and Lane-Change Signals . . . . . . . . . . . . . . . . . 4-4
Headlamp High/Low-Beam Changer . . . . . . . . . . . . 4-5
Flash-to-Pass . . . . . . . . . . . . . . . . . . . . . . . . . . . . . . . . . . . 4-5
Windshield Wipers . . . . . . . . . . . . . . . . . . . . . . . . . . . . . . 4-6
Windshield Washer . . . . . . . . . . . . . . . . . . . . . . . . . . . . . 4-6
Cruise Control . . . . . . . . . . . . . . . . . . . . . . . . . . . . . . . . . . 4-7
Exterior Lamps . . . . . . . . . . . . . . . . . . . . . . . . . . . . . . . . 4-10
Headlamps on Reminder . . . . . . . . . . . . . . . . . . . . . . . 4-11
Daytime Running Lamps (DRL) . . . . . . . . . . . . . . . . 4-12
Automatic Headlamp System . . . . . . . . . . . . . . . . . . 4-12
Fog Lamps . . . . . . . . . . . . . . . . . . . . . . . . . . . . . . . . . . . . 4-13
Auxiliary Roof-Mounted Lamp . . . . . . . . . . . . . . . . . 4-14
Instrument Panel Brightness . . . . . . . . . . . . . . . . . . . 4-14
Dome Lamps . . . . . . . . . . . . . . . . . . . . . . . . . . . . . . . . . . 4-14
Dome Lamp Override . . . . . . . . . . . . . . . . . . . . . . . . . . 4-15
Entry Lighting . . . . . . . . . . . . . . . . . . . . . . . . . . . . . . . . . . 4-15
Exit Lighting . . . . . . . . . . . . . . . . . . . . . . . . . . . . . . . . . . . 4-15
Reading Lamps . . . . . . . . . . . . . . . . . . . . . . . . . . . . . . . . 4-15
Cargo Lamp . . . . . . . . . . . . . . . . . . . . . . . . . . . . . . . . . . . 4-15
Electric Power Management . . . . . . . . . . . . . . . . . . . 4-16 Battery Run-Down Protection . . . . . . . . . . . . . . . . . . 4-16
Accessory Power Outlet(s) . . . . . . . . . . . . . . . . . . . . . 4-17
Ashtray(s) and Cigarette Lighter . . . . . . . . . . . . . . . 4-18
Climate Controls . . . . . . . . . . . . . . . . . . . . . . . . . . . . . . . . . . 4-18
Climate Control System (With Air
Conditioning) . . . . . . . . . . . . . . . . . . . . . . . . . . . . . . . . 4-18
Climate Control System (With Heater Only) . . . . 4-21
Dual Automatic Climate Control System . . . . . . . 4-22
Outlet Adjustment . . . . . . . . . . . . . . . . . . . . . . . . . . . . . . 4-28
Warning Lights, Gauges, and Indicators . . . . . . . .4-28
Instrument Panel Cluster . . . . . . . . . . . . . . . . . . . . . . . 4-29
Speedometer and Odometer . . . . . . . . . . . . . . . . . . . 4-30
Trip Odometer . . . . . . . . . . . . . . . . . . . . . . . . . . . . . . . . . 4-30
Tachometer . . . . . . . . . . . . . . . . . . . . . . . . . . . . . . . . . . . . 4-30
Safety Belt Reminders . . . . . . . . . . . . . . . . . . . . . . . . . 4-31
Airbag Readiness Light . . . . . . . . . . . . . . . . . . . . . . . . 4-32
Airbag Off Light . . . . . . . . . . . . . . . . . . . . . . . . . . . . . . . . 4-32
Passenger Airbag Status Indicator . . . . . . . . . . . . . 4-34
Charging System Light . . . . . . . . . . . . . . . . . . . . . . . . 4-36
Voltmeter Gauge . . . . . . . . . . . . . . . . . . . . . . . . . . . . . . . 4-36
Brake System Warning Light . . . . . . . . . . . . . . . . . . . 4-37
Antilock Brake System (ABS) Warning Light . . . 4-38
StabiliTrak
®Indicator Light . . . . . . . . . . . . . . . . . . . . . 4-39
Engine Coolant Temperature Gauge . . . . . . . . . . . 4-40
Tire Pressure Light . . . . . . . . . . . . . . . . . . . . . . . . . . . . 4-40
Malfunction Indicator Lamp . . . . . . . . . . . . . . . . . . . . 4-41
4-1
Page 220 of 626

Section 4 Instrument Panel
Oil Pressure Gauge . . . . . . . . . . . . . . . . . . . . . . . . . . . . 4-44
Oil Pressure Light . . . . . . . . . . . . . . . . . . . . . . . . . . . . . 4-45
Security Light . . . . . . . . . . . . . . . . . . . . . . . . . . . . . . . . . . 4-46
Fog Lamp Light . . . . . . . . . . . . . . . . . . . . . . . . . . . . . . . . 4-46
Cruise Control Light . . . . . . . . . . . . . . . . . . . . . . . . . . . 4-46
Highbeam On Light . . . . . . . . . . . . . . . . . . . . . . . . . . . . 4-46
Four-Wheel-Drive Light . . . . . . . . . . . . . . . . . . . . . . . . 4-47
Tow/Haul Mode Light . . . . . . . . . . . . . . . . . . . . . . . . . . 4-47
Fuel Gauge . . . . . . . . . . . . . . . . . . . . . . . . . . . . . . . . . . . . 4-47
Low Fuel Warning Light . . . . . . . . . . . . . . . . . . . . . . . . 4-48
Driver Information Center (DIC) . . . . . . . . . . . . . . . . . .4-49
DIC Operation and Displays (With DIC Buttons) . . . . . . . . . . . . . . . . . . . . . . . . . . . . . . . . . . . . . 4-49
DIC Operation and Displays (Without DIC Buttons) . . . . . . . . . . . . . . . . . . . . . . . . . . . . . . . . . . . . . 4-56
DIC Compass . . . . . . . . . . . . . . . . . . . . . . . . . . . . . . . . . . 4-60
DIC Warnings and Messages . . . . . . . . . . . . . . . . . . 4-63
DIC Vehicle Customization (With DIC Buttons) . . . . . . . . . . . . . . . . . . . . . . . . . . . . . . . . . . . . . 4-73 Audio System(s)
. . . . . . . . . . . . . . . . . . . . . . . . . . . . . . . . . . 4-82
Setting the Clock . . . . . . . . . . . . . . . . . . . . . . . . . . . . . . 4-82
Radio(s) . . . . . . . . . . . . . . . . . . . . . . . . . . . . . . . . . . . . . . . 4-85
Using an MP3 (Radios with CD) . . . . . . . . . . . . . . 4-105
Using an MP3 (Radios with CD and DVD) . . . . 4-112
XM Radio Messages . . . . . . . . . . . . . . . . . . . . . . . . . 4-120
Navigation/Radio System . . . . . . . . . . . . . . . . . . . . . 4-121
Bluetooth
®. . . . . . . . . . . . . . . . . . . . . . . . . . . . . . . . . . . . 4-121
Rear Seat Entertainment (RSE) System . . . . . . 4-132
Rear Seat Audio (RSA) . . . . . . . . . . . . . . . . . . . . . . . 4-141
Theft-Deterrent Feature . . . . . . . . . . . . . . . . . . . . . . 4-143
Audio Steering Wheel Controls . . . . . . . . . . . . . . . 4-143
Radio Reception . . . . . . . . . . . . . . . . . . . . . . . . . . . . . . 4-146
Fixed Mast Antenna . . . . . . . . . . . . . . . . . . . . . . . . . . 4-147
XM™ Satellite Radio Antenna System . . . . . . . . 4-147
4-2
Page 221 of 626
Instrument Panel Overview
Hazard Warning Flashers
|(Hazard Warning Flasher):Press this button
located on top of the steering column, to make the front
and rear turn signal lamps flash on and off. This warns
others that you are having trouble. Press again to turn
the flashers off.
When the hazard warning flashers are on, the vehicle's
turn signals will not work.
Horn
To sound the horn, press the horn symbols located on
the steering wheel.
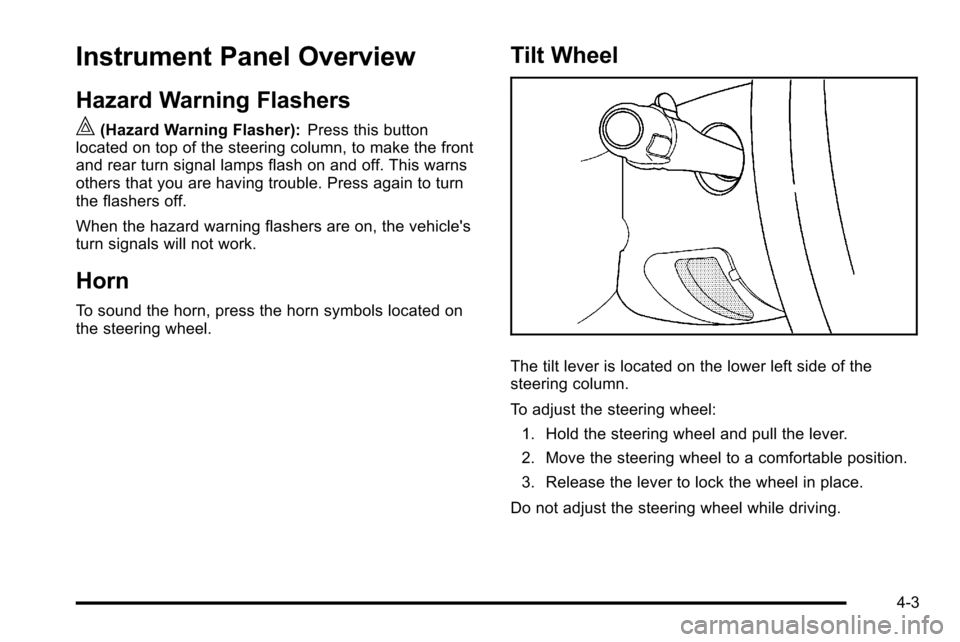
Tilt Wheel
The tilt lever is located on the lower left side of the
steering column.
To adjust the steering wheel:
1. Hold the steering wheel and pull the lever.
2. Move the steering wheel to a comfortable position.
3. Release the lever to lock the wheel in place.
Do not adjust the steering wheel while driving.
4-3
Page 224 of 626
Windshield Wipers
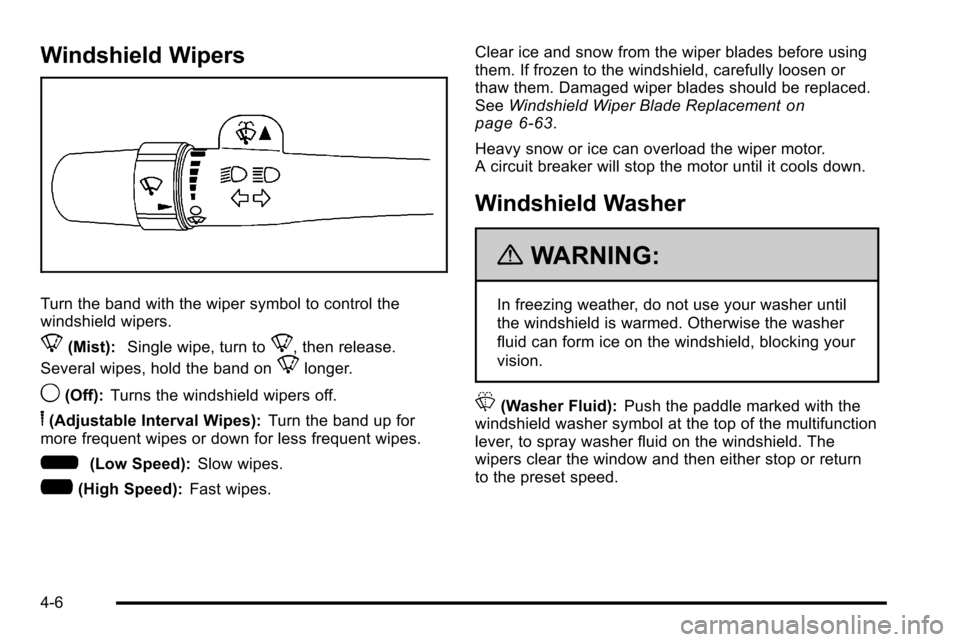
Turn the band with the wiper symbol to control the
windshield wipers.
8(Mist):Single wipe, turn to8, then release.
Several wipes, hold the band on
8longer.
9(Off): Turns the windshield wipers off.
6(Adjustable Interval Wipes): Turn the band up for
more frequent wipes or down for less frequent wipes.
6(Low Speed): Slow wipes.
?(High Speed): Fast wipes. Clear ice and snow from the wiper blades before using
them. If frozen to the windshield, carefully loosen or
thaw them. Damaged wiper blades should be replaced.
See
Windshield Wiper Blade Replacement
on
page 6‑63.
Heavy snow or ice can overload the wiper motor.
A circuit breaker will stop the motor until it cools down.
Windshield Washer
{WARNING:
In freezing weather, do not use your washer until
the windshield is warmed. Otherwise the washer
fluid can form ice on the windshield, blocking your
vision.
L(Washer Fluid): Push the paddle marked with the
windshield washer symbol at the top of the multifunction
lever, to spray washer fluid on the windshield. The
wipers clear the window and then either stop or return
to the preset speed.
4-6
Page 231 of 626
If the vehicle is started in a dark garage, the automatic
headlamp system comes on immediately. Once the
vehicle leaves the garage, it takes approximately
one minute for the automatic headlamp system to
change to DRL if it is bright enough outside. During that
delay, the instrument panel cluster may not be as bright
as usual. Make sure the instrument panel brightness
control is in the full bright position. SeeInstrument
Panel Brightness on page 4‑14.
To idle the vehicle with the automatic headlamp system
off, turn the control to the off position.
The headlamps will also stay on after you exit the
vehicle. This feature can be programmed using the
Driver Information Center (DIC), if equipped. See DIC
Vehicle Customization (With DIC Buttons)
on
page 4‑73.
If the vehicle is not equipped with DIC buttons, exit
lighting is automatic. When it is dark enough outside,
the exterior lamps remain on for 30 seconds after the
ignition is moved from ON/RUN to LOCK/OFF.
For vehicles without a radio, the instrument panel light
remains on for 30 seconds with the driver's door closed.
For vehicles with a radio, the instrument panel light
remains on for 10 minutes with the driver's door closed.
See Retained Accessory Power (RAP) on page 3‑23.
The regular headlamp system can be turned on when
needed.
Fog Lamps
For vehicles with fog lamps, the control is located next
to the exterior lamps control on the instrument panel, to
the left of the steering column.
The ignition must be in the ON/RUN position for the fog
lamps to come on.
#(Fog Lamps): Press to turn the fog lamps on or off.
A light will come on in the instrument panel cluster.
When the fog lamps are turned on, the parking lamps
automatically turn on.
When the headlamps are changed to high-beam, the
fog lamps also go off. When the high-beam headlamps
are turned off, the fog lamps will come on again.
Some localities have laws that require the headlamps to
be on along with the fog lamps.
4-13