2010 CHEVROLET SILVERADO check engine
[x] Cancel search: check enginePage 488 of 626
Jump Starting
If the vehicle is a Two-mode Hybrid, see the Two-mode
Hybrid manual for more information.
If the vehicle's battery (or batteries) has run down, you
may want to use another vehicle and some jumper
cables to start your vehicle. Be sure to use the following
steps to do it safely.
{WARNING:
Batteries can hurt you. They can be dangerous
because:
.They contain acid that can burn you.
.They contain gas that can explode or ignite.
.They contain enough electricity to burn you.
If you do not follow these steps exactly, some or
all of these things can hurt you.
Notice: Ignoring these steps could result in costly
damage to the vehicle that would not be covered by
the warranty. Trying to start the vehicle by pushing or pulling it
will not work, and it could damage the vehicle.
1. Check the other vehicle. It must have a 12-volt battery with a negative ground system.
Notice: If the other vehicle's system is not a 12-volt
system with a negative ground, both vehicles can
be damaged. Only use vehicles with 12-volt systems
with negative grounds to jump start your vehicle.
2. If you have a vehicle with a diesel engine with two batteries, you should know before you begin that,
especially in cold weather, you may not be able to
get enough power from a single battery in another
vehicle to start your diesel engine. If your vehicle
has more than one battery, using the battery that is
closer to the starter will reduce electrical
resistance. This is located on the passenger side,
in the rear of the engine compartment.
3. Get the vehicles close enough so the jumper cables can reach, but be sure the vehicles are not
touching each other. If they are, it could cause an
unwanted ground connection. You would not be
able to start your vehicle, and the bad grounding
could damage the electrical systems.
6-44
Page 491 of 626
6. Check that the jumper cables do not have loose ormissing insulation. If they do, you could get a
shock. The vehicles could be damaged too.
Before you connect the cables, here are some
basic things you should know. Positive (+) will go to
positive (+) or to a remote positive (+) terminal if
the vehicle has one. Negative (−) will go to a
heavy, unpainted metal engine part or to a remote
negative (−) terminal if the vehicle has one.
Do not connect positive (+) to negative (−) or you
will get a short that would damage the battery and
maybe other parts too. And do not connect the
negative (−) cable to the negative (−) terminal on
the dead battery because this can cause sparks.
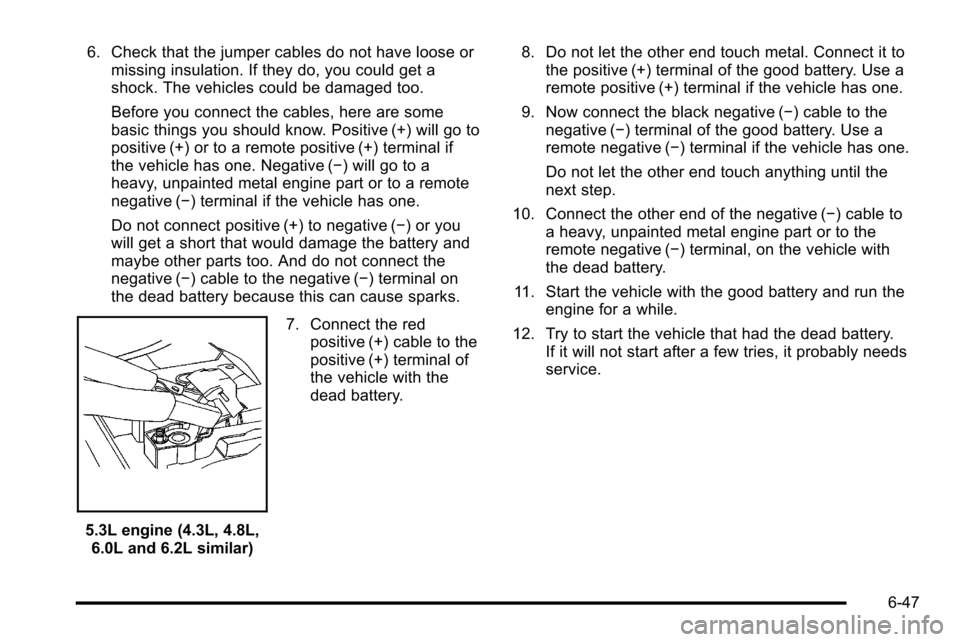
5.3L engine (4.3L, 4.8L,6.0L and 6.2L similar) 7. Connect the red
positive (+) cable to the
positive (+) terminal of
the vehicle with the
dead battery. 8. Do not let the other end touch metal. Connect it to
the positive (+) terminal of the good battery. Use a
remote positive (+) terminal if the vehicle has one.
9. Now connect the black negative (−) cable to the negative (−) terminal of the good battery. Use a
remote negative (−) terminal if the vehicle has one.
Do not let the other end touch anything until the
next step.
10. Connect the other end of the negative (−) cable to a heavy, unpainted metal engine part or to the
remote negative (−) terminal, on the vehicle with
the dead battery.
11. Start the vehicle with the good battery and run the engine for a while.
12. Try to start the vehicle that had the dead battery. If it will not start after a few tries, it probably needs
service.
6-47
Page 492 of 626
Notice:If the jumper cables are connected or
removed in the wrong order, electrical shorting may
occur and damage the vehicle. The repairs would
not be covered by the vehicle warranty. Always
connect and remove the jumper cables in the
correct order, making sure that the cables do not
touch each other or other metal.
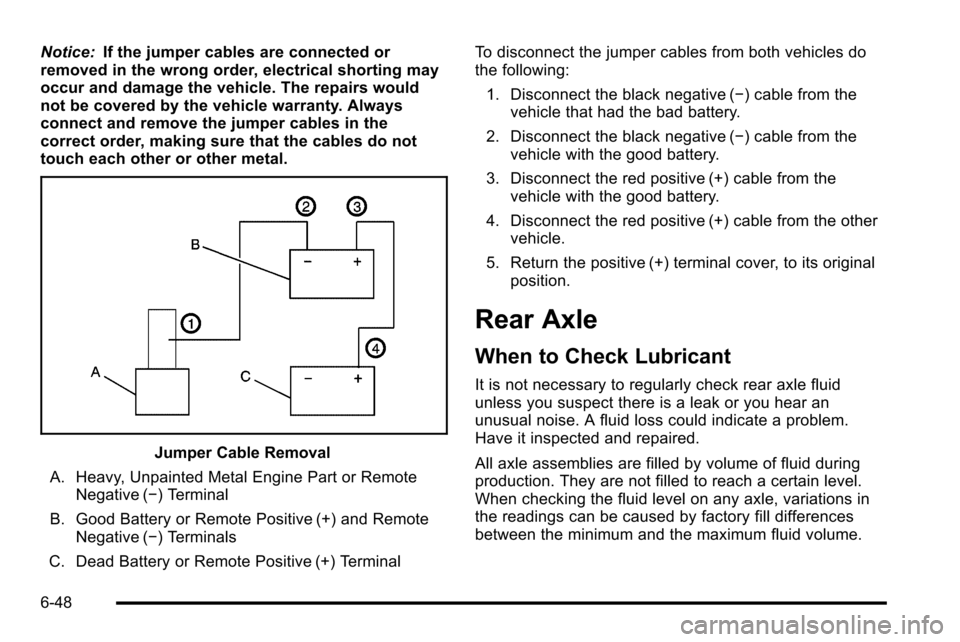
Jumper Cable Removal
A. Heavy, Unpainted Metal Engine Part or Remote Negative (−) Terminal
B. Good Battery or Remote Positive (+) and Remote Negative (−) Terminals
C. Dead Battery or Remote Positive (+) Terminal To disconnect the jumper cables from both vehicles do
the following:
1. Disconnect the black negative (−) cable from the vehicle that had the bad battery.
2. Disconnect the black negative (−) cable from the vehicle with the good battery.
3. Disconnect the red positive (+) cable from the vehicle with the good battery.
4. Disconnect the red positive (+) cable from the other vehicle.
5. Return the positive (+) terminal cover, to its original position.
Rear Axle
When to Check Lubricant
It is not necessary to regularly check rear axle fluid
unless you suspect there is a leak or you hear an
unusual noise. A fluid loss could indicate a problem.
Have it inspected and repaired.
All axle assemblies are filled by volume of fluid during
production. They are not filled to reach a certain level.
When checking the fluid level on any axle, variations in
the readings can be caused by factory fill differences
between the minimum and the maximum fluid volume.
6-48
Page 493 of 626
Also, if a vehicle has just been driven before checking
the fluid level, it may appear lower than normal because
fluid has traveled out along the axle tubes and has not
drained back to the sump area. Therefore, a reading
taken five minutes after the vehicle has been driven will
appear to have a lower fluid level than a vehicle that
has been stationary for an hour or two. Remember that
the rear axle assembly must be supported to get a true
reading.
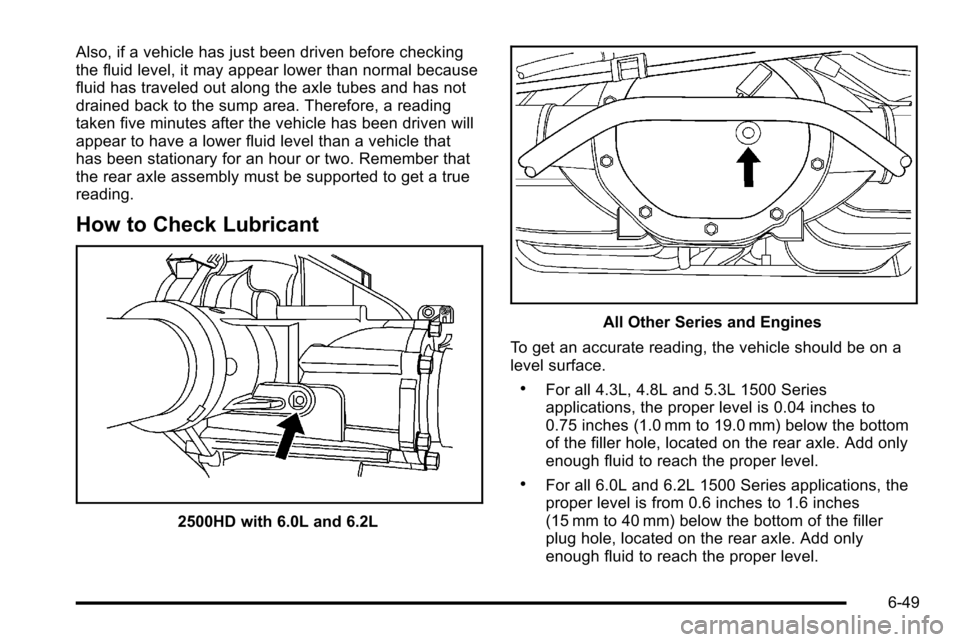
How to Check Lubricant
2500HD with 6.0L and 6.2L
All Other Series and Engines
To get an accurate reading, the vehicle should be on a
level surface.
.For all 4.3L, 4.8L and 5.3L 1500 Series
applications, the proper level is 0.04 inches to
0.75 inches (1.0 mm to 19.0 mm) below the bottom
of the filler hole, located on the rear axle. Add only
enough fluid to reach the proper level.
.For all 6.0L and 6.2L 1500 Series applications, the
proper level is from 0.6 inches to 1.6 inches
(15 mm to 40 mm) below the bottom of the filler
plug hole, located on the rear axle. Add only
enough fluid to reach the proper level.
6-49
Page 561 of 626
Vehicle Identification
Vehicle Identification Number (VIN)
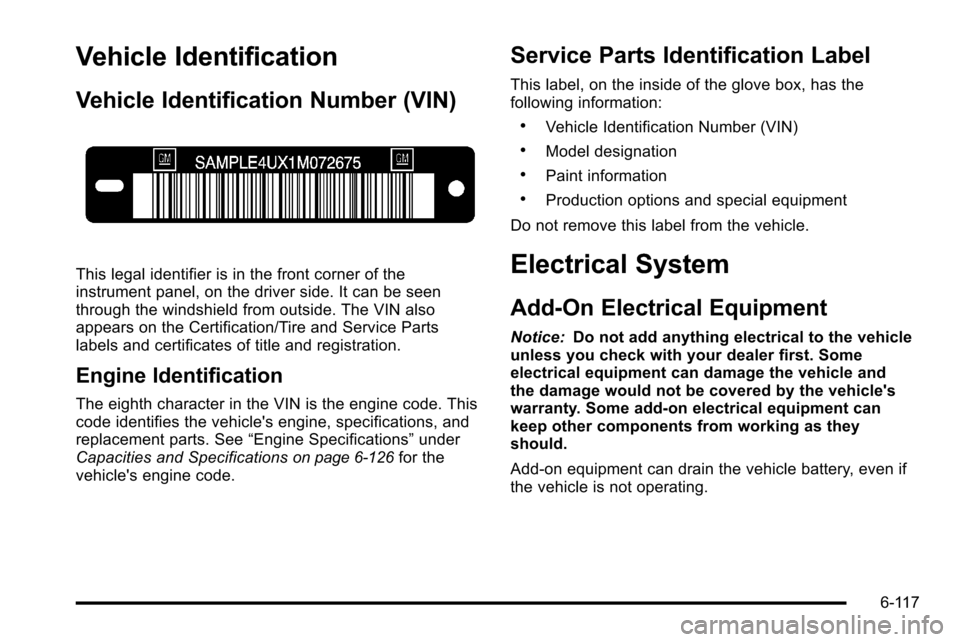
This legal identifier is in the front corner of the
instrument panel, on the driver side. It can be seen
through the windshield from outside. The VIN also
appears on the Certification/Tire and Service Parts
labels and certificates of title and registration.
Engine Identification
The eighth character in the VIN is the engine code. This
code identifies the vehicle's engine, specifications, and
replacement parts. See“Engine Specifications”under
Capacities and Specifications
on page 6‑126for the
vehicle's engine code.
Service Parts Identification Label
This label, on the inside of the glove box, has the
following information:
.Vehicle Identification Number (VIN)
.Model designation
.Paint information
.Production options and special equipment
Do not remove this label from the vehicle.
Electrical System
Add-On Electrical Equipment
Notice: Do not add anything electrical to the vehicle
unless you check with your dealer first. Some
electrical equipment can damage the vehicle and
the damage would not be covered by the vehicle's
warranty. Some add-on electrical equipment can
keep other components from working as they
should.
Add-on equipment can drain the vehicle battery, even if
the vehicle is not operating.
6-117
Page 573 of 626
Section 7 Maintenance Schedule
Maintenance Schedule. . . . . . . . . . . . . . . . . . . . . . . . . . . . 7-2
Introduction . . . . . . . . . . . . . . . . . . . . . . . . . . . . . . . . . . . . . 7-2
Scheduled Maintenance . . . . . . . . . . . . . . . . . . . . . . . . 7-3
Owner Checks and Services . . . . . . . . . . . . . . . . . . . 7-11 Recommended Fluids and Lubricants . . . . . . . . . . 7-13
Maintenance Replacement Parts . . . . . . . . . . . . . . 7-15
Engine Drive Belt Routing . . . . . . . . . . . . . . . . . . . . . 7-16
Maintenance Record . . . . . . . . . . . . . . . . . . . . . . . . . . . 7-17
7-1
Page 574 of 626
Maintenance Schedule
Introduction
This maintenance section applies to vehicles with a
gasoline engine. For diesel engine vehicles, see the
maintenance schedule section in the DURAMAX Diesel
manual.
Notice:Maintenance intervals, checks, inspections,
recommended fluids, and lubricants are necessary
to keep this vehicle in good working condition.
Damage caused by failure to follow scheduled
maintenance might not be covered by the vehicle
warranty.
As the vehicle owner, you are responsible for the
scheduled maintenance in this section. We recommend
having your dealer perform these services. Proper
vehicle maintenance helps to keep the vehicle in good
working condition, improves fuel economy, and reduces
vehicle emissions for better air quality.
Because of all the different ways people use vehicles,
maintenance needs vary. The vehicle might need more
frequent checks and services. Please read the
information under Scheduled Maintenance. To keep the
vehicle in good condition, see your dealer. The maintenance schedule is for vehicles that:
.carry passengers and cargo within recommended
limits on the Tire and Loading Information label.
See
Loading the Vehicle on page 5‑29.
.are driven on reasonable road surfaces within legal
driving limits.
.are driven off‐road in the recommended manner.
SeeOff-Road Driving on page 5‑11.
.use the recommended fuel. See Gasoline Octaneon page 6‑7.
{WARNING:
Performing maintenance work on a vehicle can be
dangerous. In trying to do some jobs, you can be
seriously injured. Do your own maintenance work
only if you have the required know-how and the
proper tools and equipment for the job. If you
have any doubt, see your dealer to have a
qualified technician do the work. See Doing Your
Own Service Work on page 6‑5.
7-2
Page 575 of 626
At your dealer, you can be certain that you will receive
the highest level of service available. Your dealer has
specially trained service technicians, uses genuine
replacement parts, as well as, up to date tools and
equipment to ensure fast and accurate diagnostics.
The proper replacement parts, fluids, and lubricants to
use are listed inRecommended Fluids and Lubricants
on page 7‑13andMaintenance Replacement Partson
page 7‑15. We recommend the use of genuine parts
from your dealer.
Rotation of New Tires
To maintain ride, handling, and performance of the
vehicle, it is important that the first rotation service for
new tires be performed when they have 8 000 to
13 000 km (5,000 to 8,000 miles). See Tire Inspection
and Rotation on page 6‑80.
Scheduled Maintenance
When the Change Engine Oil Soon
Message Displays
Change engine oil and filter. See Engine Oilon
page 6‑18. An Emission Control Service.
When the Change Engine Oil Soon message displays,
service is required for the vehicle as soon as possible,
within the next 1 000 km/600 miles. If driving under the
best conditions, the engine oil life system might not indicate the need for vehicle service for more than a
year. The engine oil and filter must be changed at least
once a year and the oil life system must be reset. Your
dealer has trained service technicians who will perform
this work and reset the system. If the engine oil life
system is reset accidentally, service the vehicle within
5 000 km/3,000 miles since the last service. Reset the
oil life system whenever the oil is changed. See
Engine
Oil Life System on page 6‑20.
When the Change Engine Oil Soon message displays,
certain services, checks, and inspections are required.
The services described for Maintenance Ishould be
performed at every engine oil change. The services
described for Maintenance IIshould be
performed when:
.Maintenance Iwas performed the last time the
engine oil was changed.
.It has been 10 months or more since the Change
Engine Oil Soon message has displayed or since
the last service.
7-3