2010 CHEVROLET SILVERADO service
[x] Cancel search: servicePage 191 of 626
Shifting Out of Park
This vehicle is equipped with an electronic shift lock
release system. The shift lock release is designed to:
.Prevent ignition key removal unless the shift lever
is in P (Park) with the shift lever button fully
released, and
.Prevent movement of the shift lever out of P (Park),
unless the ignition is in ON/RUN or ACC/
ACCESSORY and the regular brake pedal is
applied.
The shift lock release is always functional except in the
case of an uncharged or low voltage (less than 9 volt)
battery.
If the vehicle has an uncharged battery or a battery with
low voltage, try charging or jump starting the battery.
See Jump Starting
on page 6‑44for more information. To shift out of P (Park) use the following:
1. Apply the brake pedal.
2. Move the shift lever to the desired position.
If you still are unable to shift out of P (Park): 1. Ease the pressure on the shift lever.
2. While holding down the brake pedal, press the shift lever all the way into P (Park).
3. Move the shift lever to the desired position.
If you are still having a problem shifting, then have the
vehicle serviced soon.
Parking Over Things That Burn
{WARNING:
Things that can burn could touch hot exhaust
parts under the vehicle and ignite. Do not park
over papers, leaves, dry grass, or other things that
can burn.
3-53
Page 194 of 626

Mirrors
Manual Rearview Mirror
Hold the inside rearview mirror in the center to move it
for a clearer view behind your vehicle. Adjust the mirror
to avoid glare from the headlamps behind you. Push the
tab forward for daytime use and pull it for nighttime use.
Automatic Dimming Rearview Mirror
The vehicle may have an automatic dimming inside
rearview mirror.
Vehicles with OnStar
®have three additional control
buttons for the OnStar®system. See your dealer for
more information about OnStar®and how to subscribe
to it. See the OnStar®owner guide for more information
about the services OnStar®provides.
O(On/Off): Press to turn the dimming feature on or off.
The vehicle may also have a Rear Vision Camera
(RVC). See Rear Vision Camera (RVC)
on page 3‑63for more information.
If the vehicle has RVC, the
Obutton may not be
available.
Automatic Dimming Mirror Operation
Automatic dimming reduces the glare from the
headlamps of the vehicle behind you. The dimming
feature comes on and the indicator light illuminates
each time the ignition is turned to start.
Cleaning the Mirror
Do not spray glass cleaner directly on the mirror. Use a
soft towel dampened with water.
Outside Manual Mirrors
Adjust the outside mirror for a clearer view.
Manually fold the mirrors inward to prevent damage
when going through an automatic car wash. To fold,
push the mirror toward the vehicle. Push the mirror
outward, to return to its original position.
Using hood-mounted air deflectors and add-on convex
mirror attachments could decrease mirror performance.
3-56
Page 200 of 626

When the System Does Not Seem to
Work Properly
If the URPA system will not activate due to a temporary
condition, the messages PARK ASSIST OFF or PARK
ASST BLOCKED SEE OWNERS MANUAL will be
displayed on the DIC.
SERVICE PARK ASSIST:If this message occurs, take
the vehicle to your dealer to repair the system.
PARK ASSIST OFF: This message occurs if the driver
disables the system.
PARK ASST BLOCKED SEE OWNERS MANUAL:
This message can occur under the following conditions:
.The ultrasonic sensors are not clean. Keep the
vehicle's rear bumper free of mud, dirt, snow, ice
and slush. For cleaning instructions, see Washing
Your Vehicle on page 6‑113.
.The park assist sensors are covered by frost or
ice. Frost or ice can form around and behind the
sensors and may not always be seen; this can
occur after washing the vehicle in cold weather.
The message may not clear until the frost or ice
has melted.
.A trailer was attached to the vehicle, or a bicycle or
an object was hanging out of the tailgate during the
last drive cycle. Once the attached object is
removed and the tailgate is raised, URPA will
return to normal operation.
.A tow bar is attached to the vehicle.
.The vehicle's bumper is damaged. Take the vehicle
to your dealer to repair the system.
.Other conditions may affect system performance,
such as vibrations from a jackhammer or the
compression of air brakes on a very large truck.
If the system is still disabled, after driving forward at
least 40 km/h (25 mph), take the vehicle to your dealer.
3-62
Page 203 of 626
Adjusting the Brightness and Contrast of
the Screen
To adjust the brightness and contrast of the screen,
press the MENU button while the rear vision camera
image is on the display. Any adjustments made will only
affect the rear vision camera screen.
](Brightness) :Touch the + (plus) or –(minus)
screen buttons to increase or decrease the brightness
of the screen.
_(Contrast) : Touch the + (plus) or –(minus) screen
buttons to increase or decrease the contrast of the
screen.
Symbols
The navigation system may have a feature that lets the
driver view symbols on the navigation screen while
using the rear vision camera. The Ultrasonic Rear Park
Assist (URPA) system must not be disabled to use the
caution symbols. If URPA has been disabled and the
symbols have been turned on, the Rear Parking Assist
Symbols Unavailable error message may display. See
Ultrasonic Rear Parking Assist (URPA) on page 3‑60. The symbols appear when an object has been detected
by the URPA system. The symbol may cover the object
when viewing the navigation screen.
To turn the symbols on or off:
1. Make sure that URPA has not been disabled.
2. Shift into P (Park).
3. Press the MENU hard key to enter the configure menu options, then press the MENU hard key
repeatedly until Display is selected or touch the
Display screen button.
4. Select the Rear Camera Options screen button. The Rear Camera Options screen will display.
5. Touch the Symbols screen button. The screen button will be highlighted when on.
Rear Vision Camera Error Messages
Service Rear Vision Camera System: This message
can display when the system is not receiving
information it requires from other vehicle systems.
If any other problem occurs or if a problem persists, see
your dealer.
3-65
Page 232 of 626
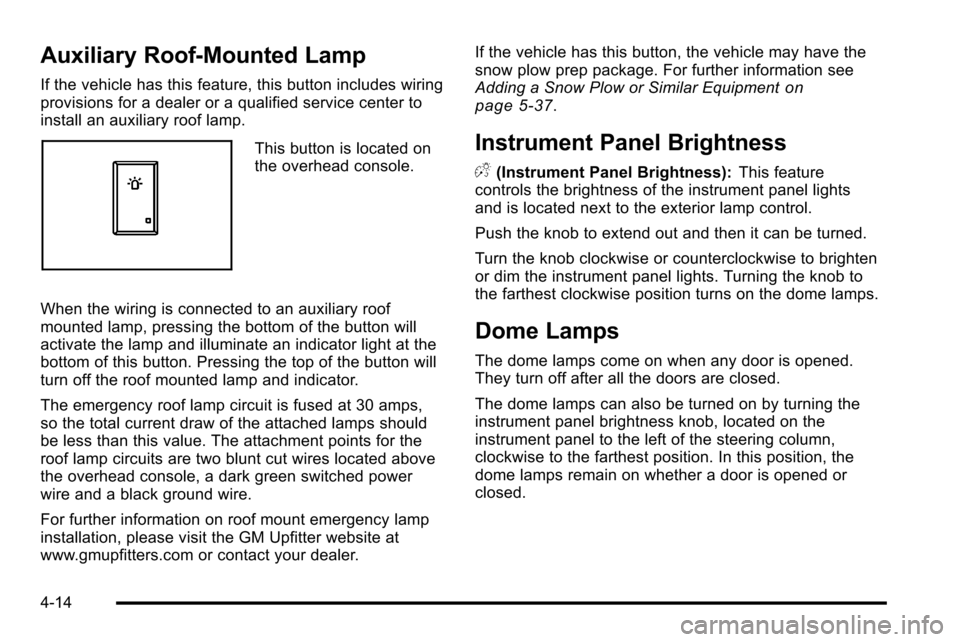
Auxiliary Roof-Mounted Lamp
If the vehicle has this feature, this button includes wiring
provisions for a dealer or a qualified service center to
install an auxiliary roof lamp.
This button is located on
the overhead console.
When the wiring is connected to an auxiliary roof
mounted lamp, pressing the bottom of the button will
activate the lamp and illuminate an indicator light at the
bottom of this button. Pressing the top of the button will
turn off the roof mounted lamp and indicator.
The emergency roof lamp circuit is fused at 30 amps,
so the total current draw of the attached lamps should
be less than this value. The attachment points for the
roof lamp circuits are two blunt cut wires located above
the overhead console, a dark green switched power
wire and a black ground wire.
For further information on roof mount emergency lamp
installation, please visit the GM Upfitter website at
www.gmupfitters.com or contact your dealer. If the vehicle has this button, the vehicle may have the
snow plow prep package. For further information see
Adding a Snow Plow or Similar Equipment
on
page 5‑37.
Instrument Panel Brightness
D (Instrument Panel Brightness): This feature
controls the brightness of the instrument panel lights
and is located next to the exterior lamp control.
Push the knob to extend out and then it can be turned.
Turn the knob clockwise or counterclockwise to brighten
or dim the instrument panel lights. Turning the knob to
the farthest clockwise position turns on the dome lamps.
Dome Lamps
The dome lamps come on when any door is opened.
They turn off after all the doors are closed.
The dome lamps can also be turned on by turning the
instrument panel brightness knob, located on the
instrument panel to the left of the steering column,
clockwise to the farthest position. In this position, the
dome lamps remain on whether a door is opened or
closed.
4-14
Page 250 of 626

Airbag Readiness Light
The system checks the airbag's electrical system for
possible malfunctions. If the light stays on it indicates
there is an electrical problem. The system check
includes the airbag sensor, the pretensioners, the
airbag modules, the wiring and the crash sensing and
diagnostic module. For more information on the airbag
system, seeAirbag System on page 2‑73.
The airbag readiness light
comes on solid for a few
seconds when the engine
is started. If the light does
not come on then, have it
fixed immediately.
{WARNING:
If the airbag readiness light stays on after the
vehicle is started or comes on while driving, it
means the airbag system might not be working
properly. The airbags in the vehicle might not
inflate in a crash, or they could even inflate
without a crash. To help avoid injury, have the
vehicle serviced right away. If there is a problem with the airbag system, an airbag
Driver Information Center (DIC) message can also
come on. See
DIC Warnings and Messages
on
page 4‑63for more information.
Airbag Off Light
If the vehicle has an airbag on-off switch, it also has a
passenger airbag status indicator located in the
overhead console.
United StatesCanada
When the vehicle is started, the passenger airbag
status indicator will light ON and OFF, or the symbol for
on and off, will light for several seconds as a system
check. Then, after several more seconds, the status
indicator ON or OFF, or either the on or off symbol, will
light to let you know the status of the right front
passenger frontal airbag.
4-32
Page 252 of 626
{WARNING:
If the airbag readiness light ever comes on and
stays on, it means that something may be wrong
with the airbag system. For example, the right
front passenger airbag could inflate even though
the airbag on-off switch is turned off.
To help avoid injury to yourself or others, have the
vehicle serviced right away. SeeAirbag
Readiness Light
on page 4‑32for more
information, including important safety information.
If the word ON or the on symbol is lit, it means that the
right front passenger frontal airbag is enabled (may
inflate). See Airbag Off Switch
on page 2‑82for more
information, including important safety information.
If, after several seconds, both status indicator lights
remain on, or if there are no lights at all, there may be a
problem with the lights or the airbag on-off switch. See
your dealer for service.
Passenger Airbag Status Indicator
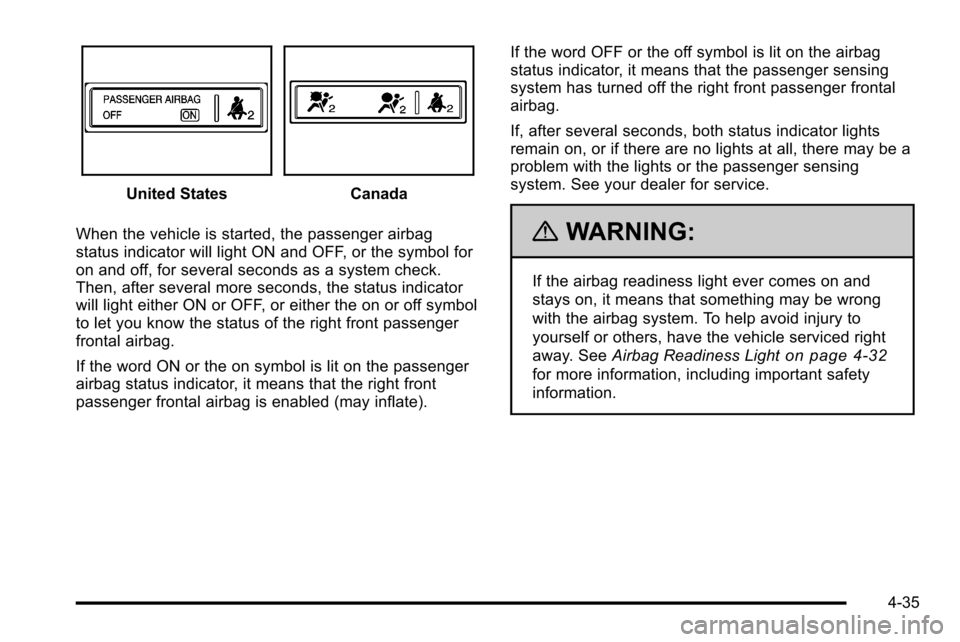
If the vehicle has one of the indicators pictured in the
following illustrations, then the vehicle has a passenger
sensing system for the right front passenger position
unless there is an airbag off switch located in the glove
box. If there is an airbag off switch, the vehicle does not
have a passenger system system. See Airbag Off
Switch on page 2‑82.
The passenger airbag status indicator is on the
overhead console. See Passenger Sensing System
on
page 2‑86for important safety information.
In addition, if the vehicle has a passenger sensing
system for the right front passenger position, the label
on the vehicle's sun visor refers to “ADVANCED
AIRBAGS”.
4-34
Page 253 of 626
United StatesCanada
When the vehicle is started, the passenger airbag
status indicator will light ON and OFF, or the symbol for
on and off, for several seconds as a system check.
Then, after several more seconds, the status indicator
will light either ON or OFF, or either the on or off symbol
to let you know the status of the right front passenger
frontal airbag.
If the word ON or the on symbol is lit on the passenger
airbag status indicator, it means that the right front
passenger frontal airbag is enabled (may inflate). If the word OFF or the off symbol is lit on the airbag
status indicator, it means that the passenger sensing
system has turned off the right front passenger frontal
airbag.
If, after several seconds, both status indicator lights
remain on, or if there are no lights at all, there may be a
problem with the lights or the passenger sensing
system. See your dealer for service.
{WARNING:
If the airbag readiness light ever comes on and
stays on, it means that something may be wrong
with the airbag system. To help avoid injury to
yourself or others, have the vehicle serviced right
away. See
Airbag Readiness Light
on page 4‑32
for more information, including important safety
information.
4-35