2010 CHEVROLET SILVERADO lights
[x] Cancel search: lightsPage 232 of 626
Auxiliary Roof-Mounted Lamp
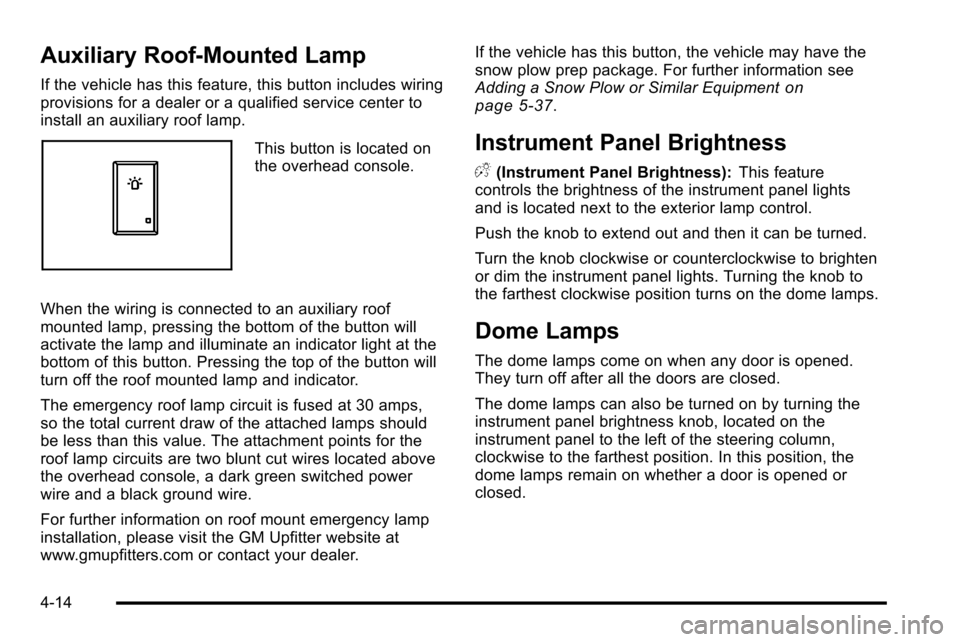
If the vehicle has this feature, this button includes wiring
provisions for a dealer or a qualified service center to
install an auxiliary roof lamp.
This button is located on
the overhead console.
When the wiring is connected to an auxiliary roof
mounted lamp, pressing the bottom of the button will
activate the lamp and illuminate an indicator light at the
bottom of this button. Pressing the top of the button will
turn off the roof mounted lamp and indicator.
The emergency roof lamp circuit is fused at 30 amps,
so the total current draw of the attached lamps should
be less than this value. The attachment points for the
roof lamp circuits are two blunt cut wires located above
the overhead console, a dark green switched power
wire and a black ground wire.
For further information on roof mount emergency lamp
installation, please visit the GM Upfitter website at
www.gmupfitters.com or contact your dealer. If the vehicle has this button, the vehicle may have the
snow plow prep package. For further information see
Adding a Snow Plow or Similar Equipment
on
page 5‑37.
Instrument Panel Brightness
D (Instrument Panel Brightness): This feature
controls the brightness of the instrument panel lights
and is located next to the exterior lamp control.
Push the knob to extend out and then it can be turned.
Turn the knob clockwise or counterclockwise to brighten
or dim the instrument panel lights. Turning the knob to
the farthest clockwise position turns on the dome lamps.
Dome Lamps
The dome lamps come on when any door is opened.
They turn off after all the doors are closed.
The dome lamps can also be turned on by turning the
instrument panel brightness knob, located on the
instrument panel to the left of the steering column,
clockwise to the farthest position. In this position, the
dome lamps remain on whether a door is opened or
closed.
4-14
Page 233 of 626
Dome Lamp Override
The dome lamp override button is located next to the
exterior lamps control.
k(Dome Off):Press the button in and the dome
lamps remain off when a door is opened. Press the
button again to return it to the extended position so that
the dome lamps come on when a door is opened.
Entry Lighting
The vehicle has an illuminated entry feature.
When the doors are opened, the dome lamps will come
on if the dome override button is in the extended
position. If the dome override button is pressed in, the
lamps will not come on.
Exit Lighting
The interior lamps come on when the key is removed
from the ignition. They turn off automatically in
20 seconds. The lights do not come on if the dome
override button is pressed in.
Reading Lamps
For vehicles with reading lamps, they are located on the
overhead console.
To turn on the reading lamps, press the button located
next to each lamp. To turn them off, press the button
again.
The vehicle may also have reading lamps in other
locations. To turn the lamps on or off, press the button
located next to the lamp.
If the vehicle has a DVD Rear Seat Entertainment
(RSE) system, press the lamp lenses to turn the lamps
on or off.
The lamps are fixed and cannot be adjusted.
Cargo Lamp
The cargo lamps come on by turning the instrument
panel brightness control knob to the farthest clockwise
position. This knob is located on the instrument panel
and also turns on the dome lamps.
The cargo lamp can be used if more light is needed in
the cargo area of the vehicle or in the top-box storage
units.
4-15
Page 246 of 626
Outlet Adjustment
Use the air outlets located in the center and on the side
of the instrument panel to direct the airflow. Use the
thumbwheels near the air outlets to open or close off
the airflow.
Operation Tips
.Clear away any ice, snow, or leaves from air inlets
at the base of the windshield that could block the
flow of air into the vehicle.
.Keep the path under the front seats clear of
objects to help circulate the air inside of the vehicle
more effectively.
.Use of non‐GM approved hood deflectors can
adversely affect the performance of the system.
Check with your dealer before adding equipment to
the outside of the vehicle.
Warning Lights, Gauges, and
Indicators
Warning lights and gauges can signal that something is
wrong before it becomes serious enough to cause an
expensive repair or replacement. Paying attention to the
warning lights and gauges could prevent injury.
Warning lights come on when there might be or there is
a problem with one of the vehicle's functions. Some
warning lights come on briefly when the engine is
started to indicate they are working.
Gauges can indicate when there might be or there is a
problem with one of the vehicle's functions. Often
gauges and warning lights work together to indicate a
problem with the vehicle.
When one of the warning lights comes on and stays on
while driving, or when one of the gauges shows there
could be a problem, check the section that explains
what to do. Follow this manual's advice. Waiting to do
repairs can be costly and even dangerous.
4-28
Page 252 of 626
{WARNING:
If the airbag readiness light ever comes on and
stays on, it means that something may be wrong
with the airbag system. For example, the right
front passenger airbag could inflate even though
the airbag on-off switch is turned off.
To help avoid injury to yourself or others, have the
vehicle serviced right away. SeeAirbag
Readiness Light
on page 4‑32for more
information, including important safety information.
If the word ON or the on symbol is lit, it means that the
right front passenger frontal airbag is enabled (may
inflate). See Airbag Off Switch
on page 2‑82for more
information, including important safety information.
If, after several seconds, both status indicator lights
remain on, or if there are no lights at all, there may be a
problem with the lights or the airbag on-off switch. See
your dealer for service.
Passenger Airbag Status Indicator
If the vehicle has one of the indicators pictured in the
following illustrations, then the vehicle has a passenger
sensing system for the right front passenger position
unless there is an airbag off switch located in the glove
box. If there is an airbag off switch, the vehicle does not
have a passenger system system. See Airbag Off
Switch on page 2‑82.
The passenger airbag status indicator is on the
overhead console. See Passenger Sensing System
on
page 2‑86for important safety information.
In addition, if the vehicle has a passenger sensing
system for the right front passenger position, the label
on the vehicle's sun visor refers to “ADVANCED
AIRBAGS”.
4-34
Page 253 of 626
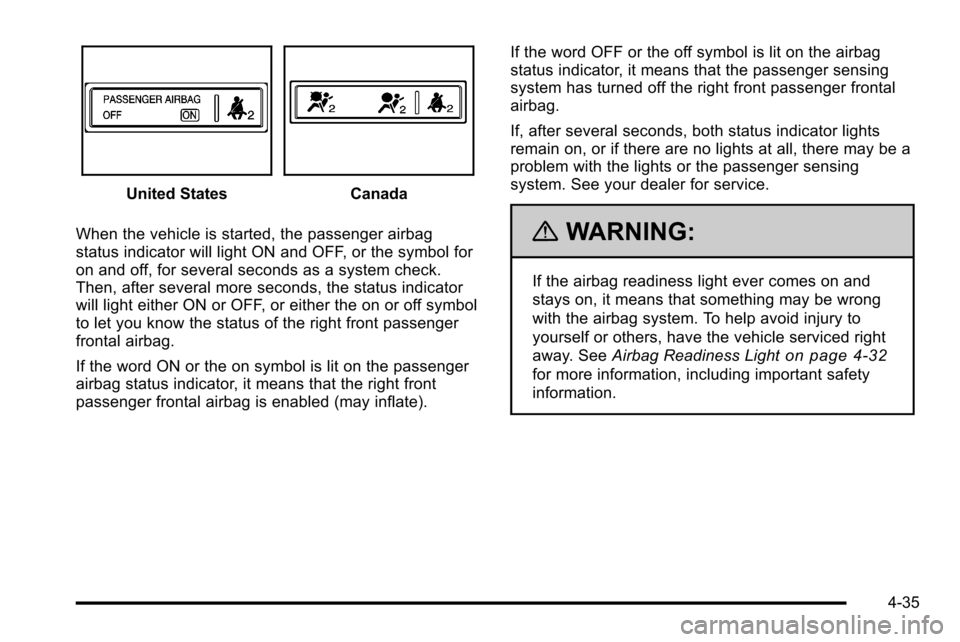
United StatesCanada
When the vehicle is started, the passenger airbag
status indicator will light ON and OFF, or the symbol for
on and off, for several seconds as a system check.
Then, after several more seconds, the status indicator
will light either ON or OFF, or either the on or off symbol
to let you know the status of the right front passenger
frontal airbag.
If the word ON or the on symbol is lit on the passenger
airbag status indicator, it means that the right front
passenger frontal airbag is enabled (may inflate). If the word OFF or the off symbol is lit on the airbag
status indicator, it means that the passenger sensing
system has turned off the right front passenger frontal
airbag.
If, after several seconds, both status indicator lights
remain on, or if there are no lights at all, there may be a
problem with the lights or the passenger sensing
system. See your dealer for service.
{WARNING:
If the airbag readiness light ever comes on and
stays on, it means that something may be wrong
with the airbag system. To help avoid injury to
yourself or others, have the vehicle serviced right
away. See
Airbag Readiness Light
on page 4‑32
for more information, including important safety
information.
4-35
Page 293 of 626
AUTO DOOR UNLOCK
This feature allows you to select whether or not to turn
off the automatic door unlocking feature. It also allows
you to select which doors and when the doors will
automatically unlock. SeeProgrammable Automatic
Door Locks
on page 3‑10for more information.
Press the customization button until AUTO DOOR
UNLOCK appears on the DIC display. Press the set/
reset button once to access the settings for this feature.
Then press the customization button to scroll through
the following settings:
OFF: None of the doors will automatically unlock.
DRIVER AT KEY OUT: Only the driver's door will
unlock when the key is taken out of the ignition.
DRIVER IN PARK: Only the driver's door will unlock
when the vehicle is shifted into P (Park) .
ALL AT KEY OUT: All of the doors will unlock when the
key is taken out of the ignition.
ALL IN PARK (default): All of the doors will unlock
when the vehicle is shifted into P (Park).
NO CHANGE: No change will be made to this feature.
The current setting will remain.
To select a setting, press the set/reset button while the
desired setting is displayed on the DIC.
REMOTE DOOR LOCK
This feature allows you to select the type of feedback
you will receive when locking the vehicle with the
Remote Keyless Entry (RKE) transmitter. You will not
receive feedback when locking the vehicle with the RKE
transmitter if the doors are open. See Remote Keyless
Entry (RKE) System Operation
on page 3‑4for more
information.
Press the customization button until REMOTE DOOR
LOCK appears on the DIC display. Press the set/reset
button once to access the settings for this feature. Then
press the customization button to scroll through the
following settings:
OFF: There will be no feedback when you press the
lock button on the RKE transmitter.
LIGHTS ONLY: The exterior lamps will flash when you
press the lock button on the RKE transmitter.
HORN ONLY: The horn will sound on the second press
of the lock button on the RKE transmitter.
HORN & LIGHTS (default): The exterior lamps will
flash when you press the lock button on the RKE
transmitter, and the horn will sound when the lock
button is pressed again within five seconds of the
previous command.
4-75
Page 294 of 626
NO CHANGE:No change will be made to this feature.
The current setting will remain.
To select a setting, press the set/reset button while the
desired setting is displayed on the DIC.
REMOTE DOOR UNLOCK
This feature allows you to select the type of feedback
you will receive when unlocking the vehicle with the
Remote Keyless Entry (RKE) transmitter. You will not
receive feedback when unlocking the vehicle with the
RKE transmitter if the doors are open. See Remote
Keyless Entry (RKE) System Operation
on page 3‑4for more information.
Press the customization button until REMOTE DOOR
UNLOCK appears on the DIC display. Press the set/
reset button once to access the settings for this feature.
Then press the customization button to scroll through
the following settings:
LIGHTS OFF: The exterior lamps will not flash when
you press the unlock button on the RKE transmitter.
LIGHTS ON (default): The exterior lamps will flash
when you press the unlock button on the RKE
transmitter.
NO CHANGE: No change will be made to this feature.
The current setting will remain.
To select a setting, press the set/reset button while the
desired setting is displayed on the DIC.
DELAY DOOR LOCK
On vehicles with a crew cab, this feature allows you to
select whether or not the locking of the vehicle's doors
will be delayed. When locking the doors with the power
door lock switch and a door is open, this feature will
delay locking the doors until five seconds after the last
door is closed. You will hear three chimes to signal that
the delayed locking feature is in use. The key must be
out of the ignition for this feature to work. You can
temporarily override delayed locking by pressing the
power door lock switch twice. See Delayed Locking
on
page 3‑10for more information.
Press the customization button until DELAY DOOR
LOCK appears on the DIC display. Press the set/reset
button once to access the settings for this feature. Then
press the customization button to scroll through the
following settings:
OFF: There will be no delayed locking of the vehicle's
doors.
ON (default): The doors will not lock until five seconds
after the last door is closed.
NO CHANGE: No change will be made to this feature.
The current setting will remain.
To select a setting, press the set/reset button while the
desired setting is displayed on the DIC.
4-76
Page 295 of 626
EXIT LIGHTING
This feature allows you to select the amount of time you
want the exterior lamps to remain on when it is dark
enough outside. This happens after the key is turned
from ON/RUN to LOCK/OFF.
Press the customization button until EXIT LIGHTING
appears on the DIC display. Press the set/reset button
once to access the settings for this feature. Then press
the customization button to scroll through the following
settings:
OFF:The exterior lamps will not turn on.
30 SECONDS (default): The exterior lamps will stay on
for 30 seconds.
1 MINUTE: The exterior lamps will stay on for
one minute.
2 MINUTES: The exterior lamps will stay on for
two minutes.
NO CHANGE: No change will be made to this feature.
The current setting will remain.
To select a setting, press the set/reset button while the
desired setting is displayed on the DIC.
APPROACH LIGHTING
This feature allows you to select whether or not to have
the exterior lights turn on briefly during low light periods
after unlocking the vehicle using the Remote Keyless
Entry (RKE) transmitter.
Press the customization button until APPROACH
LIGHTING appears on the DIC display. Press the set/
reset button once to access the settings for this feature.
Then press the customization button to scroll through
the following settings:
OFF: The exterior lights will not turn on when you
unlock the vehicle with the RKE transmitter.
ON (default): If it is dark enough outside, the exterior
lights will turn on briefly when you unlock the vehicle
with the RKE transmitter.
The lights will remain on for 20 seconds or until the lock
button on the RKE transmitter is pressed, or the vehicle
is no longer off. See Remote Keyless Entry (RKE)
System Operation
on page 3‑4for more information.
NO CHANGE: No change will be made to this feature.
The current setting will remain.
To select a setting, press the set/reset button while the
desired setting is displayed on the DIC.
4-77