2010 CHEVROLET SILVERADO mirror
[x] Cancel search: mirrorPage 43 of 626
Section 2 Seats and Restraint System
Head Restraints. . . . . . . . . . . . . . . . . . . . . . . . . . . . . . . . . . . . 2-3
Front Seats . . . . . . . . . . . . . . . . . . . . . . . . . . . . . . . . . . . . . . . . . 2-4
Manual Seats . . . . . . . . . . . . . . . . . . . . . . . . . . . . . . . . . . . 2-4
Power Seats . . . . . . . . . . . . . . . . . . . . . . . . . . . . . . . . . . . . 2-5
Manual Lumbar . . . . . . . . . . . . . . . . . . . . . . . . . . . . . . . . . 2-6
Power Lumbar . . . . . . . . . . . . . . . . . . . . . . . . . . . . . . . . . . 2-7
Heated Seats . . . . . . . . . . . . . . . . . . . . . . . . . . . . . . . . . . . 2-8
Memory Seat, Mirrors, and Pedals . . . . . . . . . . . . . . 2-8
Reclining Seatbacks . . . . . . . . . . . . . . . . . . . . . . . . . . . 2-10
Seatback Latches . . . . . . . . . . . . . . . . . . . . . . . . . . . . . 2-13
Center Seat . . . . . . . . . . . . . . . . . . . . . . . . . . . . . . . . . . . . 2-13
Rear Seats . . . . . . . . . . . . . . . . . . . . . . . . . . . . . . . . . . . . . . . . 2-14
Rear Seat Operation (Extended Cab Full Bench) . . . . . . . . . . . . . . . . . . . . . . . . . . . . . . . . . . . . . . 2-14
Rear Seat Operation (All Split Bench and Hybrid Full Bench) . . . . . . . . . . . . . . . . . . . . . . . . . . . . . . . . . . 2-15
Safety Belts . . . . . . . . . . . . . . . . . . . . . . . . . . . . . . . . . . . . . . . 2-16
Safety Belts: They Are for Everyone . . . . . . . . . . . 2-16
How to Wear Safety Belts Properly . . . . . . . . . . . . 2-21
Lap-Shoulder Belt . . . . . . . . . . . . . . . . . . . . . . . . . . . . . 2-30 Safety Belt Use During Pregnancy . . . . . . . . . . . . . 2-37
Lap Belt (Crew and Extended Cab) . . . . . . . . . . . . 2-37
Safety Belt Extender . . . . . . . . . . . . . . . . . . . . . . . . . . . 2-38
Child Restraints . . . . . . . . . . . . . . . . . . . . . . . . . . . . . . . . . . 2-39
Older Children . . . . . . . . . . . . . . . . . . . . . . . . . . . . . . . . . 2-39
Infants and Young Children . . . . . . . . . . . . . . . . . . . . 2-42
Child Restraint Systems . . . . . . . . . . . . . . . . . . . . . . . 2-45
Where to Put the Restraint . . . . . . . . . . . . . . . . . . . . . 2-48
Lower Anchors and Tethers for Children
(LATCH) . . . . . . . . . . . . . . . . . . . . . . . . . . . . . . . . . . . . . 2-49
Securing a Child Restraint in a Rear Seat Position . . . . . . . . . . . . . . . . . . . . . . . . . . . . . . . . . . . . . . 2-58
Securing a Child Restraint in the Center Front Seat Position . . . . . . . . . . . . . . . . . . . . . . . . . . . . . . . . 2-61
Securing a Child Restraint in the Right Front Seat Position (With Passenger Sensing
System) . . . . . . . . . . . . . . . . . . . . . . . . . . . . . . . . . . . . . 2-61
Securing a Child Restraint in the Right Front Seat Position (With Airbag Off Switch) . . . . . . . 2-65
Securing a Child Restraint in the Right Front Seat Position (Heavy Duty Crew
Cab Only) . . . . . . . . . . . . . . . . . . . . . . . . . . . . . . . . . . . 2-70
2-1
Page 48 of 626
Your vehicle may have additional features to adjust your
vehicle's power seat:
.Raise or lower the front part of the seat cushion by
moving the front of the control up or down.
.Raise or lower the rear part of the seat cushion by
moving the rear of the control up or down.
.Raise or lower the entire seat by moving the entire
control up or down.
On seats with power reclining seatbacks, the control is
located behind the power seat control on the outboard
side of the seats. See “Power Reclining Seatbacks”
under Reclining Seatbacks on page 2‑10.
A vehicle with a memory function allows seat settings to
be saved and recalled. See Memory Seat, Mirrors, and
Pedals
on page 2‑8for more information.
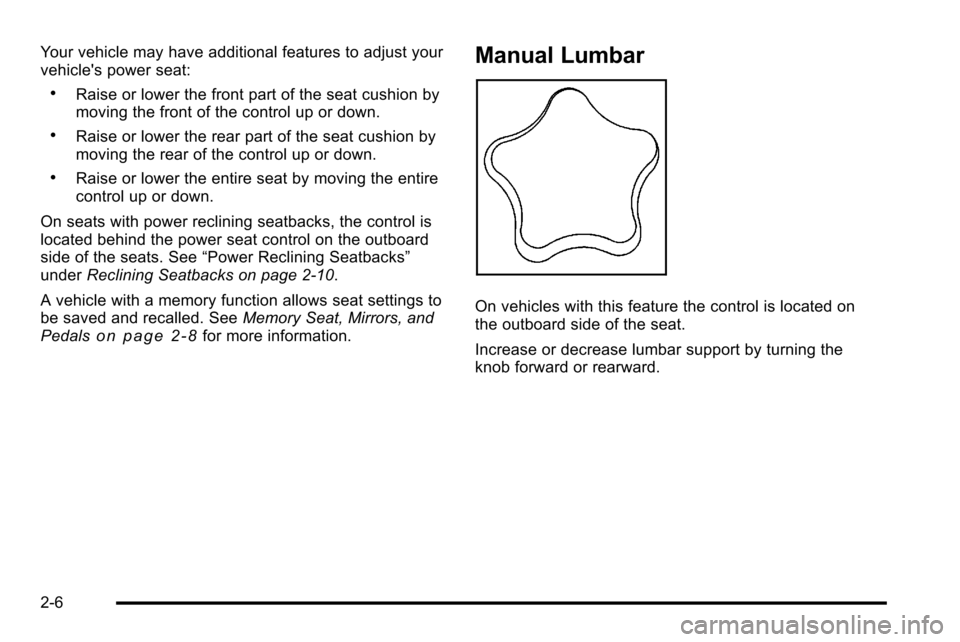
Manual Lumbar
On vehicles with this feature the control is located on
the outboard side of the seat.
Increase or decrease lumbar support by turning the
knob forward or rearward.
2-6
Page 49 of 626
Power Lumbar
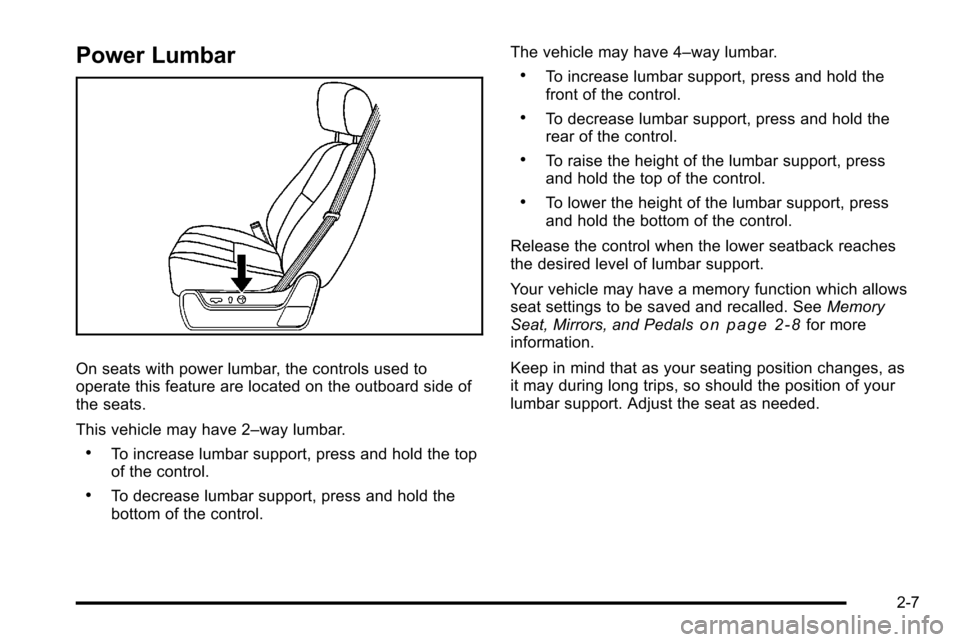
On seats with power lumbar, the controls used to
operate this feature are located on the outboard side of
the seats.
This vehicle may have 2–way lumbar.
.To increase lumbar support, press and hold the top
of the control.
.To decrease lumbar support, press and hold the
bottom of the control.The vehicle may have 4–way lumbar.
.To increase lumbar support, press and hold the
front of the control.
.To decrease lumbar support, press and hold the
rear of the control.
.To raise the height of the lumbar support, press
and hold the top of the control.
.To lower the height of the lumbar support, press
and hold the bottom of the control.
Release the control when the lower seatback reaches
the desired level of lumbar support.
Your vehicle may have a memory function which allows
seat settings to be saved and recalled. See Memory
Seat, Mirrors, and Pedals
on page 2‑8for more
information.
Keep in mind that as your seating position changes, as
it may during long trips, so should the position of your
lumbar support. Adjust the seat as needed.
2-7
Page 50 of 626
Heated Seats
{WARNING:
If you cannot feel temperature change or pain to
the skin, the seat heater may cause burns even at
low temperatures. To reduce the risk of burns,
people with such a condition should use care
when using the seat heater, especially for long
periods of time. Do not place anything on the seat
that insulates against heat, such as a blanket,
cushion, cover or similar item. This may cause the
seat heater to overheat. An overheated seat
heater may cause a burn or may damage
the seat.
On vehicles with heated front seats, the controls are
located on the driver and passenger doors.
I (Heated Seatback): Press to turn on the heated
seatback.
J (Heated Seat and Seatback): Press to turn on the
heated seat and seatback.
The light on the button will come on to indicate that the
feature is working. Press the button to cycle through the
temperature settings of high, medium, and low and to turn the heat to the seat off. Indicator lights will show
the level of heat selected: three for high, two for
medium, and one for low.
The heated seats will be canceled 10 seconds after the
ignition is turned off. To use the heated seat feature
after restarting the vehicle, press the heated seat or
seatback button again.
Memory Seat, Mirrors, and Pedals
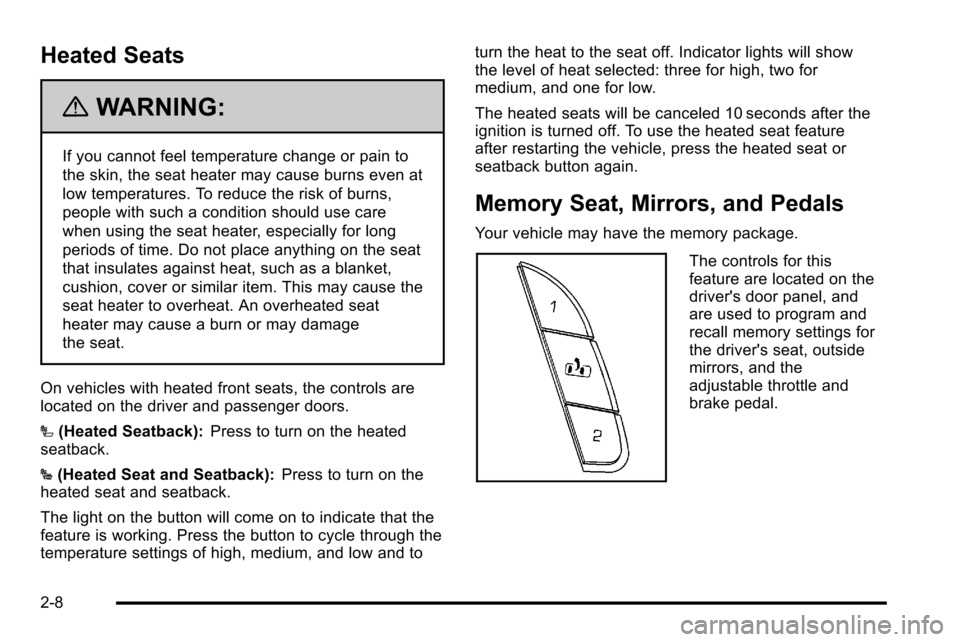
Your vehicle may have the memory package.
The controls for this
feature are located on the
driver's door panel, and
are used to program and
recall memory settings for
the driver's seat, outside
mirrors, and the
adjustable throttle and
brake pedal.
2-8
Page 51 of 626
To save seating positions in memory:1. Adjust the driver's seatback recliner, both outside mirrors, and the throttle and brake pedals to a
comfortable position.
See Outside Power Mirrors
on page 3‑57and
Adjustable Throttle and Brake Pedalon page 3‑26for more information.
Not all mirrors, adjustable throttles and brake
pedals will have the ability to save and recall their
positions.
2. Press and hold button 1 until two beeps sound to indicate that the position has been stored.
A second seating, mirror, and throttle and brake pedal
position can be programmed by repeating the above
steps and pressing button 2.
To recall the memory positions, the vehicle must be in
P (Park). Press and release either button 1 or button 2
corresponding to the desired driving position. The seat,
outside mirrors, and adjustable throttle and brake
pedals will move to the position previously stored. You
will hear a single beep. If you use the remote keyless entry transmitter to enter
your vehicle and the remote recall memory feature is
on, automatic seat, adjustable mirror, and adjustable
pedal movements will occur. See
“MEMORY SEAT
RECALL” underDIC Vehicle Customization (With DIC
Buttons)
on page 4‑73for more information.
To stop recall movement of the memory function at any
time, press one of the power seat controls, memory
buttons, power mirror buttons, or adjustable pedal
switch.
If something has blocked the driver ’s seat and/or the
adjustable pedals while recalling a memory position, the
driver ’s seat and/or the adjustable pedals recall may
stop working. If this happens, remove the obstruction
and press the appropriate control for the area that is not
responding for two seconds. Try recalling the memory
position again by pressing the appropriate memory
button. If the memory position is still not recalling, see
your dealer for service.
2-9
Page 139 of 626
Section 3 Features and Controls
Keys. . . . . . . . . . . . . . . . . . . . . . . . . . . . . . . . . . . . . . . . . . . . . . . . 3-3
Remote Keyless Entry (RKE) System . . . . . . . . . . . 3-4
Remote Keyless Entry (RKE) System Operation . . . . . . . . . . . . . . . . . . . . . . . . . . . . . . . . . . . . . 3-4
Remote Vehicle Start . . . . . . . . . . . . . . . . . . . . . . . . . . . 3-7
Doors and Locks . . . . . . . . . . . . . . . . . . . . . . . . . . . . . . . . . . 3-9
Door Locks . . . . . . . . . . . . . . . . . . . . . . . . . . . . . . . . . . . . . 3-9
Power Door Locks . . . . . . . . . . . . . . . . . . . . . . . . . . . . . . 3-9
Delayed Locking . . . . . . . . . . . . . . . . . . . . . . . . . . . . . . . 3-10
Programmable Automatic Door Locks . . . . . . . . . . 3-10
Rear Door Security Locks . . . . . . . . . . . . . . . . . . . . . 3-10
Lockout Protection . . . . . . . . . . . . . . . . . . . . . . . . . . . . . 3-11
Rear Doors . . . . . . . . . . . . . . . . . . . . . . . . . . . . . . . . . . . . 3-11
Tailgate . . . . . . . . . . . . . . . . . . . . . . . . . . . . . . . . . . . . . . . . 3-12
Windows . . . . . . . . . . . . . . . . . . . . . . . . . . . . . . . . . . . . . . . . . . 3-14
Manual Windows . . . . . . . . . . . . . . . . . . . . . . . . . . . . . . 3-14
Power Windows . . . . . . . . . . . . . . . . . . . . . . . . . . . . . . . 3-15
Power Sliding Rear Window . . . . . . . . . . . . . . . . . . . 3-16
Sun Visors . . . . . . . . . . . . . . . . . . . . . . . . . . . . . . . . . . . . . 3-17
Theft-Deterrent Systems . . . . . . . . . . . . . . . . . . . . . . . . .3-17
Content Theft-Deterrent . . . . . . . . . . . . . . . . . . . . . . . . 3-17
PASS-Key
®III+ Electronic Immobilizer . . . . . . . . . 3-19
PASS-Key®III+ Electronic Immobilizer
Operation . . . . . . . . . . . . . . . . . . . . . . . . . . . . . . . . . . . . 3-19 Starting and Operating Your Vehicle
. . . . . . . . . . . .3-21
New Vehicle Break-In . . . . . . . . . . . . . . . . . . . . . . . . . . 3-21
Ignition Positions . . . . . . . . . . . . . . . . . . . . . . . . . . . . . . 3-22
Retained Accessory Power (RAP) . . . . . . . . . . . . . 3-23
Starting the Engine . . . . . . . . . . . . . . . . . . . . . . . . . . . . 3-23
Fast Idle System . . . . . . . . . . . . . . . . . . . . . . . . . . . . . . . 3-25
Adjustable Throttle and Brake Pedal . . . . . . . . . . . 3-26
Engine Coolant Heater . . . . . . . . . . . . . . . . . . . . . . . . . 3-26
Active Fuel Management™ . . . . . . . . . . . . . . . . . . . . 3-27
Automatic Transmission Operation . . . . . . . . . . . . . 3-28
Tow/Haul Mode . . . . . . . . . . . . . . . . . . . . . . . . . . . . . . . . 3-34
Four-Wheel Drive . . . . . . . . . . . . . . . . . . . . . . . . . . . . . . 3-36
Parking Brake . . . . . . . . . . . . . . . . . . . . . . . . . . . . . . . . . 3-50
Shifting Into Park . . . . . . . . . . . . . . . . . . . . . . . . . . . . . . 3-51
Shifting Out of Park . . . . . . . . . . . . . . . . . . . . . . . . . . . . 3-53
Parking Over Things That Burn . . . . . . . . . . . . . . . . 3-53
Engine Exhaust . . . . . . . . . . . . . . . . . . . . . . . . . . . . . . . . 3-54
Running the Vehicle While Parked . . . . . . . . . . . . . 3-55
Mirrors . . . . . . . . . . . . . . . . . . . . . . . . . . . . . . . . . . . . . . . . . . . . 3-56
Manual Rearview Mirror . . . . . . . . . . . . . . . . . . . . . . . . 3-56
Automatic Dimming Rearview Mirror . . . . . . . . . . . 3-56
Outside Manual Mirrors . . . . . . . . . . . . . . . . . . . . . . . . 3-56
Outside Towing Mirrors . . . . . . . . . . . . . . . . . . . . . . . . 3-57
Outside Power Mirrors . . . . . . . . . . . . . . . . . . . . . . . . . 3-57
Outside Power Foldaway Mirrors . . . . . . . . . . . . . . 3-58
3-1
Page 140 of 626
Section 3 Features and Controls
Park Tilt Mirrors . . . . . . . . . . . . . . . . . . . . . . . . . . . . . . . . 3-59
Outside Convex Mirror . . . . . . . . . . . . . . . . . . . . . . . . . 3-59
Outside Heated Mirrors . . . . . . . . . . . . . . . . . . . . . . . . 3-59
Object Detection Systems . . . . . . . . . . . . . . . . . . . . . . .3-60
Ultrasonic Rear Parking Assist (URPA) . . . . . . . . 3-60
Rear Vision Camera (RVC) . . . . . . . . . . . . . . . . . . . . 3-63
Universal Home Remote System . . . . . . . . . . . . . . . .3-69
Universal Home Remote System Operation (With Three Round LED) . . . . . . . . . . . . . . . . . . . . 3-69 Storage Areas
. . . . . . . . . . . . . . . . . . . . . . . . . . . . . . . . . . . . 3-75
Glove Box . . . . . . . . . . . . . . . . . . . . . . . . . . . . . . . . . . . . . 3-75
Cupholders . . . . . . . . . . . . . . . . . . . . . . . . . . . . . . . . . . . . 3-75
Instrument Panel Storage . . . . . . . . . . . . . . . . . . . . . 3-76
Center Console Storage . . . . . . . . . . . . . . . . . . . . . . 3-76
Roof Rack System . . . . . . . . . . . . . . . . . . . . . . . . . . . . . 3-77
Rear Seat Armrest . . . . . . . . . . . . . . . . . . . . . . . . . . . . . 3-78
Sunroof . . . . . . . . . . . . . . . . . . . . . . . . . . . . . . . . . . . . . . . . . . . 3-78
3-2
Page 143 of 626
/(Remote Vehicle Start):For vehicles with this
feature, press /to start the engine from outside the
vehicle using the RKE transmitter. See Remote Vehicle
Start
on page 3‑7for additional information.
Q(Lock): Press to lock all the doors.
If enabled through the Driver Information Center (DIC),
the turn signal lamps flash once to indicate locking has
occurred. If enabled through the DIC, the horn chirps
when
Qis pressed again within three seconds. See DIC
Vehicle Customization (With DIC Buttons)
on
page 4‑73for additional information.
Pressing
Qarms the content theft‐deterrent system.
See Content Theft-Deterrent on page 3‑17.
K(Unlock): Press once to unlock only the driver door.
If
Kis pressed again within three seconds, all
remaining doors unlock. The interior lamps may come
on and stay on for 20 seconds or until the ignition is
turned on.
If enabled through the DIC, the turn signal lamps flash
twice to indicate unlocking has occurred. See DIC
Vehicle Customization (With DIC Buttons)
on
page 4‑73. If enabled through the DIC, the exterior
lights may turn on. See “APPROACH LIGHTING” under
DIC Vehicle Customization (With DIC Buttons)
on
page 4‑73. Pressing
Kon the RKE transmitter disarms the content
theft‐deterrent system. See Content Theft-Deterrent
on
page 3‑17.
L(Vehicle Locator/Panic Alarm): Press and release
to locate the vehicle. The turn signal lamps flash and
the horn sounds three times.
Press and hold
Lfor more than two seconds to
activate the panic alarm. The turn signal lamps flash
and the horn sounds repeatedly for 30 seconds. The
alarm turns off when the ignition is moved to ON/RUN
or
Lis pressed again. The ignition must be in LOCK/
OFF for the panic alarm to work.
The vehicle comes with two transmitters. Each
transmitter will have a number on it, “1”or“2”. These
numbers correspond to the driver of the vehicle. For
example, the memory seat position for driver 1 will be
recalled when using the transmitter labeled “1”,
if enabled through the DIC. See Memory Seat, Mirrors,
and Pedals
on page 2‑8and DIC Vehicle
Customization (With DIC Buttons)on page 4‑73for
more information.
3-5