2010 CHEVROLET HHR seat adjustment
[x] Cancel search: seat adjustmentPage 7 of 480

Section 1 In Brief
Instrument Panel. . . . . . . . . . . . . . . . . . . . . . . . . . . . . . . . . . . 1-2
Initial Drive Information . . . . . . . . . . . . . . . . . . . . . . . . . . . 1-4
Remote Keyless Entry (RKE) System . . . . . . . . . . . 1-4
Remote Vehicle Start . . . . . . . . . . . . . . . . . . . . . . . . . . . 1-4
Door Locks . . . . . . . . . . . . . . . . . . . . . . . . . . . . . . . . . . . . . 1-5
Liftgate . . . . . . . . . . . . . . . . . . . . . . . . . . . . . . . . . . . . . . . . . . 1-5
Windows . . . . . . . . . . . . . . . . . . . . . . . . . . . . . . . . . . . . . . . . 1-6
Seat Adjustment . . . . . . . . . . . . . . . . . . . . . . . . . . . . . . . . 1-6
Second Row Seats . . . . . . . . . . . . . . . . . . . . . . . . . . . . . 1-8
Heated Seats . . . . . . . . . . . . . . . . . . . . . . . . . . . . . . . . . . . 1-9
Head Restraint Adjustment . . . . . . . . . . . . . . . . . . . . . . 1-9
Safety Belt . . . . . . . . . . . . . . . . . . . . . . . . . . . . . . . . . . . . . . 1-9
Sensing System for Passenger Airbag . . . . . . . . . 1-10
Mirror Adjustment . . . . . . . . . . . . . . . . . . . . . . . . . . . . . . 1-10
Steering Wheel Adjustment . . . . . . . . . . . . . . . . . . . . 1-11
Interior Lighting . . . . . . . . . . . . . . . . . . . . . . . . . . . . . . . . 1-12
Exterior Lighting . . . . . . . . . . . . . . . . . . . . . . . . . . . . . . . 1-12
Windshield Wiper/Washer . . . . . . . . . . . . . . . . . . . . . . 1-13
Climate Controls . . . . . . . . . . . . . . . . . . . . . . . . . . . . . . . 1-14 Vehicle Features
. . . . . . . . . . . . . . . . . . . . . . . . . . . . . . . . . . 1-15
Radio(s) . . . . . . . . . . . . . . . . . . . . . . . . . . . . . . . . . . . . . . . 1-15
Satellite Radio . . . . . . . . . . . . . . . . . . . . . . . . . . . . . . . . . 1-16
Portable Audio Devices (Auxiliary Input or USB Port) . . . . . . . . . . . . . . . . 1-16
Steering Wheel Controls . . . . . . . . . . . . . . . . . . . . . . . 1-17
Bluetooth
®. . . . . . . . . . . . . . . . . . . . . . . . . . . . . . . . . . . . . 1-17
Driver Information Center (DIC) . . . . . . . . . . . . . . . . 1-18
Cruise Control . . . . . . . . . . . . . . . . . . . . . . . . . . . . . . . . . 1-19
Storage Compartments . . . . . . . . . . . . . . . . . . . . . . . . 1-19
Power Outlets . . . . . . . . . . . . . . . . . . . . . . . . . . . . . . . . . 1-20
Performance and Maintenance . . . . . . . . . . . . . . . . . . 1-21
Traction Control System (TCS) . . . . . . . . . . . . . . . . 1-21
Electronic Stability Control (ESC) . . . . . . . . . . . . . . 1-21
Tire Pressure Monitor . . . . . . . . . . . . . . . . . . . . . . . . . . 1-22
Tire Sealant and Compressor Kit . . . . . . . . . . . . . . 1-22
Engine Oil Life System . . . . . . . . . . . . . . . . . . . . . . . . 1-23
Fuel E85 (85% Ethanol) . . . . . . . . . . . . . . . . . . . . . . . 1-23
Driving for Better Fuel Economy . . . . . . . . . . . . . . . 1-24
Battery . . . . . . . . . . . . . . . . . . . . . . . . . . . . . . . . . . . . . . . . . 1-24
Roadside Assistance Program . . . . . . . . . . . . . . . . . 1-24
OnStar
®. . . . . . . . . . . . . . . . . . . . . . . . . . . . . . . . . . . . . . . 1-25
1-1
Page 12 of 480
Windows
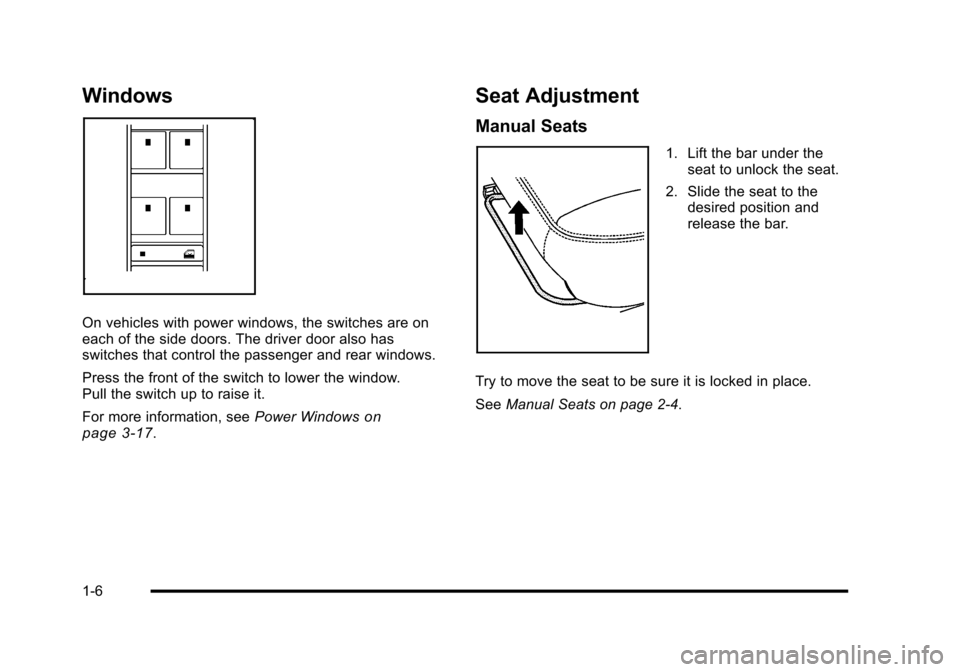
On vehicles with power windows, the switches are on
each of the side doors. The driver door also has
switches that control the passenger and rear windows.
Press the front of the switch to lower the window.
Pull the switch up to raise it.
For more information, seePower Windows
on
page 3‑17.
Seat Adjustment
Manual Seats
1. Lift the bar under the seat to unlock the seat.
2. Slide the seat to the desired position and
release the bar.
Try to move the seat to be sure it is locked in place.
See Manual Seats on page 2‑4.
1-6
Page 15 of 480

Heated Seats
On vehicles with this feature, the controls are located
on the climate control panel.
Press the button to turn the heated seat on to the high
setting, a second time to go to the low setting, and a
third to turn it off.
SeeHeated Seats
on page 2‑6for more information.
Head Restraint Adjustment
Do not drive until the head restraints for all occupants
are installed and adjusted properly.
For more information see Head Restraints
on
page 2‑2.
Safety Belt
Refer to the following sections for important information
on how to use safety belts properly.
.Safety Belts: They Are for Everyone on page 2‑14.
.How to Wear Safety Belts Properly on page 2‑19.
.Lap-Shoulder Belt on page 2‑28.
.Lower Anchors and Tethers for Children (LATCH)on page 2‑45.
1-9
Page 60 of 480
Lap-Shoulder Belt
All seating positions in the vehicle have a
lap-shoulder belt.
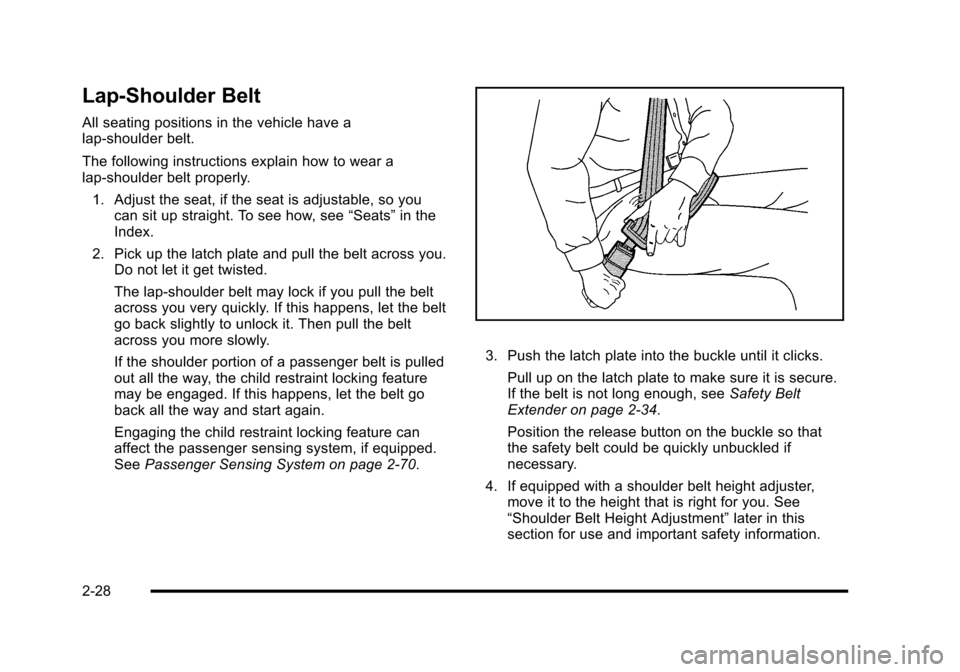
The following instructions explain how to wear a
lap-shoulder belt properly.1. Adjust the seat, if the seat is adjustable, so you can sit up straight. To see how, see “Seats”in the
Index.
2. Pick up the latch plate and pull the belt across you. Do not let it get twisted.
The lap-shoulder belt may lock if you pull the belt
across you very quickly. If this happens, let the belt
go back slightly to unlock it. Then pull the belt
across you more slowly.
If the shoulder portion of a passenger belt is pulled
out all the way, the child restraint locking feature
may be engaged. If this happens, let the belt go
back all the way and start again.
Engaging the child restraint locking feature can
affect the passenger sensing system, if equipped.
See Passenger Sensing System on page 2‑70.
3. Push the latch plate into the buckle until it clicks.
Pull up on the latch plate to make sure it is secure.
If the belt is not long enough, see Safety Belt
Extender on page 2‑34.
Position the release button on the buckle so that
the safety belt could be quickly unbuckled if
necessary.
4. If equipped with a shoulder belt height adjuster, move it to the height that is right for you. See
“Shoulder Belt Height Adjustment” later in this
section for use and important safety information.
2-28
Page 62 of 480
Shoulder Belt Height Adjuster
The vehicle has a shoulder belt height adjuster for the
driver and right front passenger seating positions.
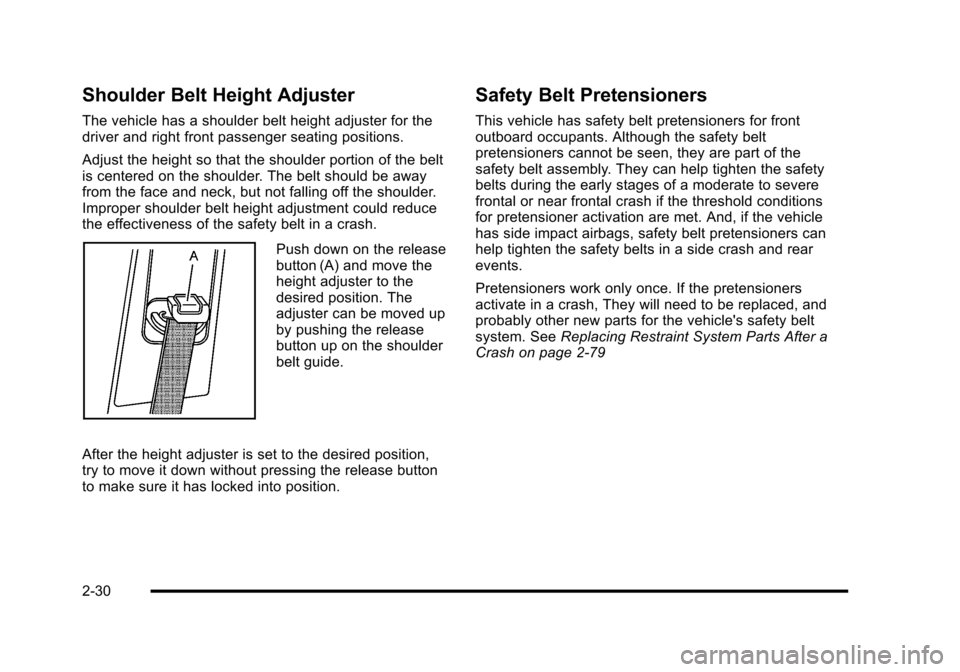
Adjust the height so that the shoulder portion of the belt
is centered on the shoulder. The belt should be away
from the face and neck, but not falling off the shoulder.
Improper shoulder belt height adjustment could reduce
the effectiveness of the safety belt in a crash.
Push down on the release
button (A) and move the
height adjuster to the
desired position. The
adjuster can be moved up
by pushing the release
button up on the shoulder
belt guide.
After the height adjuster is set to the desired position,
try to move it down without pressing the release button
to make sure it has locked into position.
Safety Belt Pretensioners
This vehicle has safety belt pretensioners for front
outboard occupants. Although the safety belt
pretensioners cannot be seen, they are part of the
safety belt assembly. They can help tighten the safety
belts during the early stages of a moderate to severe
frontal or near frontal crash if the threshold conditions
for pretensioner activation are met. And, if the vehicle
has side impact airbags, safety belt pretensioners can
help tighten the safety belts in a side crash and rear
events.
Pretensioners work only once. If the pretensioners
activate in a crash, They will need to be replaced, and
probably other new parts for the vehicle's safety belt
system. See Replacing Restraint System Parts After a
Crash on page 2‑79
2-30
Page 187 of 480
The rear window defogger turns off approximately
15 minutes after the button is pressed. If turned on
again, the defogger only runs for approximately seven
minutes before turning off.
If the vehicle speed is greater than 80 km/h (50 mph)
and the rear defogger is on, it remains on as long as the
speed is greater than 80 km/h (50 mph). The defogger
can also be turned off by turning off the engine.
For vehicles with the remote start feature, the rear
defogger automatically turns on if it is cold outside.
When the vehicle transitions out of the remote start
mode, the rear defogger turns off. SeeRemote Keyless
Entry (RKE) System Operation on page 3‑4
Notice: Do not use anything sharp on the inside of
the rear window. If you do, you could cut or damage
the warming grid, and the repairs would not be
covered by the vehicle warranty. Do not attach a
temporary vehicle license, tape, a decal or anything
similar to the defogger grid.Outlet Adjustment
Turn the outlets and move the outlet vanes to change
the direction of the airflow and to open and close the
outlets.
Operation Tips
.Clear away any ice, snow or leaves from the air
inlets at the base of the windshield that may block
the flow of air into the vehicle.
.Use of non-GM approved hood deflectors may
adversely affect the performance of the system.
.Keep the path under the front seats clear of
objects to help circulate the air inside of the vehicle
more effectively.
Passenger Compartment Air Filter
The filter removes dust and pollen from the air which is
drawn into the vehicle. Airflow reduction is an indication
that the filter needs to be replaced.
The filter should be replaced as part of routine
scheduled maintenance. See Scheduled Maintenance
on page 7‑3for replacement intervals. To find out
what type of filter to use, see Maintenance
Replacement Parts on page 7‑12.
4-21
Page 261 of 480
Cellular Phone Usage
Cellular phone usage may cause interference with the
vehicle's radio. This interference may occur when
making or receiving phone calls, charging the phone's
battery, or simply having the phone on. This
interference causes an increased level of static while
listening to the radio. If static is received while listening
to the radio, unplug the cellular phone and turn it off.
Fixed Mast Antenna
The fixed mast antenna can withstand most car washes
without being damaged as long as it is securely
attached to the base. If the mast becomes slightly bent,
straighten it out by hand. If the mast is badly bent,
replace it.
Occasionally check to make sure the antenna is
tightened to its base. If tightening is required, tighten by
hand until fully seated plus one quarter turn.
XM™Satellite Radio Antenna
System
The XM Satellite Radio antenna is located on the roof of
the vehicle. Keep the antenna clear of obstructions for
clear radio reception.
If the vehicle has a sunroof, the performance of the XM
system may be affected if the sunroof is open.
Chime Level Adjustment
The radio may be used to adjust the vehicle's chime
level. If the radio can be used to change the volume
level of the chime, press and hold the sixth numbered
pushbutton or the sixth FAV pushbutton with the ignition
on and the radio power off. The volume level changes
between Normal and Loud. The selected volume level
appears on the radio display.
Removing the radio and not replacing it with a factory
radio or chime module will disable vehicle chimes.
4-95
Page 347 of 480
To disconnect the jumper cables from both vehicles:1. Disconnect the black negative (−) cable from the vehicle that had the dead battery.
2. Disconnect the black negative (−) cable from the vehicle with the good battery.
3. Disconnect the red positive (+) cable from the vehicle with the good battery.
4. Disconnect the red positive (+) cable from the other vehicle.
5. Return the positive (+) terminal cover to its original position.
Headlamp Aiming
The vehicle has a visual optical headlamp aiming
system. The aim has been preset at the factory and
should need no further adjustment.
However, if the vehicle is damaged in a crash, the
headlamp aim may be affected and adjustment may be
necessary.
If oncoming vehicles flash their high beams at you, this
may also mean the vertical aim needs to be adjusted. It is recommended that the vehicle is taken to your
dealer/retailer for service if the headlamps need to be
re-aimed. It is possible however, to re-aim the
headlamps as described.
The vehicle should:
.Be placed so the headlamps are 25 ft. (7.6 m) from
a light colored wall.
.Have all four tires on a level surface which is level
all the way to the wall.
.Be placed so it is perpendicular to the wall or other
flat surface.
.Not have any snow, ice, or mud on it.
.Be fully assembled and all other work stopped
while headlamp aiming is being performed.
.Normally loaded with a full tank of fuel and one
person or 160 lbs (75 kg) sitting on the driver seat.
.Have all tires properly inflated.
.Have the spare tire is in its original location in the
vehicle.
6-45