Page 209 of 480

Readouts #2
TIRE PRESSURES:Displays the last gauge tire
pressures recorded from each of the wheel mounted tire
pressure sensors.
Readouts #3
BAROMETER: Displays ambient air pressure as
measured by the engine’s ambient pressure sensor.
OUTSIDE TEMPERATURE: Displays ambient
temperature as measured by an outside air temperature
sensor.
BATTERY VOLTAGE: Displays the vehicle’s battery
voltage.
Readouts #4
COOLANT TEMPERATURE: Displays engine coolant
temperature as measured by a coolant temperature
sensor.
INLET AIR TEMPERATURE: Displays the
instantaneous temperature of the air at the inlet to the
induction system. FUEL PRESSURE:
Displays fuel pressure as
measured by a sensor on the output of the
high-pressure fuel pump.
INDICATORS
The indicators come on when the corresponding
function is actively working to stabilize or control the
vehicle. Each indicator light on the RPD display can be
turned on and off using the SETUP MENU. These
indicators work independently of the telltales on the
instrument panel cluster. Turning the indicator on the
RPD display on or off does not enable or disable the
functions on the vehicle.
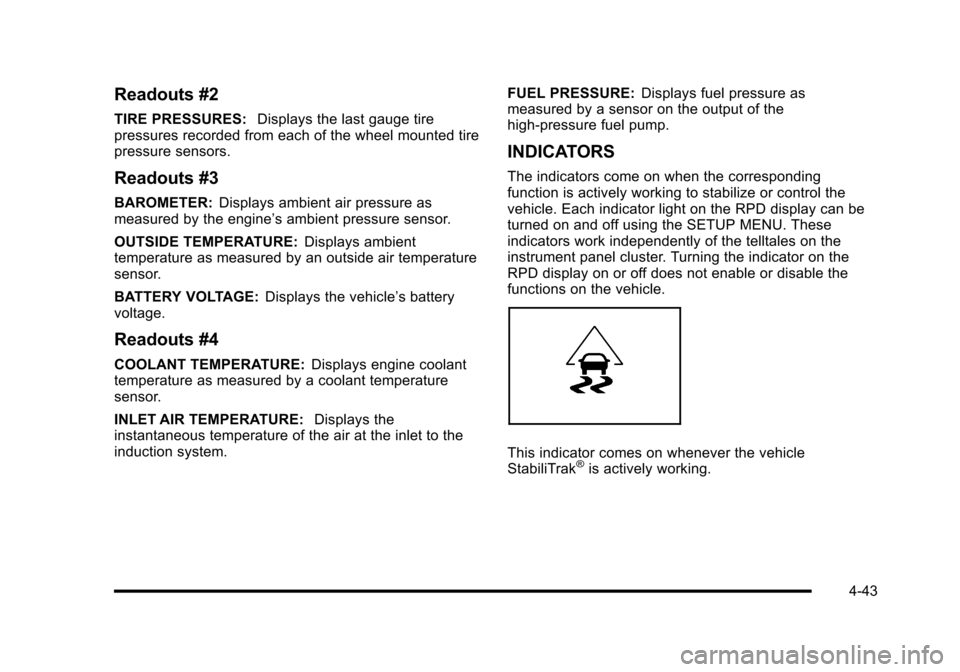
This indicator comes on whenever the vehicle
StabiliTrak®is actively working.
4-43
Page 210 of 480
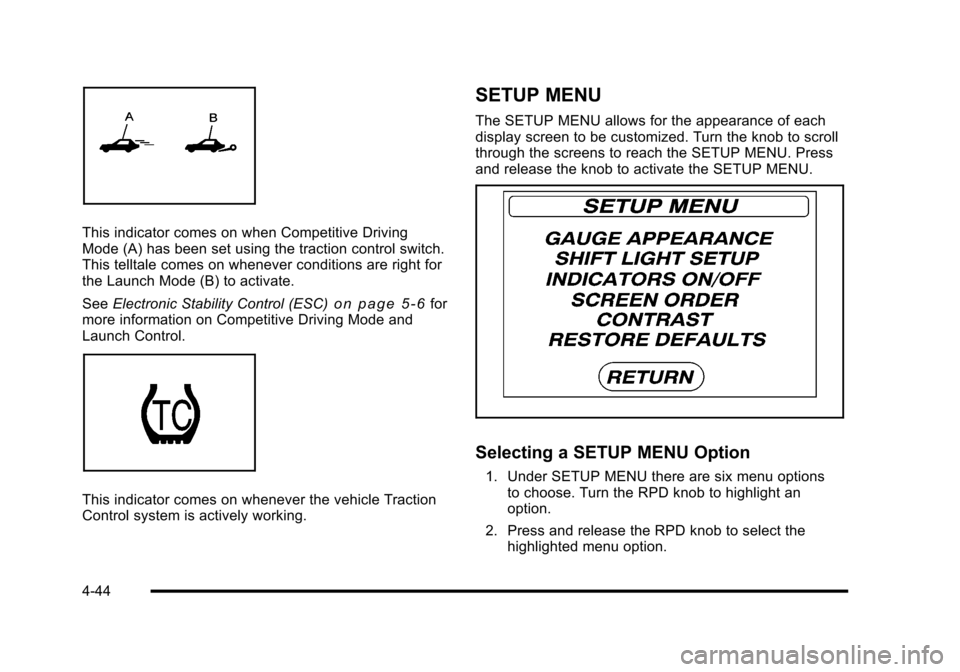
This indicator comes on when Competitive Driving
Mode (A) has been set using the traction control switch.
This telltale comes on whenever conditions are right for
the Launch Mode (B) to activate.
SeeElectronic Stability Control (ESC)
on page 5‑6for
more information on Competitive Driving Mode and
Launch Control.
This indicator comes on whenever the vehicle Traction
Control system is actively working.
SETUP MENU
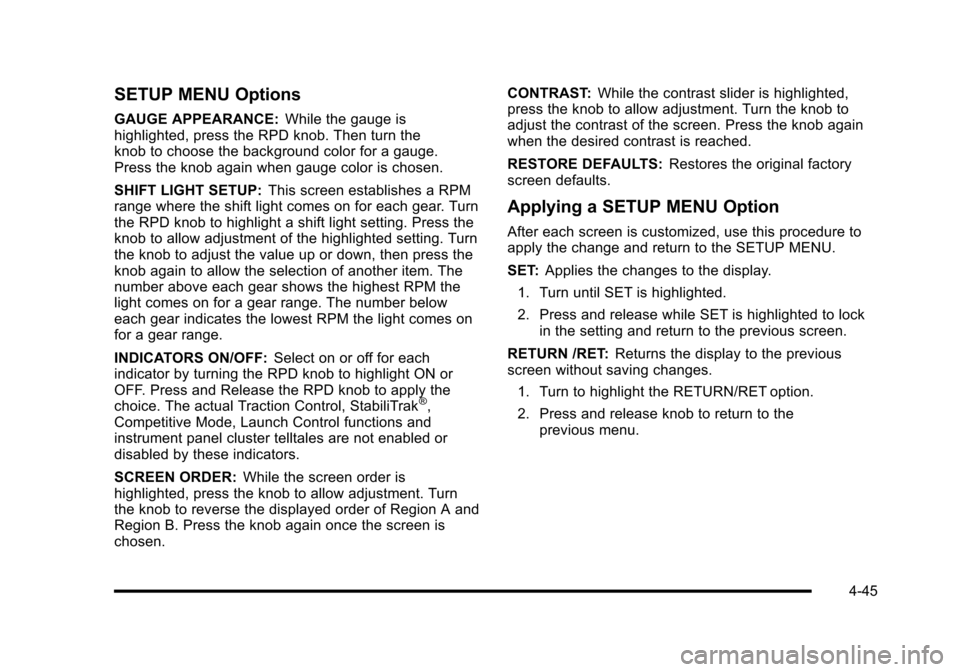
The SETUP MENU allows for the appearance of each
display screen to be customized. Turn the knob to scroll
through the screens to reach the SETUP MENU. Press
and release the knob to activate the SETUP MENU.
Selecting a SETUP MENU Option
1. Under SETUP MENU there are six menu options to choose. Turn the RPD knob to highlight an
option.
2. Press and release the RPD knob to select the highlighted menu option.
4-44
Page 211 of 480

SETUP MENU Options
GAUGE APPEARANCE:While the gauge is
highlighted, press the RPD knob. Then turn the
knob to choose the background color for a gauge.
Press the knob again when gauge color is chosen.
SHIFT LIGHT SETUP: This screen establishes a RPM
range where the shift light comes on for each gear. Turn
the RPD knob to highlight a shift light setting. Press the
knob to allow adjustment of the highlighted setting. Turn
the knob to adjust the value up or down, then press the
knob again to allow the selection of another item. The
number above each gear shows the highest RPM the
light comes on for a gear range. The number below
each gear indicates the lowest RPM the light comes on
for a gear range.
INDICATORS ON/OFF: Select on or off for each
indicator by turning the RPD knob to highlight ON or
OFF. Press and Release the RPD knob to apply the
choice. The actual Traction Control, StabiliTrak
®,
Competitive Mode, Launch Control functions and
instrument panel cluster telltales are not enabled or
disabled by these indicators.
SCREEN ORDER: While the screen order is
highlighted, press the knob to allow adjustment. Turn
the knob to reverse the displayed order of Region A and
Region B. Press the knob again once the screen is
chosen. CONTRAST:
While the contrast slider is highlighted,
press the knob to allow adjustment. Turn the knob to
adjust the contrast of the screen. Press the knob again
when the desired contrast is reached.
RESTORE DEFAULTS: Restores the original factory
screen defaults.
Applying a SETUP MENU Option
After each screen is customized, use this procedure to
apply the change and return to the SETUP MENU.
SET: Applies the changes to the display.
1. Turn until SET is highlighted.
2. Press and release while SET is highlighted to lock in the setting and return to the previous screen.
RETURN /RET: Returns the display to the previous
screen without saving changes.
1. Turn to highlight the RETURN/RET option.
2. Press and release knob to return to the previous menu.
4-45
Page 212 of 480

Driver Information Center (DIC)
Your vehicle has a Driver Information Center (DIC). The
DIC display gives you the status of many of your
vehicle's systems. The DIC is also used to display
driver personalization menu modes and warning/status
messages. All messages will appear in the DIC display,
located at the bottom of the instrument panel cluster.
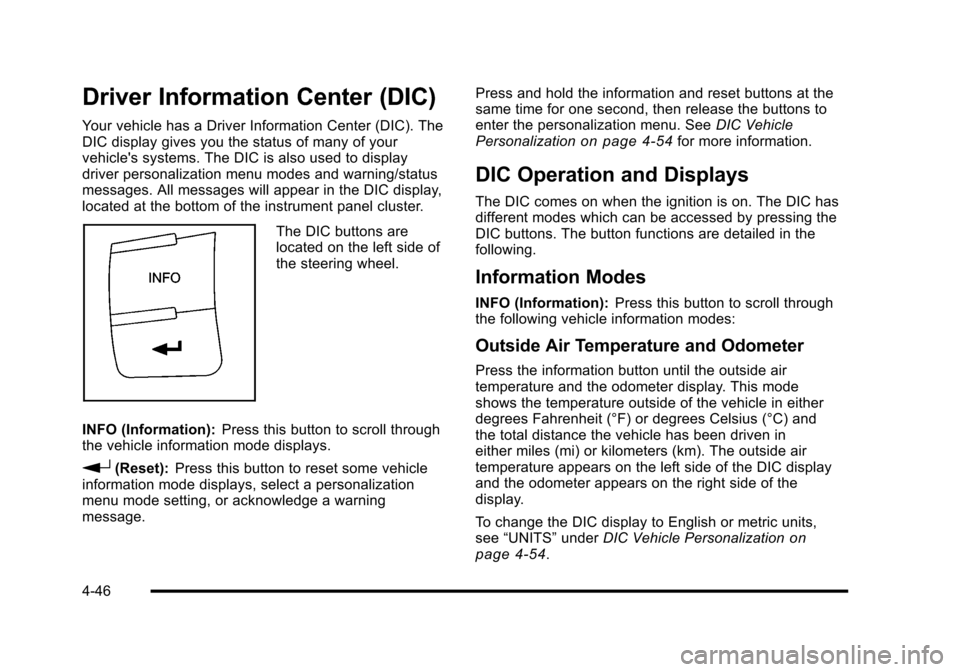
The DIC buttons are
located on the left side of
the steering wheel.
INFO (Information): Press this button to scroll through
the vehicle information mode displays.
r(Reset): Press this button to reset some vehicle
information mode displays, select a personalization
menu mode setting, or acknowledge a warning
message. Press and hold the information and reset buttons at the
same time for one second, then release the buttons to
enter the personalization menu. See
DIC Vehicle
Personalization
on page 4‑54for more information.
DIC Operation and Displays
The DIC comes on when the ignition is on. The DIC has
different modes which can be accessed by pressing the
DIC buttons. The button functions are detailed in the
following.
Information Modes
INFO (Information): Press this button to scroll through
the following vehicle information modes:
Outside Air Temperature and Odometer
Press the information button until the outside air
temperature and the odometer display. This mode
shows the temperature outside of the vehicle in either
degrees Fahrenheit (°F) or degrees Celsius (°C) and
the total distance the vehicle has been driven in
either miles (mi) or kilometers (km). The outside air
temperature appears on the left side of the DIC display
and the odometer appears on the right side of the
display.
To change the DIC display to English or metric units,
see “UNITS” underDIC Vehicle Personalization
on
page 4‑54.
4-46
Page 213 of 480

TRIP A or TRIP B
Press the information button until TRIP A or TRIP B
display. These modes show the current distance
traveled since the last reset for each trip odometer in
either miles (mi) or kilometers (km). Both odometers
can be used at the same time.
To reset the trip odometer to zero, press and hold the
reset button for a few seconds while the desired trip
odometer is displayed.
FUEL RANGE
Press the information button until FUEL RANGE
displays. This mode shows the remaining distance
you can drive without refueling in either miles (mi) or
kilometers (km). It is based on fuel economy and the
fuel remaining in the tank.
When the fuel level is low, FUEL RANGE LOW
displays.
The fuel economy data used to determine fuel range is
an average of recent driving conditions. As your driving
conditions change, this data is gradually updated. The
FUEL RANGE mode cannot be reset.
MPG (L/100 KM) AVG (Average)
Press the information button until MPG (L/100 KM)AVG displays. This mode shows how many miles per
gallon (mpg) or liters per 100 kilometers (L/100 km) your
vehicle is getting based on current and past driving
conditions.
To reset the average fuel economy, press and hold the
reset button while MPG (L/100 KM) AVG is displayed.
Average fuel economy is then calculated starting from
that point. If the average fuel economy is not reset, it is
continually updated each time you drive.
MPG (L/100 KM) INST (Instantaneous)
Press the information button until MPG (L/100 KM) INST
displays. This mode shows the current fuel economy at
a particular moment and changes frequently as driving
conditions change. This mode shows the instantaneous
fuel economy in miles per gallon (mpg) or liters per
100 kilometers (L/100 km). Unlike average fuel
economy, this screen cannot be reset.
4-47
Page 214 of 480

AV (Average) SPEED
Press the information button until AV SPEED displays.
This mode shows the vehicle's average speed in miles
per hour (mph) or kilometers per hour (km/h).
To reset the average vehicle speed, press and hold the
reset button while AV SPEED is displayed.
OIL LIFE
Press the information button until OIL LIFE displays.
The engine oil life system shows an estimate of the oil's
remaining useful life. It shows 100% when the system is
reset after an oil change. It alerts you to change the oil
on a schedule consistent with your driving conditions.
In addition to the engine oil life system monitoring the
oil life, additional maintenance is recommended in the
Maintenance Schedule in this manual. SeeEngine Oil
on page 6‑19andScheduled Maintenanceon
page 7‑3.
Always reset the engine oil life system after an oil
change. See “How to Reset the Engine Oil Life
System” underEngine Oil Life System on page 6‑23.
COOLANT
Press the information button until COOLANT displays.
This mode shows the temperature of the engine
coolant in either degrees Fahrenheit (°F) or degrees
Celsius (°C).
Tire Pressure
If your vehicle has a Tire Pressure Monitor System
(TPMS), the pressure for each tire can be viewed in the
DIC. The tire pressure is shown in either pounds per
square inch (psi) or kilopascals (kPa). Press the
information button until LF ## PSI (kPa) ## RF displays
for the front tires. Press the information button again
until LR ## PSI (kPa) ## RR displays for the rear tires.
If a low tire pressure condition is detected by the
system while driving, a message advising you to
check the tire pressure appears in the display. See
Inflation - Tire Pressure
on page 6‑63andDIC
Warnings and Messageson page 4‑48for more
information.
DIC Warnings and Messages
These messages appear if there is a problem detected
in one of your vehicle's systems.
A message clears when the vehicle's condition is no
longer present. To acknowledge a message and clear it
from the display, press and hold any of the DIC buttons.
If the condition is still present, the warning message
comes back on the next time the vehicle is turned off
and back on. With most messages, a warning chime
sounds when the message displays. Your vehicle may
have other warning messages.
4-48
Page 215 of 480

AUTO (Automatic) LIGHTS OFF
This message displays if the automatic headlamp
system is disabled with the headlamp switch. See
Automatic Headlamp System
on page 4‑12for more
information.
AUTO (Automatic) LIGHTS ON
This message displays if the automatic headlamp
system is enabled with the headlamp switch. See
Automatic Headlamp System
on page 4‑12for more
information.
BRAKE FLUID
This message displays, while the ignition is on, when
the brake fluid level is low. The brake system warning
light on the instrument panel cluster also comes on.
See Brake System Warning Light
on page 4‑30for
more information. Have the brake system serviced by
your dealer/retailer as soon as possible.
CHANGE OIL SOON
This message displays when the life of the engine oil
has expired and it should be changed.
When this message is acknowledged and cleared from
the display, the engine oil life system must still be reset
separately. See Engine Oil Life System
on page 6‑23andScheduled Maintenanceon page 7‑3for more
information.
CHECK GAS CAP
This message displays if the fuel cap has not been fully
tightened. Recheck the fuel cap to make sure that it is
on properly. A few driving trips with the cap properly
installed should turn the message off.
COMPETITIVE MODE
If your vehicle has this feature, this message displays
when the Competitive Driving mode is selected. The
Traction Control System (TCS) will not be operating
while in the Competitive Driving mode and the ESC/
TCS light on the instrument panel cluster will be on
solid. Adjust your driving accordingly. See Traction
Control System (TCS)
on page 5‑9, Electronic
Stability Control (ESC)on page 5‑6, and Electronic
Stability Control (ESC)/Traction Control System (TCS)
Indicator/Warning Light
on page 4‑33for more
information.
COOLING MODE ON
This message may display on some vehicles. Under
severe conditions, hot ambient temperatures, steep
grades, and towing, your vehicle may experience more
transmission shifting. This is temporary and normal
under these conditions. This does not require engine or
transmission service.
4-49
Page 216 of 480

CRUISE ENGAGED
This message displays when the cruise control system
is active. SeeCruise Controlon page 4‑8for more
information.
DOOR AJAR
This message displays if one or more of the vehicle's
doors are open. Make sure that the door(s) are closed
completely.
ENGINE DISABLED
This message displays if the starting of the engine is
disabled. Have your vehicle serviced by your dealer/
retailer immediately.
ENG (Engine) PWR (Power) REDUCED
This message displays to inform you that the vehicle
has reduced engine power to avoid damaging the
engine. Reduced engine power can affect the vehicle's
ability to accelerate. If this message is on, but there
is no reduction in performance, proceed to your
destination. The performance may be reduced the
next time the vehicle is driven. The vehicle may be
driven at a reduced speed while this message is on,
but acceleration and speed may be reduced. Anytime
this message stays on, the vehicle should be taken to
your dealer/retailer for service as soon as possible.
ESC (Electronic Stability Control) ACTIVE
If your vehicle has Electronic Stability Control (ESC),
this message displays and the ESC/TCS light on the
instrument panel cluster flashes when ESC is assisting
you with directional control of the vehicle. You may
feel or hear the system working and see this message
displayed in the DIC. Slippery road conditions may exist
when this message is displayed, so adjust your driving
accordingly. This message may stay on for a few
seconds after ESC stops assisting you with directional
control of the vehicle. This is normal when the system
is operating. See Electronic Stability Control (ESC)
on
page 5‑6and Electronic Stability Control (ESC)/
Traction Control System (TCS) Indicator/Warning Light
on page 4‑33for more information.
ESC (Electronic Stability Control)
NOT READY
If your vehicle has Electronic Stability Control (ESC),
this message may display briefly after starting the
vehicle if the system's sensors are not yet calibrated.
The system is not functional until the message stops
displaying. Adjust your driving accordingly. When
the message is no longer displayed, the system is
functional. See Electronic Stability Control (ESC)
on
page 5‑6for more information.
4-50