2010 CHEVROLET EQUINOX wheel
[x] Cancel search: wheelPage 333 of 394
Vehicle Care 9-65
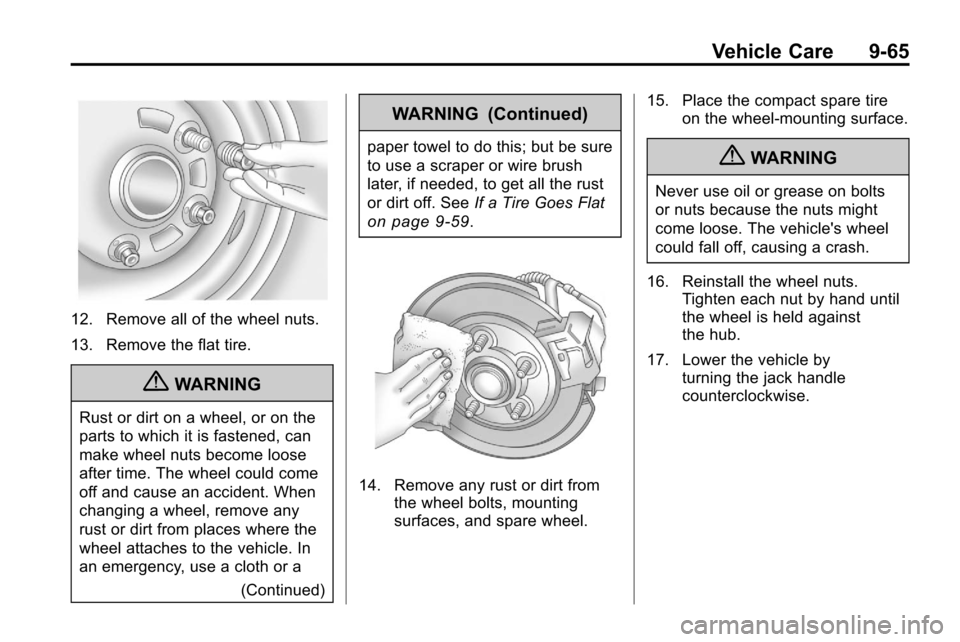
12. Remove all of the wheel nuts.
13. Remove the flat tire.
{WARNING
Rust or dirt on a wheel, or on the
parts to which it is fastened, can
make wheel nuts become loose
after time. The wheel could come
off and cause an accident. When
changing a wheel, remove any
rust or dirt from places where the
wheel attaches to the vehicle. In
an emergency, use a cloth or a(Continued)
WARNING (Continued)
paper towel to do this; but be sure
to use a scraper or wire brush
later, if needed, to get all the rust
or dirt off. SeeIf a Tire Goes Flat
on page 9‑59.
14. Remove any rust or dirt from
the wheel bolts, mounting
surfaces, and spare wheel. 15. Place the compact spare tire
on the wheel-mounting surface.
{WARNING
Never use oil or grease on bolts
or nuts because the nuts might
come loose. The vehicle's wheel
could fall off, causing a crash.
16. Reinstall the wheel nuts. Tighten each nut by hand until
the wheel is held against
the hub.
17. Lower the vehicle by turning the jack handle
counterclockwise.
Page 334 of 394
9-66 Vehicle Care
{WARNING
Wheel nuts that are improperly or
incorrectly tightened can cause
the wheels to become loose or
come off. The wheel nuts should
be tightened with a torque wrench
to the proper torque specification
after replacing. Follow the torque
specification supplied by the
aftermarket manufacturer when
using accessory locking wheel
nuts. SeeCapacities and
Specifications
on page 11‑2for
original equipment wheel nut
torque specifications.
Notice: Improperly tightened
wheel nuts can lead to brake
pulsation and rotor damage. To
avoid expensive brake repairs,
evenly tighten the wheel nuts in
the proper sequence and to the
proper torque specification. See
Capacities and Specifications
on
page 11‑2for the wheel nut
torque specification.
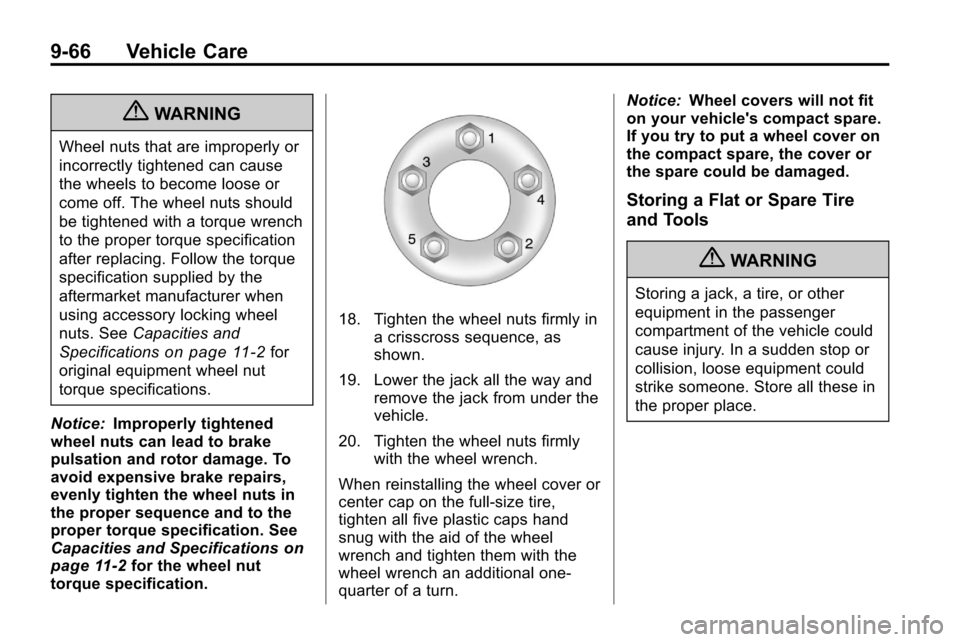
18. Tighten the wheel nuts firmly in a crisscross sequence, as
shown.
19. Lower the jack all the way and remove the jack from under the
vehicle.
20. Tighten the wheel nuts firmly with the wheel wrench.
When reinstalling the wheel cover or
center cap on the full-size tire,
tighten all five plastic caps hand
snug with the aid of the wheel
wrench and tighten them with the
wheel wrench an additional one‐
quarter of a turn. Notice:
Wheel covers will not fit
on your vehicle's compact spare.
If you try to put a wheel cover on
the compact spare, the cover or
the spare could be damaged.
Storing a Flat or Spare Tire
and Tools
{WARNING
Storing a jack, a tire, or other
equipment in the passenger
compartment of the vehicle could
cause injury. In a sudden stop or
collision, loose equipment could
strike someone. Store all these in
the proper place.
Page 335 of 394
Vehicle Care 9-67
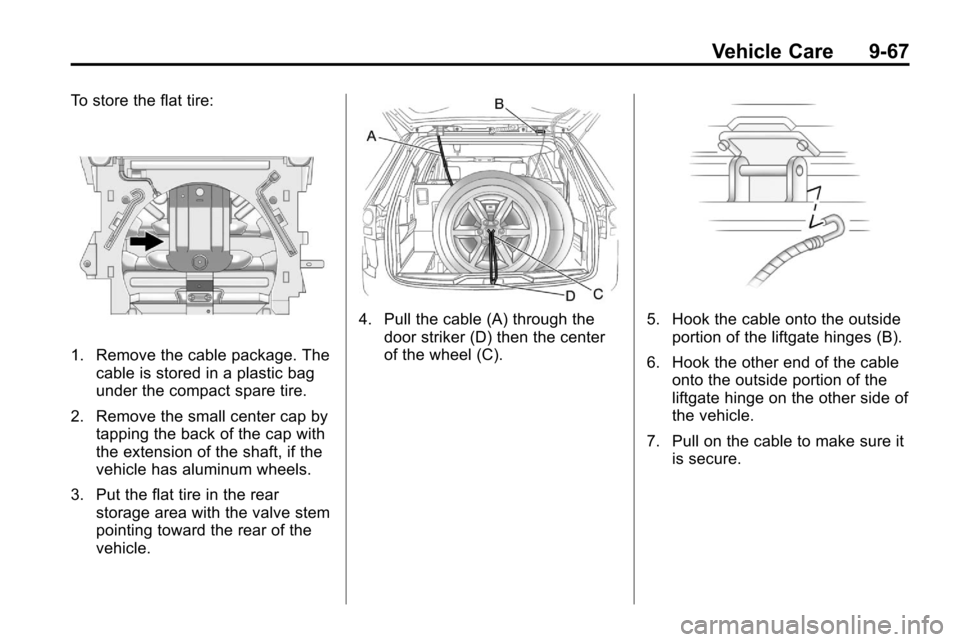
To store the flat tire:
1. Remove the cable package. Thecable is stored in a plastic bag
under the compact spare tire.
2. Remove the small center cap by tapping the back of the cap with
the extension of the shaft, if the
vehicle has aluminum wheels.
3. Put the flat tire in the rear storage area with the valve stem
pointing toward the rear of the
vehicle.
4. Pull the cable (A) through thedoor striker (D) then the center
of the wheel (C).5. Hook the cable onto the outsideportion of the liftgate hinges (B).
6. Hook the other end of the cable onto the outside portion of the
liftgate hinge on the other side of
the vehicle.
7. Pull on the cable to make sure it is secure.
Page 336 of 394
9-68 Vehicle Care
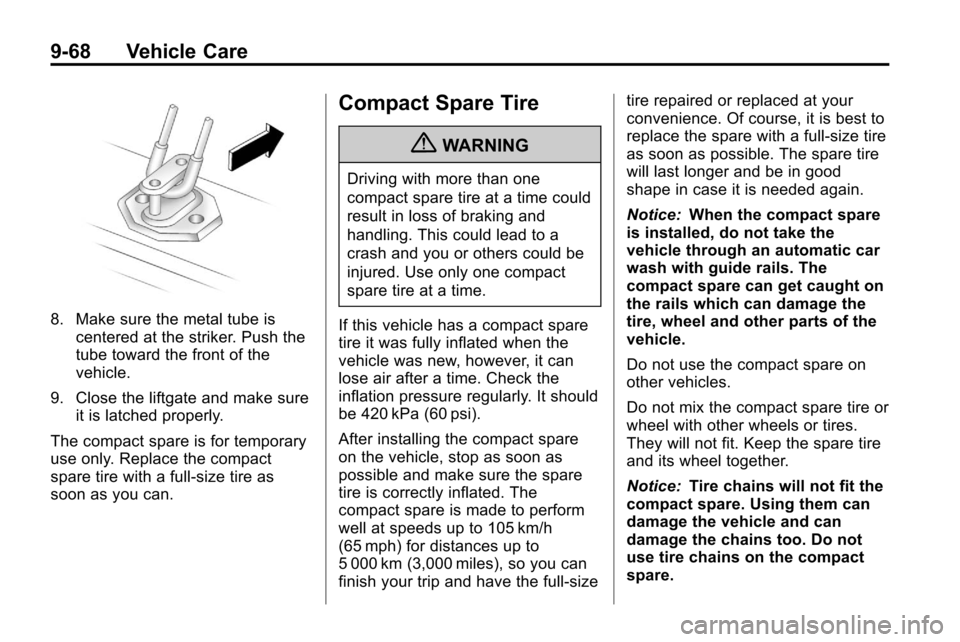
8. Make sure the metal tube iscentered at the striker. Push the
tube toward the front of the
vehicle.
9. Close the liftgate and make sure it is latched properly.
The compact spare is for temporary
use only. Replace the compact
spare tire with a full-size tire as
soon as you can.
Compact Spare Tire
{WARNING
Driving with more than one
compact spare tire at a time could
result in loss of braking and
handling. This could lead to a
crash and you or others could be
injured. Use only one compact
spare tire at a time.
If this vehicle has a compact spare
tire it was fully inflated when the
vehicle was new, however, it can
lose air after a time. Check the
inflation pressure regularly. It should
be 420 kPa (60 psi).
After installing the compact spare
on the vehicle, stop as soon as
possible and make sure the spare
tire is correctly inflated. The
compact spare is made to perform
well at speeds up to 105 km/h
(65 mph) for distances up to
5 000 km (3,000 miles), so you can
finish your trip and have the full-size tire repaired or replaced at your
convenience. Of course, it is best to
replace the spare with a full-size tire
as soon as possible. The spare tire
will last longer and be in good
shape in case it is needed again.
Notice:
When the compact spare
is installed, do not take the
vehicle through an automatic car
wash with guide rails. The
compact spare can get caught on
the rails which can damage the
tire, wheel and other parts of the
vehicle.
Do not use the compact spare on
other vehicles.
Do not mix the compact spare tire or
wheel with other wheels or tires.
They will not fit. Keep the spare tire
and its wheel together.
Notice: Tire chains will not fit the
compact spare. Using them can
damage the vehicle and can
damage the chains too. Do not
use tire chains on the compact
spare.
Page 340 of 394
9-72 Vehicle Care
To disconnect the jumper cables
from both vehicles,
1. Disconnect the blacknegative (−) cable from the
vehicle that had the dead
battery.
2. Disconnect the black negative (−) cable from the
vehicle with the good battery.
3. Disconnect the red positive (+) cable from the vehicle with the
good battery.
4. Disconnect the red positive (+) cable from the other vehicle.
5. Return the underhood fuse block cover to its original position,
if applicable.Towing
Towing the Vehicle
To avoid damage, the disabled
vehicle should be towed with all four
wheels off the ground. Consult your
dealer or a professional towing
service if the disabled vehicle must
be towed. See Roadside Assistance
Program on page 12‑6.
To tow the vehicle behind
another vehicle for recreational
purposes —such as behind a
motorhome, see Recreational
Vehicle Towing following.
Recreational Vehicle
Towing
Recreational vehicle towing means
towing the vehicle behind another
vehicle –such as behind a
motorhome. The two most common
types of recreational vehicle towing
are known as dinghy towing and dolly towing. Dinghy towing is
towing the vehicle with all four
wheels on the ground. Dolly towing
is towing the vehicle with two
wheels on the ground and two
wheels up on a device known as a
dolly.
Here are some important things to
consider before recreational vehicle
towing:
.What is the towing capacity of
the towing vehicle? Be sure to
read the tow vehicle
manufacturer's
recommendations.
.What is the distance that will be
travelled? Some vehicles have
restrictions on how far and how
long they can tow.
.Is the proper towing equipment
going to be used? See your
dealer or trailering professional
for additional advice and
equipment recommendations.
Page 341 of 394
Vehicle Care 9-73
.Is the vehicle ready to be
towed? Just as preparing the
vehicle for a long trip, make sure
the vehicle is prepared to be
towed.
Dinghy Towing
Front-wheel‐drive and
all-wheel-drive vehicles may be
dinghy towed from the front. These
vehicles can also be towed by
placing them on a platform trailer
with all four wheels off of the
ground. For other towing options,
see“Dolly Towing” following in this
section.
For vehicles being dinghy towed,
the vehicle should be run at the
beginning of each day and at each
RV fuel stop for about five minutes.
This will ensure proper lubrication of
transmission components.
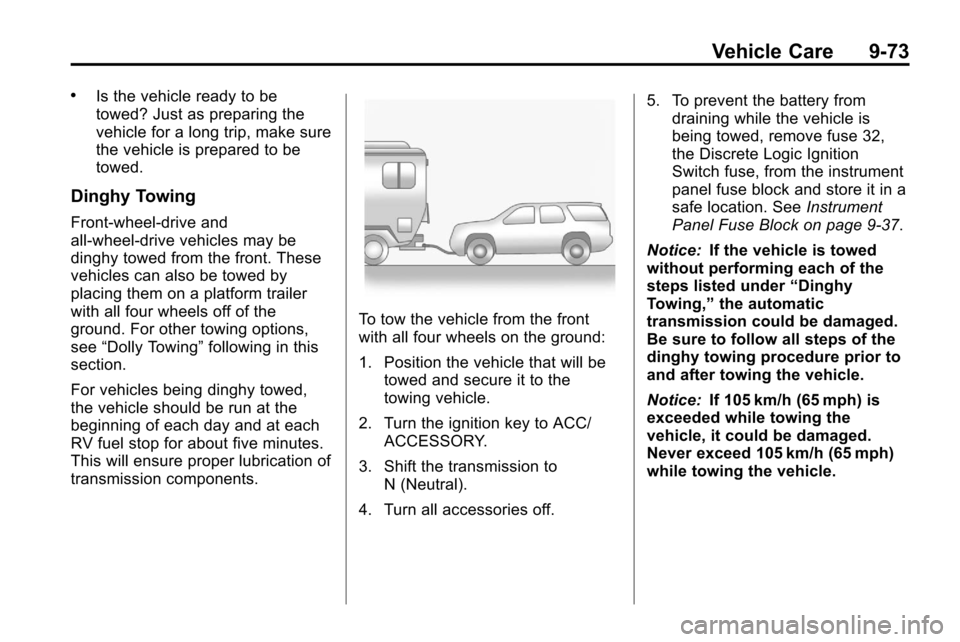
To tow the vehicle from the front
with all four wheels on the ground:
1. Position the vehicle that will be towed and secure it to the
towing vehicle.
2. Turn the ignition key to ACC/ ACCESSORY.
3. Shift the transmission to N (Neutral).
4. Turn all accessories off. 5. To prevent the battery from
draining while the vehicle is
being towed, remove fuse 32,
the Discrete Logic Ignition
Switch fuse, from the instrument
panel fuse block and store it in a
safe location. See Instrument
Panel Fuse Block on page 9‑37.
Notice: If the vehicle is towed
without performing each of the
steps listed under “Dinghy
Towing,” the automatic
transmission could be damaged.
Be sure to follow all steps of the
dinghy towing procedure prior to
and after towing the vehicle.
Notice: If 105 km/h (65 mph) is
exceeded while towing the
vehicle, it could be damaged.
Never exceed 105 km/h (65 mph)
while towing the vehicle.
Page 342 of 394
9-74 Vehicle Care
Once the destination has been
reached:
1. Set the parking brake.
2. Shift the transmission toP (Park).
3. Turn the ignition key to LOCK/OFF.
4. Install fuse 32, the Discrete Logic Ignition Switch fuse. See
Instrument Panel Fuse Block
on
page 9‑37.
5. Start the engine and let it idle for more than three minutes before
driving the vehicle.
Notice: Too much or too little
fluid can damage the
transmission. Be sure that the
transmission fluid is at the proper
level before towing with all four
wheels on the ground. Notice:
Do not tow a vehicle with
the front drive wheels on the
ground if one of the front tires is
a compact spare tire. Towing with
two different tire sizes on the
front of the vehicle can cause
severe damage to the
transmission.
Dolly Towing (All-Wheel‐Drive
Vehicles)
All-wheel‐drive vehicles should not
be towed with two wheels on the
ground. To properly tow these
vehicles, they should be placed on
a platform trailer with all four wheels
off of the ground or dinghy towed
from the front.
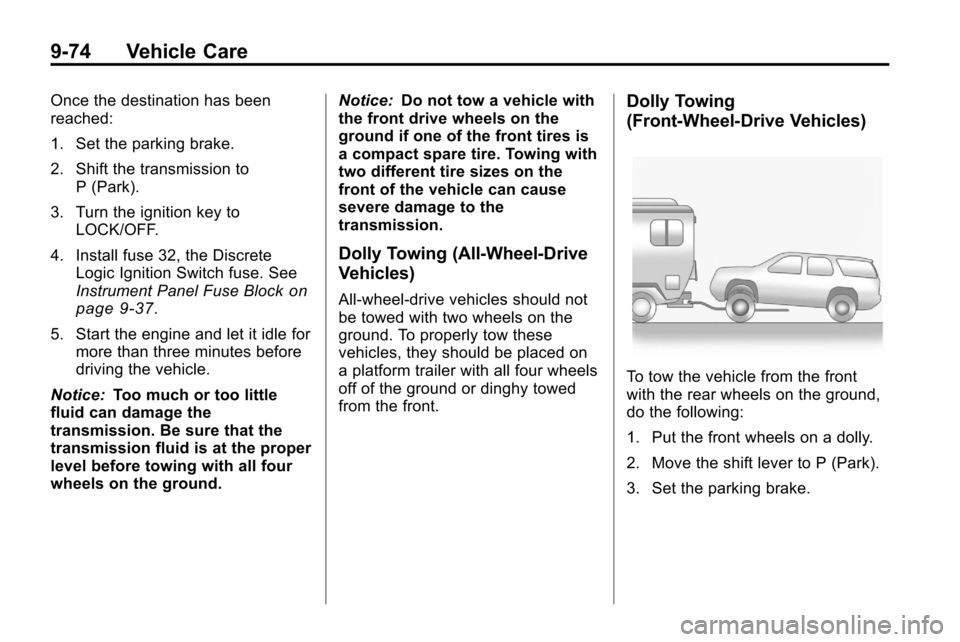
Dolly Towing
(Front-Wheel‐ Drive Vehicles)
To tow the vehicle from the front
with the rear wheels on the ground,
do the following:
1. Put the front wheels on a dolly.
2. Move the shift lever to P (Park).
3. Set the parking brake.
Page 345 of 394
Vehicle Care 9-77
High pressure car washes could
cause water to enter the vehicle.
Avoid using high pressure washes
closer than 30 cm (12 inches) to the
surface of the vehicle. Use of power
washers exceeding 8,274 kPa
(1,200 psi) can result in damage or
removal of paint and decals.
Notice:Conveyor systems on
some automatic car washes could
damage the vehicle. There may
not be enough clearance for the
undercarriage. Check with the car
wash manager before using the
automatic car wash.
Weatherstrips
Silicone grease on weatherstrips will
make them last longer, seal better,
and not stick or squeak. Apply
silicone grease with a clean cloth.
During very cold, damp weather
frequent application may be
required. See Recommended Fluids
and Lubricants on page 10‑7.
Wheels and Trim —Aluminum
or Chrome
The vehicle may have either
aluminum or chrome-plated wheels.
Keep the wheels clean using a soft
clean cloth with mild soap and
water. Rinse with clean water. After
rinsing thoroughly, dry with a soft
clean towel. A wax may then be
applied.
Notice: Chrome wheels and
other chrome trim may be
damaged if the vehicle is not
washed after driving on roads
that have been sprayed with
magnesium, calcium or sodium
chloride. These chlorides are
used on roads for conditions
such as ice and dust. Always
wash the vehicle's chrome with
soap and water after exposure.
Notice: Using strong soaps,
chemicals, abrasive polishes,
cleaners, brushes, or cleaners
that contain acid on aluminum or
chrome-plated wheels, could
damage the surface of the wheel(s). The repairs would not
be covered by the vehicle
warranty. Use only approved
cleaners on aluminum or
chrome-plated wheels.
The surface of these wheels is
similar to the painted surface of the
vehicle. Do not use strong soaps,
chemicals, abrasive polishes,
abrasive cleaners, cleaners with
acid, or abrasive cleaning brushes
on them because the surface could
be damaged. Do not use chrome
polish on aluminum wheels.
Notice:
Using chrome polish on
aluminum wheels could damage
the wheels. The repairs would not
be covered by the vehicle
warranty. Use chrome polish on
chrome wheels only.
Use chrome polish only on
chrome-plated wheels, but avoid
any painted surface of the wheel,
and buff off immediately after
application.