2010 BUICK LACROSSE trailer
[x] Cancel search: trailerPage 106 of 414

4-18 Instruments and Controls
If the check engine light comes on
and stays on, while the engine is
running, this indicates that there is
an OBD II problem and service is
required.
Malfunctions often are indicated by
the system before any problem is
apparent. Being aware of the light
can prevent more serious damage
to the vehicle. This system assists
the service technician in correctly
diagnosing any malfunction.
Notice:If the vehicle is
continually driven with this light
on, after a while, the emission
controls might not work as well,
the vehicle's fuel economy might
not be as good, and the engine
might not run as smoothly. This
could lead to costly repairs that
might not be covered by the
vehicle warranty. Notice:
Modifications made to the
engine, transmission, exhaust,
intake, or fuel system of the
vehicle or the replacement of the
original tires with other than
those of the same Tire
Performance Criteria (TPC) can
affect the vehicle's emission
controls and can cause this light
to come on. Modifications to
these systems could lead to
costly repairs not covered by the
vehicle warranty. This could also
result in a failure to pass a
required Emission Inspection/
Maintenance test. See
Accessories and Modifications
on page 9‑3.
This light comes on during a
malfunction in one of two ways:
Light Flashing: A misfire condition
has been detected. A misfire
increases vehicle emissions and
could damage the emission control
system on the vehicle. Diagnosis
and service might be required. The following can prevent more
serious damage to the vehicle:
.Reduce vehicle speed.
.Avoid hard accelerations.
.Avoid steep uphill grades.
.If towing a trailer, reduce the
amount of cargo being hauled as
soon as it is possible.
If the light continues to flash, when
it is safe to do so, stop the vehicle.
Find a safe place to park the
vehicle. Turn the vehicle off, wait at
least 10 seconds, and restart the
engine. If the light is still flashing,
follow the previous steps and see
your dealer/retailer for service as
soon as possible.
Light On Steady: An emission
control system malfunction has
been detected on the vehicle.
Diagnosis and service might be
required.
Page 145 of 414

Lighting 5-7
has a voltmeter gage or a voltage
display on the Driver Information
Center (DIC), you may see the
voltage move up or down. This is
normal. If there is a problem, an
alert will be displayed.
The battery can be discharged at
idle if the electrical loads are very
high. This is true for all vehicles.
This is because the generator
(alternator) may not be spinning fast
enough at idle to produce all the
power that is needed for very high
electrical loads.
A high electrical load occurs when
several of the following are on, such
as: headlamps, high beams, fog
lamps, rear window defogger,
climate control fan at high speed,
heated seats, engine cooling fans,
trailer loads, and loads plugged into
accessory power outlets.EPM works to prevent excessive
discharge of the battery. It does this
by balancing the generator's output
and the vehicle's electrical needs.
It can increase engine idle speed to
generate more power, whenever
needed. It can temporarily reduce
the power demands of some
accessories.
Normally, these actions occur in
steps or levels, without being
noticeable. In rare cases at the
highest levels of corrective action,
this action may be noticeable to the
driver. If so, a Driver Information
Center (DIC) message might be
displayed, such as BATTERY
SAVER ACTIVE, BATTERY
VOLTAGE LOW, or LOW BATTERY.
If one of these messages display, it
is recommended that the driver
reduce the electrical loads as much
as possible. See
Driver Information
Center (DIC) on page 4‑25.Battery Power Protection
The battery saver feature is
designed to protect the vehicle's
battery.
If the exterior lamps or any interior
light is left on and the ignition is
turned off, the battery rundown
protection system automatically
turns the lamp off after about
10 minutes.
Page 224 of 414

8-2 Driving and Operating
Towing
General TowingInformation . . . . . . . . . . . . . . . . . 8-54
Driving Characteristics and Towing Tips . . . . . . . . . . . . . . . . 8-54
Trailer Towing (2.4L L4
Engine) . . . . . . . . . . . . . . . . . . . . . 8-58
Trailer Towing (3.0L and 3.6L V6 Engines) . . . . . . . . . . . . . . . . 8-58
Towing Equipment . . . . . . . . . . . 8-59
Conversions and Add-Ons
Add-On Electrical Equipment . . . . . . . . . . . . . . . . . 8-60
Driving Information
Driving for Better Fuel
Economy
Driving habits can affect fuel
mileage. Here are some driving tips
to get the best fuel economy
possible.
.Avoid fast starts and accelerate
smoothly.
.Brake gradually and avoid
abrupt stops.
.Avoid idling the engine for long
periods of time.
.When road and weather
conditions are appropriate, use
cruise control, if equipped.
.Always follow posted speed
limits or drive more slowly when
conditions require.
.Keep vehicle tires properly
inflated.
.Combine several trips into a
single trip.
.Replace the vehicle's tires with
the same TPC Spec number
molded into the tire's sidewall
near the size.
.Follow recommended scheduled
maintenance.
Page 236 of 414

8-14 Driving and Operating
4.The resulting figure equals
the available amount of cargo
and luggage load capacity.
For example, if the“XXX”
amount equals 1400 lbs and
there will be five 150 lb
passengers in your vehicle,
the amount of available cargo
and luggage load capacity is
650 lbs (1400 −750 (5 x 150)
= 650 lbs).
5.Determine the combined
weight of luggage and cargo
being loaded on the vehicle.
That weight may not safely
exceed the available cargo
and luggage load capacity
calculated in Step 4.
6.If your vehicle will be towing
a trailer, the load from your
trailer will be transferred to
your vehicle. Consult this
manual to determine how this
reduces the available cargo
and luggage load capacity of
your vehicle.
See Trailer Towing (2.4L L4
Engine)
on page 8‑58or Trailer
Towing (3.0L and 3.6L
V6 Engines)
on page 8‑58for
important information on towing
a trailer, towing safety rules and
trailering tips.Example 1
A.
Vehicle Capacity Weight for
Example 1 = 453 kg
(1,000 lbs).
B.Subtract Occupant Weight @
68 kg (150 lbs) × 2 = 136 kg
(300 lbs).
C.Available Occupant and
Cargo Weight = 317 kg
(700 lbs).
Page 239 of 414

Driving and Operating 8-17
WARNING (Continued)
.Never stack heavier
things, like suitcases,
inside the vehicle so that
some of them are above
the tops of the seats.
.Do not leave an
unsecured child restraint
in the vehicle.
.When you carry something
inside the vehicle, secure
it whenever you can.
.Do not leave a seat folded
down unless you need to.
Starting and
Operating
New Vehicle Break-In
Notice:The vehicle does not
need an elaborate break-in. But it
will perform better in the long run
if you follow these guidelines:
.Do not drive at any one
constant speed, fast or slow,
for the first 805 km
(500 miles). Do not make
full-throttle starts. Avoid
downshifting to brake or
slow the vehicle.
.During the first 1 000 km
(600 miles), avoid using more
than moderate acceleration
in lower gears and avoid
vehicle speeds above
110 km/h (68 mph).
.Between the first 1 000 km
(600 miles) and 5 000 km
(3,000 miles), heavy
acceleration in lower gears can be used. Vehicle speeds
above 110 km/h (68 mph)
should be limited to
five minutes per use.
.Avoid making hard stops for
the first 322 km (200 miles) or
so. During this time the new
brake linings are not yet
broken in. Hard stops with
new linings can mean
premature wear and earlier
replacement. Follow this
breaking-in guideline every
time you get new brake
linings.
.Do not tow a trailer during
break-in. See
Driving
Characteristics and Towing
Tips
on page 8‑54for the
trailer towing capabilities of
your vehicle and more
information.
Following break-in, engine speed
and load can be gradually
increased.
Page 249 of 414

Driving and Operating 8-27
{WARNING
It can be dangerous to get out of
the vehicle if the automatic
transmission shift lever is not fully
in P (Park) with the parking brake
firmly set. The vehicle can roll. Do
not leave the vehicle when the
engine is running unless you
have to. If you have left the
engine running, the vehicle can
move suddenly. You or others
could be injured. To be sure the
vehicle will not move, even when
you are on fairly level ground,
always set the parking brake and
move the shift lever to P (Park).
Follow the proper steps to be sure
the vehicle will not move. See
Shifting Into Park on page 8‑23.
If parking on a hill and pulling a
trailer, see Driving Characteristics
and Towing Tips on page 8‑54.
Automatic
Transmission
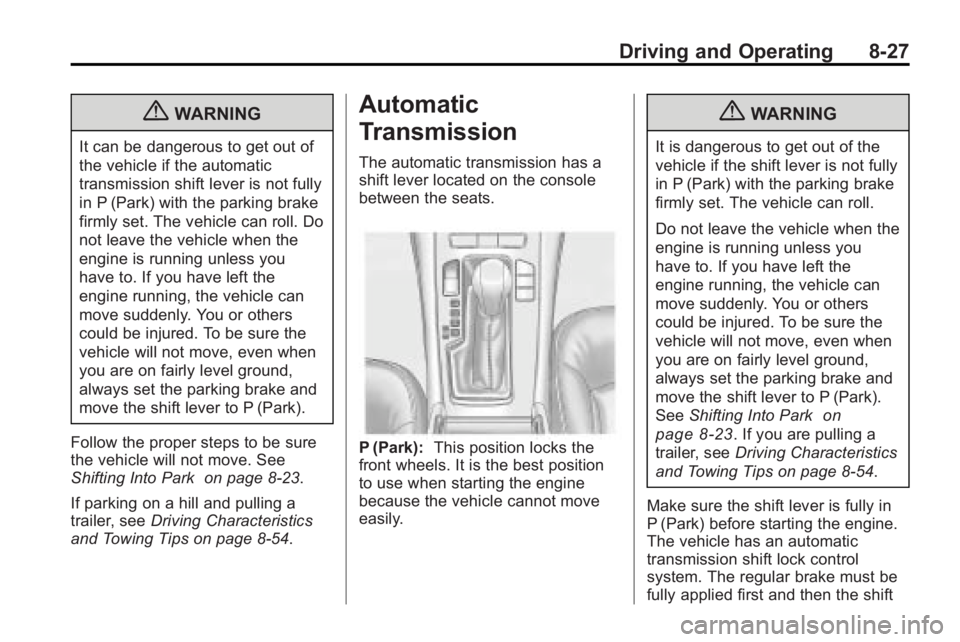
The automatic transmission has a
shift lever located on the console
between the seats.
P (Park): This position locks the
front wheels. It is the best position
to use when starting the engine
because the vehicle cannot move
easily.
{WARNING
It is dangerous to get out of the
vehicle if the shift lever is not fully
in P (Park) with the parking brake
firmly set. The vehicle can roll.
Do not leave the vehicle when the
engine is running unless you
have to. If you have left the
engine running, the vehicle can
move suddenly. You or others
could be injured. To be sure the
vehicle will not move, even when
you are on fairly level ground,
always set the parking brake and
move the shift lever to P (Park).
See Shifting Into Park
on
page 8‑23
. If you are pulling a
trailer, see Driving Characteristics
and Towing Tips on page 8‑54.
Make sure the shift lever is fully in
P (Park) before starting the engine.
The vehicle has an automatic
transmission shift lock control
system. The regular brake must be
fully applied first and then the shift
Page 255 of 414

Driving and Operating 8-33
If the park brake status light flashes
continuously, the EPB is only
partially applied or released,
or there is a problem with the EPB.
The DIC message SERVICE PARK
BRAKE will be displayed. If this light
flashes continuously, release the
EPB, and attempt to apply it again.
If this light continues to flash, do not
drive the vehicle. See your dealer/
retailer.
If the park brake warning light is on,
the EPB has detected an error in
another system and is operating
with reduced functionality. To apply
the EPB when this light is on, lift up
on the EPB switch and hold it in the
up position. Full application of the
parking brake by the EPB system
may take a longer period of time
than normal when this light is on.
Continue to hold the switch until the
park brake status light remains on.
If the park brake warning light is on,
see your dealer/retailer.
If the EPB fails to apply, the rear
wheels should be blocked to
prevent vehicle movement.EPB Release
To release the EPB, place the
ignition in the ON/RUN position,
apply and hold the brake pedal, and
push down momentarily on the EPB
switch. If you attempt to release the
EPB without the brake pedal
applied, a chime will sound, and the
DIC message PRESS BRAKE
PEDAL TO RELEASE PARK
BRAKE will be displayed. The EPB
is released when the park brake
status light is off.
If the park brake warning light is on,
the EPB has detected an error in
another system and is operating
with reduced functionality. To
release the EPB when this light is
on, push down on the EPB switch
and hold it in the down position.
EPB release may take a longer
period of time than normal when this
light is on. Continue to hold the
switch until the park brake status
light is off. If the light is on, see your
dealer/retailer.Notice:
Driving with the parking
brake on can overheat the brake
system and cause premature
wear or damage to brake system
parts. Make sure that the parking
brake is fully released and the
brake warning light is off before
driving.
Automatic EPB Release
The EPB will automatically release if
the vehicle is running, placed into
gear and an attempt is made to
drive away. Avoid rapid acceleration
when the EPB is applied, to
preserve park brake lining life.
For maximum EPB force when
towing a trailer or parking on a hill,
pull the EPB switch twice. If you are
towing a trailer and parking on a hill,
see Driving Characteristics and
Towing Tips
on page 8‑54for more
information.
Page 264 of 414

8-42 Driving and Operating
The following describes how the URPA display lights appear as the vehicle
gets closer to a detected object:Description Metric Englishamber light 2.5 m 8 ft.
amber/amber lights 1.0 m 40 in.
amber/amber/red lights and continuous beeping for five seconds 0.6 m 23 in.
amber/amber/red lights flashing and continuous beeping for five seconds 0.3 m 1 ft.
PARK ASSIST OFF displays on the
Driver Information Center (DIC) to
indicate that URPA is off, see Driver
Information Center (DIC)
on
page 4‑25for more information.
Turning the System On and Off
The URPA system can be turned on
and off using the park assist button
located next to the shift lever.
The park assist button lights up
when the system is on and turns off
when it has been disabled.
URPA defaults to the on setting
each time the vehicle is started.
When the System Does Not
Seem to Work Properly
If the URPA system does not
activate due to a temporary
condition, the message PARK
ASSIST OFF displays on the DIC
and a red light is shown on the rear
URPA display when the shift lever is
moved into R (Reverse). This can
occur under the following
conditions:
.The ultrasonic sensors are not
clean. Keep the vehicle's rear
bumper free of mud, dirt, snow,
ice and slush. For cleaning
instructions, see Exterior Care
on page 9‑82.
.A trailer was attached to the
vehicle, or an object was
hanging out of the trunk during
the last drive cycle, a red light
may come on in the rear display.
Once the attached object is
removed, URPA will return to
normal operation.