2010 BUICK LACROSSE warning light
[x] Cancel search: warning lightPage 258 of 414

8-36 Driving and Operating
This also occurs when traction
control is activated. A noise might
be heard or vibration might be felt in
the brake pedal. This is normal.
Continue to steer the vehicle in the
intended direction.
If there is a problem detected with
StabiliTrak, the TCS/StabiliTrak light
comes on and the system is not
operational. SeeElectronic Stability
Control (ESC)/Traction Control
System (TCS) Indicator/Warning
Light
on page 4‑22. Driving should
be adjusted accordingly.
StabiliTrak comes on automatically
whenever the vehicle is started. To
assist with directional control of the
vehicle, the system should always
be left on.
StabiliTrak can be turned off if
needed by pressing and holding
g
until the StabiliTrak Off light comes
on the instrument panel. For
information on turning TCS off and
on, see Traction Control System
(TCS) in this section.
If cruise control is being used when
StabiliTrak activates, the cruise
control automatically disengages.
Press the cruise control button to
reengage when road conditions
allow. See Cruise Control
on
page 8‑37for more information.
Selective Ride Control
The vehicle may have a ride control
system called Selective Ride
Control. The system provides the
following performance benefits:
.Reduced Impact Harshness
.Improved Road Isolation
.Improved High-Speed Stability
.Improved Handling Response
.Better Control of Body Ride
Motions
To switch from TOUR to SPORT
mode, move the shift lever to
the left while the transmission is
in D (Drive).
Page 260 of 414

8-38 Driving and Operating
Setting Cruise Control
{WARNING
If you leave your cruise control on
when you are not using cruise,
you might hit a button and go into
cruise when you do not want to.
You could be startled and even
lose control. Keep the cruise
control switch off until you want to
use cruise control.
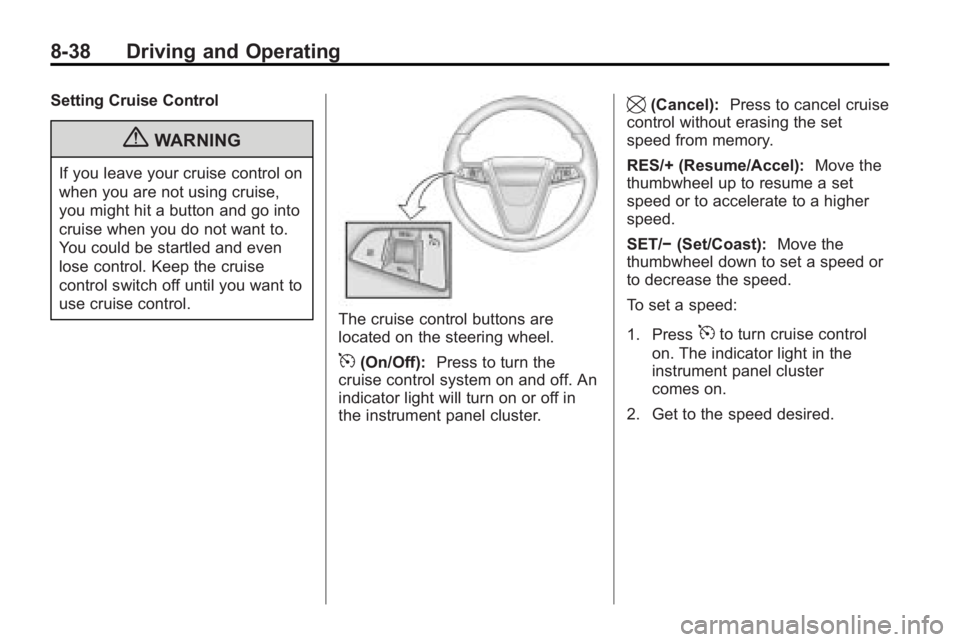
The cruise control buttons are
located on the steering wheel.
5(On/Off):Press to turn the
cruise control system on and off. An
indicator light will turn on or off in
the instrument panel cluster.
\(Cancel): Press to cancel cruise
control without erasing the set
speed from memory.
RES/+ (Resume/Accel): Move the
thumbwheel up to resume a set
speed or to accelerate to a higher
speed.
SET/− (Set/Coast): Move the
thumbwheel down to set a speed or
to decrease the speed.
To set a speed:
1. Press
5to turn cruise control
on. The indicator light in the
instrument panel cluster
comes on.
2. Get to the speed desired.
Page 263 of 414

Driving and Operating 8-41
{WARNING
The Ultrasonic Rear Parking
Assist (URPA) system does not
replace driver vision. It cannot
detect:
.objects that are below the
bumper, underneath the
vehicle, or if they are too
close or far from the vehicle
.children, pedestrians,
bicyclists, or pets.
If you do not use proper care
before and while backing; vehicle
damage, injury, or death could
occur. Even with URPA, always
check behind the vehicle before
backing up. While backing, be
sure to look for objects and check
the vehicle's mirrors. The display is located in the
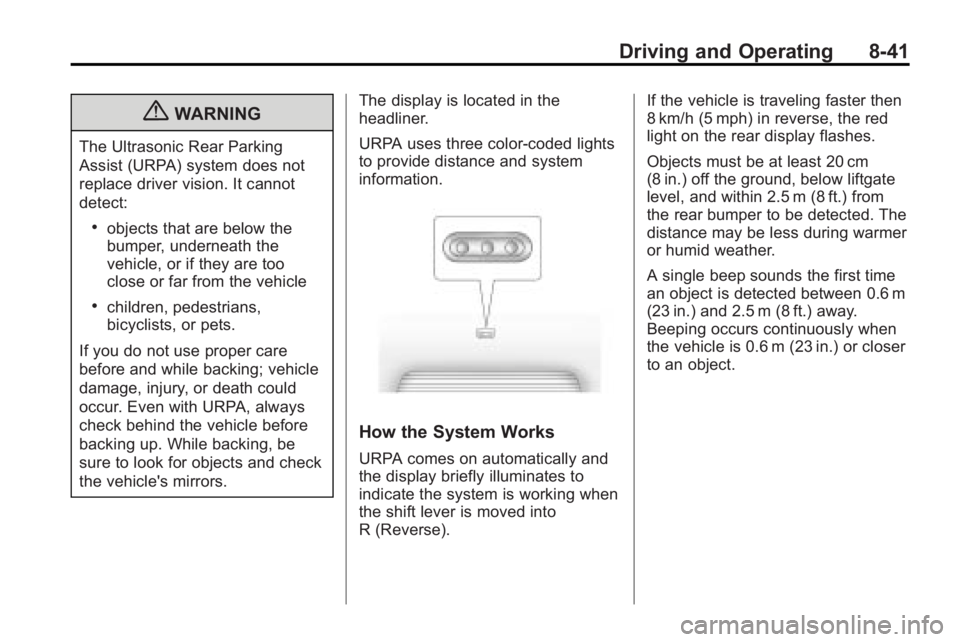
headliner.
URPA uses three color-coded lights
to provide distance and system
information.
How the System Works
URPA comes on automatically and
the display briefly illuminates to
indicate the system is working when
the shift lever is moved into
R (Reverse). If the vehicle is traveling faster then
8 km/h (5 mph) in reverse, the red
light on the rear display flashes.
Objects must be at least 20 cm
(8 in.) off the ground, below liftgate
level, and within 2.5 m (8 ft.) from
the rear bumper to be detected. The
distance may be less during warmer
or humid weather.
A single beep sounds the first time
an object is detected between 0.6 m
(23 in.) and 2.5 m (8 ft.) away.
Beeping occurs continuously when
the vehicle is 0.6 m (23 in.) or closer
to an object.
Page 265 of 414

Driving and Operating 8-43
.A tow bar is attached to the
vehicle.
.The vehicle's bumper is
damaged. Take the vehicle to
your dealer/retailer to repair the
system.
.Other conditions may affect
system performance, such as
vibrations from a jackhammer or
the compression of air brakes on
a very large truck.
If the system is still disabled, after
driving forward at least 25 km/h
(15 mph), take the vehicle to your
dealer/retailer.
Side Blind Zone
Alert (SBZA)
The vehicle may have a Side Blind
Zone Alert (SBZA) system. Read
this entire section before using the
system.
{WARNING
SBZA is only a lane changing aid
and does not replace driver
vision. SBZA does not detect:
.Vehicles outside the side
blind zones which may be
rapidly approaching.
.Pedestrians, bicyclists,
or animals. (Continued)
WARNING (Continued)
Failure to use proper care when
changing lanes may result in
damage to the vehicle, injury,
or death. Always check the
outside and rearview mirrors,
glance over your shoulder, and
use the turn signal before
changing lanes.
When the system detects a vehicle
in the side blind zone, amber SBZA
displays will light up in the side
mirrors. This indicates that it may be
unsafe to change lanes. Before
making a lane change, always
check the SBZA display, check the
outside and rearview mirrors, look
over your shoulder for vehicles and
hazards, and use the turn signal.
Page 266 of 414

8-44 Driving and Operating
SBZA Detection Zones
The SBZA sensor covers a zone
of approximately one lane over
from both sides of the vehicle,
3.5 m (11 ft.). This zone starts at
each side mirror and goes back
approximately 5.0 m (16 ft.). The
height of the zone is approximately
between 0.5 m (1.5 ft.) and
2.0 m (6 ft.) off the ground.
The SBZA detection zones do not
change if the vehicle is towing a
trailer. So be extra careful when
changing lanes while towing a
trailer.How the System Works
Left Side Mirror
DisplayRight Side Mirror Display
When the vehicle is started, both
outside mirror displays will briefly
come on to indicate that the system
is operating. While driving forward,
the left or right side mirror SBZA
display will light up if a vehicle is
detected in that blind zone. If you
activate a turn signal and a vehicle
has been detected on the same
side, the SBZA display will flash to
give you extra warning not to
change lanes. SBZA displays do not come on
while the vehicle is approaching or
passing other vehicles. At speeds
greater than 32 km/h (20 mph),
SBZA displays may come on when
a vehicle you have passed remains
in or drops back into the
detection zone.
SBZA can be disabled through
Vehicle Personalization. See
Vehicle Personalization
on
page 4‑38for more information.
If the SBZA is disabled by the
driver, the SBZA mirror displays will
not light up during normal driving.
Page 275 of 414

Driving and Operating 8-53
{WARNING
Fuel can spray out on you if you
open the fuel cap too quickly.
If you spill fuel and then
something ignites it, you could be
badly burned. This spray can
happen if the tank is nearly full,
and is more likely in hot weather.
Open the fuel cap slowly and wait
for any hiss noise to stop. Then
unscrew the cap all the way.
Do not top off or overfill the tank and
wait a few seconds before removing
the nozzle. Clean fuel from painted
surfaces as soon as possible. See
Exterior Care on page 9‑82.
{WARNING
If a fire starts while you are
refueling, do not remove the
nozzle. Shut off the flow of fuel by
shutting off the pump or by
notifying the station attendant.
Leave the area immediately. Notice:
If a new fuel cap is
needed, be sure to get the right
type of cap from your dealer/
retailer. The wrong type fuel cap
might not fit properly, might
cause the malfunction indicator
lamp to light, and could damage
the fuel tank and emissions
system. See Malfunction Indicator
Lamp on page 4‑17.
Filling a Portable Fuel
Container
{WARNING
Never fill a portable fuel container
while it is in the vehicle. Static
electricity discharge from the
container can ignite the fuel
(Continued)
WARNING (Continued)
vapor. You can be badly burned
and the vehicle damaged if this
occurs. To help avoid injury to you
and others:
.Dispense fuel only into
approved containers.
.Do not fill a container while it
is inside a vehicle, in a
vehicle's trunk, pickup bed,
or on any surface other than
the ground.
.Bring the fill nozzle in contact
with the inside of the fill
opening before operating the
nozzle. Contact should be
maintained until the filling is
complete.
.Do not smoke while
pumping fuel.
.Do not use a cellular phone
while pumping fuel.
Page 283 of 414

Vehicle Care 9-1
Vehicle Care
General Information
General Information . . . . . . . . . . . 9-2
California Proposition65 Warning . . . . . . . . . . . . . . . . . . 9-2
California Perchlorate Materials Requirements . . . . . . . . . . . . . . . 9-3
Accessories and Modifications . . . . . . . . . . . . . . . . 9-3
Vehicle Checks
Doing Your OwnService Work . . . . . . . . . . . . . . . . 9-4
Hood . . . . . . . . . . . . . . . . . . . . . . . . . . 9-5
Engine Compartment Overview . . . . . . . . . . . . . . . . . . . . 9-6
Engine Oil . . . . . . . . . . . . . . . . . . . 9-11
Engine Oil Life System . . . . . . 9-13
Automatic Transmission Fluid . . . . . . . . . . . . . . . . . . . . . . . 9-15
Engine Air Cleaner/Filter . . . . . 9-15
Cooling System . . . . . . . . . . . . . . 9-17
Engine Coolant . . . . . . . . . . . . . . 9-18
Engine Overheating . . . . . . . . . 9-20
Overheated Engine Protection Operating Mode . . . . . . . . . . . . 9-21
Power Steering Fluid . . . . . . . . 9-22 Washer Fluid . . . . . . . . . . . . . . . . 9-23
Brakes . . . . . . . . . . . . . . . . . . . . . . . 9-24
Brake Fluid . . . . . . . . . . . . . . . . . . 9-25
Battery . . . . . . . . . . . . . . . . . . . . . . . 9-26
Starter Switch Check . . . . . . . . 9-27
Automatic Transmission Shift
Lock Control System
Check . . . . . . . . . . . . . . . . . . . . . . 9-27
Ignition Transmission Lock Check . . . . . . . . . . . . . . . . . . . . . . 9-28
Park Brake and P (Park) Mechanism Check . . . . . . . . . 9-28
Wiper Blade Replacement . . . 9-29Headlamp Aiming
Headlamp Aiming . . . . . . . . . . . . 9-30
Bulb Replacement
Bulb Replacement . . . . . . . . . . . 9-33
Halogen Bulbs . . . . . . . . . . . . . . . 9-33
High Intensity Discharge (HID) Lighting . . . . . . . . . . . . . . . . . . . . 9-33
Headlamps, Front Turn Signal and Parking Lamps . . . . . . . . . 9-33
Fog Lamps . . . . . . . . . . . . . . . . . . 9-35 Taillamps, Turn Signal,
Stoplamps, and Back-Up
Lamps . . . . . . . . . . . . . . . . . . . . . . 9-35
License Plate Lamp . . . . . . . . . . 9-36
Replacement Bulbs . . . . . . . . . . 9-37
Electrical System
Electrical System Overload . . . . . . . . . . . . . . . . . . . 9-38
Fuses and Circuit Breakers . . . . . . . . . . . . . . . . . . . 9-38
Engine Compartment Fuse Block . . . . . . . . . . . . . . . . . . . . . . . 9-39
Instrument Panel Fuse Block . . . . . . . . . . . . . . . . . . . . . . . 9-41
Rear Compartment Fuse Block . . . . . . . . . . . . . . . . . . . . . . . 9-43
Wheels and Tires
Tires . . . . . . . . . . . . . . . . . . . . . . . . . 9-46
Winter Tires . . . . . . . . . . . . . . . . . . 9-46
Tire Sidewall Labeling . . . . . . . 9-47
Tire Designations . . . . . . . . . . . . 9-49
Tire Terminology and
Definitions . . . . . . . . . . . . . . . . . . 9-50
Tire Pressure . . . . . . . . . . . . . . . . 9-53
Tire Pressure Monitor System . . . . . . . . . . . . . . . . . . . . . 9-54
Page 302 of 414

9-20 Vehicle Care
3. Fill the coolant surge tank withthe proper mixture to the mark
pointed to on the front of the
coolant surge tank.
4. With the coolant surge tank cap off, start the engine and let it run
until the upper radiator hose
starts getting hot. Watch out for
the engine cooling fan(s). By this
time, the coolant level inside the
coolant surge tank may be
lower. If the level is lower, add
more of the proper mixture to the
coolant surge tank until the level reaches the mark pointed to on
the front of the coolant
surge tank.
5. Replace the cap. Be sure the cap is hand–tight and full
seated.
Notice: If the pressure cap is not
tightly installed, coolant loss and
possible engine damage may
occur. Be sure the cap is properly
and tightly secured.
If coolant is needed, add the proper
DEX-COOL®coolant mixture at the
coolant recovery tank.
Engine Overheating
The vehicle has several indicators
to warn of engine overheating.
There is a coolant temperature gage
and a warning light on the
instrument panel cluster that
indicate an overheated engine
condition. See Engine Coolant
Temperature Gage
on page 4‑15for more information. You may decide not to lift the hood
when this warning appears, but
instead get service help right away.
See
Roadside Assistance Program
(US, Can) on page 12‑6.
If you do decide to lift the hood ,
make sure the vehicle is parked on
a level surface.
Then check to see if the engine
cooling fans are running. If the
engine is overheating, the fan(s)
should be running. If they are not,
do not continue to run the engine
and have the vehicle serviced.
Notice: Engine damage from
running the engine without
coolant is not covered by the
warranty.
If Steam Is Coming From The
Engine Compartment
See Overheated Engine Protection
Operating Modeon page 9‑21for
information on driving to a safe
place in an emergency.