2010 BUICK LACROSSE airbag
[x] Cancel search: airbagPage 84 of 414

2-58 Seats and Restraints
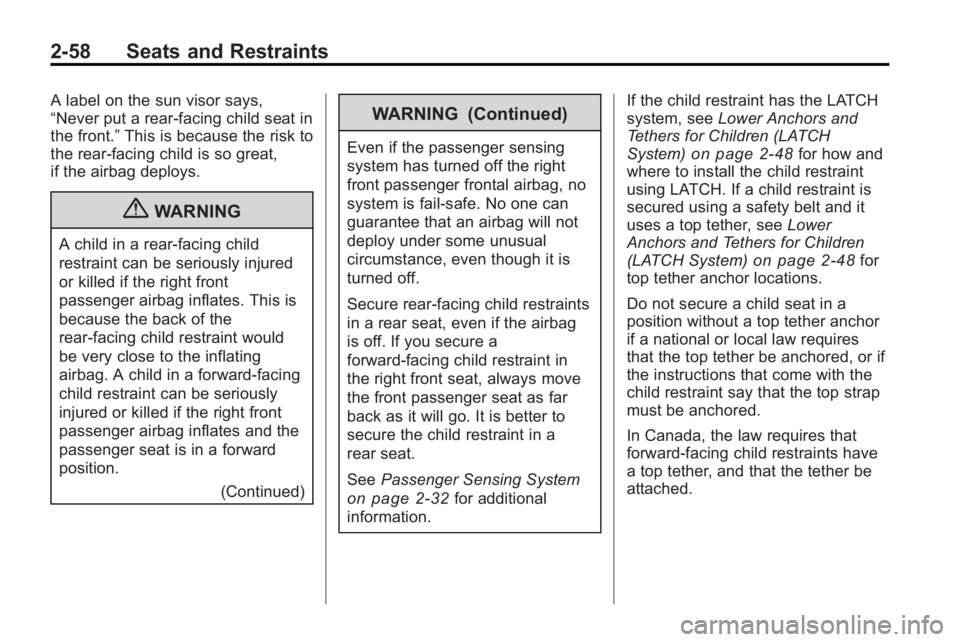
A label on the sun visor says,
“Never put a rear-facing child seat in
the front.”This is because the risk to
the rear-facing child is so great,
if the airbag deploys.
{WARNING
A child in a rear-facing child
restraint can be seriously injured
or killed if the right front
passenger airbag inflates. This is
because the back of the
rear-facing child restraint would
be very close to the inflating
airbag. A child in a forward-facing
child restraint can be seriously
injured or killed if the right front
passenger airbag inflates and the
passenger seat is in a forward
position.
(Continued)
WARNING (Continued)
Even if the passenger sensing
system has turned off the right
front passenger frontal airbag, no
system is fail-safe. No one can
guarantee that an airbag will not
deploy under some unusual
circumstance, even though it is
turned off.
Secure rear-facing child restraints
in a rear seat, even if the airbag
is off. If you secure a
forward-facing child restraint in
the right front seat, always move
the front passenger seat as far
back as it will go. It is better to
secure the child restraint in a
rear seat.
SeePassenger Sensing System
on page 2‑32for additional
information. If the child restraint has the LATCH
system, see
Lower Anchors and
Tethers for Children (LATCH
System)
on page 2‑48for how and
where to install the child restraint
using LATCH. If a child restraint is
secured using a safety belt and it
uses a top tether, see Lower
Anchors and Tethers for Children
(LATCH System)
on page 2‑48for
top tether anchor locations.
Do not secure a child seat in a
position without a top tether anchor
if a national or local law requires
that the top tether be anchored, or if
the instructions that come with the
child restraint say that the top strap
must be anchored.
In Canada, the law requires that
forward-facing child restraints have
a top tether, and that the tether be
attached.
Page 85 of 414

Seats and Restraints 2-59
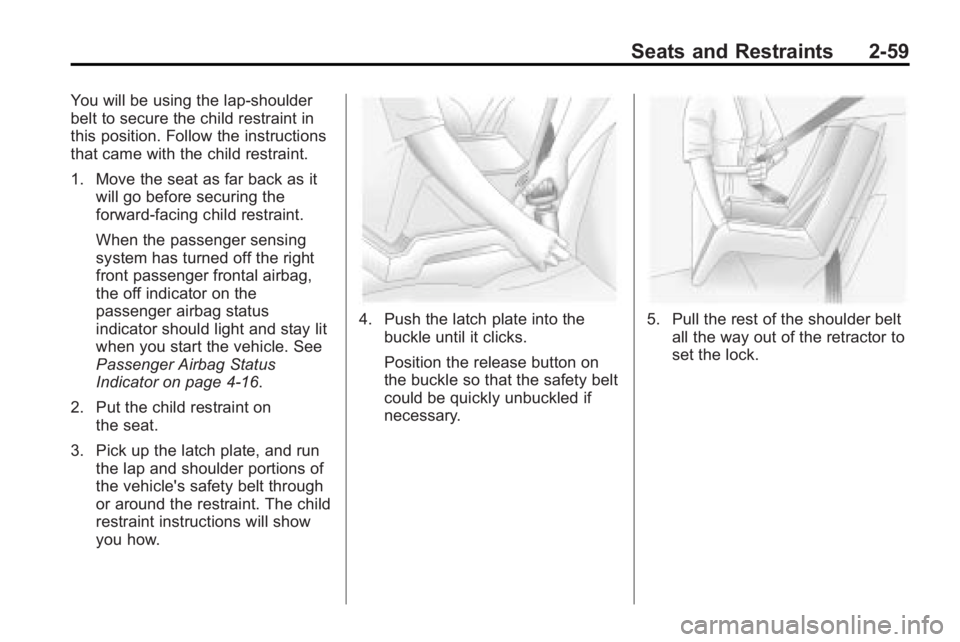
You will be using the lap-shoulder
belt to secure the child restraint in
this position. Follow the instructions
that came with the child restraint.
1. Move the seat as far back as itwill go before securing the
forward-facing child restraint.
When the passenger sensing
system has turned off the right
front passenger frontal airbag,
the off indicator on the
passenger airbag status
indicator should light and stay lit
when you start the vehicle. See
Passenger Airbag Status
Indicator on page 4‑16.
2. Put the child restraint on the seat.
3. Pick up the latch plate, and run the lap and shoulder portions of
the vehicle's safety belt through
or around the restraint. The child
restraint instructions will show
you how.
4. Push the latch plate into the
buckle until it clicks.
Position the release button on
the buckle so that the safety belt
could be quickly unbuckled if
necessary.5. Pull the rest of the shoulder beltall the way out of the retractor to
set the lock.
Page 86 of 414

2-60 Seats and Restraints
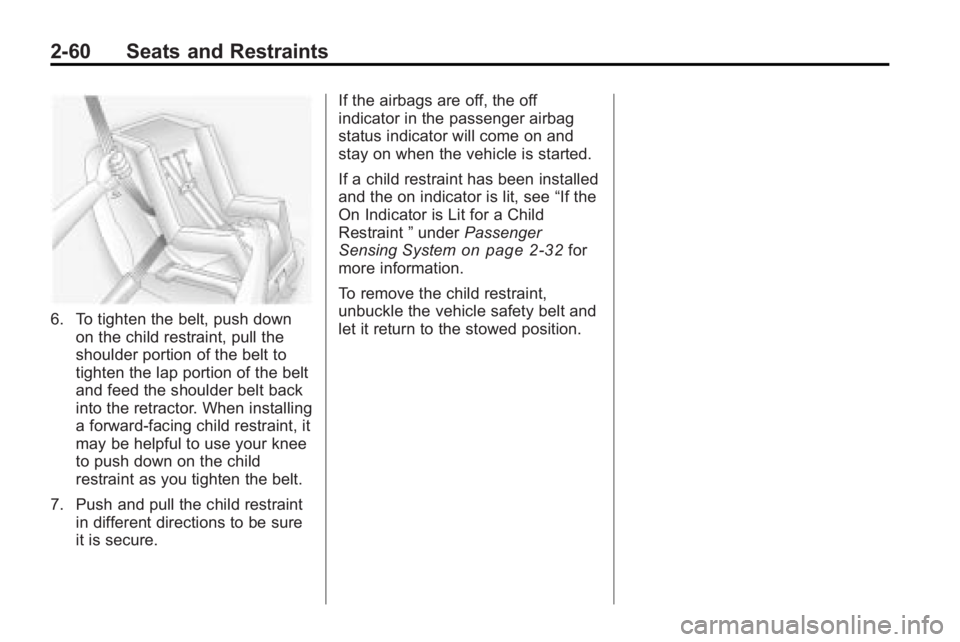
6. To tighten the belt, push downon the child restraint, pull the
shoulder portion of the belt to
tighten the lap portion of the belt
and feed the shoulder belt back
into the retractor. When installing
a forward-facing child restraint, it
may be helpful to use your knee
to push down on the child
restraint as you tighten the belt.
7. Push and pull the child restraint in different directions to be sure
it is secure. If the airbags are off, the off
indicator in the passenger airbag
status indicator will come on and
stay on when the vehicle is started.
If a child restraint has been installed
and the on indicator is lit, see
“If the
On Indicator is Lit for a Child
Restraint ”under Passenger
Sensing System
on page 2‑32for
more information.
To remove the child restraint,
unbuckle the vehicle safety belt and
let it return to the stowed position.
Page 89 of 414

Instruments and Controls 4-1
Instruments and
Controls
Instrument Panel Overview
Instrument Panel Overview . . . . 4-4
Controls
Steering Wheel Adjustment . . . 4-6
Steering Wheel Controls . . . . . . 4-6
Heated Steering Wheel . . . . . . . 4-7
Horn . . . . . . . . . . . . . . . . . . . . . . . . . . 4-7
Windshield Wiper/Washer . . . . . 4-7
Compass . . . . . . . . . . . . . . . . . . . . . 4-8
Clock (Without DateDisplay) . . . . . . . . . . . . . . . . . . . . . 4-9
Clock (With Date Display) . . . . . 4-9
Power Outlets . . . . . . . . . . . . . . . 4-10
Warning Lights, Gages, and
Indicators
Warning Lights, Gages, and Indicators . . . . . . . . . . . . . . 4-12
Instrument Cluster . . . . . . . . . . . 4-13
Speedometer . . . . . . . . . . . . . . . . 4-14
Odometer . . . . . . . . . . . . . . . . . . . . 4-14
Tachometer . . . . . . . . . . . . . . . . . . 4-14
Fuel Gage . . . . . . . . . . . . . . . . . . . 4-14
Engine Coolant Temperature Gage . . . . . . . . . 4-15
Safety Belt Reminders . . . . . . . 4-15
Airbag Readiness Light . . . . . . 4-16
Passenger Airbag Status Indicator . . . . . . . . . . . . . . . . . . . . 4-16
Charging System Light . . . . . . 4-17
Malfunction Indicator Lamp . . . . . . . . . . . . . 4-17
Brake System Warning Light . . . . . . . . . . . . . . . . . . . . . . . 4-20 Electric Parking Brake
Light . . . . . . . . . . . . . . . . . . . . . . . 4-20
Antilock Brake System (ABS) Warning Light . . . . . . . . . . . . . . 4-21
Traction Off Light . . . . . . . . . . . . 4-22
Electronic Stability Control
(ESC) Indicator Light . . . . . . . 4-22
Electronic Stability Control (ESC)/Traction Control
System (TCS) Indicator/
Warning Light . . . . . . . . . . . . . . 4-22
Tire Pressure Light . . . . . . . . . . 4-23
Engine Oil Pressure Light . . . . 4-23
Low Fuel Warning Light . . . . . . 4-24
Security Light . . . . . . . . . . . . . . . . 4-24
High-Beam on Light . . . . . . . . . 4-24
Fog Lamp Light . . . . . . . . . . . . . . 4-24
Taillamp Indicator Light . . . . . . 4-25
Cruise Control Light . . . . . . . . . 4-25
Page 104 of 414

4-16 Instruments and Controls
bag, laptop or other electronic
device. To turn off the warning light
and or chime, remove the object
from the seat or buckle the
safety belt
Airbag Readiness Light
This light shows if there is an
electrical problem. The system
check includes the airbag sensor,
the pretensioners, the airbag
modules, the wiring and the crash
sensing and diagnostic module.
For more information on the airbag
system, seeAirbag System
on
page 2‑24.
The airbag readiness light comes on
solid and stays on for several
seconds when the vehicle is started.
Then the light goes out. If it stays on solid after the vehicle
has been started or comes on while
driving, the airbag system may not
work properly. Have the vehicle
serviced right away.
{WARNING
If the airbag readiness light stays
on after the vehicle is started or
comes on while driving, it means
the airbag system might not be
working properly. The airbags in
the vehicle might not inflate in a
crash, or they could even inflate
without a crash. To help avoid
injury, have the vehicle serviced
right away.
Passenger Airbag Status
Indicator
The vehicle has a passenger
sensing system. See
Passenger
Sensing System
on page 2‑32for
important safety information. The
instrument panel has a passenger
airbag status indicator.
When the vehicle is started, the
passenger airbag status indicator
will light the words ON and OFF for
several seconds as a system check.
If you are using remote start,
if equipped, to start the vehicle from
a distance you may not see the
system check. Then, after several
more seconds, the status indicator
will light either the word ON or OFF
to let you know the status of the
right front passenger frontal airbag.
If the word ON is lit on the
passenger airbag status indicator,
it means that the right front
passenger frontal airbag is enabled
(may inflate).
Page 105 of 414

Instruments and Controls 4-17
If the word OFF is lit on the airbag
status indicator, it means that the
passenger sensing system has
turned off the right front passenger
frontal airbag.
If, after several seconds, both status
indicator lights remain on, or if there
are no lights at all, there may be a
problem with the lights or the
passenger sensing system. See
your dealer/retailer for service.
{WARNING
If the airbag readiness light ever
comes on and stays on, it means
that something may be wrong
with the airbag system. To help
avoid injury to yourself or others,
have the vehicle serviced right
away. SeeAirbag Readiness
Light
on page 4‑16for more
information, including important
safety information.
Charging System Light
The charging system light comes on
briefly when the ignition is turned
on, but the engine is not running, as
a check to show the light is working.
It should go out when the engine is
started.
If the light stays on, or comes on
while driving, there could be a
problem with the electrical charging
system. Have it checked by your
dealer/retailer. Driving while this
light is on could drain the battery.
If a short distance must be driven
with the light on, be sure to turn off
all accessories, such as the radio
and air conditioner.
Malfunction
Indicator Lamp
A computer system called OBD II
(On-Board Diagnostics-Second
Generation) monitors operation of
the fuel, ignition, and emission
control systems. It ensures that
emissions are at acceptable levels
for the life of the vehicle, helping to
produce a cleaner environment.
This light comes on when the
ignition is on, but the engine is not
running, as a check to show it is
working. If it does not, have the
vehicle serviced by your dealer/
retailer.
Page 132 of 414

4-44 Instruments and Controls
the OnStar Owner's Guide or visit
www.onstar.com (U.S.) or
www.onstar.ca (Canada), contact
OnStar at 1-888-4-ONSTAR
(1-888-466-7827) or TTY
1-877-248-2080, or press
Qto
speak with an OnStar advisor
24 hours a day, 7 days a week.
For a full description of OnStar
services and system limitations, see
the OnStar Owner's Guide in the
glove box.
OnStar service is subject to the
OnStar terms and conditions
included in the OnStar Subscriber
Information.
OnStar service cannot work unless
the vehicle is in a place where
OnStar has an agreement with a
wireless service provider for service
in that area. OnStar service also
cannot work unless the vehicle is in
a place where the wireless service
provider OnStar has hired for that
area has coverage, network
capacity and reception when the
service is needed, and technology that is compatible with the OnStar
service. Not all services are
available everywhere, particularly in
remote or enclosed areas, or at all
times.
The OnStar system can record and
transmit vehicle information. This
information is automatically sent to
an OnStar call center when
Qis
pressed,
]is pressed, or if the
airbags or ACR system deploy. This
information usually includes the
vehicle's GPS location and, in the
event of a crash, additional
information regarding the crash that
the vehicle was involved in (e.g. the
direction from which the vehicle was
hit). When the virtual advisor feature
of OnStar hands-free calling is
used, the vehicle also sends OnStar
the vehicle's GPS location so they
can provide services where it is
located.
Location information about the
vehicle is only available if the GPS
satellite signals are unobstructed
and available. The vehicle must have a working
electrical system, including
adequate battery power, for the
OnStar equipment to operate. There
are other problems OnStar cannot
control that may prevent OnStar
from providing OnStar service at
any particular time or place. Some
examples are damage to important
parts of the vehicle in a crash, hills,
tall buildings, tunnels, weather or
wireless phone network congestion.
OnStar Steering Wheel
Controls
This vehicle may have a Talk/Mute
button that can be used to interact
with OnStar hands-free calling. See
Steering Wheel Controls
on
page 4‑6for more information.
On some vehicles, the mute button
can be used to dial numbers into
voice mail systems, or to dial phone
extensions. See the OnStar Owner's
Guide for more information.
Page 142 of 414

5-4 Lighting
Hazard Warning Flashers
|
Hazard Warning Flasher:
Press this button located on the
instrument panel below the climate
control system, to make the front
and rear turn signal lamps flash on
and off. Press again to turn the
flashers off.
The hazard warning flashers turn on
automatically if the airbags deploy.
Turn and Lane-Change
Signals
Move the lever all the way up or
down to signal a turn.
An arrow on the instrument panel
cluster flashes in the direction of the
turn or lane change. Raise or lower the lever until the
arrow starts to flash to signal a lane
change. Hold it there until the lane
change is completed. If the lever is
briefly pressed and released, the
turn signal flashes three times.
The turn and lane-change signal
can be turned off manually by
moving the lever back to its original
position.
If after signaling a turn or lane
change the arrow flashes rapidly or
does not come on, a signal bulb
might be burned out.
Have the bulbs replaced. If the bulb
is not burned out, check the fuse.
See
Fuses and Circuit Breakers
on
page 9‑38.