2010 BMW Z4 SDRIVE35I ROADSTER navigation system
[x] Cancel search: navigation systemPage 47 of 254
Controls
45Reference
At a glance
Driving tips
Communications
Navigation
Entertainment
Mobility
Closing
Make sure you hear the latch plate engage in
the belt buckle.
The upper belt anchor is suitable for adults of
any stature as long as the seat is adjusted prop-
erly, refer to page41.
Opening
1.Grasp the belt firmly.
2.Press the red button in the buckle.
3.Guide the belt into its reel.
'Fasten safety belts' reminder for driver
and passenger*
The indicator lamp comes on and an
acoustic signal sounds. In addition, a
message appears on the Control Dis-
play. Check whether the safety belt
has been fastened correctly.
The 'Fasten safety belts' reminder is issued as
long as the driver's safety belt has not been fas-
tened. In some country-specific versions, the
'Fasten safety belts' reminder is also activated
at road speeds above approx. 5 mph or 8 km/h if
the passenger safety belt is not fastened, if
objects are placed on the passenger seat, or if
driver or passenger unfasten their safety belts.
Damage to safety belts
If the safety belts are damaged or
stressed in an accident: have the belt sys-
tem, including any belt tensioners or child
restraint systems, replaced and the belt
anchors checked. Have this work done only by
your BMW center or at a workshop that works
according to BMW repair procedures with cor-
respondingly trained personnel. Otherwise, it is
not guaranteed that the safety devices will func-
tion properly.<
Mirrors
Exterior mirrors
The passenger's mirror is more convex
than the driver's mirror. The objects seen
in the mirror are closer than they appear. Do not
gauge your distance from traffic behind you on
the basis of what you see in the mirror; other-
wise, there is an increased risk of an accident.<
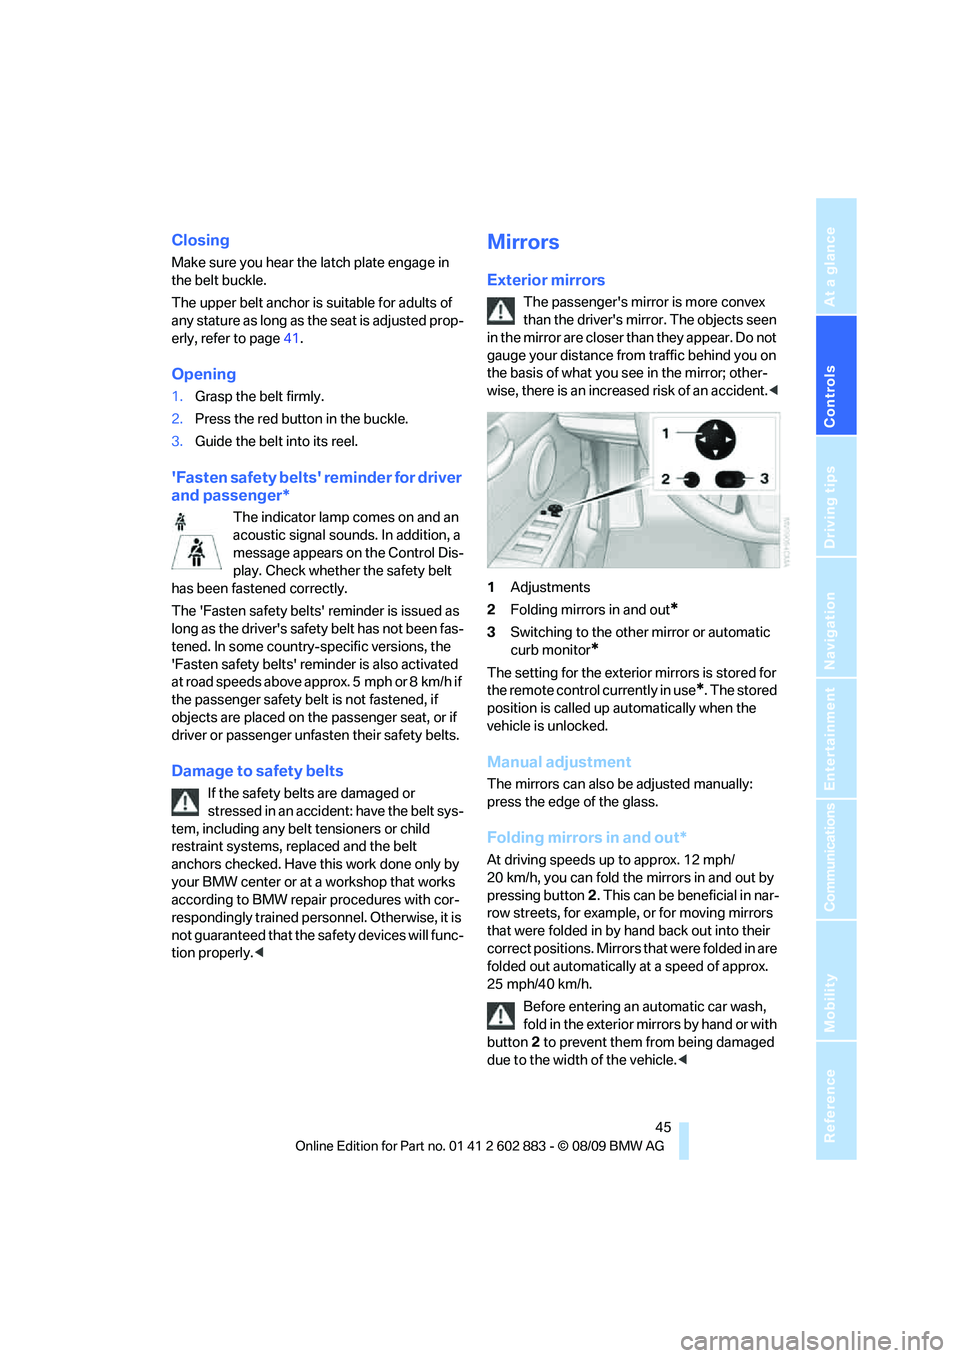
1Adjustments
2Folding mirrors in and out
*
3Switching to the other mirror or automatic
curb monitor
*
The setting for the exterior mirrors is stored for
the remote control currently in use
*. The stored
position is called up automatically when the
vehicle is unlocked.
Manual adjustment
The mirrors can also be adjusted manually:
press the edge of the glass.
Folding mirrors in and out*
At driving speeds up to approx. 12 mph/
20 km/h, you can fold the mirrors in and out by
pressing button2. This can be beneficial in nar-
row streets, for example, or for moving mirrors
that were folded in by hand back out into their
correct positions. Mirrors that were folded in are
folded out automatically at a speed of approx.
25 mph/40 km/h.
Before entering an automatic car wash,
fold in the exterior mirrors by hand or with
button2 to prevent them from being damaged
due to the width of the vehicle.<
Page 51 of 254
Controls
49Reference
At a glance
Driving tips
Communications
Navigation
Entertainment
Mobility
To lock the safety belt
1.Secure the child restraint system with
the belt.
2.Pull the belt strap all the way out.
3.Allow the belt strap to retract and pull it taut
against the child restraint system.
The safety belt is locked.
To unlock the safety belt
1.Open the belt buckle.
2.Remove the child restraint system.
3.Allow the safety belt strap to retract all
the way.
Upper LATCH retaining strap
For Canadian Customers only
The following statement is required by Trans-
port Canada
This vehicle is not equipped with user-ready
tether anchorages. As such neither a child
restraint system, nor a booster cushion, requir-
ing the use of a tether strap can be properly
secured in the vehicle.
Page 57 of 254
Controls
55Reference
At a glance
Driving tips
Communications
Navigation
Entertainment
Mobility
a downshift that would cause the engine to
overrev will not be executed by the system. The
gear selected is briefly displayed in the instru-
ment cluster, followed by the gear actually
in use.
Shifting gears via shift paddles* on the
steering wheel
The shift paddles allow you to shift gears with-
out taking your hands off the steering wheel.
>When you use the shift paddles on the
steering wheel to shift gears in automatic
mode, the transmission switches to man-
ual mode.
>If you do not accelerate or shift gears using
the shift paddles for a certain amount of
time, the transmission switches back to
automatic mode.
If the selector lever is in the M/S gear
plane, manual mode remains active.<
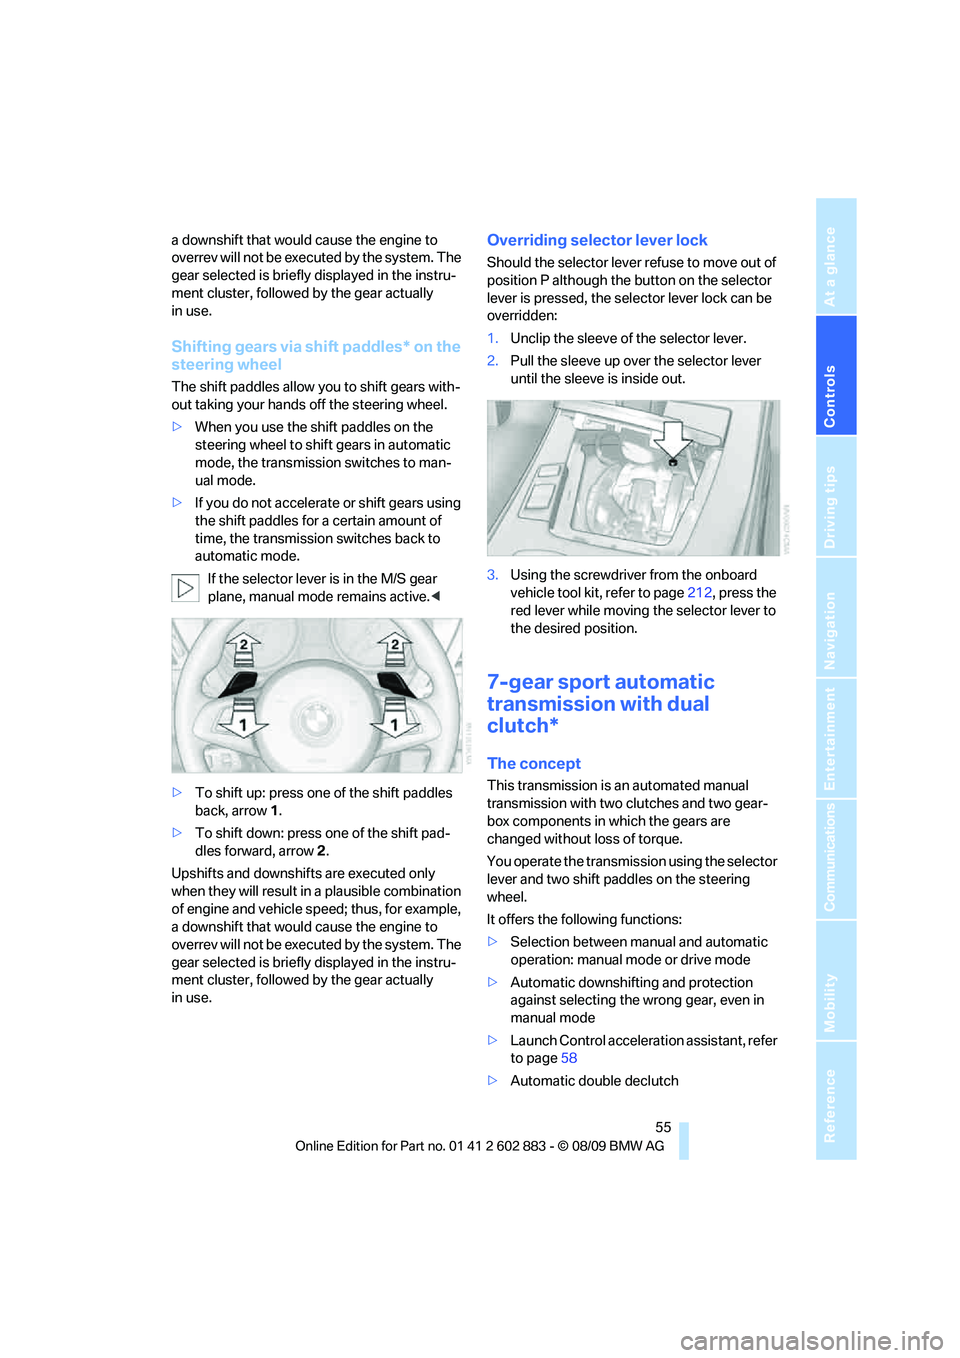
>To shift up: press one of the shift paddles
back, arrow 1.
>To shift down: press one of the shift pad-
dles forward, arrow 2.
Upshifts and downshifts are executed only
when they will result in a plausible combination
of engine and vehicle speed; thus, for example,
a downshift that would cause the engine to
overrev will not be executed by the system. The
gear selected is briefly displayed in the instru-
ment cluster, followed by the gear actually
in use.
Overriding selector lever lock
Should the selector lever refuse to move out of
position P although the button on the selector
lever is pressed, the selector lever lock can be
overridden:
1.Unclip the sleeve of the selector lever.
2.Pull the sleeve up over the selector lever
until the sleeve is inside out.
3.Using the screwdriver from the onboard
vehicle tool kit, refer to page212, press the
red lever while moving the selector lever to
the desired position.
7-gear sport automatic
transmission with dual
clutch*
The concept
This transmission is an automated manual
transmission with two clutches and two gear-
box components in which the gears are
changed without loss of torque.
You operate the transmission using the selector
lever and two shift paddles on the steering
wheel.
It offers the following functions:
>Selection between manual and automatic
operation: manual mode or drive mode
>Automatic downshifting and protection
against selecting the wrong gear, even in
manual mode
>Launch Control acceleration assistant, refer
to page58
>Automatic double declutch
Page 59 of 254
Controls
57Reference
At a glance
Driving tips
Communications
Navigation
Entertainment
Mobility
P Park
The rear wheels are locked.
P is engaged automatically when the following
conditions are met:
>The driver's door is opened while the
engine is running, your safety belt is not fas-
tened and neither the brake pedal nor the
accelerator are activated.
>The engine is switched off unless N is
engaged and the remote control is in the
ignition lock.
>The remote control is removed from the
ignition lock.
Kickdown
T o a cc ele ra te ra pidly, e.g., when passing, press
the accelerator down past the resistance point.
This provides maximum acceleration.
Activating the Sport program and
manual mode M/S
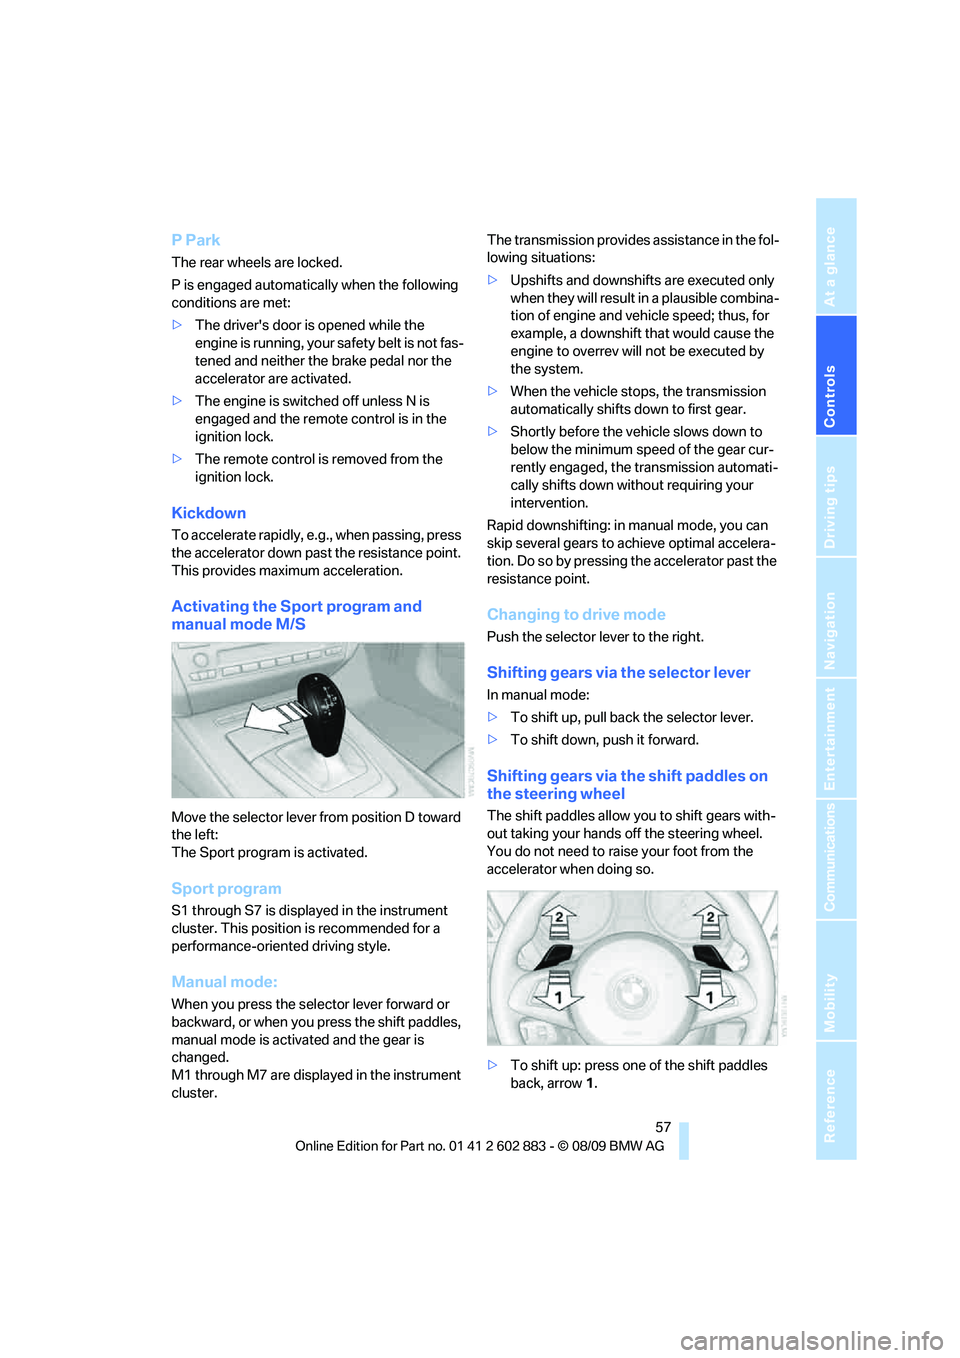
Move the selector lever from position D toward
the left:
The Sport program is activated.
Sport program
S1 through S7 is displayed in the instrument
cluster. This position is recommended for a
performance-oriented driving style.
Manual mode:
When you press the selector lever forward or
backward, or when you press the shift paddles,
manual mode is activated and the gear is
changed.
M1 through M7 are displayed in the instrument
cluster.The transmission provides assistance in the fol-
lowing situations:
>Upshifts and downshifts are executed only
when they will result in a plausible combina-
tion of engine and vehicle speed; thus, for
example, a downshift that would cause the
engine to overrev will not be executed by
the system.
>When the vehicle stops, the transmission
automatically shifts down to first gear.
>Shortly before the vehicle slows down to
below the minimum speed of the gear cur-
rently engaged, the transmission automati-
cally shifts down without requiring your
intervention.
Rapid downshifting: in manual mode, you can
skip several gears to achieve optimal accelera-
tion. Do so by pressing the accelerator past the
resistance point.
Changing to drive mode
Push the selector lever to the right.
Shifting gears via the selector lever
In manual mode:
>To shift up, pull back the selector lever.
>To shift down, push it forward.
Shifting gears via the shift paddles on
the steering wheel
The shift paddles allow you to shift gears with-
out taking your hands off the steering wheel.
You do not need to raise your foot from the
accelerator when doing so.
>To shift up: press one of the shift paddles
back, arrow1.
Page 63 of 254

Controls
61Reference
At a glance
Driving tips
Communications
Navigation
Entertainment
Mobility
Deactivating intermittent wipe or rain
sensor
Press the button again, arrow3.
The LED goes out.
Deactivate the rain sensor before enter-
ing an automatic car wash. Failure to do
so could result in damage caused by undesired
wiper activation.<
Cleaning windshield and headlamps*
Pull the lever, arrow 4.
Washer fluid is sprayed onto the windshield and
the wipers are operated for a short time.
When the vehicle lighting system is switched
on, the headlamps are cleaned at regular and
appropriate intervals.
Do not use the washers if there is any
danger that the fluid will freeze on the
windshield. If you do, your vision could be
obscured. Antifreeze should therefore be
added to the fluid, refer to Washer fluid.
Do not use the washers when the washer fluid
reservoir is empty; otherwise, you will damage
the washer pump.<
Windshield washer nozzles
The windshield washer nozzles are heated
automatically while the engine is running or the
ignition is switched on.
Washer fluid
Washer fluid antifreeze is flammable.
Therefore, keep it away from ignition
sources and only store it in the closed original
container that is kept out of reach of children;
otherwise, there is a risk of personal injury.
Comply with the instructions on the con-
tainer.<
Washer fluid filler neck
Only refill washer fluid when the engine is
cool to avoid contact with hot engine
parts. Otherwise, fluid spills constitute a fire
hazard and a risk to personal safety.
Fill with water and, if required, with a washer
antifreeze, according to manufacturer's recom-
mendations.
Mix the water and antifreeze before filling
the washer fluid reservoir to make sure
the correct concentration is maintained.<
Capacity
Approx. 6.3 US quarts/6 liters.
Cruise control*
The concept
Cruise control is available for use at speeds of
approx. 20 mph or 30 km/h. The car then stores
and maintains the speed that you specify using
the lever on the steering column. In order to
maintain the specified speed, the system
brakes the vehicle when the engine braking
effect is insufficient on downhill gradients.
Do not use cruise control when driving at
constant speed is prevented by adverse
conditions, e.g., winding roads, dense traffic,
poor visibility or unfavorable road conditions
due to, e.g., snow, rain, ice or loose surfaces.
Otherwise, you could lose control of the vehicle
and cause an accident as a result.<
Manual transmission
You can shift gears while cruise control is acti-
vated. An indicator lamp notifies you that you
should shift gears when you drive for an
extended period at very high or very low engine
speeds, or the system is deactivated.
Page 65 of 254
Controls
63Reference
At a glance
Driving tips
Communications
Navigation
Entertainment
Mobility
Warning lamp
The warning lamp comes on, for
example, when cruise control has
been deactivated as a result of DSC
intervention. A message appears on the Control
Display.
Deactivating the system
>Press the lever upward or downward twice,
arrow3.
>Switch off the ignition.
The stored speed is cleared.
Resuming a speed stored beforehand
Press the button, arrow4. The last stored
speed is resumed and maintained.
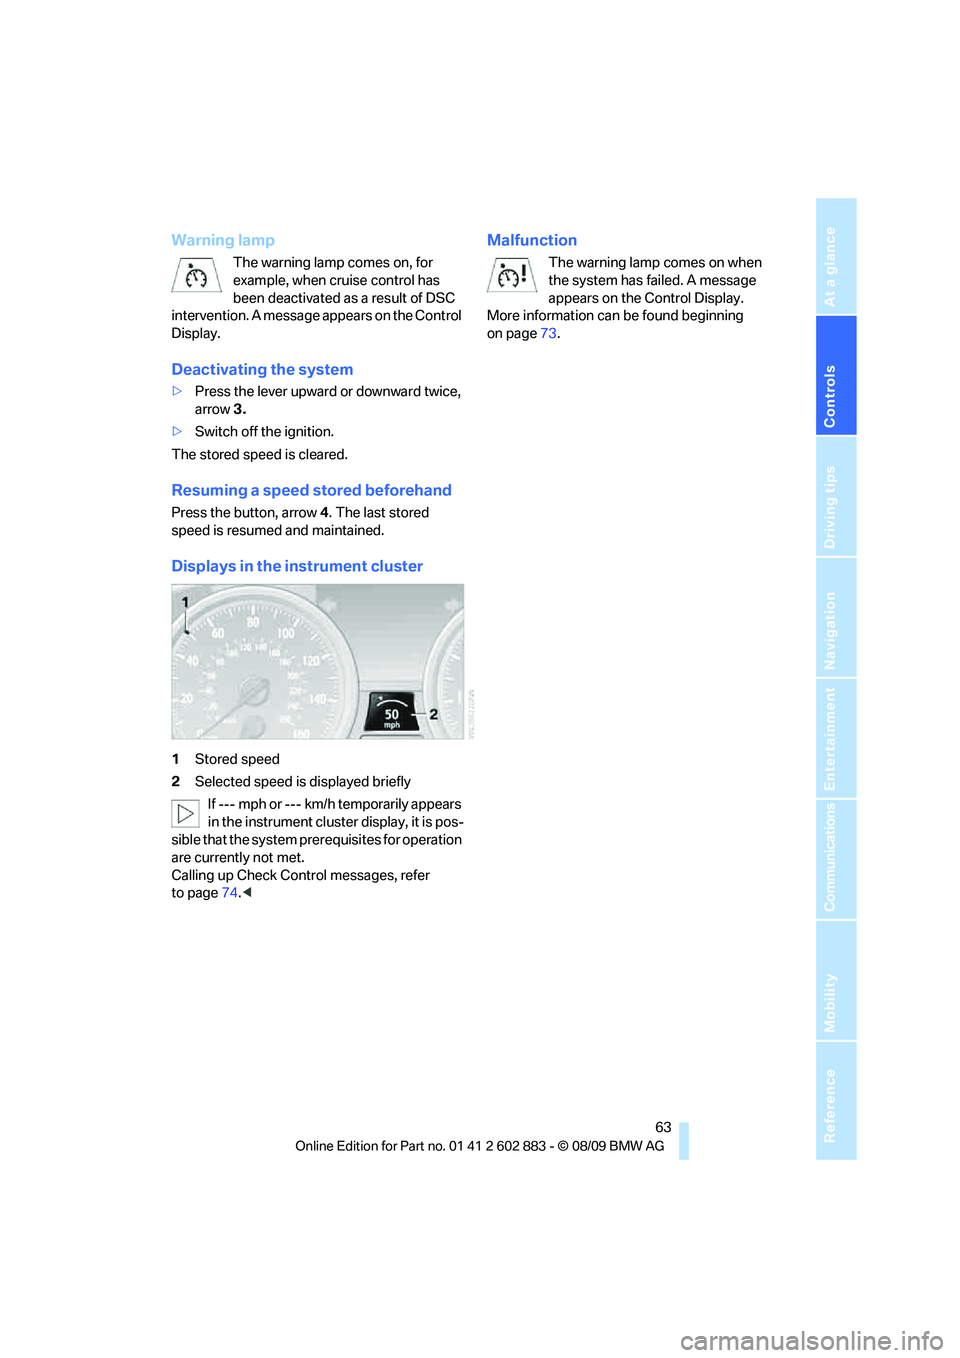
Displays in the instrument cluster
1Stored speed
2Selected speed is displayed briefly
If --- mph or --- km/h temporarily appears
in the instrument cluster display, it is pos-
sible that the system prerequisites for operation
are currently not met.
Calling up Check Control messages, refer
to page74.<
Malfunction
The warning lamp comes on when
the system has failed. A message
appears on the Control Display.
More information can be found beginning
on page73.
Page 69 of 254
Controls
67Reference
At a glance
Driving tips
Communications
Navigation
Entertainment
Mobility
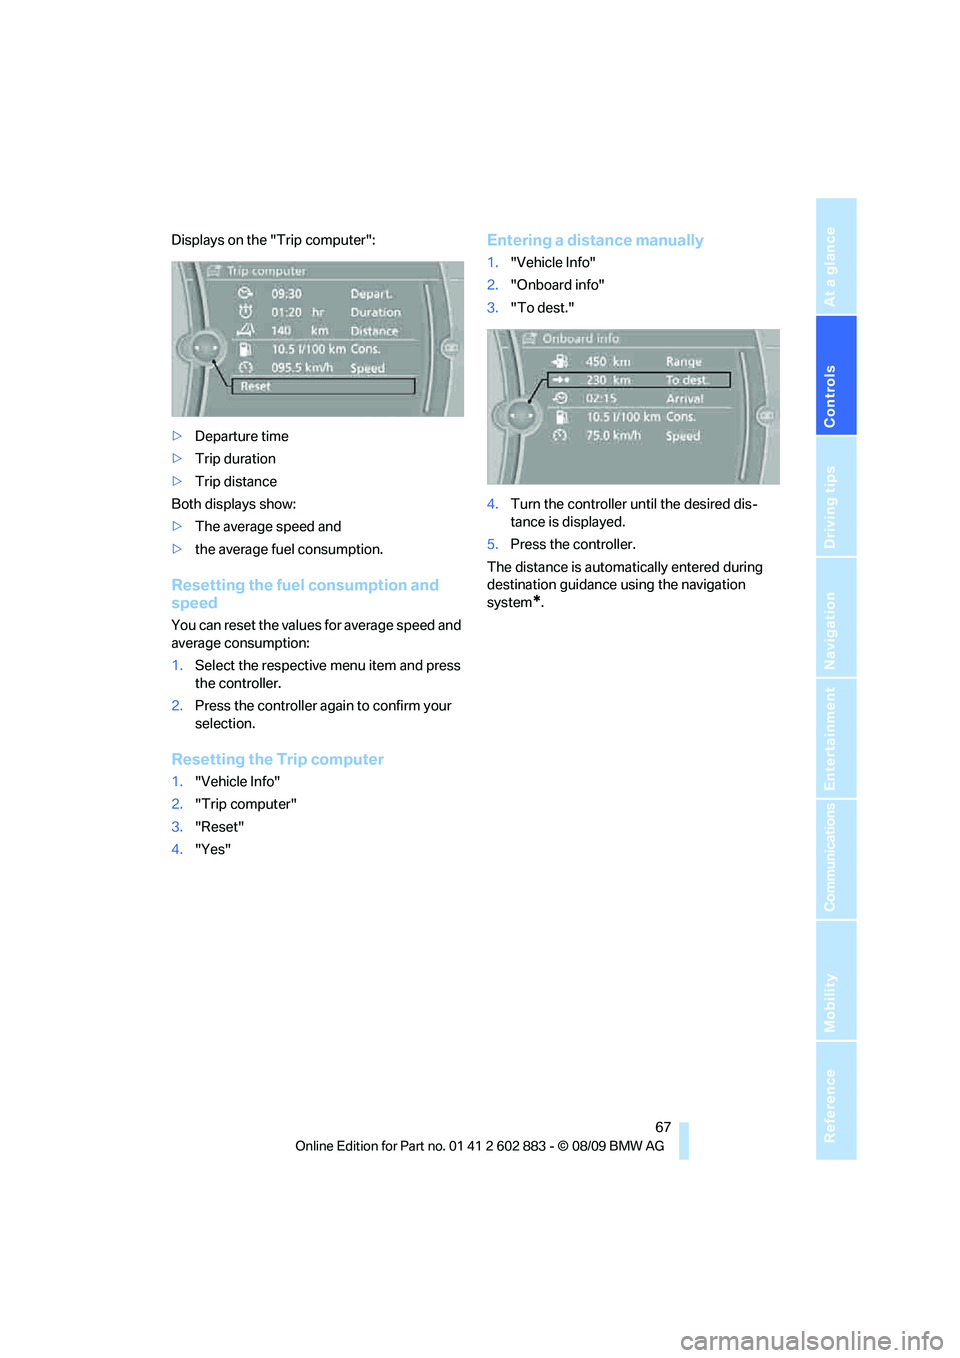
Displays on the "Trip computer":
>Departure time
>Trip duration
>Trip distance
Both displays show:
>The average speed and
>the average fuel consumption.
Resetting the fuel consumption and
speed
You can reset the values for average speed and
average consumption:
1.Select the respective menu item and press
the controller.
2.Press the controller again to confirm your
selection.
Resetting the Trip computer
1."Vehicle Info"
2."Trip computer"
3."Reset"
4."Yes"
Entering a distance manually
1."Vehicle Info"
2."Onboard info"
3."To dest."
4.Turn the controller until the desired dis-
tance is displayed.
5.Press the controller.
The distance is automatically entered during
destination guidance using the navigation
system
*.
Page 73 of 254
Controls
71Reference
At a glance
Driving tips
Communications
Navigation
Entertainment
Mobility
Entering deadlines for legally required
inspections*
Make sure the date on the Control Display is set
correctly, refer to page72; otherwise, the effec-
tiveness of CBS Condition Based Service is not
ensured.
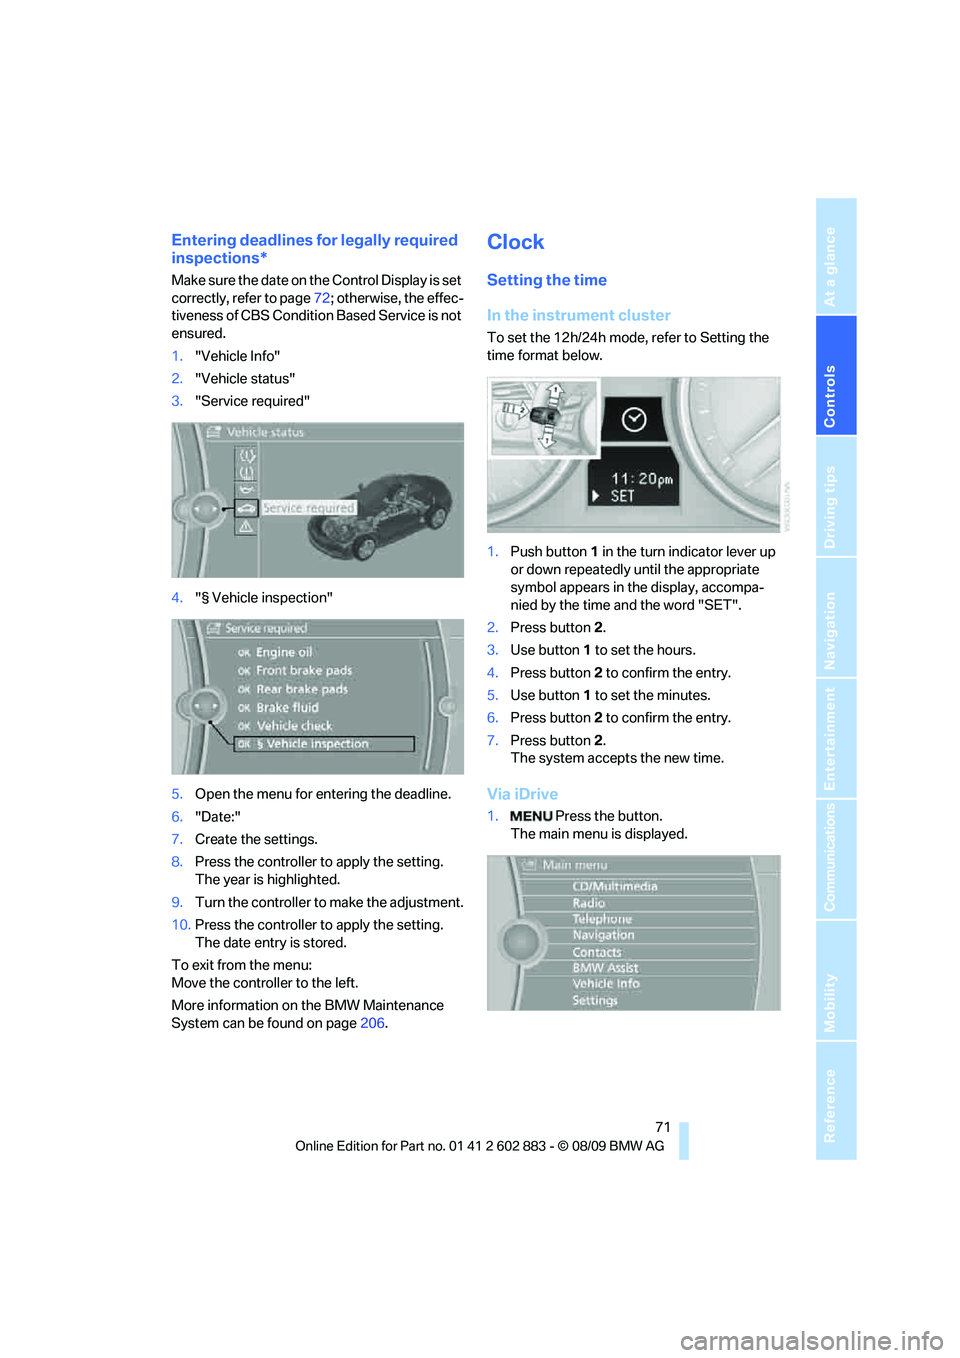
1."Vehicle Info"
2."Vehicle status"
3."Service required"
4."§ Vehicle inspection"
5.Open the menu for entering the deadline.
6."Date:"
7.Create the settings.
8.Press the controller to apply the setting.
The year is highlighted.
9.Turn the controller to make the adjustment.
10.Press the controller to apply the setting.
The date entry is stored.
To exit from the menu:
Move the controller to the left.
More information on the BMW Maintenance
System can be found on page206.
Clock
Setting the time
In the instrument cluster
To set the 12h/24h mode, refer to Setting the
time format below.
1.Push button 1 in the turn indicator lever up
or down repeatedly until the appropriate
symbol appears in the display, accompa-
nied by the time and the word "SET".
2.Press button 2.
3.Use button 1 to set the hours.
4.Press button 2 to confirm the entry.
5.Use button 1 to set the minutes.
6.Press button 2 to confirm the entry.
7.Press button 2.
The system accepts the new time.
Via iDrive
1. Press the button.
The main menu is displayed.