2010 BMW Z4 SDRIVE35I ROADSTER light
[x] Cancel search: lightPage 38 of 254

Opening and closing
36
Before driving a vehicle with automatic
transmission into a car wash
1.Insert the remote control into the ignition
switch.
2.Depress the brake.
3.Move the selector lever to position N.
4.Switch off the engine.
The vehicle can roll.
Malfunction
Comfort Access may malfunction due to local
radio waves. If this happens, open or close the
vehicle via the buttons on the remote control or
using the integrated key. To start the engine
afterward, insert the remote control into the
ignition switch.
Warning lamps
The warning lamp in the instrument
cluster lights up when you attempt to
start the engine: the engine cannot
be started. The remote control is not inside the
vehicle or is malfunctioning. Take the remote
control with you inside the vehicle or have it
checked. If necessary, insert another remote
control into the ignition switch.
The warning lamp in the instrument
cluster lights up while the engine is
running: the remote control is no
longer inside the vehicle. After the engine is
switched off, the engine can only be restarted
within approx. 10 seconds.
The indicator lamp in the instrument
cluster comes on and a message
appears on the Control Display:
replace the battery in the remote control.
Replacing the battery
The remote control for Comfort Access con-
tains a battery that will need to be replaced from
time to time.
1.Take the integrated key out of the remote
control, refer to page28.
2.Remove the cover.
3.Insert the new battery with the plus side fac-
ing up.
4.Press the cover on to close.
Take the old battery to a battery collec-
tion point or to your BMW center.<
Windows
To prevent injuries, watch the windows
while closing them.
Take the remote control with you when you
leave the car; otherwise, children could operate
the electric windows and possibly injure them-
selves.<
Page 39 of 254
Controls
37Reference
At a glance
Driving tips
Communications
Navigation
Entertainment
Mobility
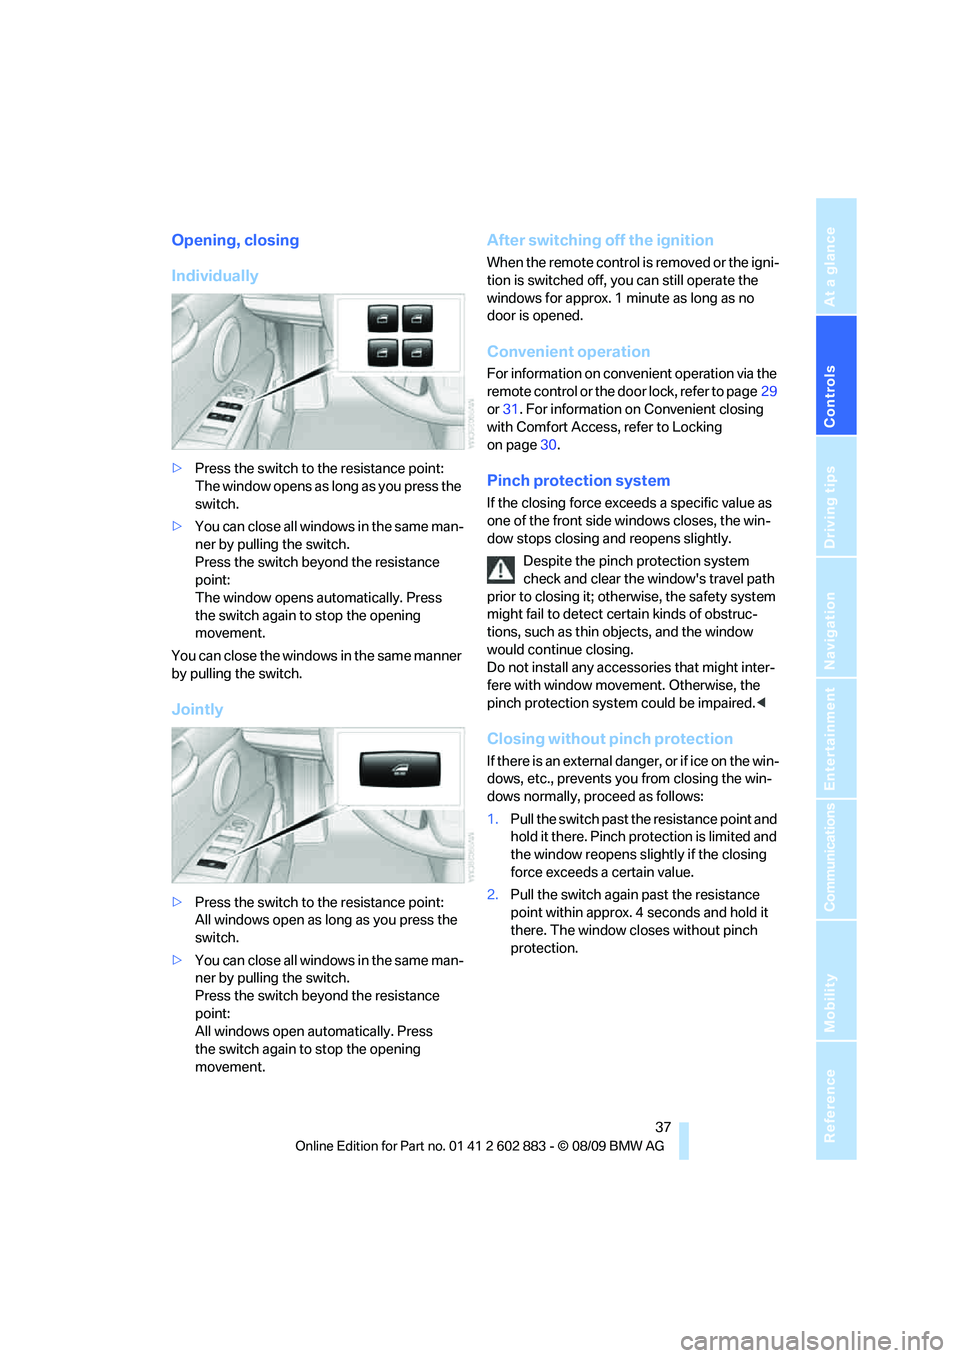
Opening, closing
Individually
>Press the switch to the resistance point:
The window opens as long as you press the
switch.
>You can close all windows in the same man-
ner by pulling the switch.
Press the switch beyond the resistance
point:
The window opens automatically. Press
the switch again to stop the opening
movement.
You can close the windows in the same manner
by pulling the switch.
Jointly
>Press the switch to the resistance point:
All windows open as long as you press the
switch.
>You can close all windows in the same man-
ner by pulling the switch.
Press the switch beyond the resistance
point:
All windows open automatically. Press
the switch again to stop the opening
movement.
After switching off the ignition
When the remote control is removed or the igni-
tion is switched off, you can still operate the
windows for approx. 1 minute as long as no
door is opened.
Convenient operation
For information on convenient operation via the
remote control or the door lock, refer to page29
or31. For information on Convenient closing
with Comfort Access, refer to Locking
on page30.
Pinch protection system
If the closing force exceeds a specific value as
one of the front side windows closes, the win-
dow stops closing and reopens slightly.
Despite the pinch protection system
check and clear the window's travel path
prior to closing it; otherwise, the safety system
might fail to detect certain kinds of obstruc-
tions, such as thin objects, and the window
would continue closing.
Do not install any accessories that might inter-
fere with window movement. Otherwise, the
pinch protection system could be impaired.<
Closing without pinch protection
If there is an external danger, or if ice on the win-
dows, etc., prevents you from closing the win-
dows normally, proceed as follows:
1.Pull the switch past the resistance point and
hold it there. Pinch protection is limited and
the window reopens slightly if the closing
force exceeds a certain value.
2.Pull the switch again past the resistance
point within approx. 4 seconds and hold it
there. The window closes without pinch
protection.
Page 41 of 254
Controls
39Reference
At a glance
Driving tips
Communications
Navigation
Entertainment
Mobility
Opening and closing
When the vehicle is stationary and at radio
readiness or beyond, refer to page50:
If possible, conserve the battery by only
operating the retractable hardtop when
the engine is running.
Before closing the retractable hardtop, remove
all foreign objects from the windshield frame as
these could prevent the hardtop from closing
properly.<
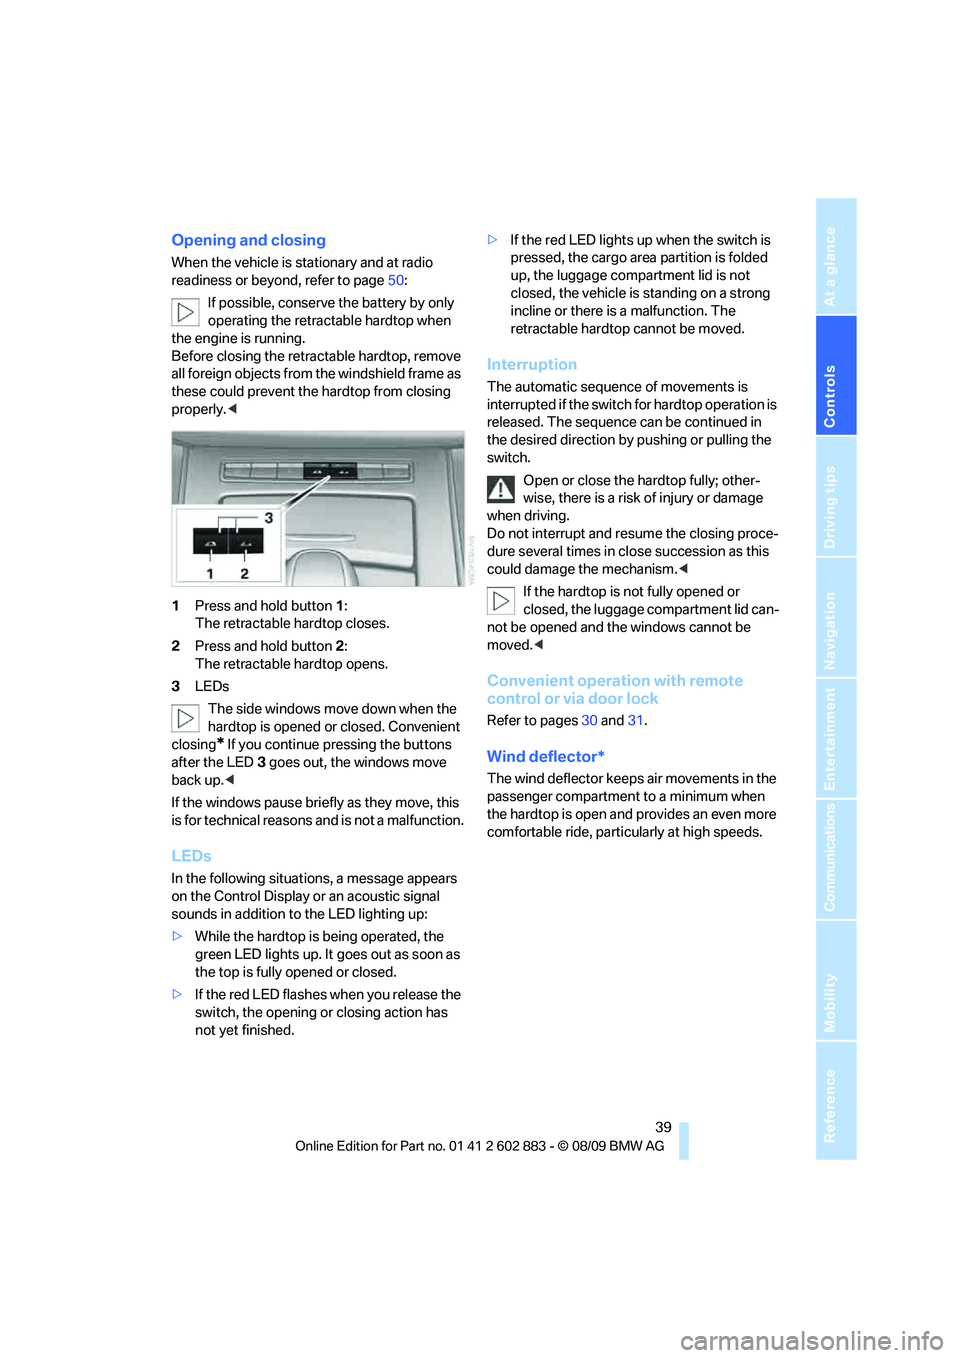
1Press and hold button1:
The retractable hardtop closes.
2Press and hold button2:
The retractable hardtop opens.
3LEDs
The side windows move down when the
hardtop is opened or closed. Convenient
closing
* If you continue pressing the buttons
after the LED 3 goes out, the windows move
back up.<
If the windows pause briefly as they move, this
is for technical reasons and is not a malfunction.
LEDs
In the following situations, a message appears
on the Control Display or an acoustic signal
sounds in addition to the LED lighting up:
>While the hardtop is being operated, the
green LED lights up. It goes out as soon as
the top is fully opened or closed.
>If the red LED flashes when you release the
switch, the opening or closing action has
not yet finished.>If the red LED lights up when the switch is
pressed, the cargo area partition is folded
up, the luggage compartment lid is not
closed, the vehicle is standing on a strong
incline or there is a malfunction. The
retractable hardtop cannot be moved.
Interruption
The automatic sequence of movements is
interrupted if the switch for hardtop operation is
released. The sequence can be continued in
the desired direction by pushing or pulling the
switch.
Open or close the hardtop fully; other-
wise, there is a risk of injury or damage
when driving.
Do not interrupt and resume the closing proce-
dure several times in close succession as this
could damage the mechanism.<
If the hardtop is not fully opened or
closed, the luggage compartment lid can-
not be opened and the windows cannot be
moved.<
Convenient operation with remote
control or via door lock
Refer to pages30 and31.
Wind deflector*
The wind deflector keeps air movements in the
passenger compartment to a minimum when
the hardtop is open and provides an even more
comfortable ride, particularly at high speeds.
Page 46 of 254
Adjustments
44
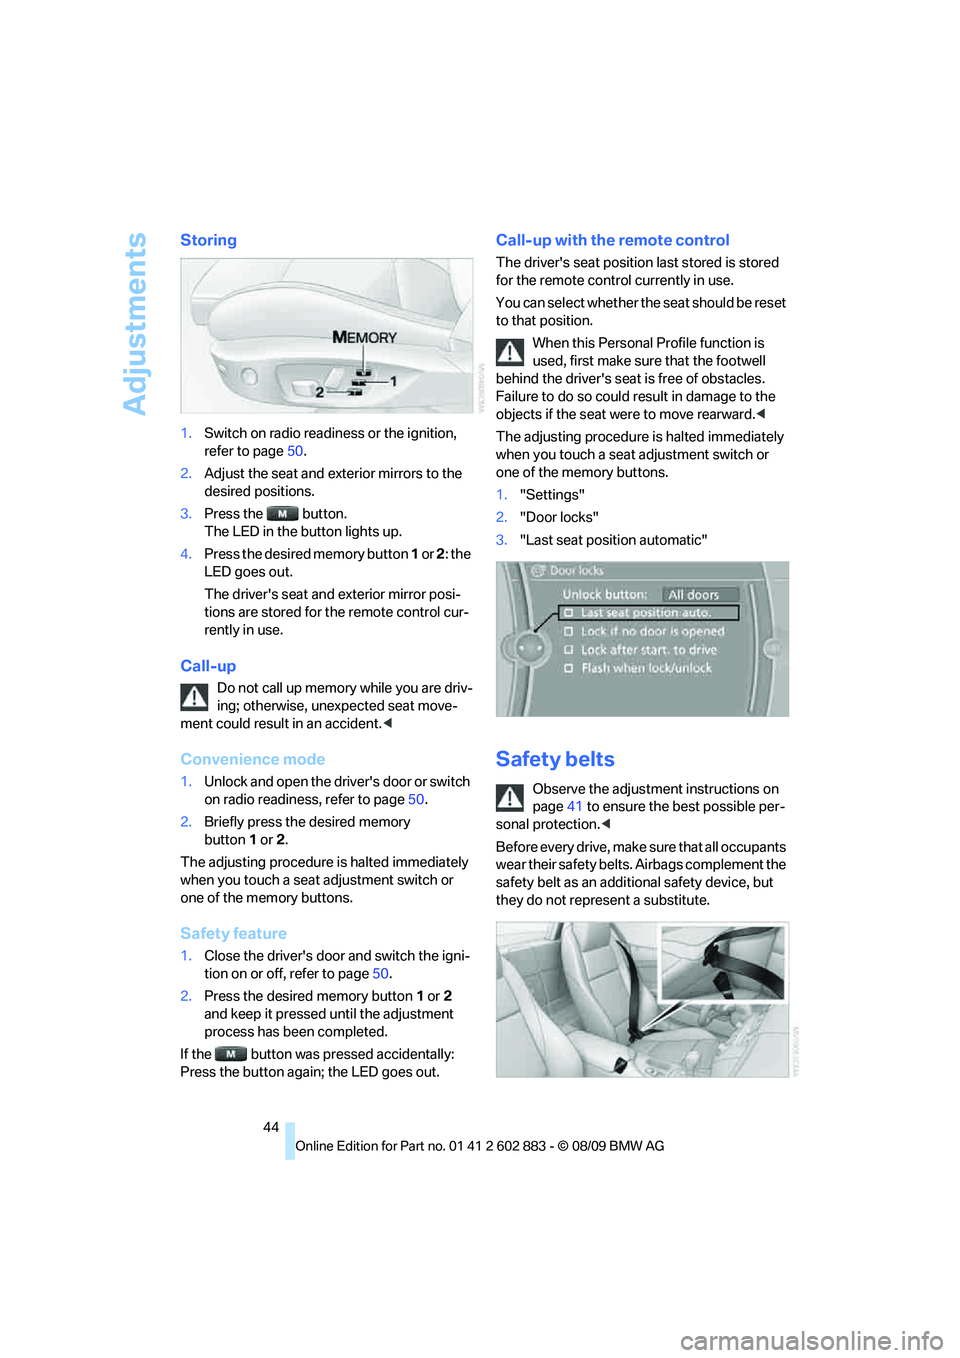
Storing
1.Switch on radio readiness or the ignition,
refer to page50.
2.Adjust the seat and exterior mirrors to the
desired positions.
3.Press the button.
The LED in the button lights up.
4.Press the desired memory button 1 or 2: the
LED goes out.
The driver's seat and exterior mirror posi-
tions are stored for the remote control cur-
rently in use.
Call-up
Do not call up memory while you are driv-
ing; otherwise, unexpected seat move-
ment could result in an accident.<
Convenience mode
1.Unlock and open the driver's door or switch
on radio readiness, refer to page50.
2.Briefly press the desired memory
button1or 2.
The adjusting procedure is halted immediately
when you touch a seat adjustment switch or
one of the memory buttons.
Safety feature
1.Close the driver's door and switch the igni-
tion on or off, refer to page50.
2.Press the desired memory button1 or2
and keep it pressed until the adjustment
process has been completed.
If the button was pressed accidentally:
Press the button again; the LED goes out.
Call-up with the remote control
The driver's seat position last stored is stored
for the remote control currently in use.
You can select whether the seat should be reset
to that position.
When this Personal Profile function is
used, first make sure that the footwell
behind the driver's seat is free of obstacles.
Failure to do so could result in damage to the
objects if the seat were to move rearward.<
The adjusting procedure is halted immediately
when you touch a seat adjustment switch or
one of the memory buttons.
1."Settings"
2."Door locks"
3."Last seat position automatic"
Safety belts
Observe the adjustment instructions on
page41 to ensure the best possible per-
sonal protection.<
Before every drive, make sure that all occupants
wear their safety belts. Airbags complement the
safety belt as an additional safety device, but
they do not represent a substitute.
Page 48 of 254
Adjustments
46
Automatic heating
Depending on the outside temperature, both
exterior mirrors are heated automatically when
the engine is running or the ignition is
switched on.
Passenger-side mirror tilt function –
automatic curb monitor*
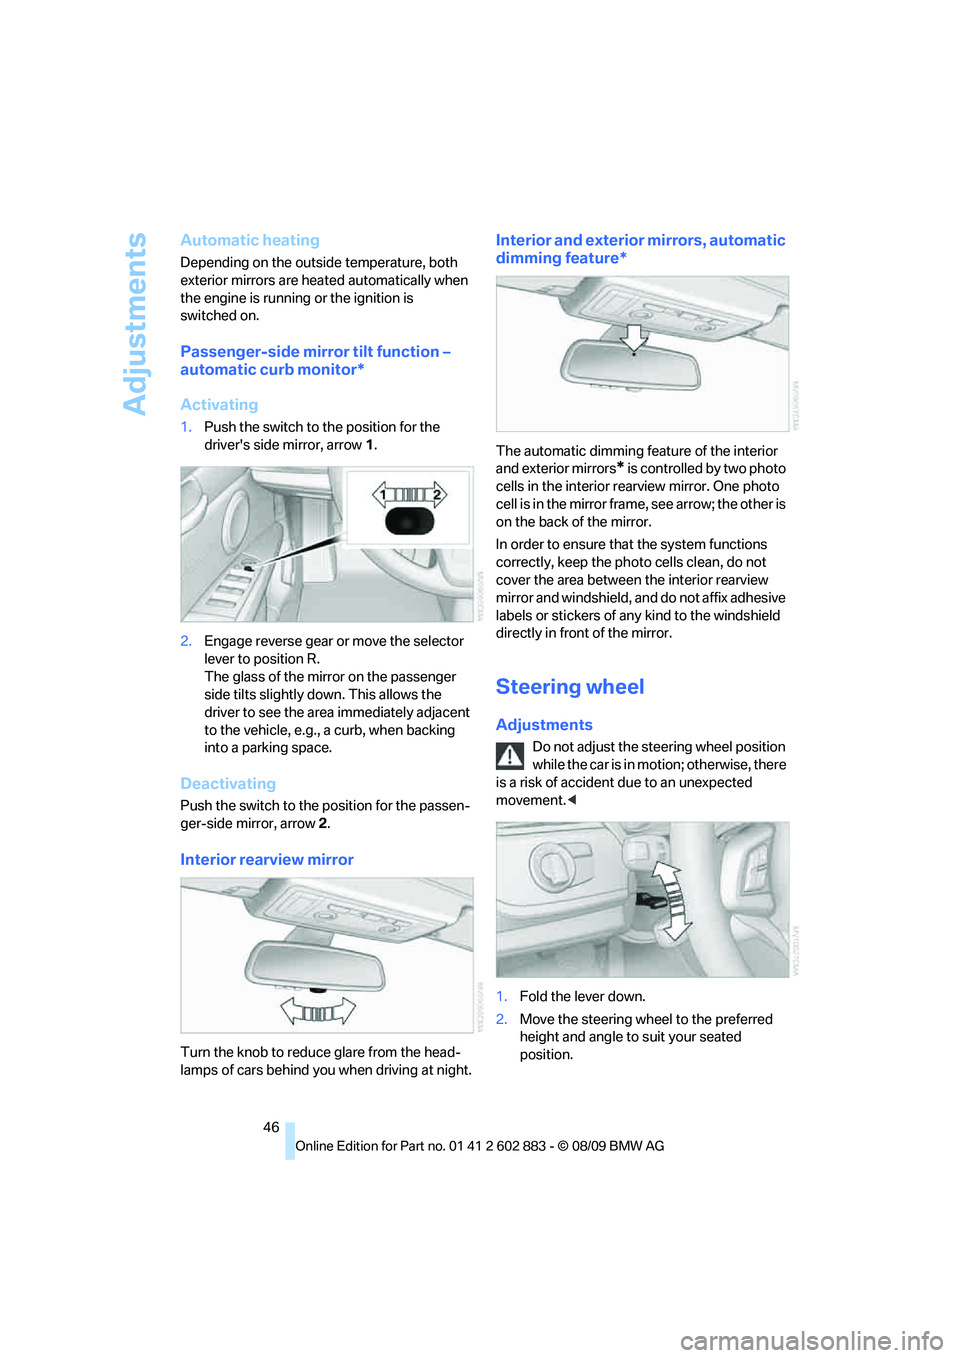
Activating
1.Push the switch to the position for the
driver's side mirror, arrow 1.
2.Engage reverse gear or move the selector
lever to position R.
The glass of the mirror on the passenger
side tilts slightly down. This allows the
driver to see the area immediately adjacent
to the vehicle, e.g., a curb, when backing
into a parking space.
Deactivating
Push the switch to the position for the passen-
ger-side mirror, arrow 2.
Interior rearview mirror
Turn the knob to reduce glare from the head-
lamps of cars behind you when driving
at night.
Interior and exterior mirrors, automatic
dimming feature*
The automatic dimming feature of the interior
and exterior mirrors
* is controlled by two photo
cells in the interior rearview mirror. One photo
cell is in the mirror frame, see arrow; the other is
on the back of the mirror.
In order to ensure that the system functions
correctly, keep the photo cells clean, do not
cover the area between the interior rearview
mirror and windshield, and do not affix adhesive
labels or stickers of any kind to the windshield
directly in front of the mirror.
Steering wheel
Adjustments
Do not adjust the steering wheel position
while the car is in motion; otherwise, there
is a risk of accident due to an unexpected
movement.<
1.Fold the lever down.
2.Move the steering wheel to the preferred
height and angle to suit your seated
position.
Page 49 of 254
Controls
47Reference
At a glance
Driving tips
Communications
Navigation
Entertainment
Mobility
3.Swing the lever back up.
Do not use force to swing the lever
back up; otherwise, the mechanism
will be damaged.<
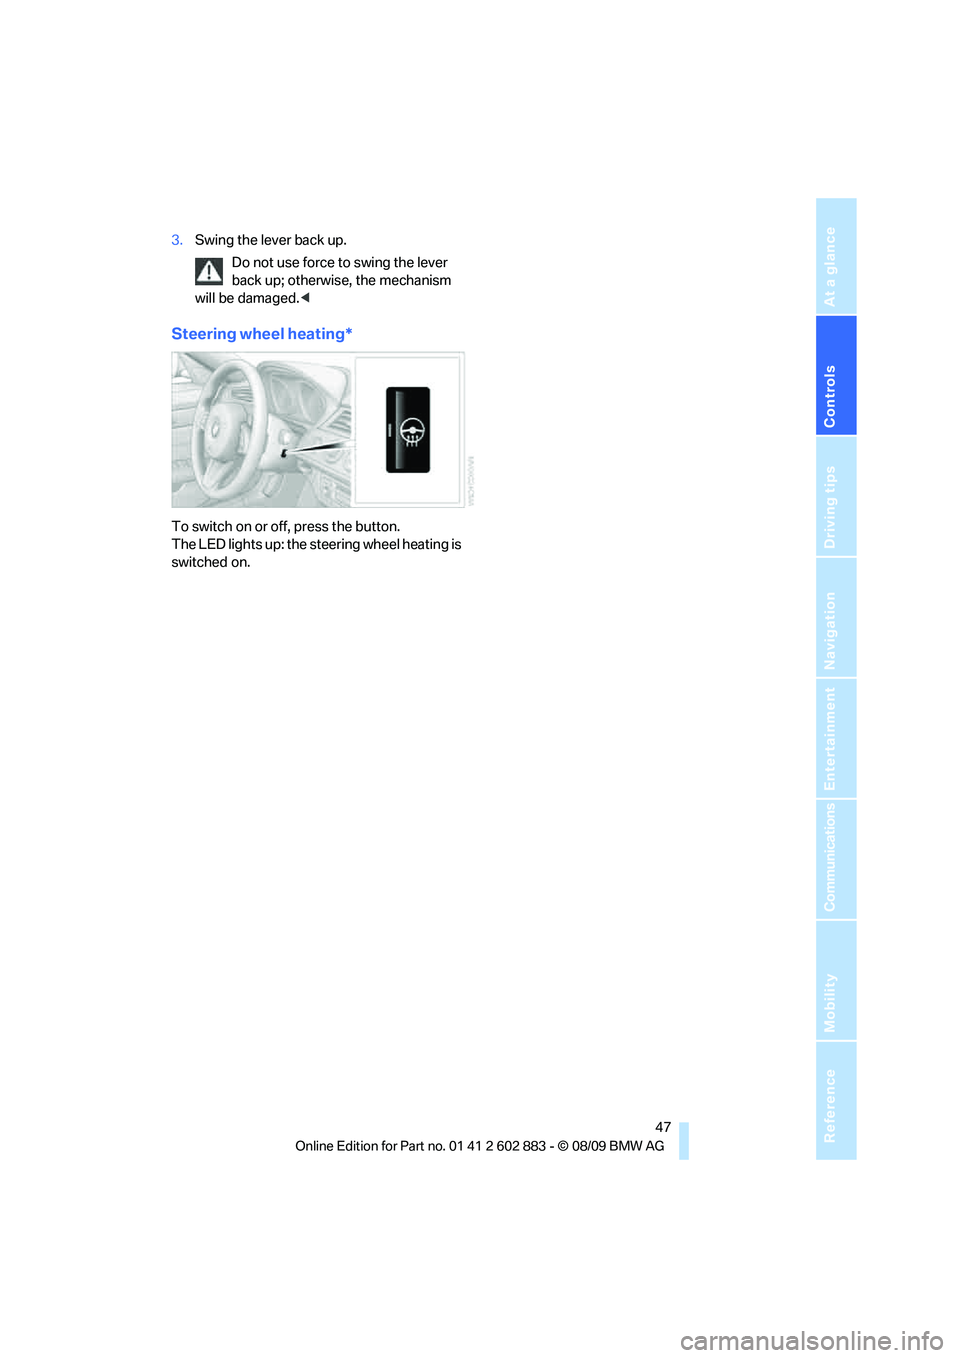
Steering wheel heating*
To switch on or off, press the button.
The LED lights up: the steering wheel heating is
switched on.
Page 54 of 254
Driving
52
Switching off the engine
Always take the remote control with you
when you leave the vehicle.
Set the parking brake firmly when parking; oth-
erwise, the vehicle could roll.<
Manual transmission
1.With the car at a standstill, press the start/
stop button.
2.Shift into first gear or reverse.
3.Set the parking brake.
4.Removing the remote control from the igni-
tion lock, refer to page50.
Automatic transmission
1.With the car at a standstill, move the selec-
tor lever to position P.
2.Press the start/stop button.
3.Set the parking brake.
4.Removing the remote control from the igni-
tion lock, refer to page50.
7-gear sport automatic transmission
with dual clutch
1.With the car at a standstill, engage trans-
mission position P.
2.Press the start/stop button.
3.Set the parking brake.
4.Removing the remote control from the igni-
tion lock, refer to page50.
Parking brake
The concept
Your BMW is equipped with an electromechan-
ical parking brake that can be set and released
by using a button.
The parking brake is primarily used to prevent
the vehicle from rolling when it is parked.When the vehicle is stationary, the parking
brake acts on the rear wheels via an electrome-
chanical mechanism. When the vehicle is rolling
or being driven, the parking brake acts on the
disc brakes of the front and rear wheels via the
hydraulic brake system.
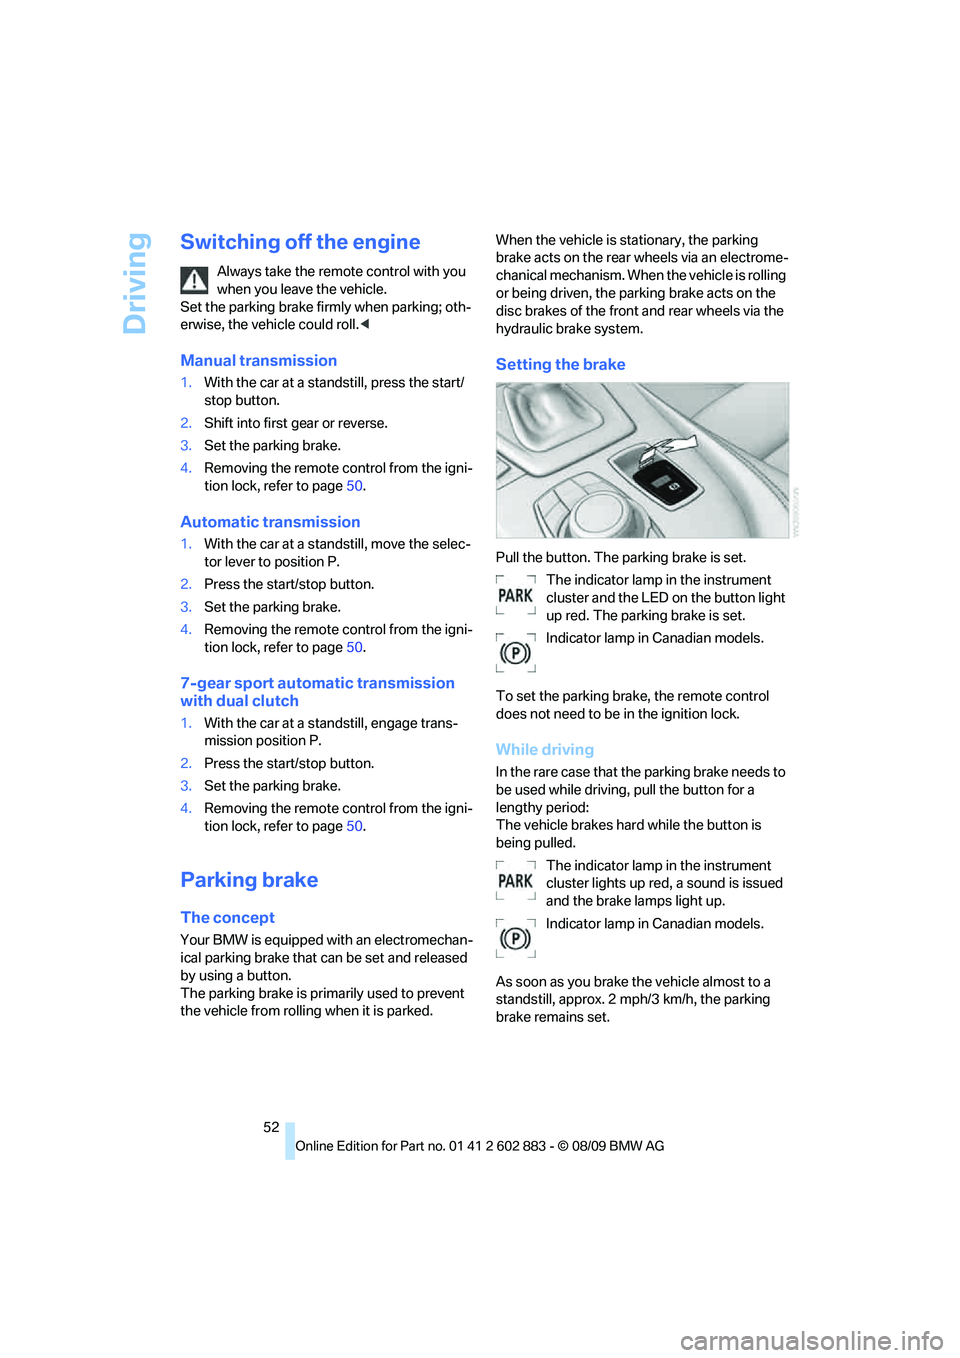
Setting the brake
Pull the button. The parking brake is set.
The indicator lamp in the instrument
cluster and the LED on the button light
up red. The parking brake is set.
Indicator lamp in Canadian models.
To set the parking brake, the remote control
does not need to be in the ignition lock.
While driving
In the rare case that the parking brake needs to
be used while driving, pull the button for a
lengthy period:
The vehicle brakes hard while the button is
being pulled.
The indicator lamp in the instrument
cluster lights up red, a sound is issued
and the brake lamps light up.
Indicator lamp in Canadian models.
As soon as you brake the vehicle almost to a
standstill, approx. 2 mph/3 km/h, the parking
brake remains set.
Page 55 of 254
Controls
53Reference
At a glance
Driving tips
Communications
Navigation
Entertainment
Mobility
Releasing
Take the remote control with you when
leaving the vehicle so that children, for
example, cannot release the parking brake.<
The parking brake can only be released while
the ignition is switched on or the engine is
running.
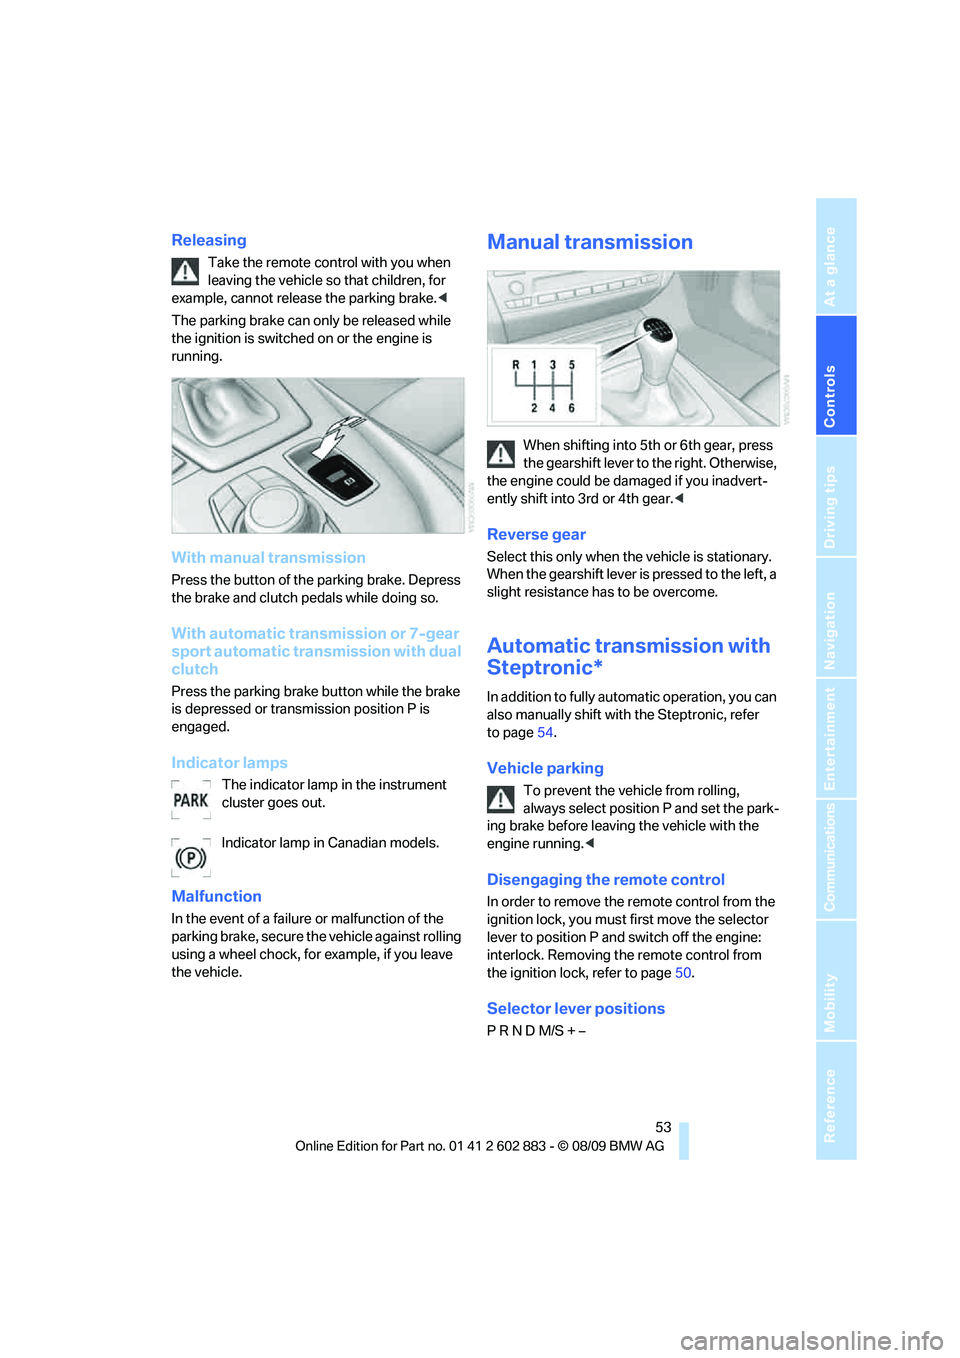
With manual transmission
Press the button of the parking brake. Depress
the brake and clutch pedals while doing so.
With automatic transmission or 7-gear
sport automatic transmission with dual
clutch
Press the parking brake button while the brake
is depressed or transmission position P is
engaged.
Indicator lamps
The indicator lamp in the instrument
cluster goes out.
Indicator lamp in Canadian models.
Malfunction
In the event of a failure or malfunction of the
parking brake, secure the vehicle against rolling
using a wheel chock, for example, if you leave
the vehicle.
Manual transmission
When shifting into 5th or 6th gear, press
the gearshift lever to the right. Otherwise,
the engine could be damaged if you inadvert-
ently shift into 3rd or 4th gear.<
Reverse gear
Select this only when the vehicle is stationary.
When the gearshift lever is pressed to the left, a
slight resistance has to be overcome.
Automatic transmission with
Steptronic*
In addition to fully automatic operation, you can
also manually shift with the Steptronic, refer
to page54.
Vehicle parking
To prevent the vehicle from rolling,
always select position P and set the park-
ing brake before leaving the vehicle with the
engine running.<
Disengaging the remote control
In order to remove the remote control from the
ignition lock, you must first move the selector
lever to position P and switch off the engine:
interlock. Removing the remote control from
the ignition lock, refer to page50.
Selector lever positions
P R N D M/S + –