2010 BMW Z4 ROADSTER SDRIVE35I phone
[x] Cancel search: phonePage 87 of 254
Controls
85Reference
At a glance
Driving tips
Communications
Navigation
Entertainment
Mobility
able to detect or signal low tire pressure as
intended. TPMS malfunctions may occur for a
variety of reasons, including the installation of
replacement or alternate tires or wheels on the
vehicle that prevent the TPMS from functioning
properly. Always check the TPMS malfunction
telltale after replacing one or more tires or
wheels on your vehicle to ensure that the
replacement or alternate tires and wheels allow
the TPMS to continue to function properly.
Servotronic*
The concept
The Servotronic varies the steering force
required to turn the wheels depending on the
speed at which you are driving. When you are
driving at low speeds, power steering provides
more support, i. e. little effort is needed to turn
the wheels. Power steering support lessens as
your speed increases.
The system works automatically.
Malfunction
Malfunctions are displayed via Check Control.
Dynamic brake lamps*
On the left: normal braking.
On the right: sharp braking.
During sharp braking, the brake lamps and the
dynamic brake lamps of your BMW light up.
The dynamic brake lamps are automatically
activated if the turn signal is not flashing.
Airbags
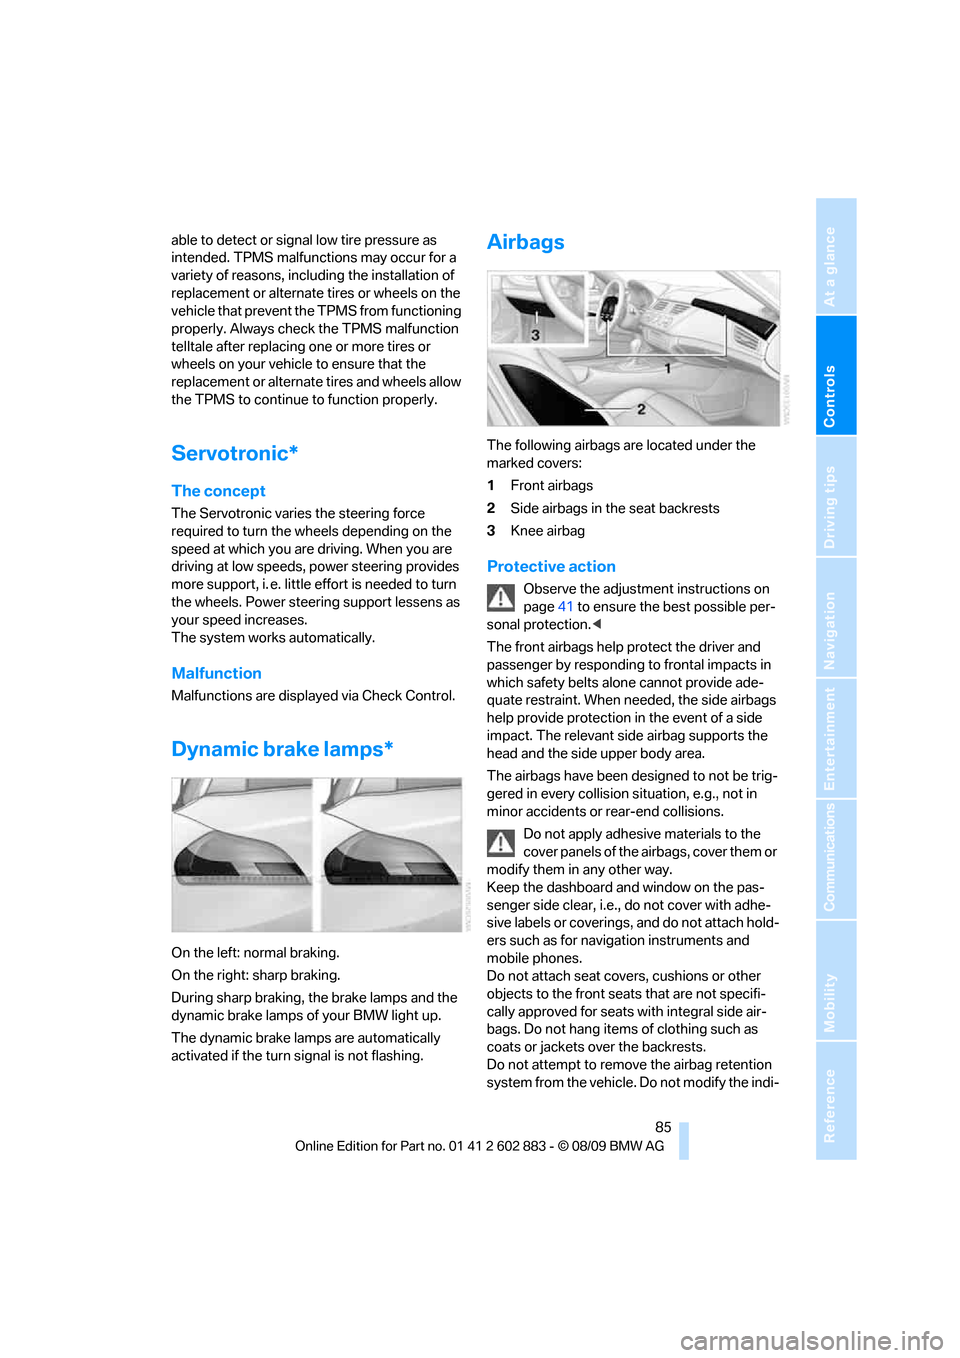
The following airbags are located under the
marked covers:
1Front airbags
2Side airbags in the seat backrests
3Knee airbag
Protective action
Observe the adjustment instructions on
page41 to ensure the best possible per-
sonal protection.<
The front airbags help protect the driver and
passenger by responding to frontal impacts in
which safety belts alone cannot provide ade-
quate restraint. When needed, the side airbags
help provide protection in the event of a side
impact. The relevant side airbag supports the
head and the side upper body area.
The airbags have been designed to not be trig-
gered in every collision situation, e.g., not in
minor accidents or rear-end collisions.
Do not apply adhesive materials to the
cover panels of the airbags, cover them or
modify them in any other way.
Keep the dashboard and window on the pas-
senger side clear, i.e., do not cover with adhe-
sive labels or coverings, and do not attach hold-
ers such as for navigation instruments and
mobile phones.
Do not attach seat covers, cushions or other
objects to the front seats that are not specifi-
cally approved for seats with integral side air-
bags. Do not hang items of clothing such as
coats or jackets over the backrests.
Do not attempt to remove the airbag retention
system from the vehicle. Do not modify the indi-
Page 125 of 254
Navigation
Driving tips
123Reference
At a glance
Controls
Communications
Entertainment
Mobility
Entering a house number
You can enter any house number stored in the
navigation data for the street.
1."House number"
2.Select the digits.
3.Change to the list of house numbers.
4.Select a house number or range of house
numbers.
Starting destination guidance after
entering the destination
1."Accept destination"
2."Start guidance" or "Add as another dest.".
>Set your "Route preference",
refer to page130.
>Search for "Points of Interest at loc.",
refer to page124.
Address book
To create contacts, refer to page182.
Selecting a destination from the
address book
1."Navigation"
2."Address book"
Contacts with addresses are displayed if
these have been checked as destinations.
If the contacts with addresses from the
mobile phone are not displayed, they first
need to be checked as destinations, refer
to page183.3.Select a contact from the list or, if neces-
sary, using "A-Z search".
4.If necessary, select "Business address" or
"Home address".
Storing a destination in the
address book
Store the destination in the address book after
entering the destination.
1.Open "Options".
2."Store as new contact" or "Add to existing
contact".
3.Select an existing contact, if available.
4.Select "Business address" or "Home
address".
5.Enter "Last name" and, if necessary,
"First name".
6."Store in vehicle"
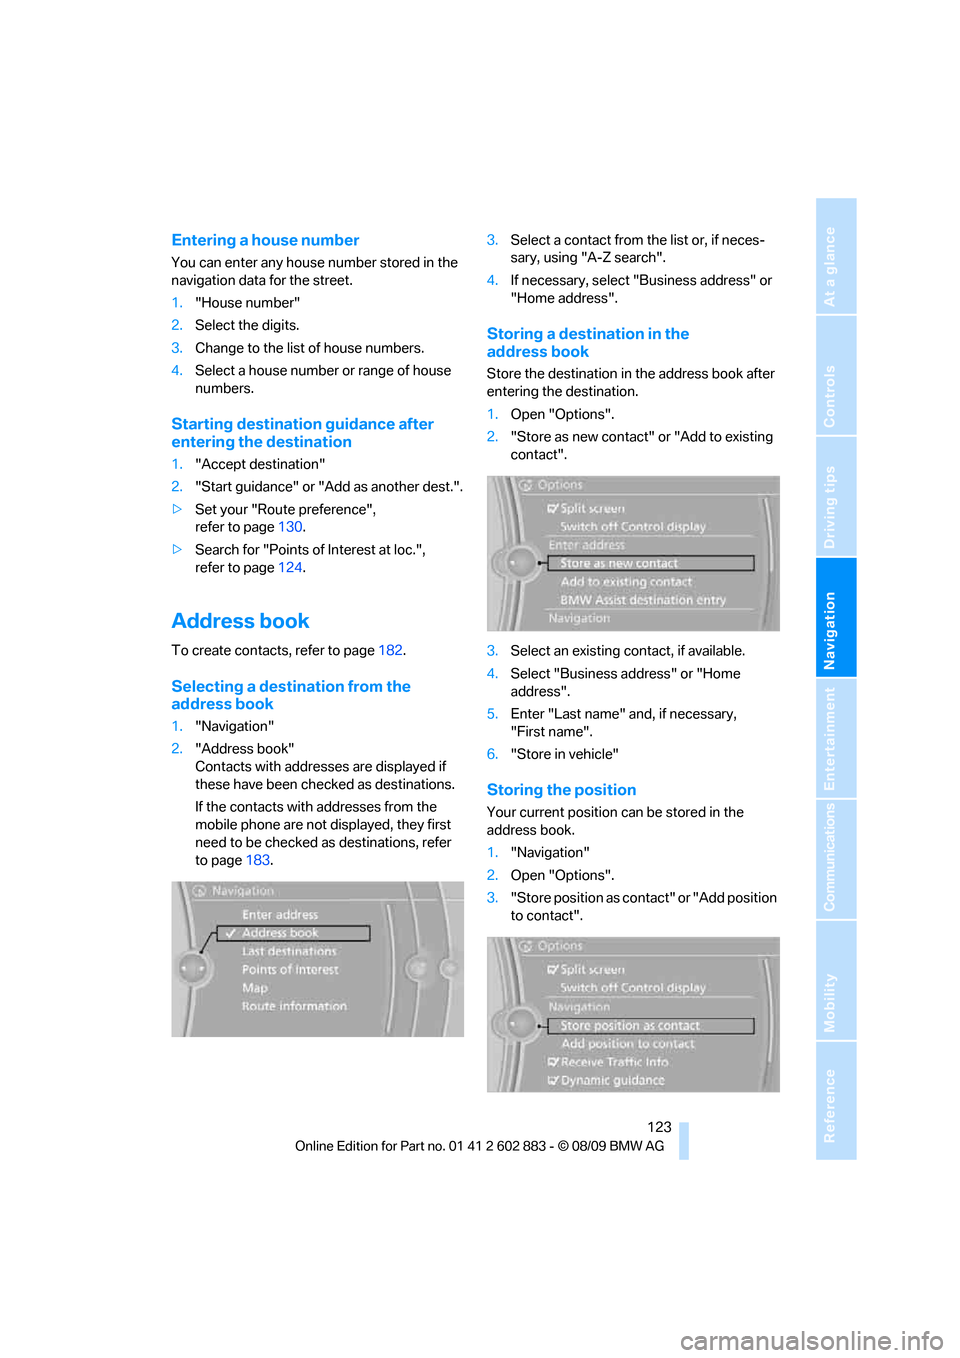
Storing the position
Your current position can be stored in the
address book.
1."Navigation"
2.Open "Options".
3."Store position as contact" or "Add position
to contact".
Page 127 of 254
Navigation
Driving tips
125Reference
At a glance
Controls
Communications
Entertainment
Mobility
Opening the search for special
destinations
1."Navigation"
2."Points of Interest"
Special destination location
Search for a special destination according to its
location relative to a locality or route.
1."Search area"
2.Select the location where the system is to
search for the special destination:
>"At current location"
>"At destination"
>"At a different destination"
>"Along route"
Special destination category
1."Category"
2.Select "All" or a specific category, e.g.,
hotels or restaurants.
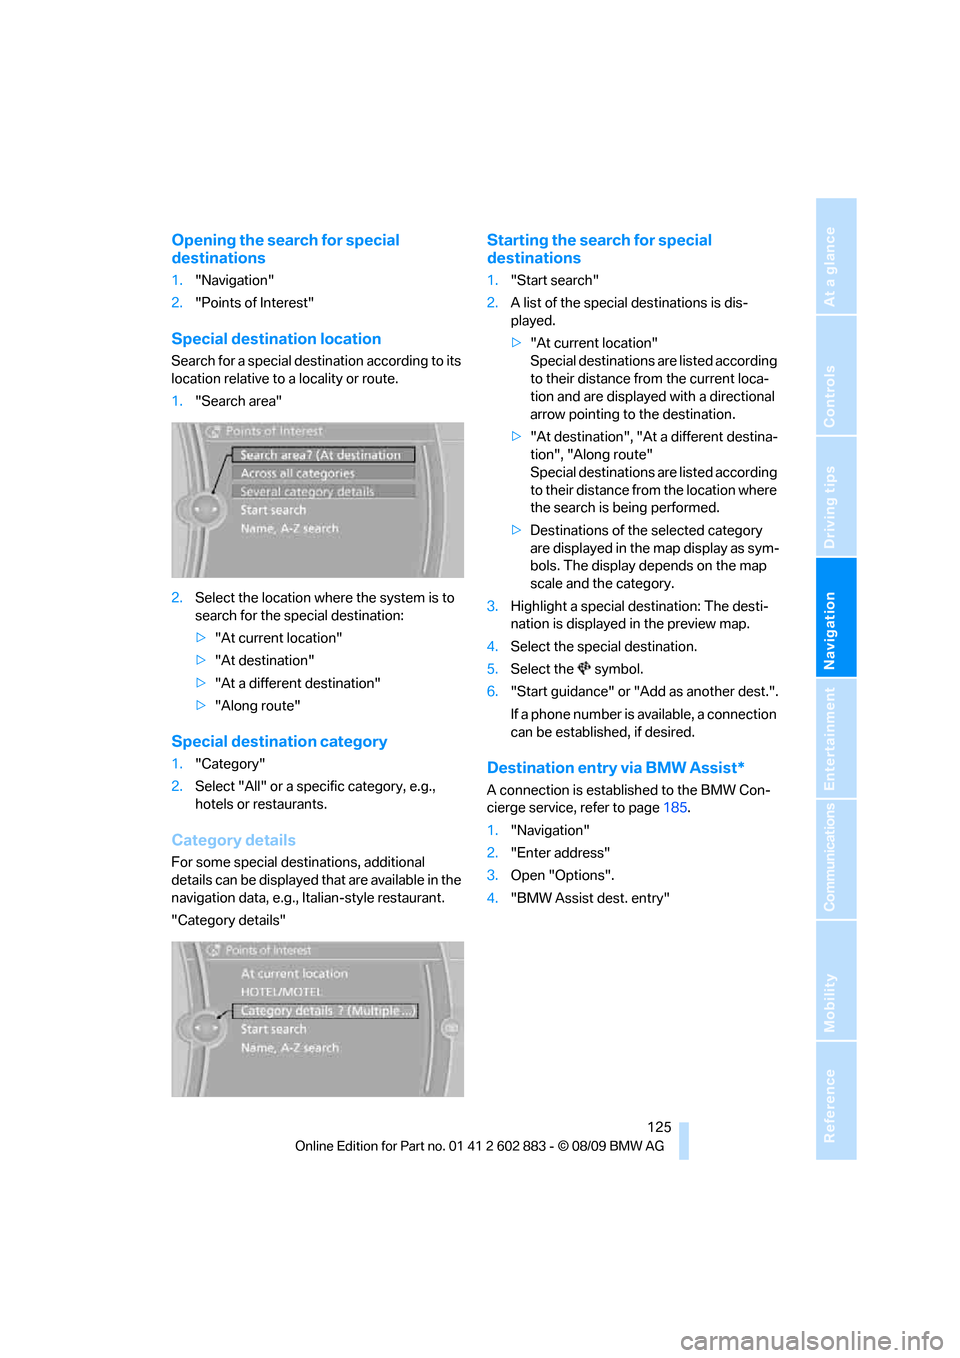
Category details
For some special destinations, additional
details can be displayed that are available in the
navigation data, e.g., Italian-style restaurant.
"Category details"
Starting the search for special
destinations
1."Start search"
2.A list of the special destinations is dis-
played.
>"At current location"
Special destinations are listed according
to their distance from the current loca-
tion and are displayed with a directional
arrow pointing to the destination.
>"At destination", "At a different destina-
tion", "Along route"
Special destinations are listed according
to their distance from the location where
the search is being performed.
>Destinations of the selected category
are displayed in the map display as sym-
bols. The display depends on the map
scale and the category.
3.Highlight a special destination: The desti-
nation is displayed in the preview map.
4.Select the special destination.
5.Select the symbol.
6."Start guidance" or "Add as another dest.".
If a phone number is available, a connection
can be established, if desired.
Destination entry via BMW Assist*
A connection is established to the BMW Con-
cierge service, refer to page185.
1."Navigation"
2."Enter address"
3.Open "Options".
4."BMW Assist dest. entry"
Page 148 of 254
Satellite radio
146
Satellite radio
General information
The channels are offered in predefined pack-
ages. The packages must be enabled by tele-
phone.
Navigation bar overview
The functions of the navigation bar symbols can
also be stored on the programmable memory
buttons, refer to page21.
Managing a subscription
To be able to enable or unsubscribe from the
channels, you must have reception. It is usually
at its best when you have an unobstructed view
of the sky. The channel name is displayed in the
status line.
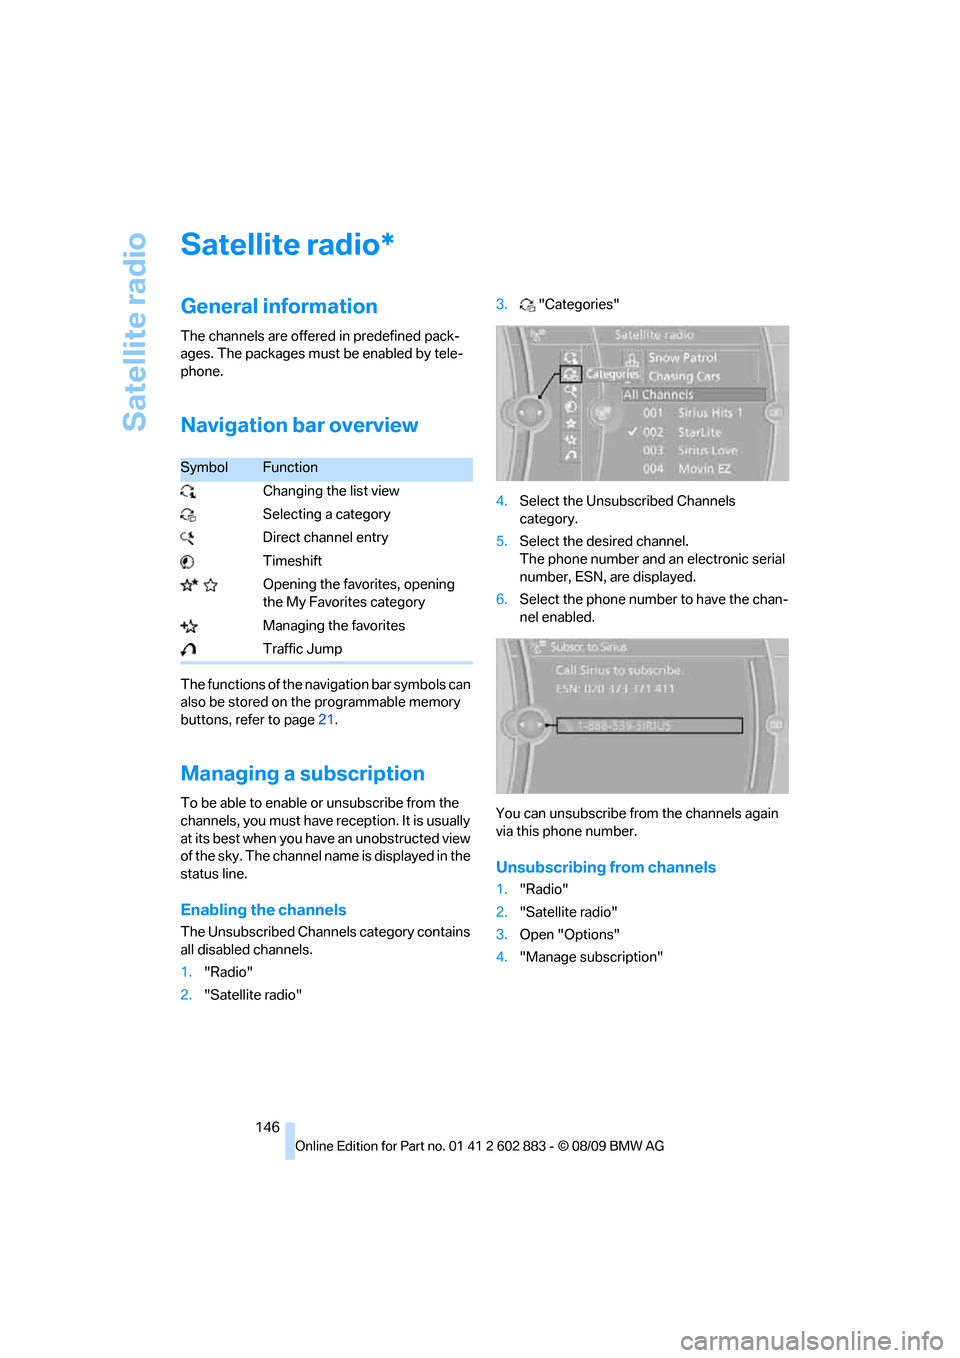
Enabling the channels
The Unsubscribed Channels category contains
all disabled channels.
1."Radio"
2."Satellite radio"3."Categories"
4.Select the Unsubscribed Channels
category.
5.Select the desired channel.
The phone number and an electronic serial
number, ESN, are displayed.
6.Select the phone number to have the chan-
nel enabled.
You can unsubscribe from the channels again
via this phone number.
Unsubscribing from channels
1."Radio"
2."Satellite radio"
3.Open "Options"
4."Manage subscription"
*
SymbolFunction
Changing the list view
Selecting a category
Direct channel entry
Timeshift
Opening the favorites, opening
the My Favorites category
Managing the favorites
Traffic Jump
Page 149 of 254
Navigation
Entertainment
Driving tips
147Reference
At a glance
Controls
Communications
Mobility
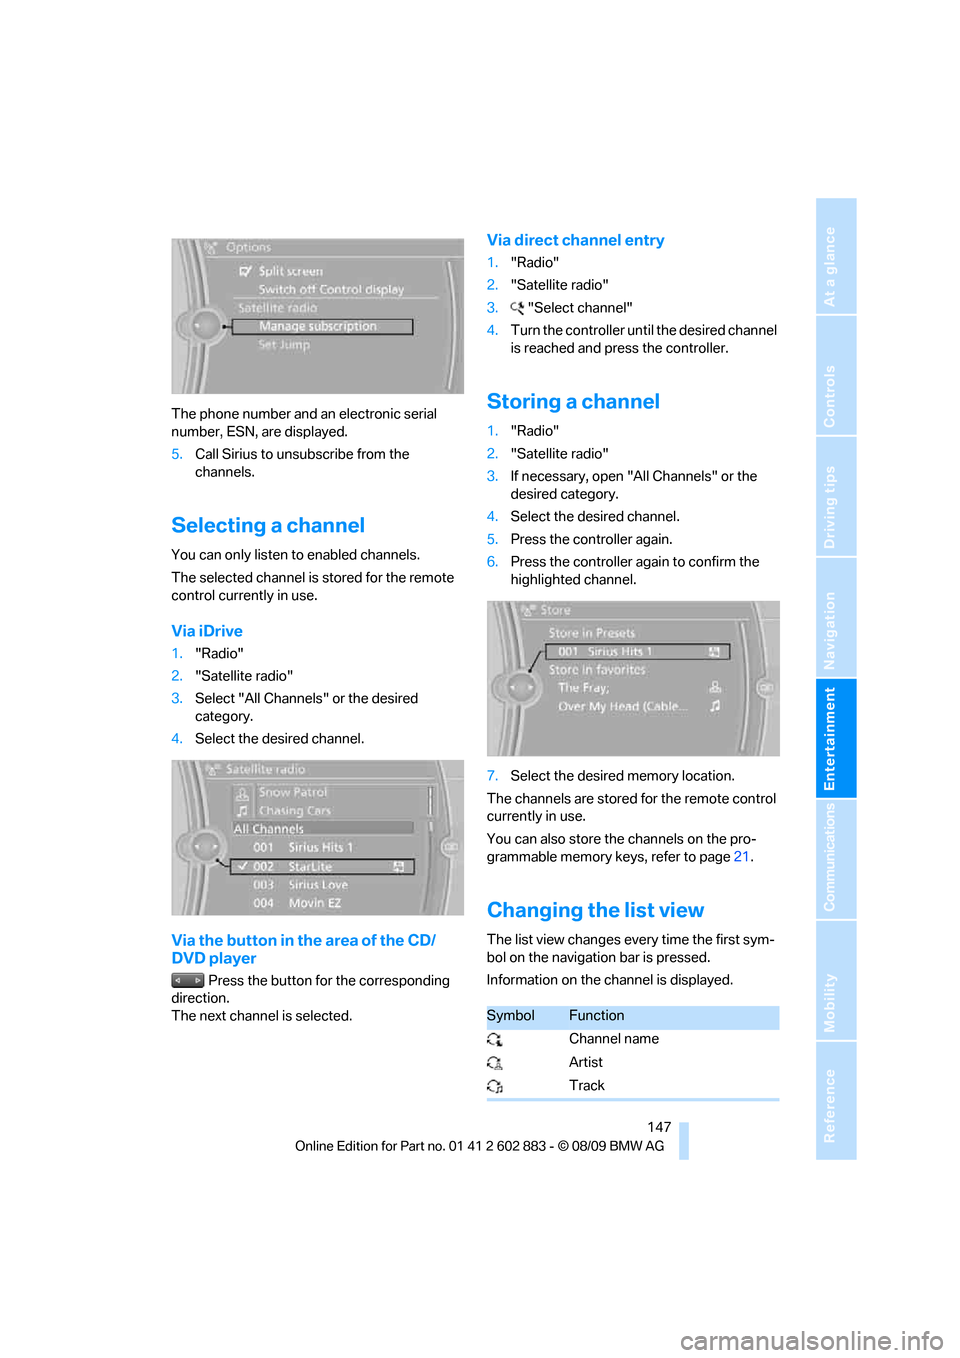
The phone number and an electronic serial
number, ESN, are displayed.
5.Call Sirius to unsubscribe from the
channels.
Selecting a channel
You can only listen to enabled channels.
The selected channel is stored for the remote
control currently in use.
Via iDrive
1."Radio"
2."Satellite radio"
3.Select "All Channels" or the desired
category.
4.Select the desired channel.
Via the button in the area of the CD/
DVD player
Press the button for the corresponding
direction.
The next channel is selected.
Via direct channel entry
1."Radio"
2."Satellite radio"
3."Select channel"
4.Turn the controller until the desired channel
is reached and press the controller.
Storing a channel
1."Radio"
2."Satellite radio"
3.If necessary, open "All Channels" or the
desired category.
4.Select the desired channel.
5.Press the controller again.
6.Press the controller again to confirm the
highlighted channel.
7.Select the desired memory location.
The channels are stored for the remote control
currently in use.
You can also store the channels on the pro-
grammable memory keys, refer to page21.
Changing the list view
The list view changes every time the first sym-
bol on the navigation bar is pressed.
Information on the channel is displayed.
SymbolFunction
Channel name
Artist
Track
Page 161 of 254
Navigation
Entertainment
Driving tips
159Reference
At a glance
Controls
Communications
Mobility
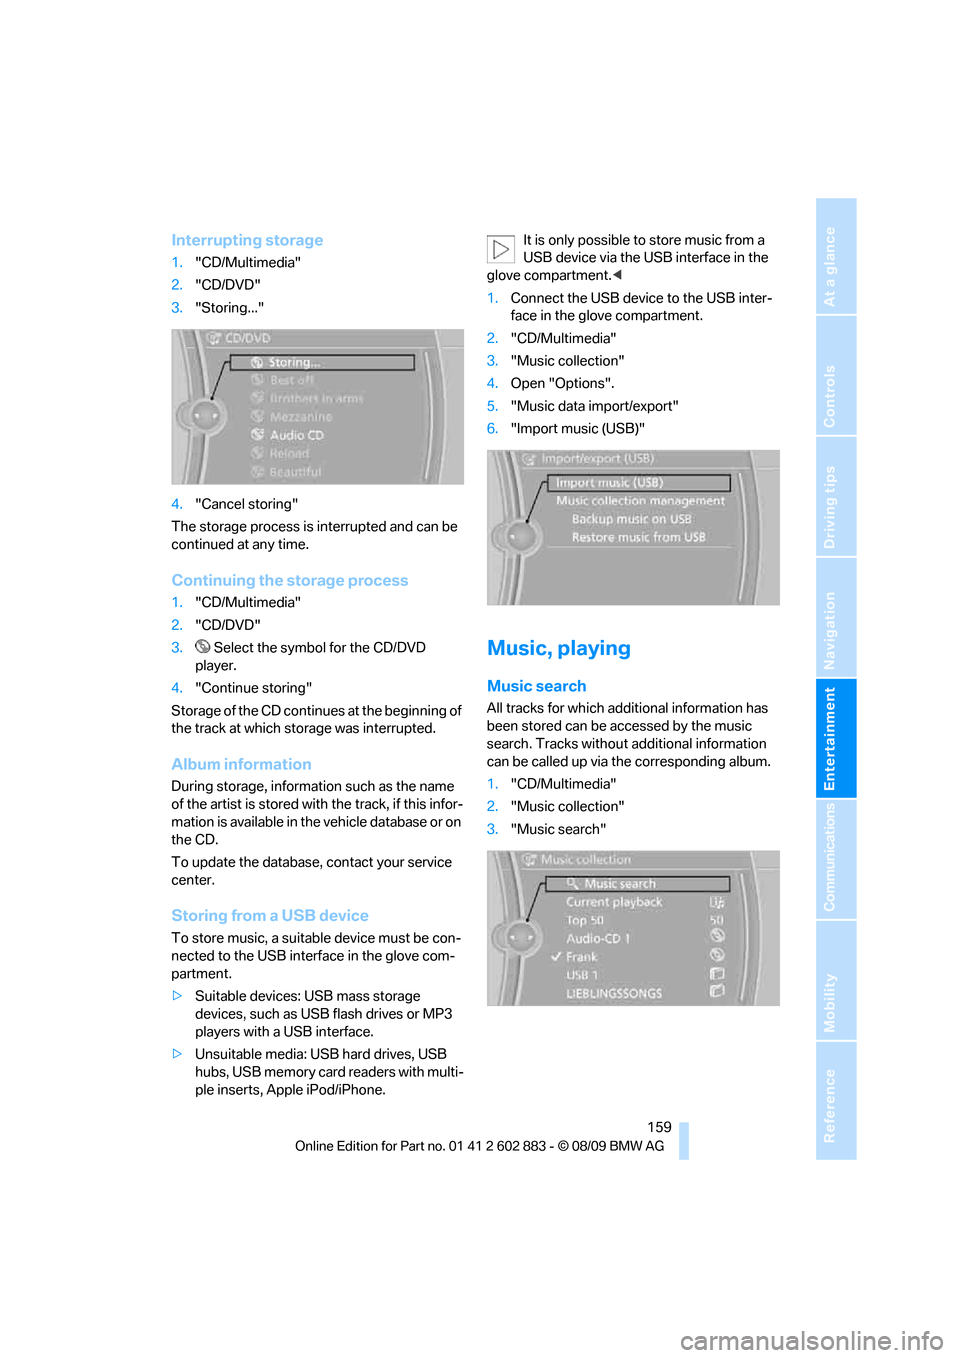
Interrupting storage
1."CD/Multimedia"
2."CD/DVD"
3."Storing..."
4."Cancel storing"
The storage process is interrupted and can be
continued at any time.
Continuing the storage process
1."CD/Multimedia"
2."CD/DVD"
3. Select the symbol for the CD/DVD
player.
4."Continue storing"
Storage of the CD continues at the beginning of
the track at which storage was interrupted.
Album information
During storage, information such as the name
of the artist is stored with the track, if this infor-
mation is available in the vehicle database or on
the CD.
To update the database, contact your service
center.
Storing from a USB device
To store music, a suitable device must be con-
nected to the USB interface in the glove com-
partment.
>Suitable devices: USB mass storage
devices, such as USB flash drives or MP3
players with a USB interface.
>Unsuitable media: USB hard drives, USB
hubs, USB memory card readers with multi-
ple inserts, Apple iPod/iPhone.It is only possible to store music from a
USB device via the USB interface in the
glove compartment.<
1.Connect the USB device to the USB inter-
face in the glove compartment.
2."CD/Multimedia"
3."Music collection"
4.Open "Options".
5."Music data import/export"
6."Import music (USB)"
Music, playing
Music search
All tracks for which additional information has
been stored can be accessed by the music
search. Tracks without additional information
can be called up via the corresponding album.
1."CD/Multimedia"
2."Music collection"
3."Music search"
Page 165 of 254
Navigation
Entertainment
Driving tips
163Reference
At a glance
Controls
Communications
Mobility
External devices
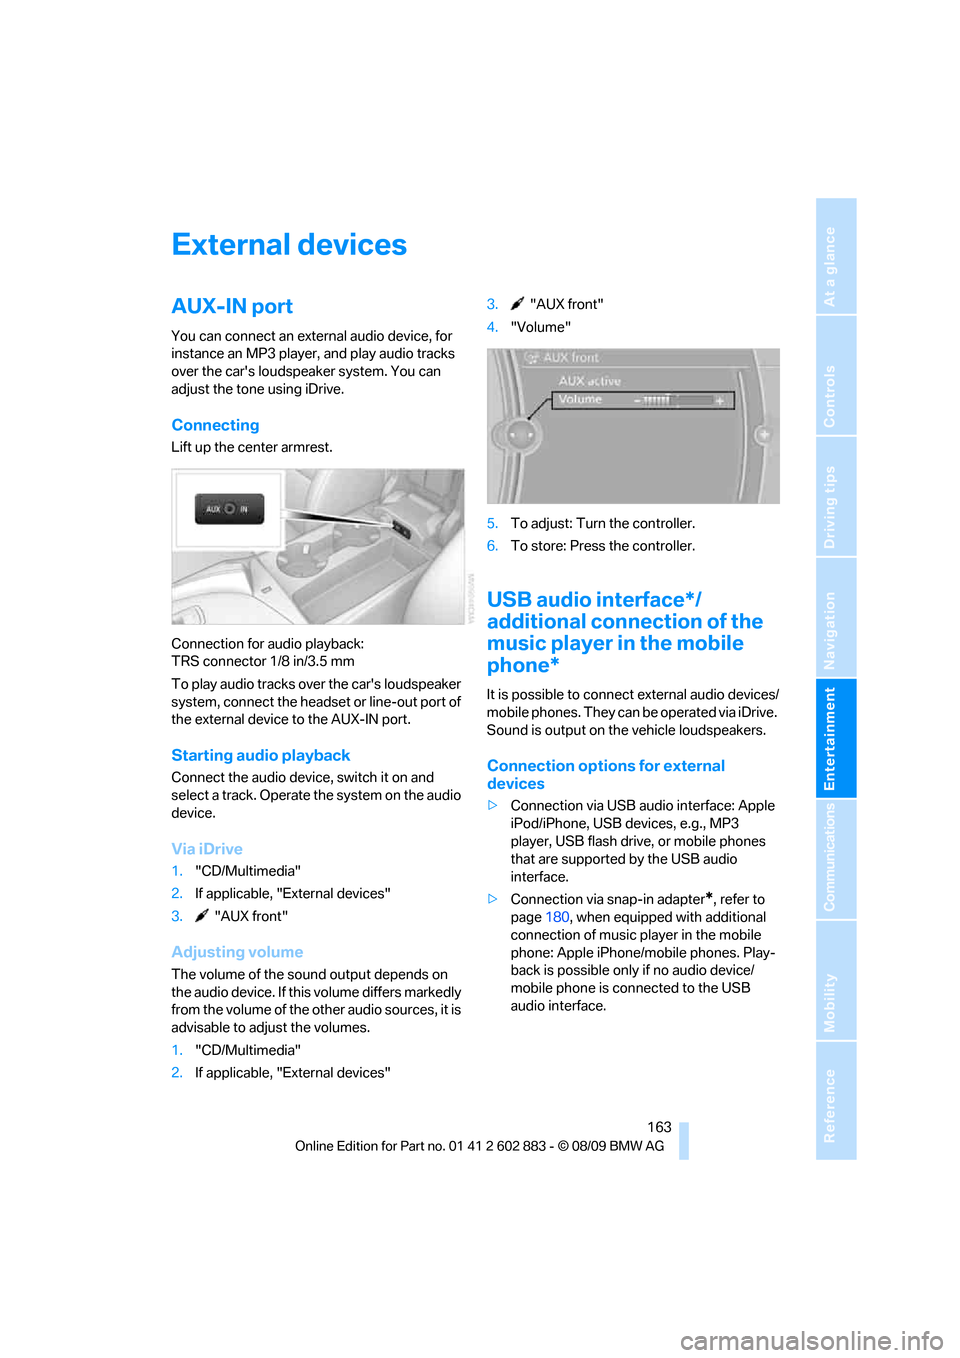
AUX-IN port
You can connect an external audio device, for
instance an MP3 player, and play audio tracks
over the car's loudspeaker system. You can
adjust the tone using iDrive.
Connecting
Lift up the center armrest.
Connection for audio playback:
TRS connector 1/8 in/3.5 mm
To play audio tracks over the car's loudspeaker
system, connect the headset or line-out port of
the external device to the AUX-IN port.
Starting audio playback
Connect the audio device, switch it on and
select a track. Operate the system on the audio
device.
Via iDrive
1."CD/Multimedia"
2.If applicable, "External devices"
3. "AUX front"
Adjusting volume
The volume of the sound output depends on
the audio device. If this volume differs markedly
from the volume of the other audio sources, it is
advisable to adjust the volumes.
1."CD/Multimedia"
2.If applicable, "External devices"3. "AUX front"
4."Volume"
5.To adjust: Turn the controller.
6.To store: Press the controller.
USB audio interface*/
additional connection of the
music player in the mobile
phone*
It is possible to connect external audio devices/
mobile phones. They can be operated via iDrive.
Sound is output on the vehicle loudspeakers.
Connection options for external
devices
>Connection via USB audio interface: Apple
iPod/iPhone, USB devices, e.g., MP3
player, USB flash drive, or mobile phones
that are supported by the USB audio
interface.
>Connection via snap-in adapter
*, refer to
page180, when equipped with additional
connection of music player in the mobile
phone: Apple iPhone/mobile phones. Play-
back is possible only if no audio device/
mobile phone is connected to the USB
audio interface.
Page 166 of 254
External devices
164 Due to the large number of different audio
devices/mobile phones available on the market,
it cannot be ensured that every audio device/
mobile phone is operable on the vehicle.
Ask about suitable audio devices/mobile
phones at your BMW center.
Audio files
Standard audio formats, e.g., MP3, WMA, WAV
(PCM) and AAC, and playlists in the M3U format
can be played.
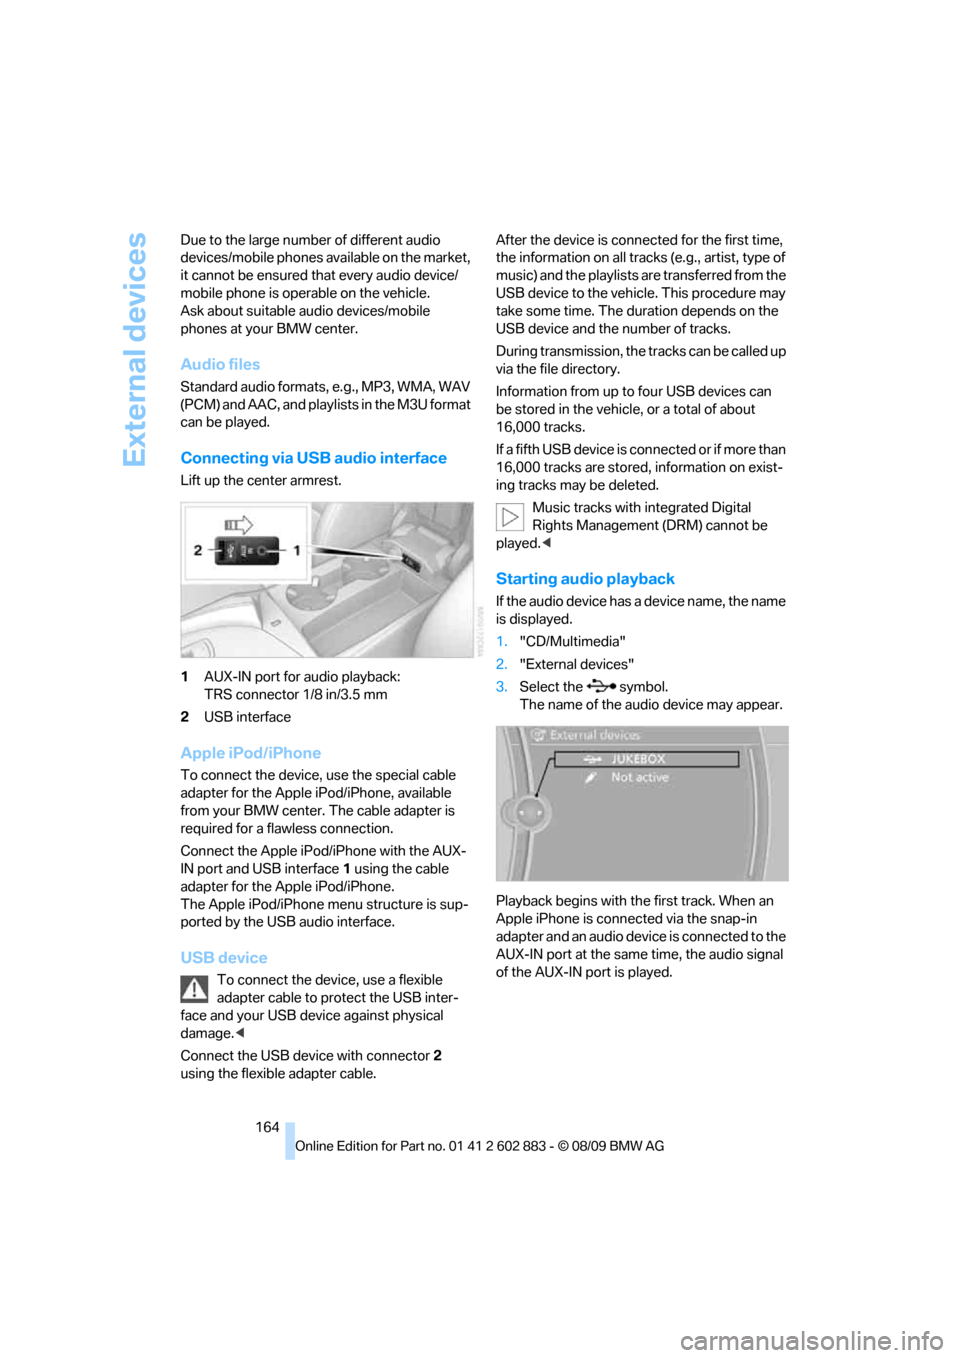
Connecting via USB audio interface
Lift up the center armrest.
1AUX-IN port for audio playback:
TRS connector 1/8 in/3.5 mm
2USB interface
Apple iPod/iPhone
To connect the device, use the special cable
adapter for the Apple iPod/iPhone, available
from your BMW center. The cable adapter is
required for a flawless connection.
Connect the Apple iPod/iPhone with the AUX-
IN port and USB interface1 using the cable
adapter for the Apple iPod/iPhone.
The Apple iPod/iPhone menu structure is sup-
ported by the USB audio interface.
USB device
To connect the device, use a flexible
adapter cable to protect the USB inter-
face and your USB device against physical
damage.<
Connect the USB device with connector 2
using the flexible adapter cable.After the device is connected for the first time,
the information on all tracks (e.g., artist, type of
music) and the playlists are transferred from the
USB device to the vehicle. This procedure may
take some time. The duration depends on the
USB device and the number of tracks.
During transmission, the tracks can be called up
via the file directory.
Information from up to four USB devices can
be stored in the vehicle, or a total of about
16,000 tracks.
I f a f i f t h U S B d e v i c e i s c o n n e c t e d o r i f m o r e t h a n
16,000 tracks are stored, information on exist-
ing tracks may be deleted.
Music tracks with integrated Digital
Rights Management (DRM) cannot be
played.<
Starting audio playback
If the audio device has a device name, the name
is displayed.
1."CD/Multimedia"
2."External devices"
3.Select the symbol.
The name of the audio device may appear.
Playback begins with the first track. When an
Apple iPhone is connected via the snap-in
adapter and an audio device is connected to the
AUX-IN port at the same time, the audio signal
of the AUX-IN port is played.