Page 5 of 136
Clutch . . . . . . . . . . . . . . . . . . . . . . . 73Tyres . . . . . . . . . . . . . . . . . . . . . . . . 74Rims . . . . . . . . . . . . . . . . . . . . . . . . 74Chain . . . . . . . . . . . . . . . . . . . . . . . . 75Wheels . . . . . . . . . . . . . . . . . . . . . . 76BMW Motorrad front-wheelstand . . . . . . . . . . . . . . . . . . . . . . . . 83Fuses . . . . . . . . . . . . . . . . . . . . . . . 84Bulbs . . . . . . . . . . . . . . . . . . . . . . . . 85Air filter . . . . . . . . . . . . . . . . . . . . . . 91Jump starting . . . . . . . . . . . . . . . 92Battery . . . . . . . . . . . . . . . . . . . . . . 93Body panels . . . . . . . . . . . . . . . . . 96
9 Care . . . . . . . . . . . . . . . . . . . . 101Care products . . . . . . . . . . . . . 102Washing motorcycle . . . . . . . 102Cleaning easily damagedcomponents . . . . . . . . . . . . . . . 102Paint care . . . . . . . . . . . . . . . . . 103Protective wax coating . . . . 104Laying up motorcycle . . . . . 104Restoring motorcycle touse . . . . . . . . . . . . . . . . . . . . . . . . 104
10 Technical data . . . . . . 105Troubleshooting chart . . . . . 106Threaded fasteners . . . . . . . 107Engine . . . . . . . . . . . . . . . . . . . . 109Fuel . . . . . . . . . . . . . . . . . . . . . . . 110Engine oil . . . . . . . . . . . . . . . . . 110Clutch . . . . . . . . . . . . . . . . . . . . . 111Transmission . . . . . . . . . . . . . . 111Rear-wheel drive . . . . . . . . . . 112Running gear . . . . . . . . . . . . . . 112Brakes . . . . . . . . . . . . . . . . . . . . 113Wheels and tyres . . . . . . . . . . 113Electrics . . . . . . . . . . . . . . . . . . . 114Frame . . . . . . . . . . . . . . . . . . . . . 116Dimensions . . . . . . . . . . . . . . . 117Weights . . . . . . . . . . . . . . . . . . . 117Riding specifications . . . . . . 118
11 Service . . . . . . . . . . . . . . . 119BMW Motorrad service . . . . 120BMW Motorrad servicequality . . . . . . . . . . . . . . . . . . . . . 120BMW Motorrad mobilityservices - roadside assist-ance . . . . . . . . . . . . . . . . . . . . . . . 120
BMW Motorrad servicenetwork . . . . . . . . . . . . . . . . . . . 121Maintenance work . . . . . . . . . 121Confirmation of mainten-ance work . . . . . . . . . . . . . . . . . 122Confirmation of service . . . . 127
Page 15 of 136
General view, right side
1Fuel filler neck (49)
2Brake-fluid reservoir, front(70)
3Type plate (on right frametube)
VIN (on steering-headbearing, right)
4Air filter (underneath sidepanel) (91)
5Adjuster for spring preload,rear (35)
6Adjuster for damping char-acteristic, rear suspension(36)
7Brake-fluid reservoir, rear(71)
8Tyre pressures table (onrear wheel swinging arm)
2
13
zGeneral views
Page 27 of 136
Self-diagnosis not
completed
ABS warning light flashes.
Possible cause:
The ABS function is notavailable, because self-diagnosis did not complete. Themotorcycle has to move forwarda few metres for the wheelsensors to be tested.
Pull away slowly. Bear in mindthat the ABS function is notavailable until self-diagnosis hascompleted.
ABS deactivated
ABS warning light shows.
Possible cause:
The rider has switched off theABS system.
Activating ABS function(34).
ABS fault
ABS warning light shows.
Possible cause:
The ABS control unit has detec-ted a fault. The ABS function isnot available.
You can continue to ride. Bearin mind that the ABS functionis not available. Bear in mindthe more detailed informationon situations that can lead toan ABS fault (55).
Have the fault rectified asquickly as possible by aspecialist workshop, preferablyan authorised BMW Motorraddealer.
3
25
zStatus indicators
Page 34 of 136
The hazard warning flash-ers place a strain on thebattery. Do not use the hazardwarning flashers for longer thanabsolutely necessary.
Press left section of switch1to switch on the hazard warn-ing flashers.
Switch off the ignition.
Press right section of switch1to switch off the hazard warn-ing flashers.
Emergency off switch
(kill switch)
1Emergency off switch (killswitch)
Operating the kill switchwhen riding can causethe rear wheel to lock and thuscause a fall.
Do not operate the kill switchwhen riding.
The emergency off switch is akill switch for switching off theengine quickly and easily.
aNormal operating position(run)
bEngine switched off.
You cannot start the engineunless the kill switch is inthe run position.
4
32
zOperation
Page 37 of 136
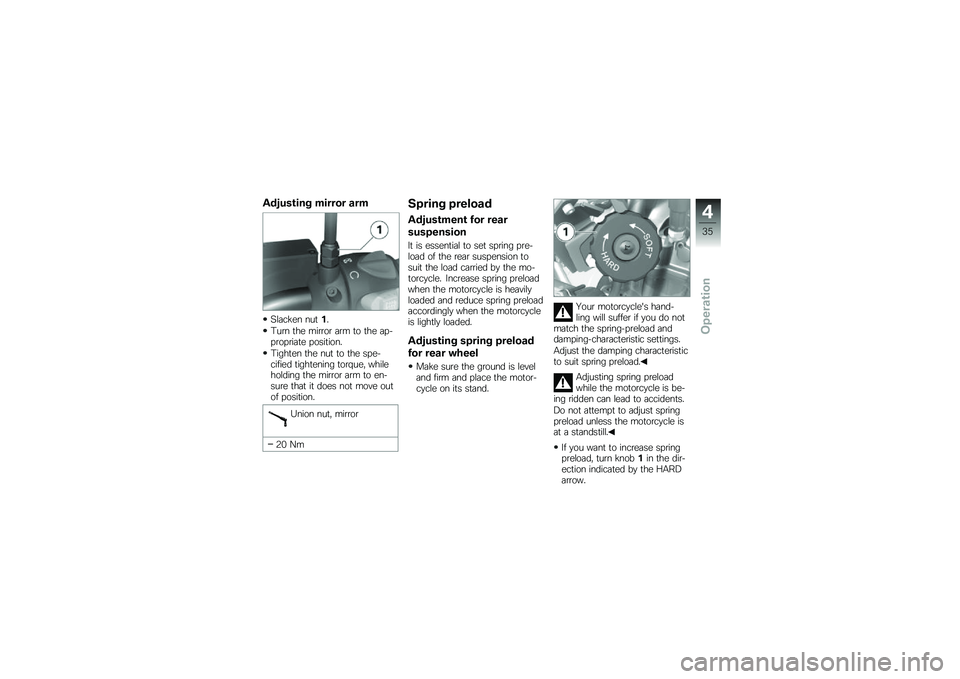
Adjusting mirror arm
Slacken nut1.
Turn the mirror arm to the ap-propriate position.
Tighten the nut to the spe-cified tightening torque, whileholding the mirror arm to en-sure that it does not move outof position.
Union nut, mirror
20 Nm
Spring preload
Adjustment for rear
suspension
It is essential to set spring pre-load of the rear suspension tosuit the load carried by the mo-torcycle. Increase spring preloadwhen the motorcycle is heavilyloaded and reduce spring preloadaccordingly when the motorcycleis lightly loaded.
Adjusting spring preload
for rear wheel
Make sure the ground is leveland firm and place the motor-cycle on its stand.
Your motorcycle's hand-ling will suffer if you do notmatch the spring-preload anddamping-characteristic settings.
Adjust the damping characteristicto suit spring preload.
Adjusting spring preloadwhile the motorcycle is be-ing ridden can lead to accidents.
Do not attempt to adjust springpreload unless the motorcycle isat a standstill.
If you want to increase springpreload, turn knob1in the dir-ection indicated by the HARDarrow.
4
35
zOperation
Page 38 of 136
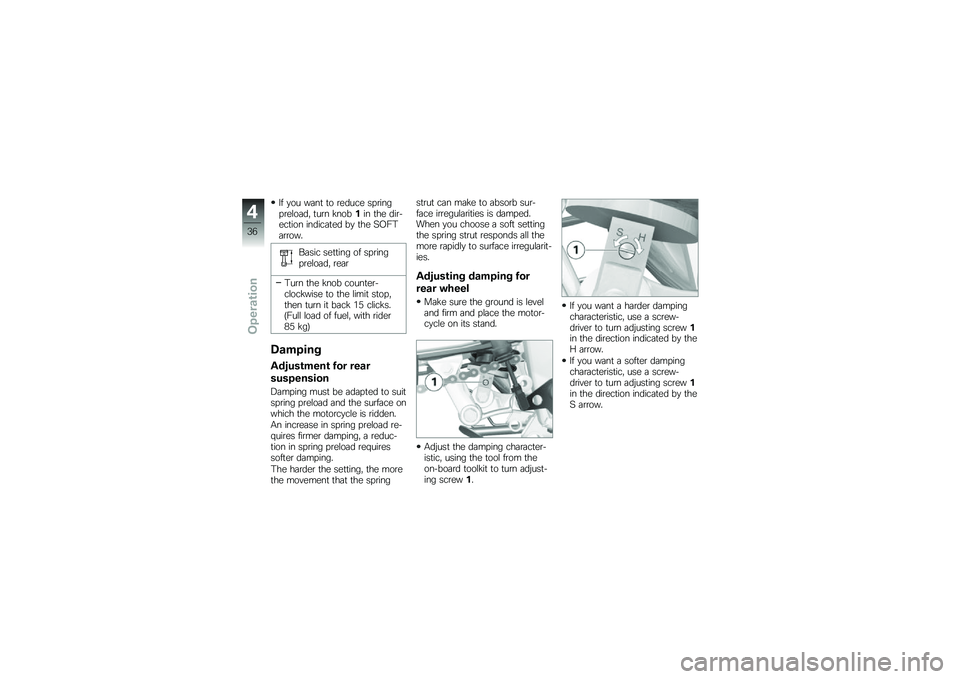
If you want to reduce springpreload, turn knob1in the dir-ection indicated by the SOFTarrow.
Basic setting of springpreload, rear
Turn the knob counter-clockwise to the limit stop,then turn it back 15 clicks.(Full load of fuel, with rider85 kg)
Damping
Adjustment for rear
suspension
Damping must be adapted to suitspring preload and the surface onwhich the motorcycle is ridden.
An increase in spring preload re-quires firmer damping, a reduc-tion in spring preload requiressofter damping.
The harder the setting, the morethe movement that the spring
strut can make to absorb sur-face irregularities is damped.When you choose a soft settingthe spring strut responds all themore rapidly to surface irregularit-ies.
Adjusting damping for
rear wheel
Make sure the ground is leveland firm and place the motor-cycle on its stand.
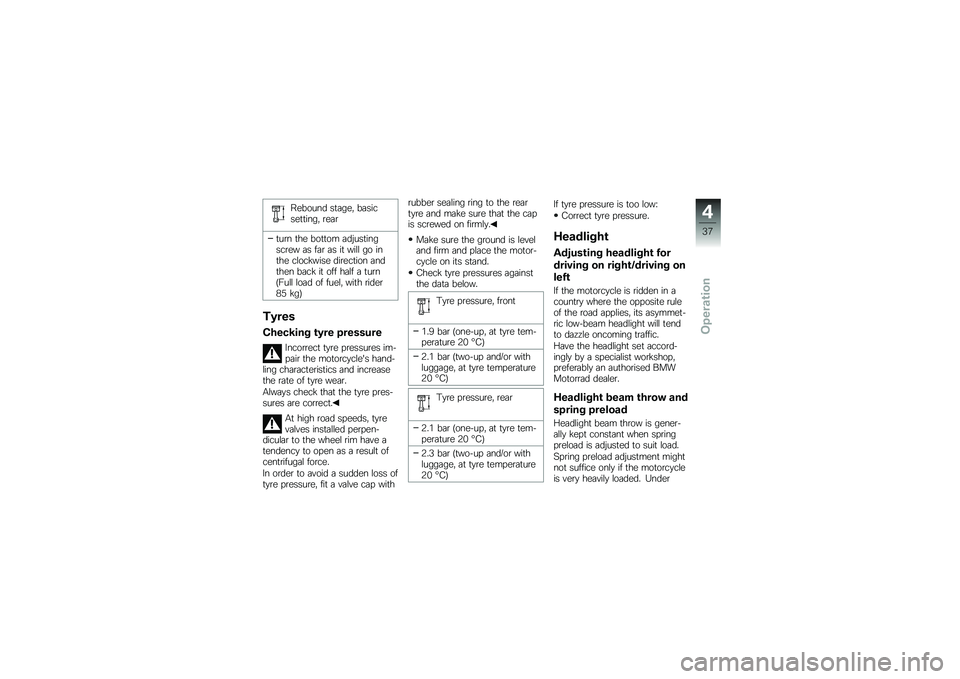
Adjust the damping character-istic, using the tool from theon-board toolkit to turn adjust-ing screw1.
If you want a harder dampingcharacteristic, use a screw-driver to turn adjusting screw1in the direction indicated by theH arrow.
If you want a softer dampingcharacteristic, use a screw-driver to turn adjusting screw1in the direction indicated by theS arrow.
4
36
zOperation
Page 39 of 136
Rebound stage, basicsetting, rear
turn the bottom adjustingscrew as far as it will go inthe clockwise direction andthen back it off half a turn(Full load of fuel, with rider85 kg)
Tyres
Checking tyre pressure
Incorrect tyre pressures im-pair the motorcycle's hand-ling characteristics and increasethe rate of tyre wear.
Always check that the tyre pres-sures are correct.
At high road speeds, tyrevalves installed perpen-dicular to the wheel rim have atendency to open as a result ofcentrifugal force.
In order to avoid a sudden loss oftyre pressure, fit a valve cap with
rubber sealing ring to the reartyre and make sure that the capis screwed on firmly.
Make sure the ground is leveland firm and place the motor-cycle on its stand.
Check tyre pressures againstthe data below.
Tyre pressure, front
1.9 bar (one-up, at tyre tem-perature 20 °C)
2.1 bar (two-up and/or withluggage, at tyre temperature20 °C)
Tyre pressure, rear
2.1 bar (one-up, at tyre tem-perature 20 °C)
2.3 bar (two-up and/or withluggage, at tyre temperature20 °C)
If tyre pressure is too low:
Correct tyre pressure.
Headlight
Adjusting headlight for
driving on right/driving on
left
If the motorcycle is ridden in acountry where the opposite ruleof the road applies, its asymmet-ric low-beam headlight will tendto dazzle oncoming traffic.
Have the headlight set accord-ingly by a specialist workshop,preferably an authorised BMWMotorrad dealer.
Headlight beam throw and
spring preload
Headlight beam throw is gener-ally kept constant when springpreload is adjusted to suit load.
Spring preload adjustment mightnot suffice only if the motorcycleis very heavily loaded. Under
4
37
zOperation
Page 47 of 136
Wait until the warning light forthe coolant temperature stopsflashing.
The idle actuator is posi-tioned after you switch onthe ignition. The coolant-tem-perature warning light flashesif the idle actuator has not cor-rectly positioned before the pre-ride check completes. In orderto avoid subsequent problems,wait for this process to completebefore proceeding.
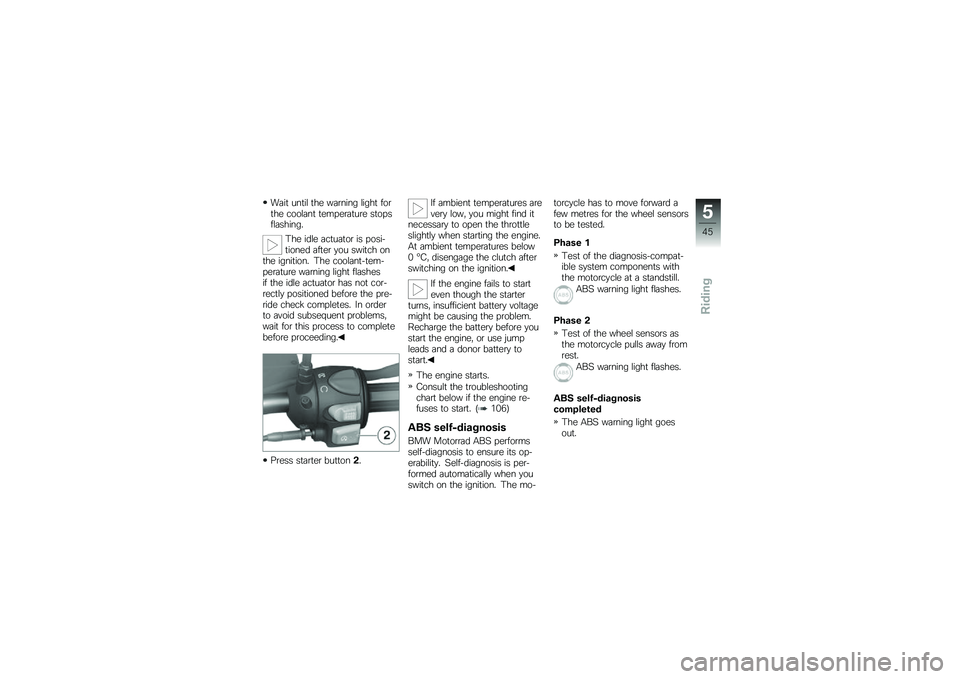
Press starter button2.
If ambient temperatures arevery low, you might find itnecessary to open the throttleslightly when starting the engine.At ambient temperatures below0 °C, disengage the clutch afterswitching on the ignition.
If the engine fails to starteven though the starterturns, insufficient battery voltagemight be causing the problem.Recharge the battery before youstart the engine, or use jumpleads and a donor battery tostart.
The engine starts.
Consult the troubleshootingchart below if the engine re-fuses to start. (106)
ABS self-diagnosis
BMW Motorrad ABS performsself-diagnosis to ensure its op-erability. Self-diagnosis is per-formed automatically when youswitch on the ignition. The mo-
torcycle has to move forward afew metres for the wheel sensorsto be tested.
Phase 1
Test of the diagnosis-compat-ible system components withthe motorcycle at a standstill.
ABS warning light flashes.
Phase 2
Test of the wheel sensors asthe motorcycle pulls away fromrest.
ABS warning light flashes.
ABS self-diagnosiscompleted
The ABS warning light goesout.
5
45
zRiding