2010 BMW M3 power steering
[x] Cancel search: power steeringPage 55 of 196
Reference
At a glance
Controls
Driving tips
Mobility
53
Washer fluid filler neck
Only refill washer fluid when the engine is
cool to avoid contact with hot engine
parts. Otherwise, fluid spills constitute a fire
hazard and a risk to personal safety.<
All washer nozzles are supplied with washer
fluid by the same reservoir.
Fill with water and, if required, with a washer
antifreeze, according to manufacturer's recom-
mendations.
Mix the water and antifreeze before filling
the washer fluid reservoir to make sure
the correct concentration is maintained.<
Capacity
Approx. 6.3 US quarts/6 liters.
Cruise control*
The concept
Cruise control is available for use at speeds of
approx. 20 mph or 30 km/h. The car then stores
and maintains the speed that you specify using
the lever on the steering column. In order to
maintain the specified speed, the system
brakes the vehicle when the engine braking
effect is insufficient on downhill gradients.
Do not use cruise control when driving at
constant speed is prevented by adverse
conditions, e.g. winding roads, dense traffic or
poor road conditions due to, e.g., snow, rain, ice
or loose surfaces. Otherwise, you could lose
control of the vehicle and cause an accident as a
result.<
Manual transmission
You can shift gears while cruise control is acti-
vated. The system is deactivated when you
drive at very low engine speeds for an extended
period.
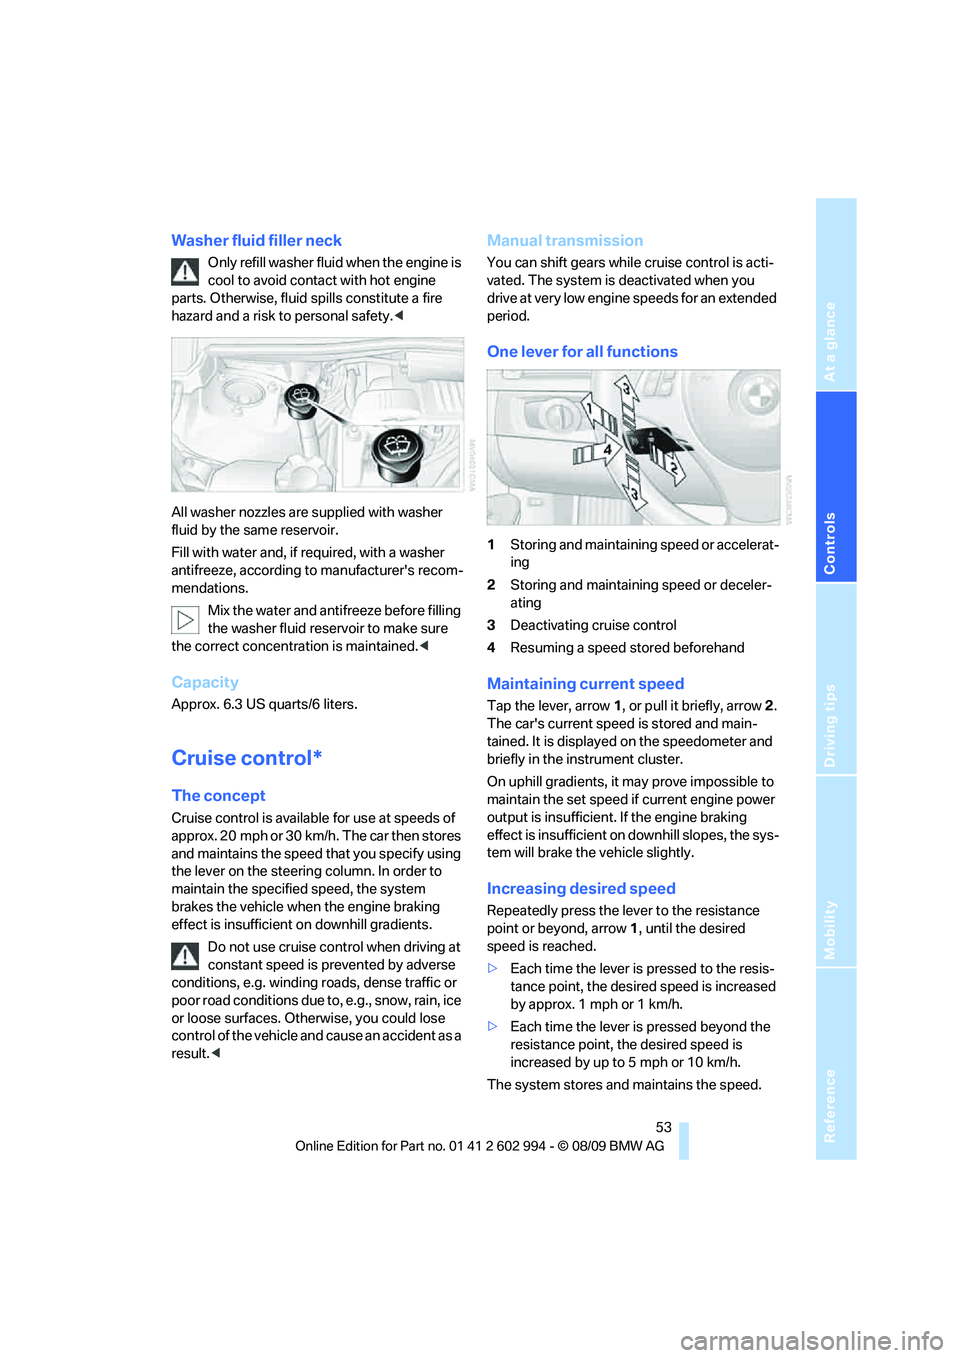
One lever for all functions
1Storing and maintaining speed or accelerat-
ing
2Storing and maintaining speed or deceler-
ating
3Deactivating cruise control
4Resuming a speed stored beforehand
Maintaining current speed
Tap the lever, arrow 1, or pull it briefly, arrow 2.
The car's current speed is stored and main-
tained. It is displayed on the speedometer and
briefly in the instrument cluster.
On uphill gradients, it may prove impossible to
maintain the set speed if current engine power
output is insufficient. If the engine braking
effect is insufficient on downhill slopes, the sys-
tem will brake the vehicle slightly.
Increasing desired speed
Repeatedly press the lever to the resistance
point or beyond, arrow1, until the desired
speed is reached.
>Each time the lever is pressed to the resis-
tance point, the desired speed is increased
by approx. 1 mph or 1 km/h.
>Each time the lever is pressed beyond the
resistance point, the desired speed is
increased by up to 5 mph or 10 km/h.
The system stores and maintains the speed.
Page 73 of 196
Reference
At a glance
Controls
Driving tips
Mobility
71
>When driving uphill on snow-covered roads,
in slush or on unplowed, snow-covered
roads
>When rocking a stuck vehicle free or start-
ing off in deep snow or on loose ground
>When driving with snow chains
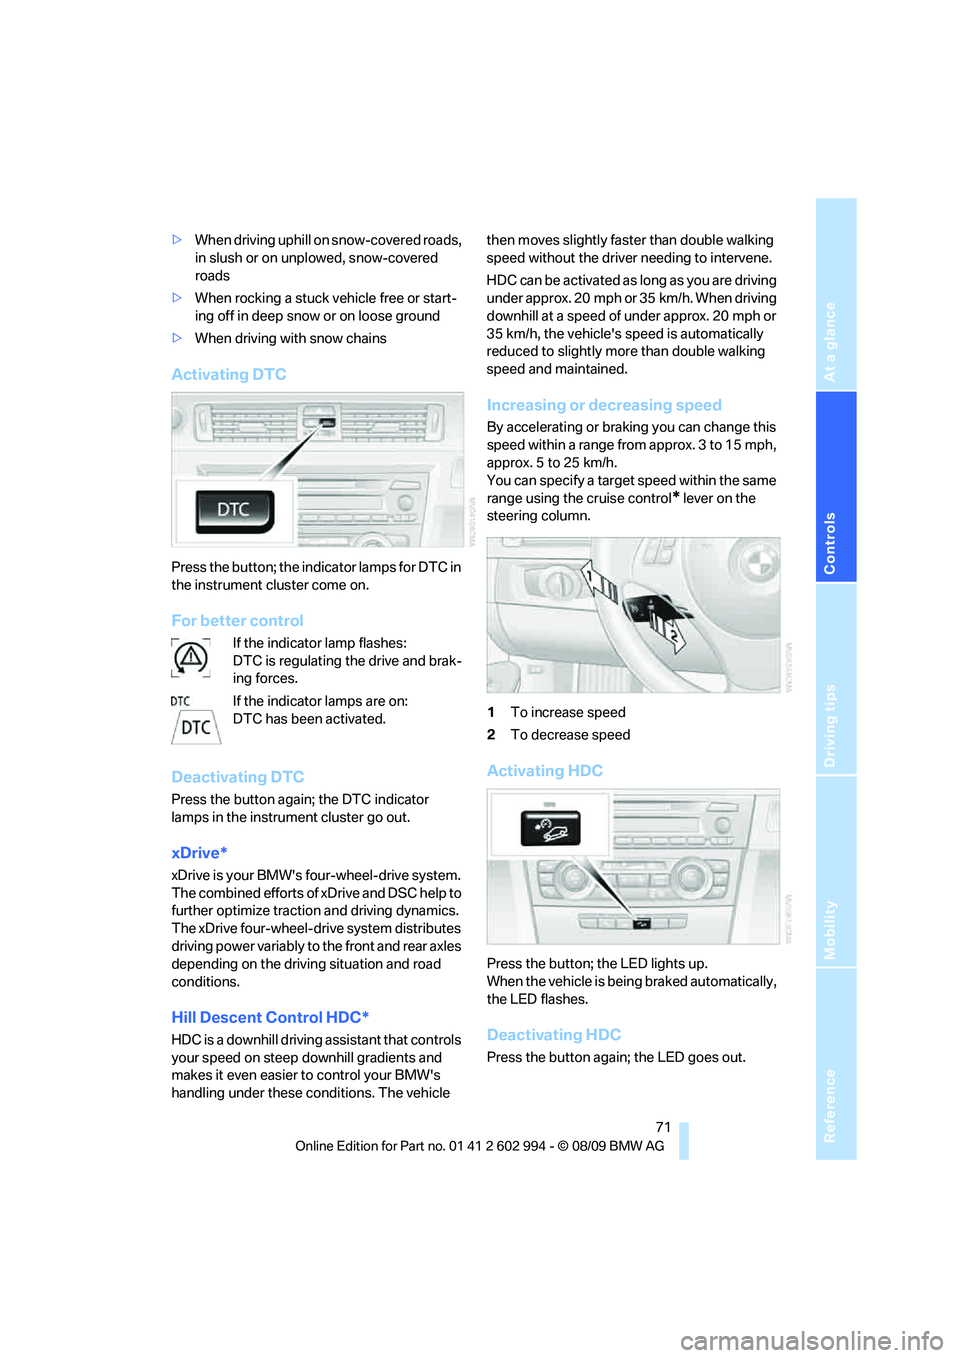
Activating DTC
Press the button; the indicator lamps for DTC in
the instrument cluster come on.
For better control
If the indicator lamp flashes:
DTC is regulating the drive and brak-
ing forces.
If the indicator lamps are on:
DTC has been activated.
Deactivating DTC
Press the button again; the DTC indicator
lamps in the instrument cluster go out.
xDrive*
xDrive is your BMW's four-wheel-drive system.
The combined efforts of xDrive and DSC help to
further optimize traction and driving dynamics.
The xDrive four-wheel-drive system distributes
driving power variably to the front and rear axles
depending on the driving situation and road
conditions.
Hill Descent Control HDC*
HDC is a downhill driving assistant that controls
your speed on steep downhill gradients and
makes it even easier to control your BMW's
handling under these conditions. The vehicle then moves slightly faster than double walking
speed without the driver needing to intervene.
HDC can be activated as long as you are driving
under approx. 20 mph or 35 km/h. When driving
downhill at a speed of under approx. 20 mph or
35 km/h, the vehicle's speed is automatically
reduced to slightly more than double walking
speed and maintained.
Increasing or decreasing speed
By accelerating or braking you can change this
speed within a range from approx. 3 to 15 mph,
approx. 5 to 25 km/h.
You can specify a target speed within the same
range using the cruise control
* lever on the
steering column.
1To increase speed
2To decrease speed
Activating HDC
Press the button; the LED lights up.
When the vehicle is being braked automatically,
the LED flashes.
Deactivating HDC
Press the button again; the LED goes out.
Page 78 of 196

Technology for driving comfort and safety
76
Active steering*
The concept
Active steering varies the turning angle of the
front wheels in relation to steering wheel move-
ments. It also varies the steering force required
to turn the wheels depending on the speed at
which you are driving.
When you are driving in the low road speed
range, e.g. in a town or when parking, the steer-
ing angle is increased, i.e. steering becomes
very direct and less effort is required to turn the
wheels. In the higher speed range, on the other
hand, the steering angle is reduced as the
speed increases. This improves the handling of
your BMW over the entire speed range.
In critical situations, the system can make tar-
geted corrections to the steering angle pro-
vided by the driver and thus stabilize the vehicle
before the driver intervenes. This stabilizing
intervention is simultaneously deactivated
when DSC is switched off, refer to page70.
Malfunction
The warning lamps come on. Active
steering is malfunctioning or is tem-
porarily deactivated. At low speeds,
greater steering wheel movements
are required, whereas at higher speeds the
vehicle reacts more sensitively to steering
wheel movements. The stability-enhancing
feature may also be deactivated. Drive cau-
tiously and think well ahead.
Deactivation
Active steering is deactivated to perform an ini-
tialization. A message indicates that the feature
is deactivated. Initialization may take several
minutes.
If the message does not disappear during the
current trip, have the system checked.
Defect
If there is a defect, a corresponding message
appears. Have the system checked.
Servotronic*
The concept
The Servotronic varies the steering force
required to turn the wheels relative to the vehi-
cle speed.
At low speeds, the steering force is strongly
assisted, i.e. less force is needed for steering.
As the vehicle speed increases, the steering
assisting power is reduced.
Malfunction
Malfunctions are displayed via Check Control,
refer to page67.
Brake Force Display
On the left: normal braking.
On the right: sharp braking.
Page 83 of 196

Reference
At a glance
Controls
Driving tips
Mobility
81
Adaptive light control*
The concept
Adaptive light control is a variable headlamp
control system that enables better illumination
of the road surface. Depending on the steering
angle and other parameters, the light from the
headlamp follows the course of the road.
Activating Adaptive Light Control
With the ignition switched on, turn the light
switch to position 3, refer to page79.
Standstill function
*: to avoid blinding oncoming
traffic, the adaptive light control directs light
towards the front passenger side when the
vehicle is at a standstill.
Adaptive light control is not active when revers-
ing.
Malfunction
The LED next to the symbol for automatic head-
lamp control flashes. Adaptive light control is
malfunctioning or has failed. Have the system
checked as soon as possible.
High beams/roadside parking
lamps
1High beams
2Headlamp flasher
3Roadside parking lamps
*
Roadside parking lamps, left or right*
There is an additional option of switching on the
lamps on the side of the car facing the road
when parked.
Switching on
After parking the vehicle, press the lever up or
down beyond the pressure point for a longer
period, arrow 3.
The roadside parking lamps drain the bat-
tery. Therefore, do not leave them on for
unduly long periods of time; otherwise, the bat-
tery might not have enough power to start the
engine.<
Switching off
Press the lever in the opposite direction to the
pressure point, arrow 3.
High-beam assistant*
The concept
This system automatically switches the high
beams on and off. The procedure is controlled
by a sensor on the front of the interior rearview
mirror. The assistant ensures that the high
beams are switched on whenever the traffic sit-
uation allows. It handles this task for you and
gives you the benefit of the best possible view.
You can intervene at any time and switch the
high beams on and off as usual.
Activating the system
1.Turn the light switch to position3, refer to
page79.
2.With the low beams switched on, briefly
push the turn indicator lever in the direction
of the high beam.
The indicator lamp in the instrument
cluster lights up when the high beams
are activated. The system automati-
cally switches from high beams to low beams
and vice versa in response to oncoming traffic,
traffic ahead of you, and adequate ambient
lighting, e.g. on city streets.
Switching the high beams on and off
manually
Whenever you wish, or when the situation
requires, you can intervene:
Page 87 of 196
Reference
At a glance
Controls
Driving tips
Mobility
85
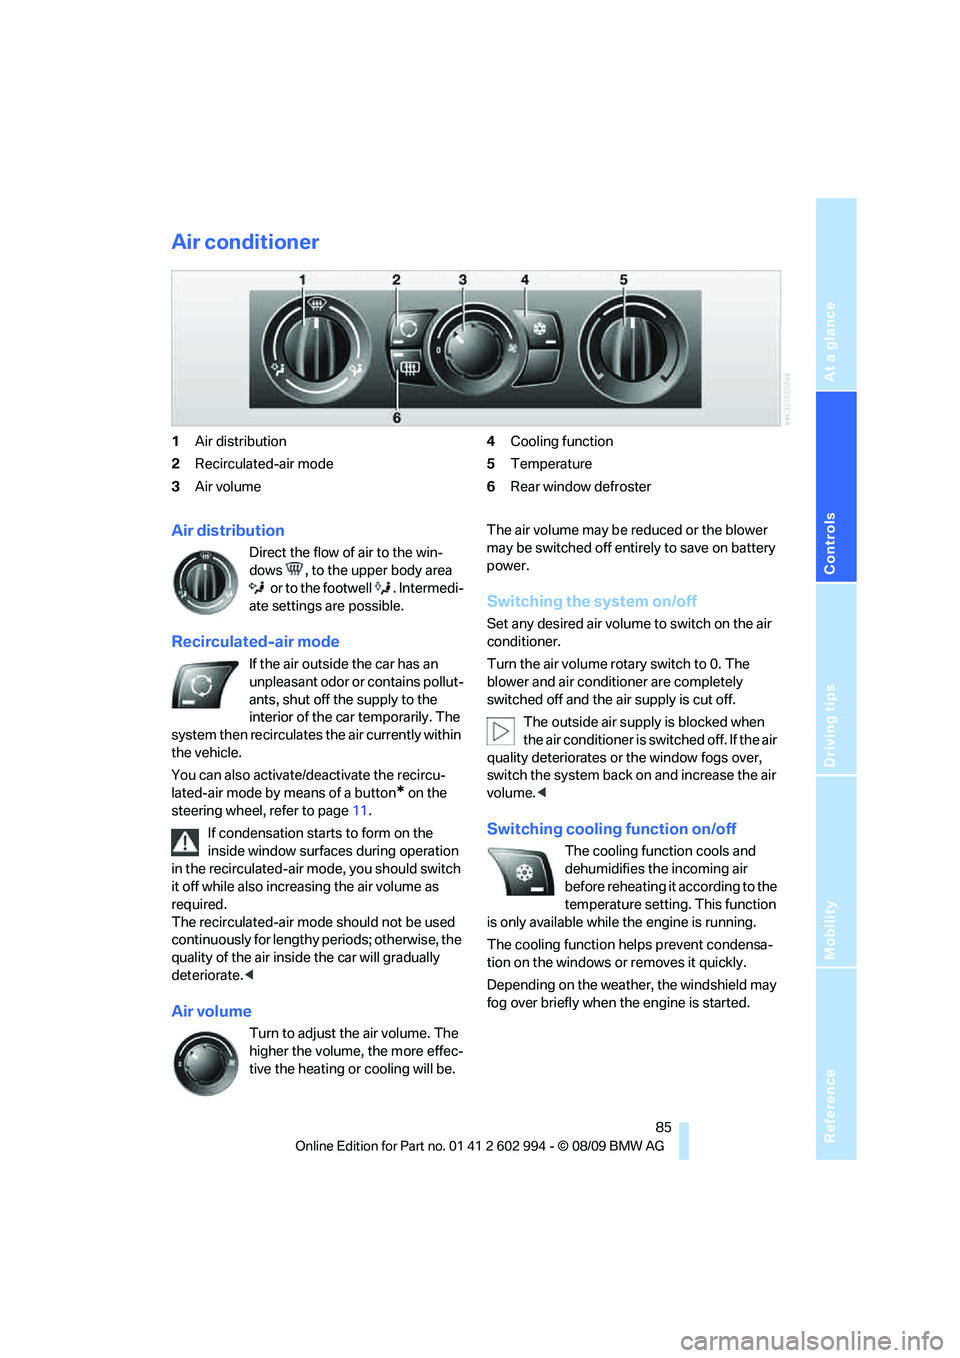
Air conditioner
1Air distribution
2Recirculated-air mode
3Air volume4Cooling function
5Temperature
6Rear window defroster
Air distribution
Direct the flow of air to the win-
dows , to the upper body area
or to the footwell . Intermedi-
ate settings are possible.
Recirculated-air mode
If the air outside the car has an
unpleasant odor or contains pollut-
ants, shut off the supply to the
interior of the car temporarily. The
system then recirculates the air currently within
the vehicle.
You can also activate/deactivate the recircu-
lated-air mode by means of a button
* on the
steering wheel, refer to page11.
If condensation starts to form on the
inside window surfaces during operation
in the recirculated-air mode, you should switch
it off while also increasing the air volume as
required.
The recirculated-air mode should not be used
continuously for lengthy periods; otherwise, the
quality of the air inside the car will gradually
deteriorate.<
Air volume
Turn to adjust the air volume. The
higher the volume, the more effec-
tive the heating or cooling will be.The air volume may be reduced or the blower
may be switched off entirely to save on battery
power.
Switching the system on/off
Set any desired air volume to switch on the air
conditioner.
Turn the air volume rotary switch to 0. The
blower and air conditioner are completely
switched off and the air supply is cut off.
The outside air supply is blocked when
the air conditioner is switched off. If the air
quality deteriorates or the window fogs over,
switch the system back on and increase the air
volume.<
Switching cooling function on/off
The cooling function cools and
dehumidifies the incoming air
before reheating it according to the
temperature setting. This function
is only available while the engine is running.
The cooling function helps prevent condensa-
tion on the windows or removes it quickly.
Depending on the weather, the windshield may
fog over briefly when the engine is started.
Page 90 of 196
Climate
88 Air flows out of the vent outlets for the upper
body region. Open them for this purpose.
Air is cooled as quickly as possible:
>Above an outside temperature of approx.
327/06
>When the engine is running
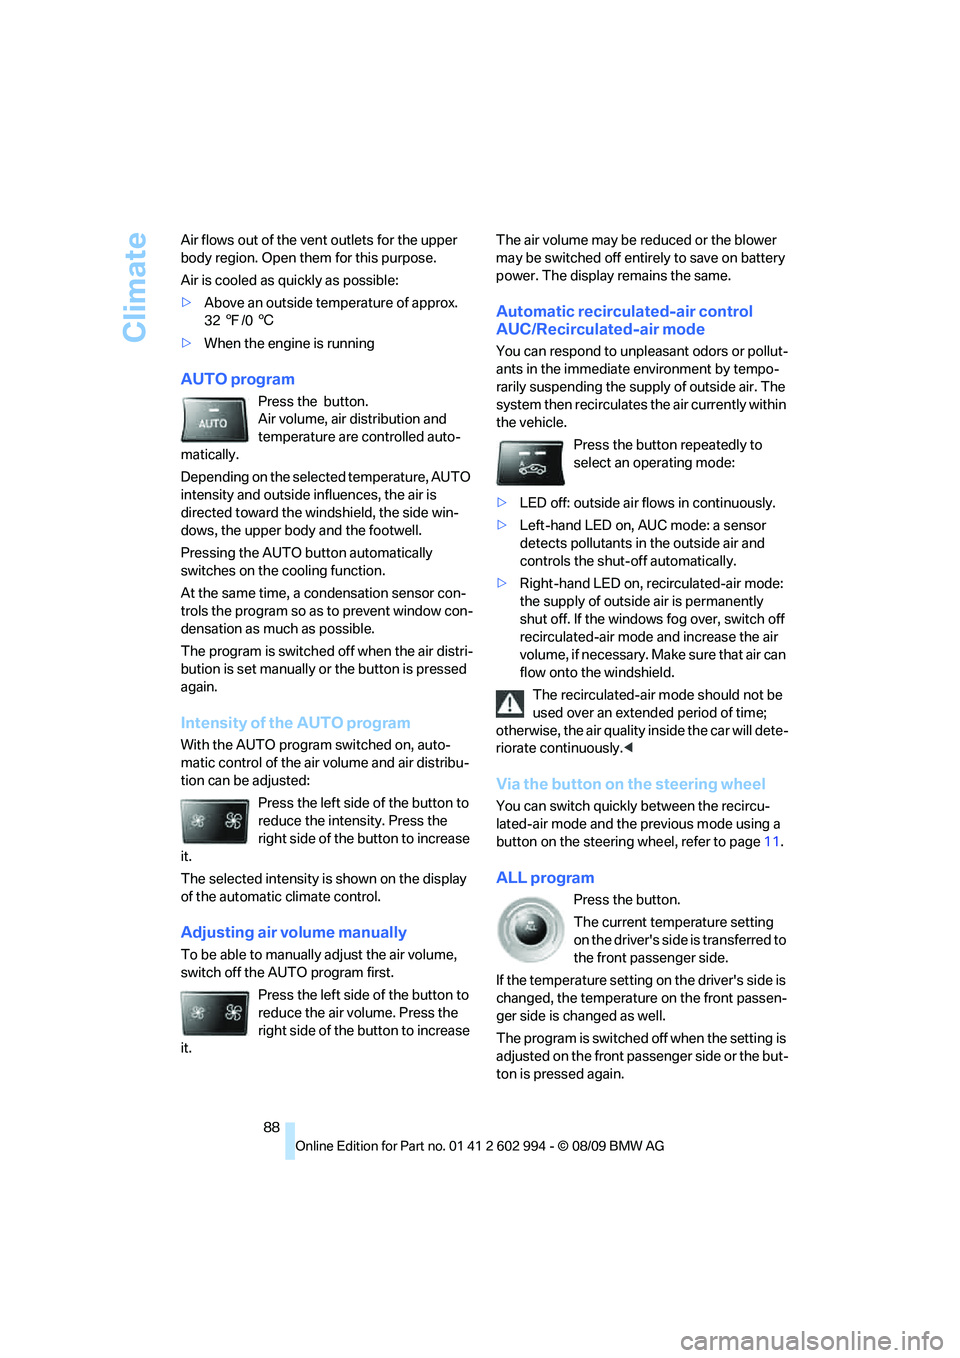
AUTO program
Press the button.
Air volume, air distribution and
temperature are controlled auto-
matically.
Depending on the selected temperature, AUTO
intensity and outside influences, the air is
directed toward the windshield, the side win-
dows, the upper body and the footwell.
Pressing the AUTO button automatically
switches on the cooling function.
At the same time, a condensation sensor con-
trols the program so as to prevent window con-
densation as much as possible.
The program is switched off when the air distri-
bution is set manually or the button is pressed
again.
Intensity of the AUTO program
With the AUTO program switched on, auto-
matic control of the air volume and air distribu-
tion can be adjusted:
Press the left side of the button to
reduce the intensity. Press the
right side of the button to increase
it.
The selected intensity is shown on the display
of the automatic climate control.
Adjusting air volume manually
To be able to manually adjust the air volume,
switch off the AUTO program first.
Press the left side of the button to
reduce the air volume. Press the
right side of the button to increase
it.The air volume may be reduced or the blower
may be switched off entirely to save on battery
power. The display remains the same.
Automatic recirculated-air control
AUC/Recirculated-air mode
You can respond to unpleasant odors or pollut-
ants in the immediate environment by tempo-
rarily suspending the supply of outside air. The
system then recirculates the air currently within
the vehicle.
Press the button repeatedly to
select an operating mode:
>LED off: outside air flows in continuously.
>Left-hand LED on, AUC mode: a sensor
detects pollutants in the outside air and
controls the shut-off automatically.
>Right-hand LED on, recirculated-air mode:
the supply of outside air is permanently
shut off. If the windows fog over, switch off
recirculated-air mode and increase the air
volume, if necessary. Make sure that air can
flow onto the windshield.
The recirculated-air mode should not be
used over an extended period of time;
otherwise, the air quality inside the car will dete-
riorate continuously.<
Via the button on the steering wheel
You can switch quickly between the recircu-
lated-air mode and the previous mode using a
button
on the steering wheel, refer to page11.
ALL program
Press the button.
The current temperature setting
on the driver's side is transferred to
the front passenger side.
If the temperature setting on the driver's side is
changed, the temperature on the front passen-
ger side is changed as well.
The program is switched off when the setting is
adjusted on the front passenger side or the but-
ton is pressed again.
Page 96 of 196
Practical interior accessories
94 >The compass direction shown does not
change although the direction of travel
does.
>Not all compass directions are shown.
Procedure
1.Make sure that no large metal objects or
overhead power lines are in the vicinity of
your vehicle and that you have enough
space to drive in a circle.
2.Set the currently valid compass zone.
3.Press the adjustment button for approx.
6-7 seconds to call up C. Then drive in at
least one full circle at a speed of no more
than 4mph or 7km/h.
If calibration is successful, the display
changes from C to a compass direction.
Setting right-hand/left-hand steering
Your digital compass is factory-set to right-
hand or left-hand steering, in accordance with
your vehicle.
Set the language
You can set the language of the display:
Press the adjustment button for approx.
12-13 seconds. Briefly press the adjustment
button again to switch between English, "E",
and German, "O".
The setting is automatically saved after approx.
10 seconds.
Roller sun blinds*
Rear window blind
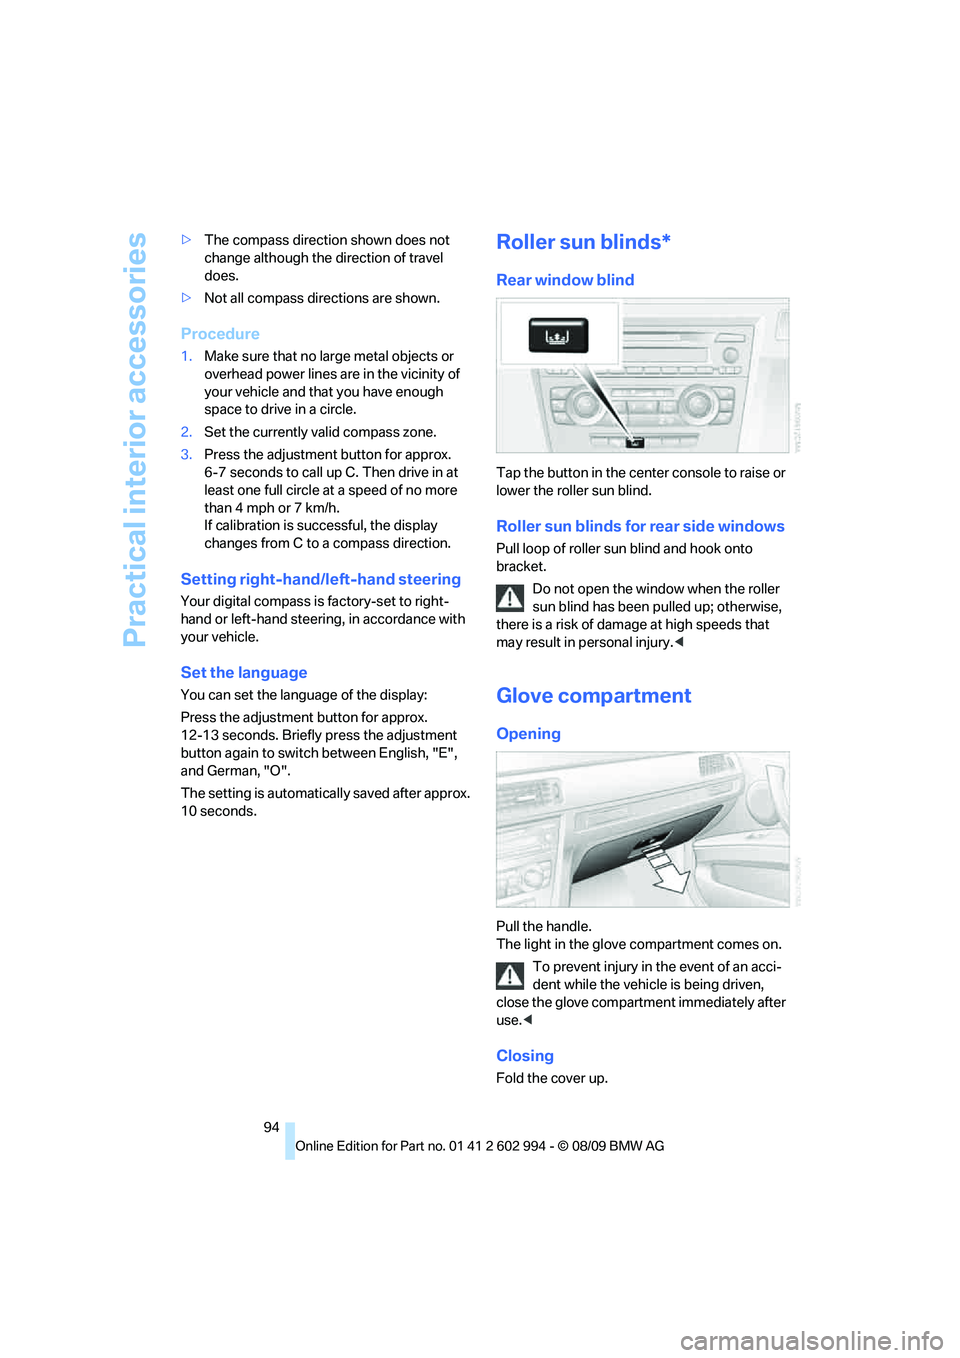
Tap the button in the center console to raise or
lower the roller sun blind.
Roller sun blinds for rear side windows
Pull loop of roller sun blind and hook onto
bracket.
Do not open the window when the roller
sun blind has been pulled up; otherwise,
there is a risk of damage at high speeds that
may result in personal injury.<
Glove compartment
Opening
Pull the handle.
The light in the glove compartment comes on.
To prevent injury in the event of an acci-
dent while the vehicle is being driven,
close the glove compartment immediately after
use.<
Closing
Fold the cover up.
Page 110 of 196
Things to remember when driving
108 for a short period after the engine is switched
off.
Hydroplaning
When driving on wet or slushy roads,
reduce road speed. If you do not, a wedge
of water can form between tires and road sur-
face. This situation, known as hydroplaning,
means that the tire can completely lose contact
with the road surface, so that neither the car can
be steered nor the brake be properly applied.<
The risk of hydroplaning increases with declin-
ing tread depth on the tires, refer also to Mini-
mum tread depth on page133.
Driving through water
Drive through water on the road only if it is
not deeper than 1 ft/30 cm, and then only
at walking speed at the most. Otherwise, the
vehicle's engine, the electrical systems and the
transmission may be damaged.<
Use the parking brake on inclines
On inclines, do not hold the vehicle for a
lengthy period using the clutch; use the
parking brake instead. Otherwise, greater
clutch wear will result.<
For more information about the drive-off assis-
tant, refer to page72.
Braking safely
Your BMW is equipped with ABS as a standard
feature. Applying the brakes fully is the most
effective way of braking in situations in which
this is necessary. Since the vehicle maintains
steering responsiveness, you can still avoid
possible obstacles with a minimum of steering
effort.
Pulsation of the brake pedal, combined with
sounds from the hydraulic circuits, indicate that
ABS is in its active mode.
Driving in wet conditions
When roads are wet or there is heavy rain,
briefly exert gentle pressure on the brake pedal
every few miles. Monitor traffic conditions to
ensure that this maneuver does not endanger other road users. The heat generated in this
process helps dry the pads and rotors to ensure
that full braking efficiency will then be available
when you need it.
Hills
To prevent overheating and the resulting
reduced efficiency of the brake system,
drive long or steep downhill gradients in the
gear in which the least braking is required. Even
light but consistent brake pressure can lead to
high temperatures, brake wear and possibly
even brake failure.<
You can increase the engine's braking effect by
shifting down, all the way to first gear if neces-
sary. This strategy helps you avoid placing
excessive loads on the brake system. Down-
shifting in manual mode of the automatic trans-
mission, refer to page49.
Never drive with the clutch held down,
with the transmission in neutral or with
the engine switched off; otherwise, engine
braking action will not be present or there will be
no power assistance to the brakes or steering.
Never allow floor mats, carpets or any other
objects to protrude into the area around the
pedals; otherwise, pedal function could be
impaired.<
Corrosion on brake rotors
When the vehicle is driven only occasionally,
during extended periods when the vehicle is not
used at all, and in operating conditions where
brake applications are less frequent, there is an
increased tendency for corrosion to form on
rotors, while contaminants accumulate on the
brake pads. This occurs because the minimum
pressure which must be exerted by the pads
during brake applications to clean the rotors is
not reached.
Should corrosion form on the brake rotors, the
brakes will tend to respond with a pulsating
effect that even extended application will fail to
cure.