2010 BMW M3 child lock
[x] Cancel search: child lockPage 30 of 196

Opening and closing
28
Warning lamps
The warning lamp in the instrument
cluster lights up when you attempt to
start the engine: the engine cannot
be started. The remote control is not inside the
vehicle or is malfunctioning.
Take the remote control with you inside the
vehicle or have it checked. If necessary, insert
another remote control into the ignition lock.
The warning lamp in the instrument
cluster lights up while the engine is
running: the remote control is no
longer inside the vehicle. After the engine is
switched off, the engine can only be restarted
within approx. 10 seconds.
The indicator lamp in the instrument
cluster comes on: replace the battery
in the remote control.
Replacing the battery
The remote control for Comfort Access con-
tains a battery that will need to be replaced from
time to time.
1.Take the integrated key out of the remote
control, refer to page18.
2.Remove the cover.
3.Insert the new battery with the plus side fac-
ing up.
4.Press the cover on to close.
Take the old battery to a battery collec-
tion point or to your BMW center.<
Windows
To prevent injuries, watch the windows
while closing them.
Take the remote control with you when you
leave the car; otherwise, children could operate
the electric windows and possibly injure them-
selves.<
Opening, closing
>Press the switch to the resistance point:
The window opens as long as you press the
switch.
>Press the switch beyond the resistance
point:
The window opens automatically. Press the
switch again to stop the opening move-
ment.
You can close the windows in the same manner
by pulling the switch.
There are separate switches in the rear seat
armrests.
After switching off the ignition
When the remote control is removed or the igni-
tion is switched off, you can still operate the
windows for approx. 1 minute as long as no
door is opened.
Convenient operation
For information on Convenient operation via the
remote control or the door lock, refer to page19
or22. For information on Convenient closing
with Comfort Access, refer to Locking on
page20.
Page 31 of 196
Reference
At a glance
Controls
Driving tips
Mobility
29
Pinch protection system
If the closing force exceeds a specific value as a
window closes, the closing action is interrupted
and the window reopens slightly.
Despite the pinch protection system
check and clear the window's travel path
prior to closing it; otherwise, the safety system
might fail to detect certain kinds of obstruc-
tions, such as thin objects, and the window
would continue closing.
Do not install any accessories that might inter-
fere with window movement. Otherwise, the
pinch protection system could be impaired.<
Closing without pinch protection
If there is an external danger, or if ice on the win-
dows, etc., prevents you from closing the win-
dows normally, proceed as follows:
1.Pull the switch past the resistance point and
hold it there. Pinch protection is limited and
the window reopens slightly if the closing
force exceeds a certain value.
2.Pull the switch again past the resistance
point within approx. 4 seconds and hold it
there. The window closes without pinch
protection.
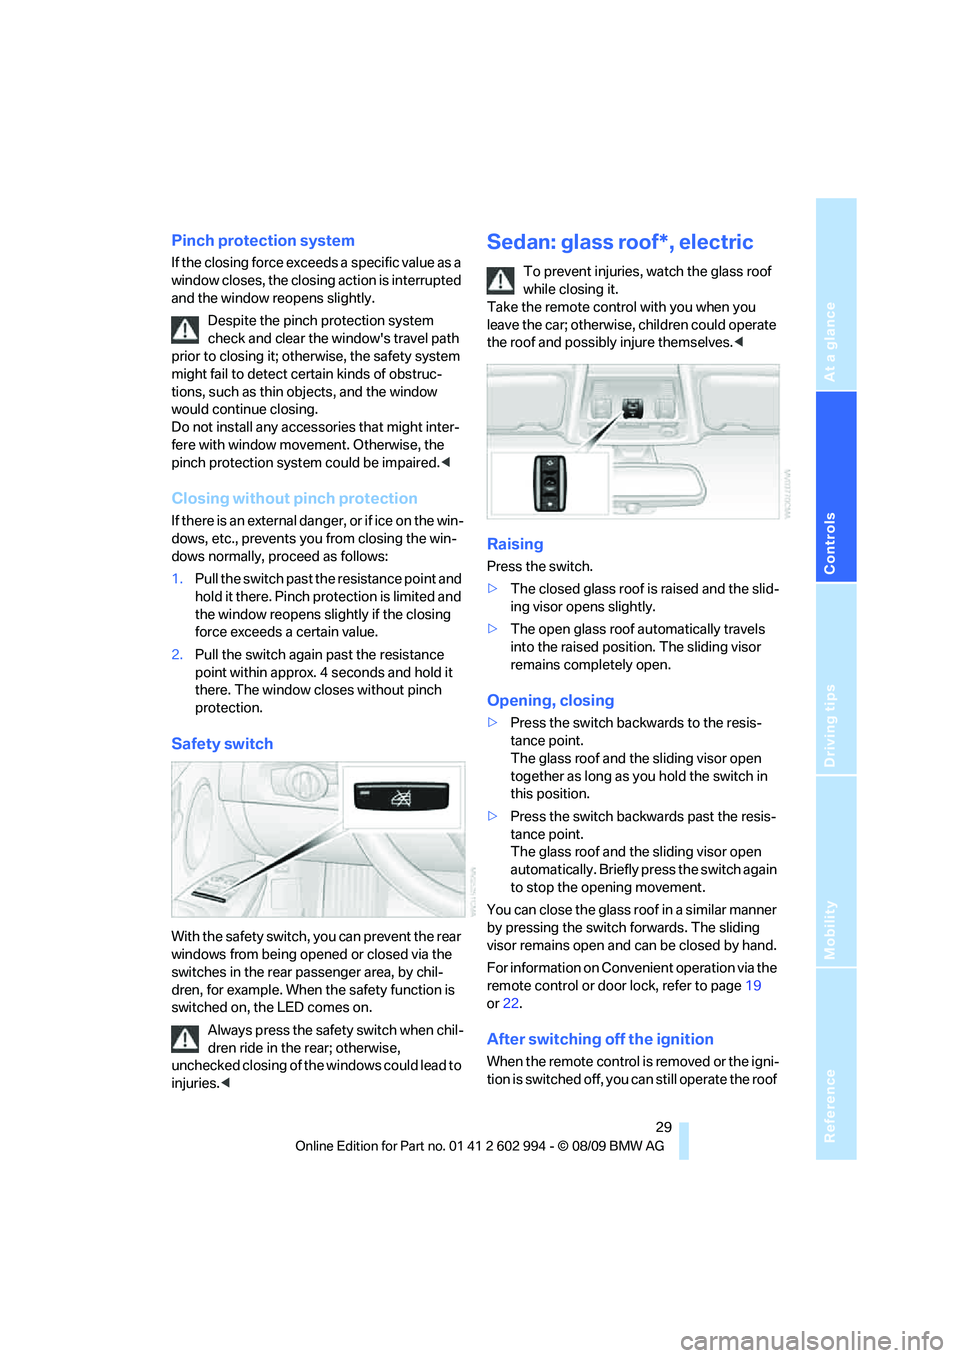
Safety switch
With the safety switch, you can prevent the rear
windows from being opened or closed via the
switches in the rear passenger area, by chil-
dren, for example. When the safety function is
switched on, the LED comes on.
Always press the safety switch when chil-
dren ride in the rear; otherwise,
unchecked closing of the windows could lead to
injuries.<
Sedan: glass roof*, electric
To prevent injuries, watch the glass roof
while closing it.
Take the remote control with you when you
leave the car; otherwise, children could operate
the roof and possibly injure themselves.<
Raising
Press the switch.
>The closed glass roof is raised and the slid-
ing visor opens slightly.
>The open glass roof automatically travels
into the raised position. The sliding visor
remains completely open.
Opening, closing
>Press the switch backwards to the resis-
tance point.
The glass roof and the sliding visor open
together as long as you hold the switch in
this position.
>Press the switch backwards past the resis-
tance point.
The glass roof and the sliding visor open
automatically. Briefly press the switch again
to stop the opening movement.
You can close the glass roof in a similar manner
by pressing the switch forwards. The sliding
visor remains open and can be closed by hand.
For information on Convenient operation via the
remote control or door lock, refer to page19
or22.
After switching off the ignition
When the remote control is removed or the igni-
tion is switched off, you can still operate the roof
Page 33 of 196
Reference
At a glance
Controls
Driving tips
Mobility
31
it in your field of vision until it is shut.
Take the remote control with you when you
leave the car; otherwise, children could operate
the roof and possibly injure themselves.<
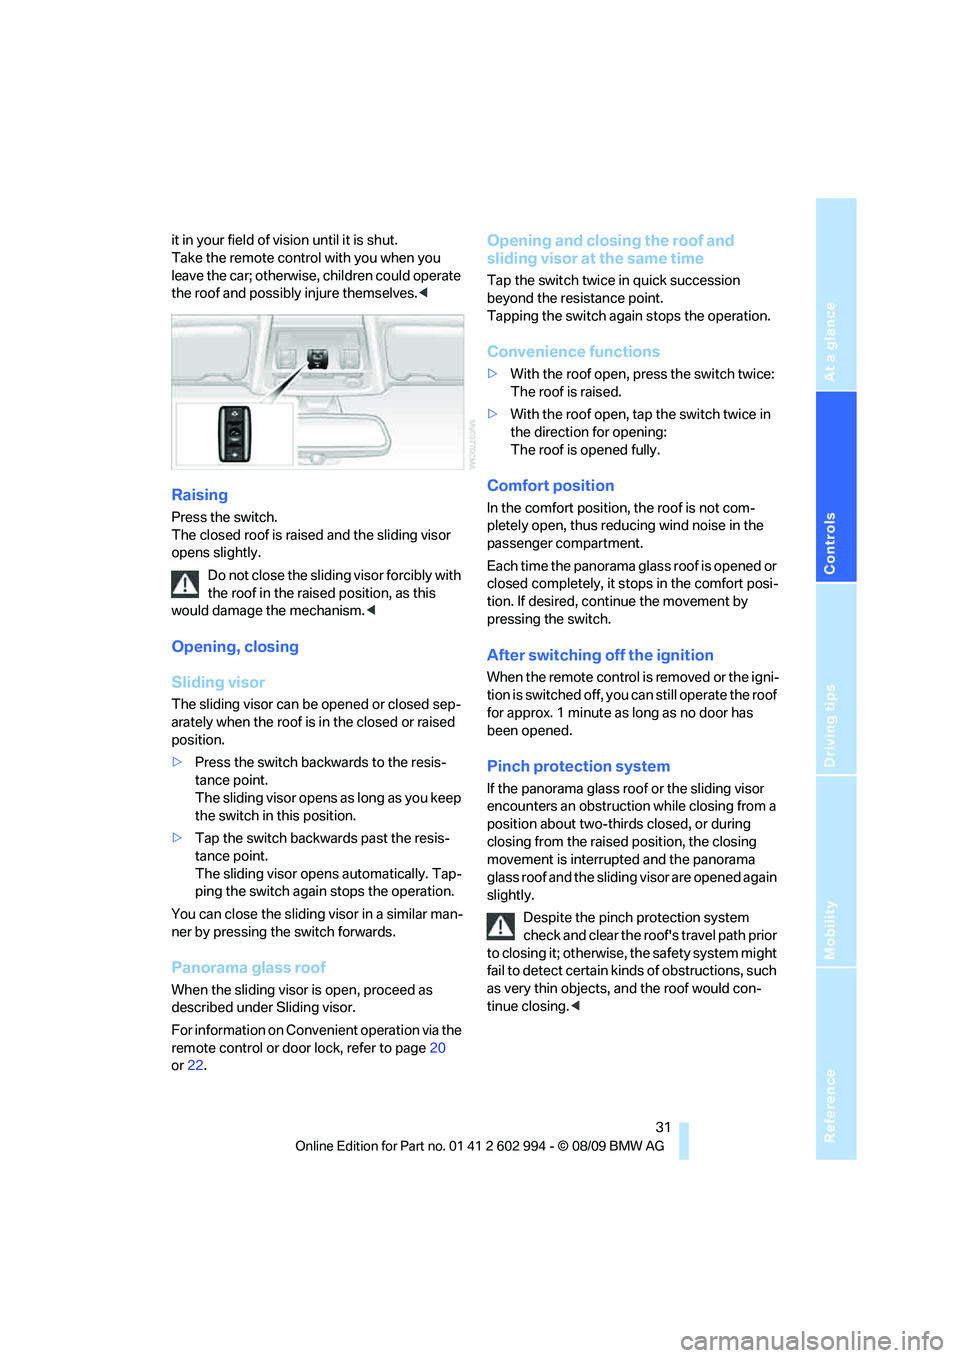
Raising
Press the switch.
The closed roof is raised and the sliding visor
opens slightly.
Do not close the sliding visor forcibly with
the roof in the raised position, as this
would damage the mechanism.<
Opening, closing
Sliding visor
The sliding visor can be opened or closed sep-
arately when the roof is in the closed or raised
position.
>Press the switch backwards to the resis-
tance point.
The sliding visor opens as long as you keep
the switch in this position.
>Tap the switch backwards past the resis-
tance point.
The sliding visor opens automatically. Tap-
ping the switch again stops the operation.
You can close the sliding visor in a similar man-
ner by pressing the switch forwards.
Panorama glass roof
When the sliding visor is open, proceed as
described under Sliding visor.
For information on Convenient operation via the
remote control or door lock, refer to page20
or22.
Opening and closing the roof and
sliding visor at the same time
Tap the switch twice in quick succession
beyond the resistance point.
Tapping the switch again stops the operation.
Convenience functions
>With the roof open, press the switch twice:
The roof is raised.
>With the roof open, tap the switch twice in
the direction for opening:
The roof is opened fully.
Comfort position
In the comfort position, the roof is not com-
pletely open, thus reducing wind noise in the
passenger compartment.
Each time the panorama glass roof is opened or
closed completely, it stops in the comfort posi-
tion. If desired, continue the movement by
pressing the switch.
After switching off the ignition
When the remote control is removed or the igni-
tion is switched off, you can still operate the roof
for approx. 1 minute as long as no door has
been opened.
Pinch protection system
If the panorama glass roof or the sliding visor
encounters an obstruction while closing from a
position about two-thirds closed, or during
closing from the raised position, the closing
movement is interrupted and the panorama
glass roof and the sliding visor are opened again
slightly.
Despite the pinch protection system
check and clear the roof's travel path prior
to closing it; otherwise, the safety system might
fail to detect certain kinds of obstructions, such
as very thin objects, and the roof would con-
tinue closing.<
Page 35 of 196
Reference
At a glance
Controls
Driving tips
Mobility
33
Adjustments
Sitting safely
The ideal sitting position can make a vital con-
tribution to relaxed, fatigue-free driving. In con-
junction with the safety belts, the head
restraints and the airbags, the seated position
has a major influence on your safety in the event
of an accident. To ensure that the safety sys-
tems operate with optimal efficiency, we
strongly urge you to observe the instructions
contained in the following section.
For additional information on transporting chil-
dren safely, refer to page42.
Airbags
Always maintain an adequate distance
between yourself and the airbags. Always
grip the steering wheel on the rim, with your
hands in the 3 o'clock and 9 o'clock positions,
to minimize the risk of injury to the hands or
arms in the event of the airbag being triggered
off.
No one and nothing should come between the
airbags and the seat occupant.
Do not use the cover of the front airbag on the
front passenger side as a storage area. Make
sure that the front passenger is sitting correctly,
e.g. not resting feet or legs on the dashboard;
otherwise, leg injuries can occur if the front air-
bag deploys.
Make sure that passengers keep their heads
away from the side airbag and do not lean
against the cover of the head airbag; otherwise,
serious injuries can result if the airbag
deploys.<
Even if you follow all the instructions, injuries
resulting from contact with airbags cannot be
fully excluded, depending on the circum-
stances. The ignition and inflation noise may
provoke a mild hearing loss in extremely sensi-
tive individuals. This effect is usually only tem-
porary.
For airbag locations and additional information
on airbags, refer to page77.
Head restraint
A correctly adjusted head restraint reduces the
risk of neck injury in the event of an accident.
Adjust the head restraint in such a way
that its center is at approx. ear level. Oth-
erwise, there is an increased risk of injury in the
event of an accident.<
Head restraints, refer to page35.
Safety belt
Before every drive, make sure that all occupants
wear their safety belts. Airbags complement the
safety belt as an additional safety device, but
they do not represent a substitute.
Your vehicle has five seats, each of which is
equipped with a safety belt.
Never allow more than one person to
wear a single safety belt. Never allow
infants or small children to ride in a passenger's
lap. Make sure that the belt in the lap area sits
low across the hips and does not press against
the abdomen.
The safety belt must not rest against the throat,
run across sharp edges, pass over hard or frag-
ile objects or be pinched. Fasten the safety belt
so that it sits as snugly as possible against the
lap and shoulder without being twisted. Other-
wise, the belt could slide over your hips and
injure your abdomen in the event of a frontal
collision.
Avoid wearing bulky clothing and regularly pull
the belt in the upper-body area taut; otherwise,
its restraining effect could be impaired.
Sports Wagon: if the rear center safety belt is
used, the wider backrest must be locked in
place, refer to page99. Otherwise, the safety
belt will have no restraining effect.<
Safety belts, refer to page38.
Page 41 of 196

Reference
At a glance
Controls
Driving tips
Mobility
39
"Fasten safety belts" reminder for
driver's and front passenger seat
The indicator lamps light up and an
acoustic signal sounds. Check
whether the safety belt has been fas-
tened correctly.
The "Fa sten safety belts " reminder is iss ued a s
long as the driver's safety belt has not been fas-
tened. The "Fasten safety belts" reminder is
also activated at road speeds above approx.
5 mph or 8 km/h if the front passenger safety
belt is not fastened, if objects are placed on the
front passenger seat, or if driver or front pas-
senger unfasten their safety belts.
Damage to safety belts
If the safety belts are damaged or
stressed in an accident: have the belt sys-
tem, including any belt tensioners or child
restraint systems, replaced and the belt
anchors checked. Have this work done only by
your BMW center or at a workshop that works
according to BMW repair procedures with cor-
respondingly trained personnel. Otherwise, it is
not guaranteed that the safety devices will func-
tion properly.<
Rear center safety belt
With through-loading system*:
Before using the center rear seat, release the
latch plate from the fixture on the rear window
shelf and insert it into the belt lock of the center
safety belt. Make sure you hear the latch plate
engage.
Mirrors
Exterior mirrors
The front passenger's mirror is more con-
vex than the driver's mirror. The objects
seen in the mirror are closer than they appear.
Do not gauge your distance from traffic behind
you on the basis of what you see in the mirror;
otherwise, there is an increased risk of an acci-
dent.<
1Adjustments
2Switching to the other mirror or automatic
curb monitor
*
3Folding mirrors in and out*
The setting for the exterior mirrors is stored for
the remote control currently in use
*. The stored
position is called up automatically when the
vehicle is unlocked.
Manual adjustment
The mirrors can also be adjusted manually:
press the edge of the glass.
Folding mirrors in and out*
At driving speeds up to approx. 12 mph/
20 km/h, you can fold the mirrors in and out by
Page 45 of 196
Reference
At a glance
Controls
Driving tips
Mobility
43
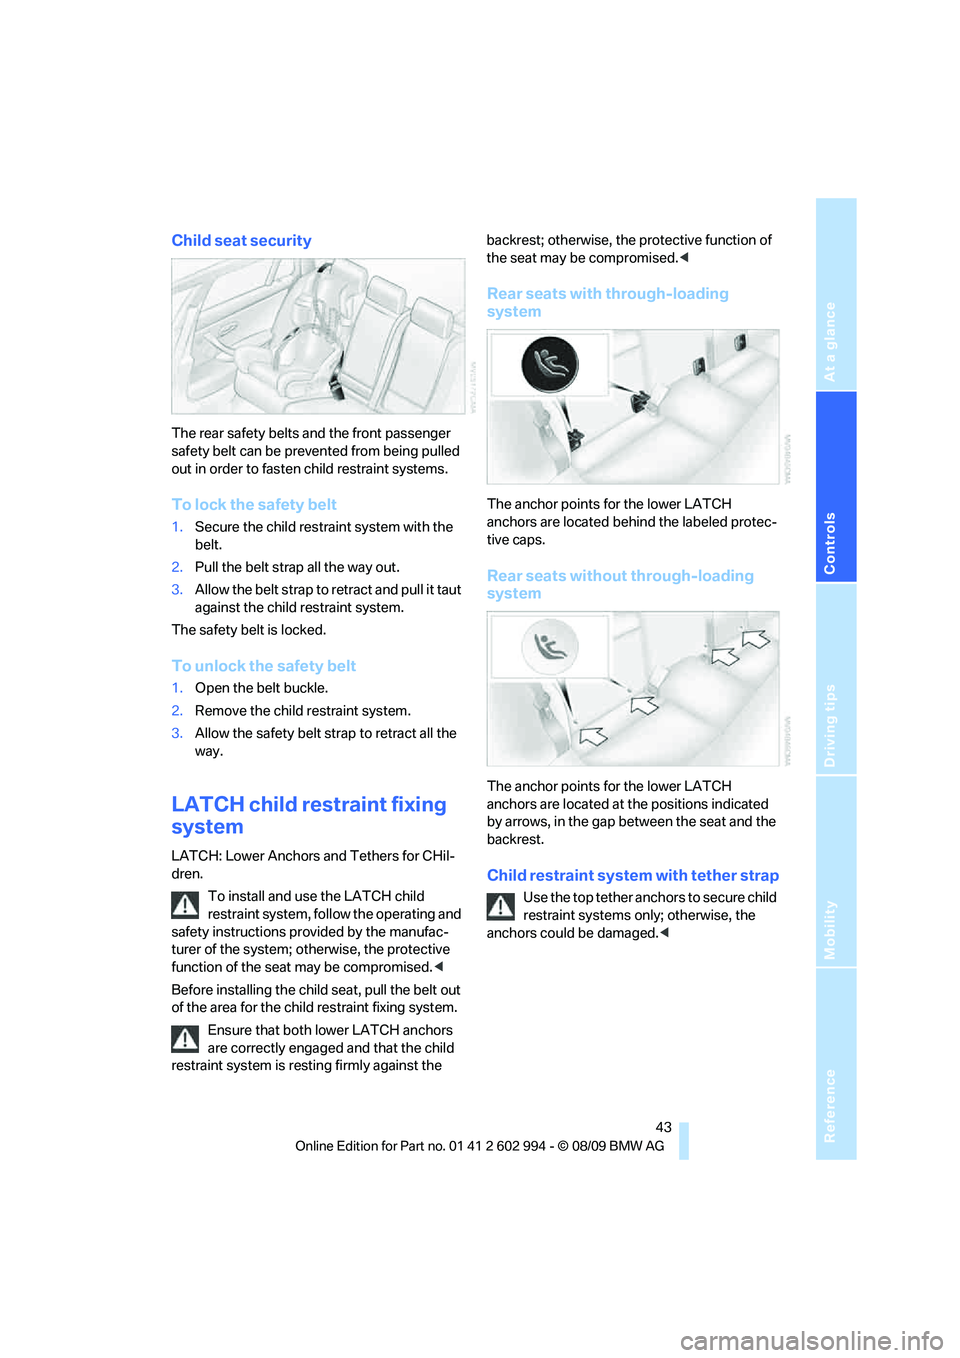
Child seat security
The rear safety belts and the front passenger
safety belt can be prevented from being pulled
out in order to fasten child restraint systems.
To lock the safety belt
1.Secure the child restraint system with the
belt.
2.Pull the belt strap all the way out.
3.Allow the belt strap to retract and pull it taut
against the child restraint system.
The safety belt is locked.
To unlock the safety belt
1.Open the belt buckle.
2.Remove the child restraint system.
3.Allow the safety belt strap to retract all the
way.
LATCH child restraint fixing
system
LATCH: Lower Anchors and Tethers for CHil-
dren.
To install and use the LATCH child
restraint system, follow the operating and
safety instructions provided by the manufac-
turer of the system; otherwise, the protective
function of the seat may be compromised.<
Before installing the child seat, pull the belt out
of the area for the child restraint fixing system.
Ensure that both lower LATCH anchors
are correctly engaged and that the child
restraint system is resting firmly against the backrest; otherwise, the protective function of
the seat may be compromised.<
Rear seats with through-loading
system
The anchor points for the lower LATCH
anchors are located behind the labeled protec-
tive caps.
Rear seats without through-loading
system
The anchor points for the lower LATCH
anchors are located at the positions indicated
by arrows, in the gap between the seat and the
backrest.
Child restraint system with tether strap
Use the top tether anchors to secure child
restraint systems only; otherwise, the
anchors could be damaged.<
Page 47 of 196
Reference
At a glance
Controls
Driving tips
Mobility
45
3.Use the hook to clip the retaining strap to
the anchor.
4.Push the head restraint into its lowermost
position.
5.Pull the retaining strap taut.
On journeys
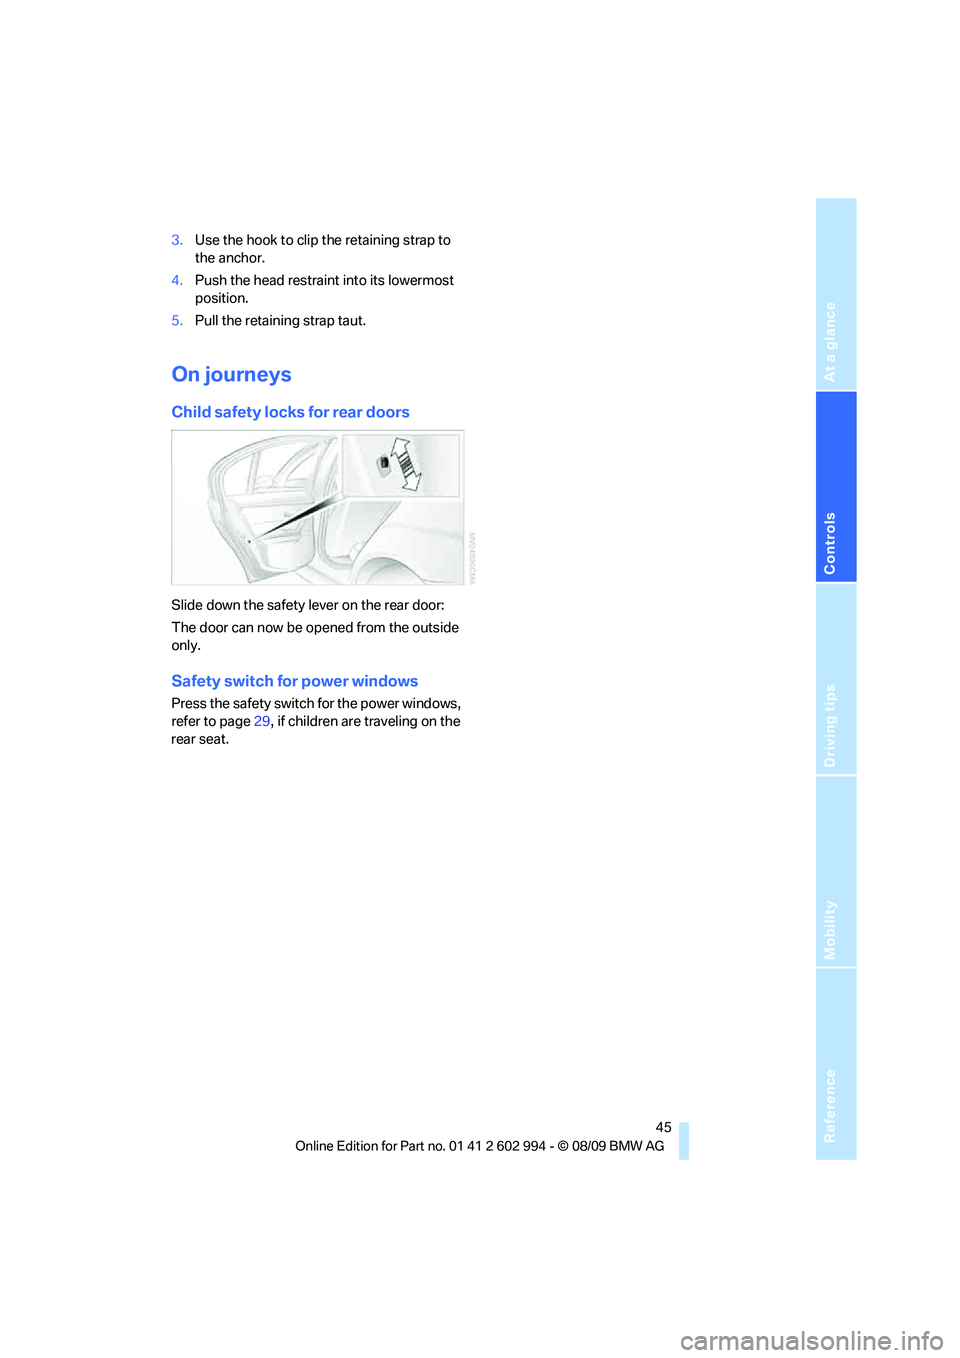
Child safety locks for rear doors
Slide down the safety lever on the rear door:
The door can now be opened from the outside
only.
Safety switch for power windows
Press the safety switch for the power windows,
refer to page29, if children are traveling on the
rear seat.
Page 184 of 196

Everything from A to Z
182 Car jack
– jacking points153
Car key, refer to Integrated
key/remote control18
Car phone
– installation location, refer to
Center armrest95
– refer to separate Owner's
Manual
Car shampoo145
Catalytic converter, refer to
Hot exhaust system107
Center armrest95
Center brake lamp
– replacing bulb152
Center console, refer to
Around the center
console14
Central locking
– from inside22
– from outside19
Central locking system19
– Comfort Access26
– hotel function24
– setting unlocking
characteristics19
Changes, technical, refer to
For your own safety5
Changing bulbs, refer to
Lamps and bulbs147
Changing wheels153
Chassis number, refer to
Engine compartment137
Check Control67
Child restraint fixing system
LATCH43
Child restraint systems42
Child safety locks45
Child seats, refer to
Transporting children
safely42
Chrome parts145
Chrome polish145
Cigarette lighter, refer to
Lighter96
Cleaning headlamps52
– washer fluid53
Cleaning your BMW, refer to
Care143Clock61
– 12h/24h format64
– setting time67
Closing
– from inside22
– from outside19
Clothes hooks95
Cockpit10
Cold start, refer to Starting the
engine47
Combined instrument, refer to
Instrument cluster12
Comfort Access26
– replacing the battery28
Comfort access, refer to
Comfort Access26
Comfort area, refer to Around
the center console14
Compartment for remote
control, refer to Ignition
lock46
Compass93
Computer63
Condensation, refer to When
the vehicle is parked109
Condition Based Service
CBS141
Configuring settings, refer to
Personal Profile18
Confirmation signals for
locking/unlocking the
vehicle20
Connecting vacuum cleaner,
refer to Connecting
electrical appliances96
Consumption, refer to
Average consumption63
Consumption display
– average consumption63
– Energy Control62
Controls and displays10
Convenient operation
– glass roof20
– windows20
Coolant139
– checking level140
Coolant temperature62
Cooling, maximum87Cooling fluid, refer to
Coolant139
Cooling system, refer to
Coolant139
Copyright2
Corner-illuminating lamps
– replacing bulbs148
Corner-illuminating lamps,
refer to Adaptive light
control81
Cornering lamps, refer to
Adaptive light control81
Correct tires134
Courtesy lamps, refer to
Interior lamps83
Cruise control53
– active55
– malfunction54
Cruising range63
Cupholders95
Curb weight, refer to
Weights177
Current fuel consumption,
refer to Energy Control62
D
Dashboard, refer to
Cockpit10
Dashboard, refer to
Instrument cluster12
Dashboard lighting, refer to
Instrument lighting82
Data, technical174
– capacities178
– dimensions175
– engine174
– weights177
Date
– setting67
Daytime running lights80
– replacing bulbs148
DBC Dynamic Brake
Control70
Deactivating front passenger
airbags77
Deadlocking, refer to
Locking20