Page 65 of 196

Reference
At a glance
Controls
Driving tips
Mobility
63
Computer
Displays in the instrument cluster
Calling up information
Press the button in the turn indicator lever.
The following items of information are dis-
played in the order listed:
>Cruising range
>Average speed
>Average fuel consumption
>Current fuel consumption
*
>No information
To set the corresponding units of measure,
refer to Formats and units of measure on
page64.
Cruising range
Displays the estimated cruising range available
with the remaining fuel. The range is calculated
on the basis of the way the car has been driven
over the last 18 miles/30 km and the amount of
fuel currently in the tank.
Refuel as soon as possible once your
cruising range falls below 30 miles/
50 km; otherwise, engine functions are not
ensured and damage can occur.<
Average speed
Periods with the vehicle parked and the engine
switched off are not included in the calculations
of average speed.
To reset average speed: press the button in the
turn indicator lever for approx. 2 seconds.
Average fuel consumption
The average fuel consumption is calculated for
the time during which the engine is running.
To reset average fuel consumption: press the
button in the turn indicator lever for approx.
2seconds.
Current fuel consumption*
Displays the current fuel consumption. This
allows you to see whether your current driving
style is conducive to fuel economy with mini-
mum exhaust emissions.
Page 66 of 196

Controls overview
64
Settings and information
Operating principle
Certain settings and information can only be
called up when the ignition is switched on. A
number of settings cannot be made while driv-
ing.
1Button for:
>Selecting display
>Setting values
2Button for:
>Confirming selected display or set val-
ues
>Calling up computer information63
3When the lights are on: instrument lighting
brightness82
4Calling up Check Control67
5Checking engine oil level
*137
6Initializing the Flat Tire Monitor72
Resetting the Tire Pressure Monitor74
7Setting the time67
8Setting the date67
9Viewing service requirement display65
10Setting formats and units of measure,
resetting to factory settings6411Adjusting settings
>Confirmation signals when locking and
unlocking the vehicle20
>Response during unlocking
procedure19
>Automatic locking22
>Pathway lighting79
>Daytime running lights80
>Triple turn signal activation51
>Seat memory
*38
Exiting displays
The outside temperature reading and the time
reappear when you press button2 or if you
make no entries within approx. 15 seconds. If
required, complete the current setting first.
Formats and units of measure
You can set formats and units of measure.
Page 67 of 196

Reference
At a glance
Controls
Driving tips
Mobility
65
1.Switch on the ignition, refer to page46.
2.Lightly push button1 in the turn indicator
lever up or down repeatedly until the sym-
bol appears in the display accompanied by
the word "SET".
3.Press button 2.
4.Use button 1 to select desired format or
desired unit of measure, e.g. for fuel con-
sumption.
> Fuel consumption: mpg, km/l,
l/100km
> Distance covered: mls, km
> Time: 12h, 24h format
> Date: day.month dd.mm,
month/day mm/dd
> Temperature: 7, 6
5.Press button 2.
6.Use button 1 to make the setting.
7.Press button 2.
The setting is stored for the remote control
currently in use.
Resetting to factory settings
You can reset the settings for formats and units
of measure to the factory settings.1.Lightly push button1 in the turn indicator
lever up or down repeatedly until the sym-
bol appears in the display accompanied by
the word "SET".
2.Press button 2.
3.Use button1 to select "RESET".
4.Press button 2 until is displayed.
The settings are reset.
The setting is stored for the remote control
currently in use.
Service requirements
The remaining driving distance and the date of
the next scheduled service are displayed briefly
immediately after you start the engine or switch
on the ignition.
Page 68 of 196
Controls overview
66 The extent of service work required can
be read out from the remote control by
your BMW Service Advisor.<
For certain maintenance operations, you can
view the respective distance remaining or due
date individually in the instrument cluster.
1.Switch on the ignition, refer to page46.
2.Push button 1 in the turn indicator lever up
or down repeatedly until the appropriate
symbol appears in the display, accompa-
nied by the words "SERVICE-INFO".
3.Press button 2.
4.Use button 1 to scroll through the individual
service items.
Possible displays
1Button for selecting functions
2Service requirements
3Engine oil
4Roadworthiness test
*
5Front brake pads
6Rear brake pads7Brake fluid
The sequence of displayed service items may
vary. The data for the next service appointment
is shown first.
Page 69 of 196

Reference
At a glance
Controls
Driving tips
Mobility
67
Clock
Setting the time
To set the 12h/24h mode, refer to Formats and
units of measure on page64.
1.Push button 1 in the turn indicator lever up
or down repeatedly until the appropriate
symbol appears in the display, accompa-
nied by the time and the word "SET".
2.Press button 2.
3.Use button 1 to set the hours.
4.Press button 2 to confirm the entry.
5.Use button 1 to set the minutes.
6.Press button 2 to confirm the entry.
7.Press button 2.
The system accepts the new time.
Date
The settings are stored for the remote control
currently in use, refer also to Personal Profile on
page18.
Setting the date
To set the dd/mm or mm/dd date format, refer
to Formats and units of measure on page64.1.Push button 1 in the turn indicator lever up
or down repeatedly until the appropriate
symbol appears in the display, accompa-
nied by the date and the word "SET".
2.Press button 2.
3.Use button 1 to set the day of the month.
4.Press button 2 to confirm the entry.
5.Set the month and the year in the same way.
6.Press button 2.
The system stores the new date.
Check Control
The concept
The Check Control monitors vehicle functions
and alerts you to any malfunctions in the sys-
tems monitored. This type of Check Control
message includes indicator and warning lamps
in the instrument cluster and, in some cases, an
acoustic signal.
Indicator and warning lamps can light up in a
variety of combinations and colors.
Several of the lamps are checked for proper
functioning and light up temporarily when the
engine is started or the ignition is switched on.
Page 70 of 196

Controls overview
68 indicates that Check Control messages have
been stored. These Check Control messages
can be viewed again later, refer to page68.
What to do in case of a malfunction
The meaning of each lamp in the event of a mal-
function and tips on how to respond are listed
starting on page160.
Hiding Check Control messages
Press the button on the turn indicator lever.
>Some Check Control messages are dis-
played continuously and remain visible until
the malfunction has been rectified. If several
malfunctions occur at once, the messages
are displayed consecutively.
These messages can be hidden for approx.
8 seconds. After this, they are displayed
again automatically.
>Other Check Control messages are hidden
automatically after approx. 20 seconds.
They are stored and can be displayed again
later.
Displaying stored Check Control
messages
1.Push button 1 in the turn indicator lever up
or down repeatedly until the appropriate
symbol appears in the display, accompa-
nied by the words "CHECK CONTROL".
2.Press button 2.
"CHECK OK" appears if there are no Check
Control messages.
If a Check Control message has been
stored, the corresponding lamp comes on.
3.Push button 1 to check for other messages.
4.Press button 2.
The display again shows the outside tem-
perature and the time.
Page 71 of 196

Reference
At a glance
Controls
Driving tips
Mobility
69
Technology for driving comfort and safety
Park Distance Control PDC*
The concept
The PDC assists you with maneuvering in tight
parking spaces. Acoustic signals warn you of
the presence of an object behind your vehicle.
To measure the distance, there are four ultra-
sonic sensors in either bumper.
An acoustic warning does not sound until an
object is closer than approx. 2 ft/60 cm to the
corner sensors, or closer than approx. 5 ft/
1.50 m to the center sensors.
PDC is a parking aid that can indicate
objects when they are approached
slowly, as is usually the case when parking.
Avoid approaching an object at high speed; oth-
erwise, physical circumstances may lead to the
system warning being issued too late.<
Switching on automatically
With the engine running or the ignition switched
on, the system is activated after approx. 1 sec-
ond when you engage reverse gear or move the
automatic transmission selector lever to
position R. Wait this short period before driving.
Switching off automatically
After approx. 55 yd/50 m of driving or above
approx. 20 mph/approx. 30 km/h, the system
switches off and the LED goes out.
Signal tones
When nearing an object, its position is indicated
correspondingly by an interval tone. As the dis-
tance between vehicle and object decreases,
the intervals between the tones become
shorter. If the distance to the nearest object
falls to below roughly 1 ft/30 cm, then a contin-
uous tone sounds.
An interval tone is interrupted after approx.
3seconds>If you remain in front of an object that has
been detected by only one of the corner
sensors
>If you are driving parallel to a wall.
Malfunction
The indicator lamp in the instrument
cluster comes on. PDC is malfunc-
tioning. Have the system checked.
To avoid this problem, keep the sensors clean
and free of ice or snow in order to ensure that
they will continue to operate effectively. When
using a high-pressure cleaner, do not spray the
sensors for extended periods of time and only
from a distance of at least 1 ft/30 cm.
System limitations
Even with PDC, final responsibility for
estimating the distance between the
vehicle and any obstructions always remains
with the driver. Even when sensors are pro-
vided, there is a blind spot in which objects can
no longer be detected. The system is also sub-
ject to the physical limits that apply to all forms
of ultrasonic measurement, such as those
encountered with trailer towbars and hitches,
thin or wedge-shaped objects, etc. Low objects
that have already been displayed, e.g. curbs,
can disappear again from the detection area of
the sensors before or after a continuous tone
sounds. Higher, protruding objects, e.g. ledges,
cannot be detected. Therefore, always drive
cautiously; otherwise, there is a risk of personal
injury or property damage.
Loud sound sources outside or inside the car
can drown out the PDC signal. Therefore,
always drive cautiously; otherwise, there is a
risk of personal injury or property damage.<
Page 72 of 196

Technology for driving comfort and safety
70
Driving stability control
systems
Your BMW has a number of systems that help
to maintain the vehicle's stability even in
adverse driving conditions.
Antilock Brake System ABS
ABS prevents locking of the wheels during
braking. Safe steering response is maintained
even during full braking. Active safety is thus
increased.
The ABS is operational every time you start the
engine. Braking safely, refer to page108.
Electronic brake-force distribution
EBV
The system controls the brake pressure in the
rear wheels to ensure stable braking behavior.
Dynamic Brake Control DBC
When you apply the brakes rapidly, this system
automatically produces the maximum braking
force boost and thus helps to achieve the short-
est possible braking distance during full brak-
ing. This system exploits all of the benefits pro-
vided by ABS.
Do not reduce the pressure on the brake for the
duration of the full braking application.
Dynamic Stability Control DSC
DSC prevents the driving wheels from losing
traction when you pull away from rest or accel-
erate. The system also recognizes unstable
driving conditions, for example if the rear of the
car is about to swerve or if momentum is acting
at an angle past the front wheels. In these
cases, DSC helps the vehicle maintain a safe
course within physical limits by reducing engine
output and through braking actions at the indi-
vidual wheels.
The laws of physics cannot be repealed,
even with DSC. An appropriate driving
style always remains the responsibility of the
driver. Therefore, do not reduce the additional
safety margin again by taking risks, as this could
result in an accident.<
Deactivating DSC
Press the button for at least 3 seconds; the indi-
cator lamps for DSC in the instrument cluster
light up. Dynamic Traction Control DTC and
DSC have been simultaneously deactivated.
Stabilizing and drive-output promoting actions
are no longer executed.
In the same way as with a differential interlock
*,
even if DSC is deactivated, brake actions are
still performed to enhance drive output if the
drive wheels experience a significant loss of
traction.
To increase vehicle stability, activate DSC again
as soon as possible.
Activating DSC
Press the button again; the indicator lamps in
the instrument cluster go out.
For better control
If the indicator lamp flashes:
DSC is regulating the drive and brak-
ing forces.
If the indicator lamps are on:
DSC is deactivated.
Dynamic Traction Control DTC
DTC is a version of DSC in which the drive out-
put is optimized for particular road conditions,
e.g. unplowed snow-covered roads. The sys-
tem assures the maximal drive output, but with
reduced driving stability. It is therefore neces-
sary to drive with appropriate caution.
You may find it useful to briefly activate DTC
under the following special circumstances:
 1
1 2
2 3
3 4
4 5
5 6
6 7
7 8
8 9
9 10
10 11
11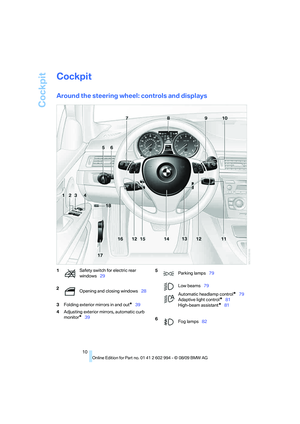 12
12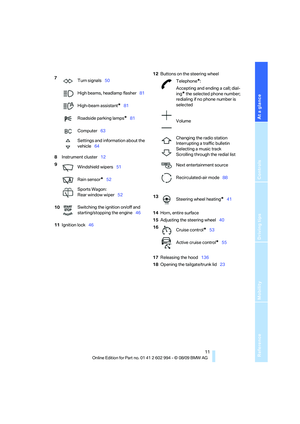 13
13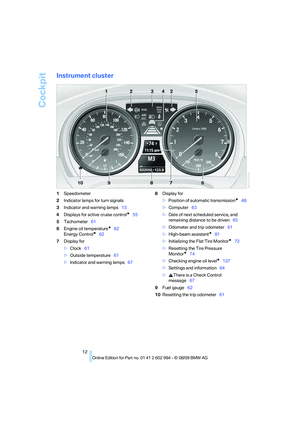 14
14 15
15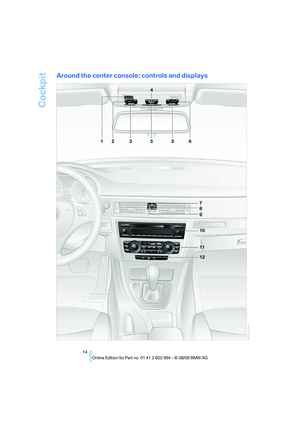 16
16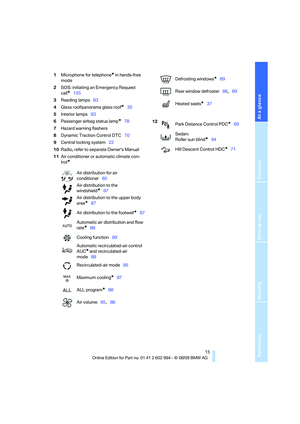 17
17 18
18 19
19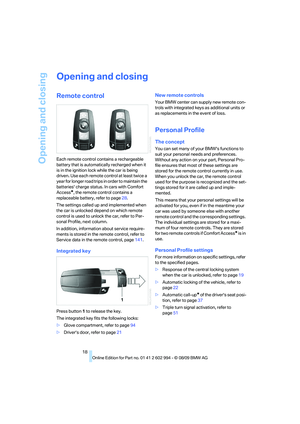 20
20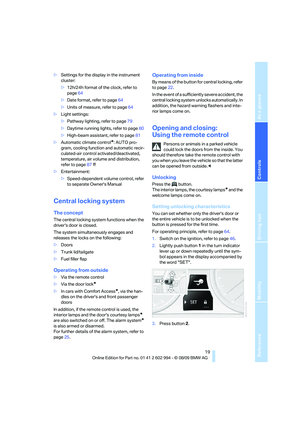 21
21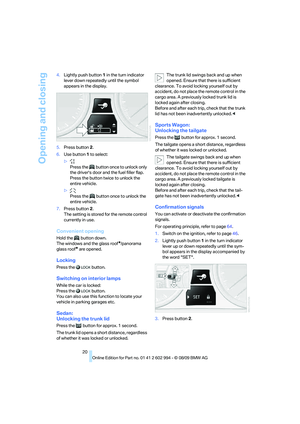 22
22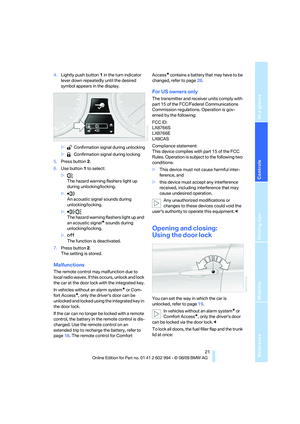 23
23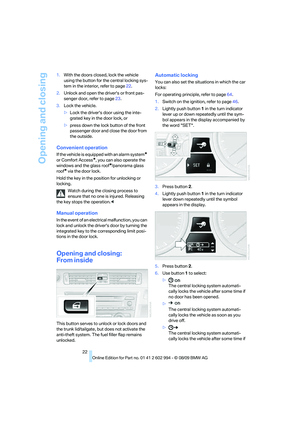 24
24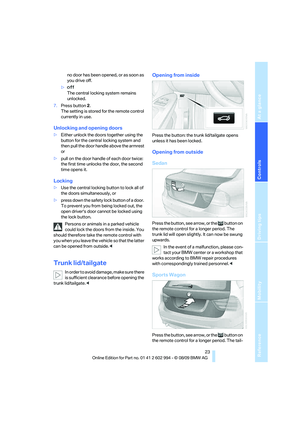 25
25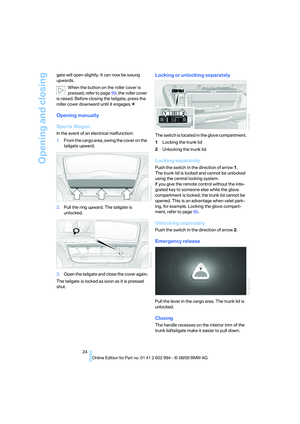 26
26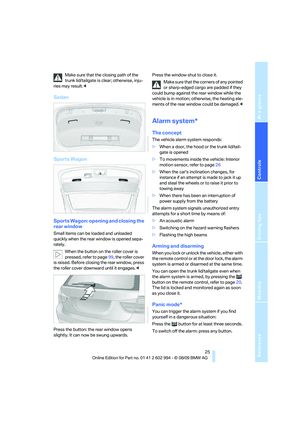 27
27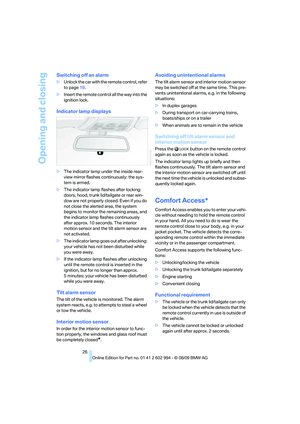 28
28 29
29 30
30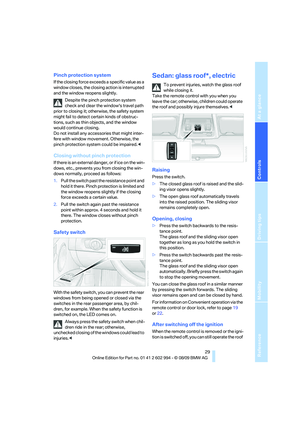 31
31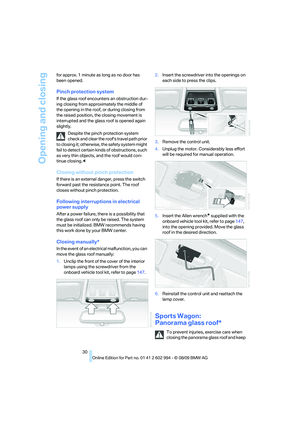 32
32 33
33 34
34 35
35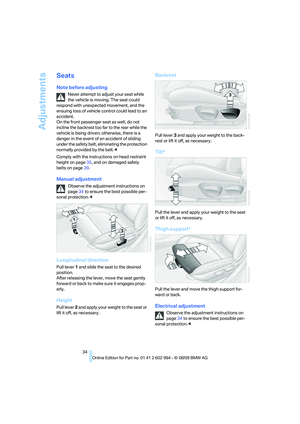 36
36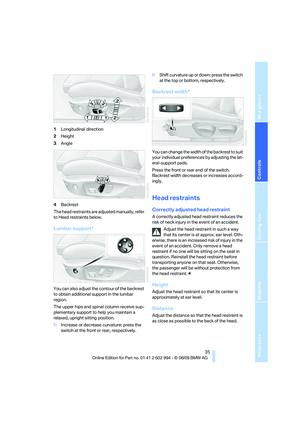 37
37 38
38 39
39 40
40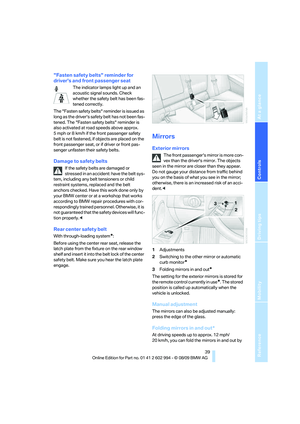 41
41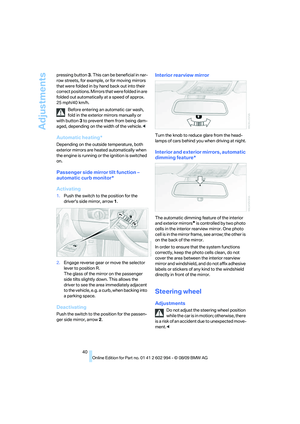 42
42 43
43 44
44 45
45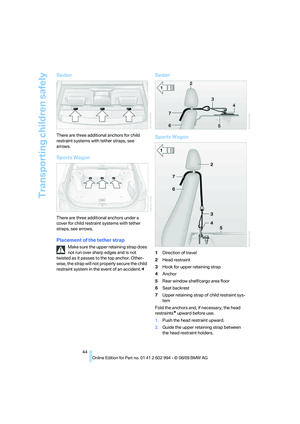 46
46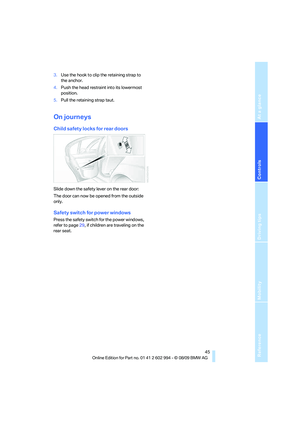 47
47 48
48 49
49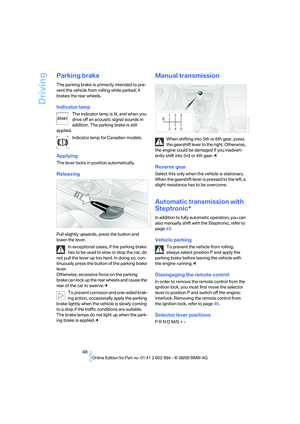 50
50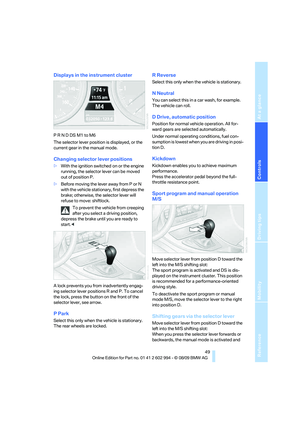 51
51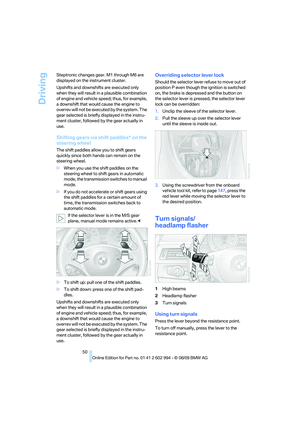 52
52 53
53 54
54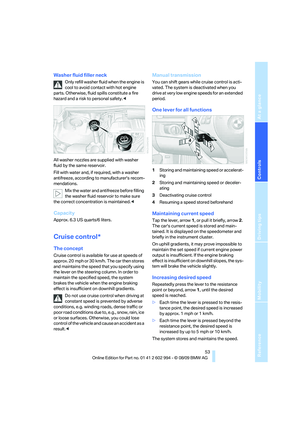 55
55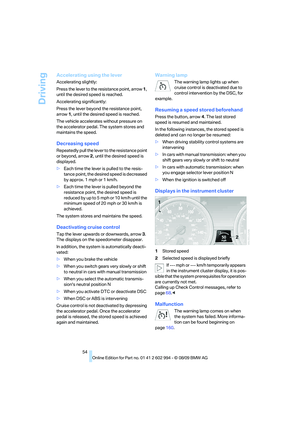 56
56 57
57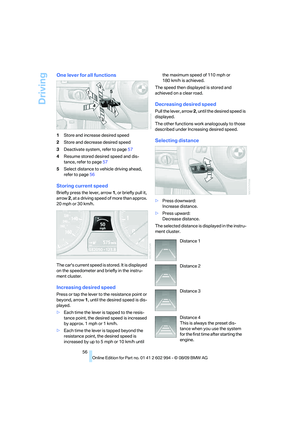 58
58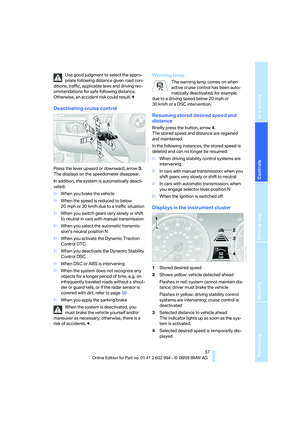 59
59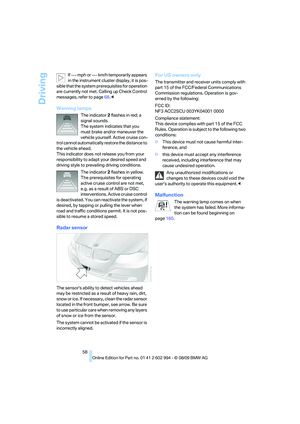 60
60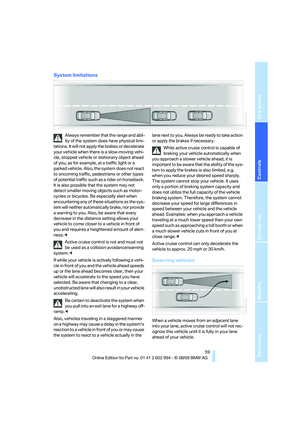 61
61 62
62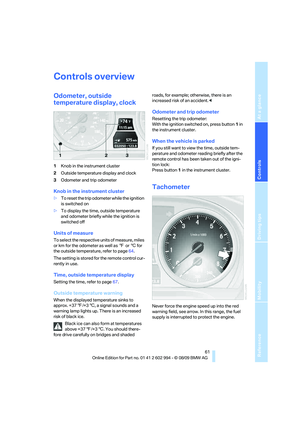 63
63 64
64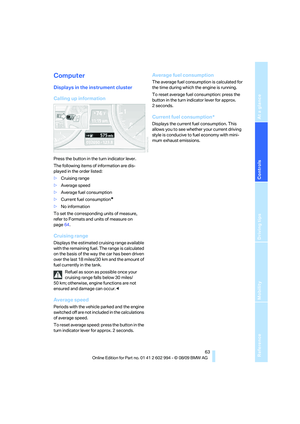 65
65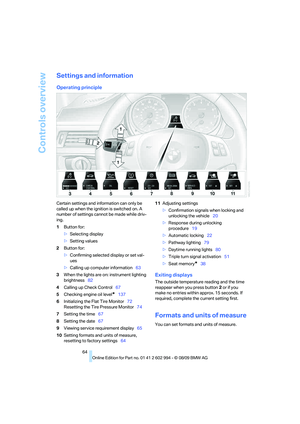 66
66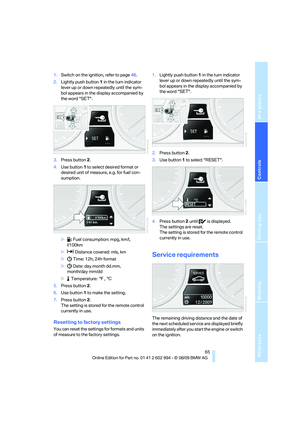 67
67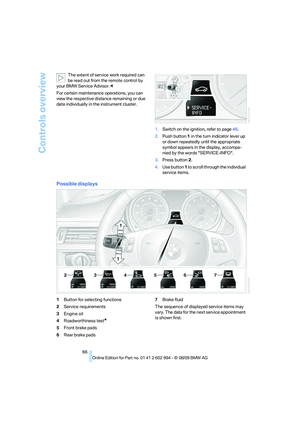 68
68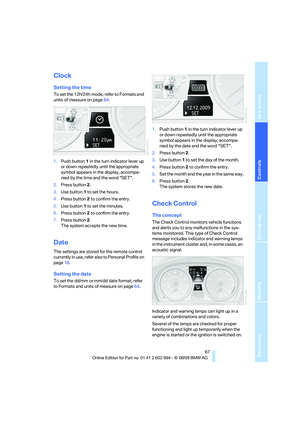 69
69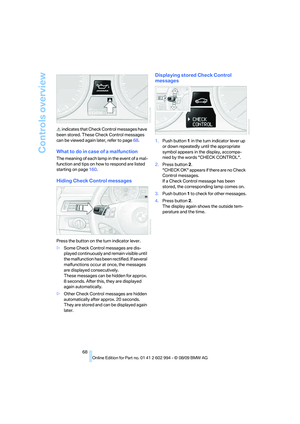 70
70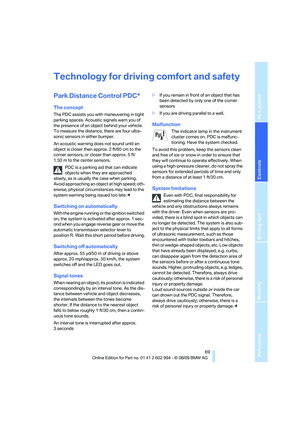 71
71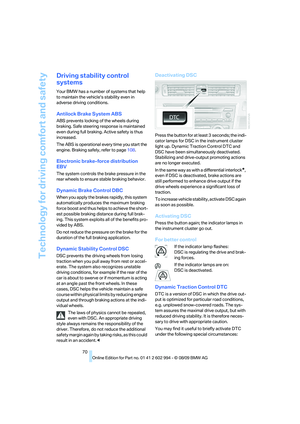 72
72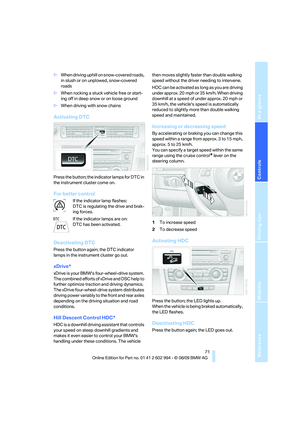 73
73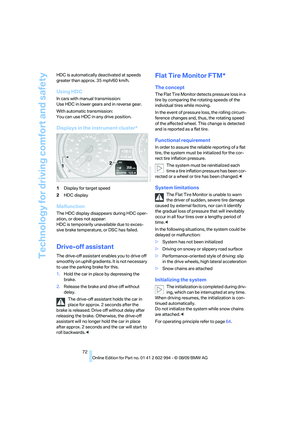 74
74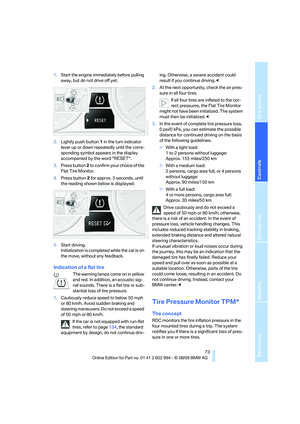 75
75 76
76 77
77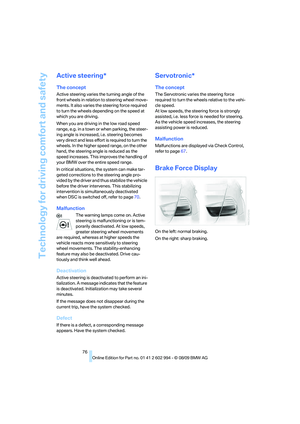 78
78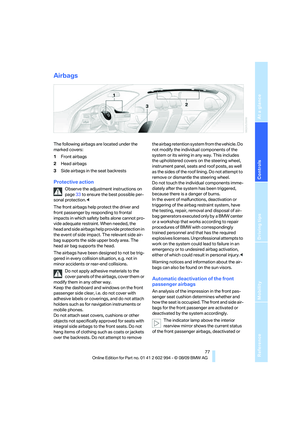 79
79 80
80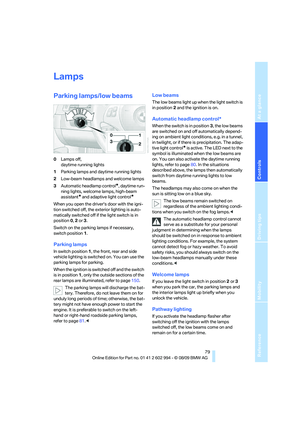 81
81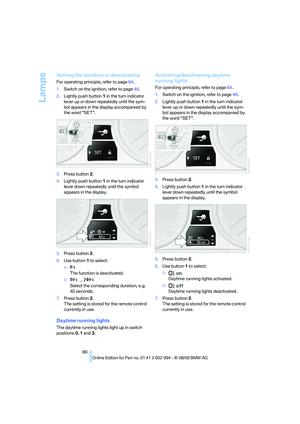 82
82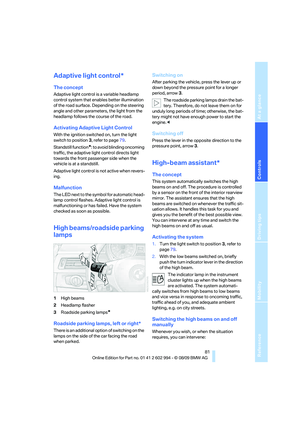 83
83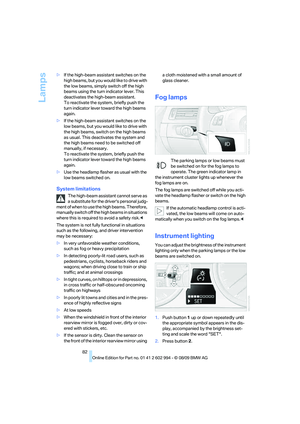 84
84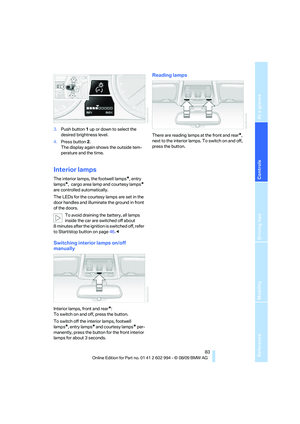 85
85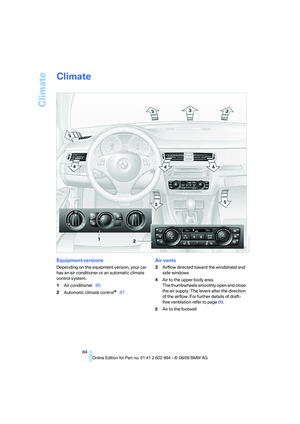 86
86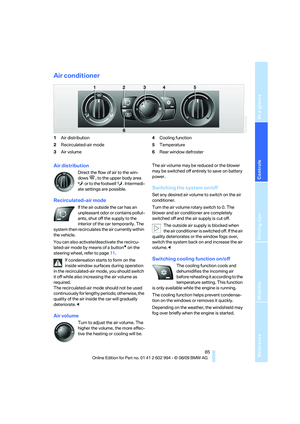 87
87 88
88 89
89 90
90 91
91 92
92 93
93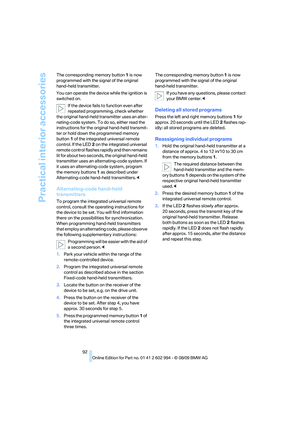 94
94 95
95 96
96 97
97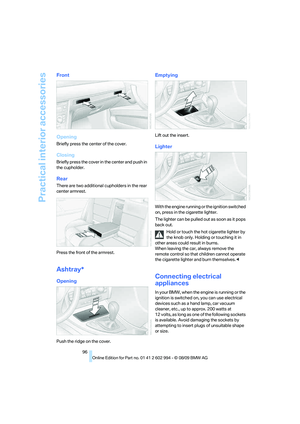 98
98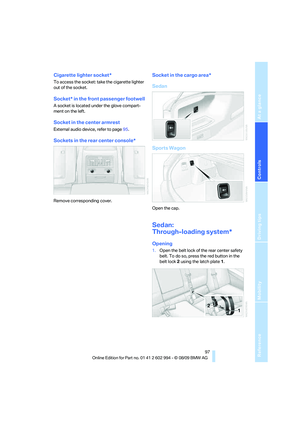 99
99 100
100 101
101 102
102 103
103 104
104 105
105 106
106 107
107 108
108 109
109 110
110 111
111 112
112 113
113 114
114 115
115 116
116 117
117 118
118 119
119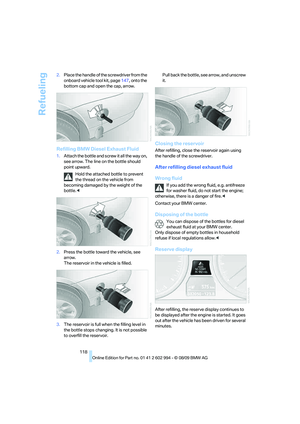 120
120 121
121 122
122 123
123 124
124 125
125 126
126 127
127 128
128 129
129 130
130 131
131 132
132 133
133 134
134 135
135 136
136 137
137 138
138 139
139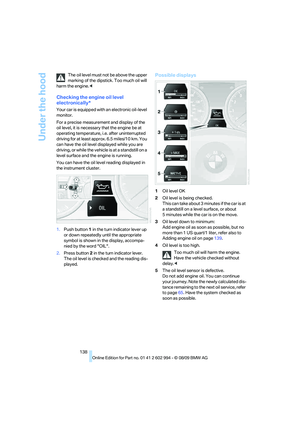 140
140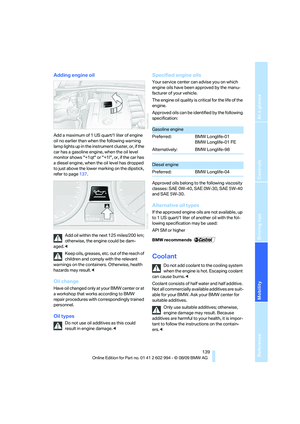 141
141 142
142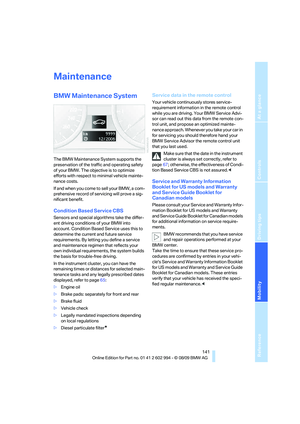 143
143 144
144 145
145 146
146 147
147 148
148 149
149 150
150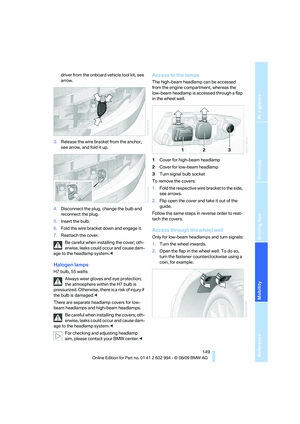 151
151 152
152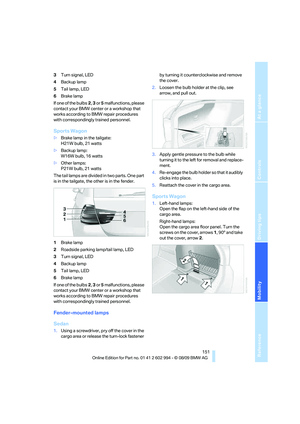 153
153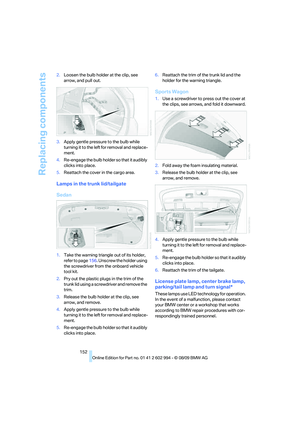 154
154 155
155 156
156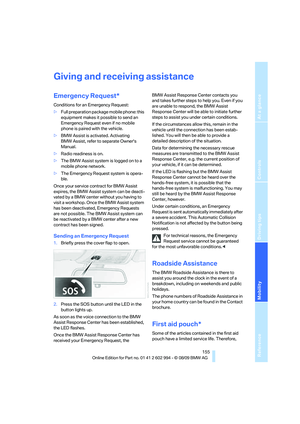 157
157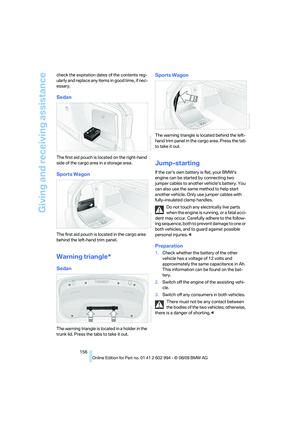 158
158 159
159 160
160 161
161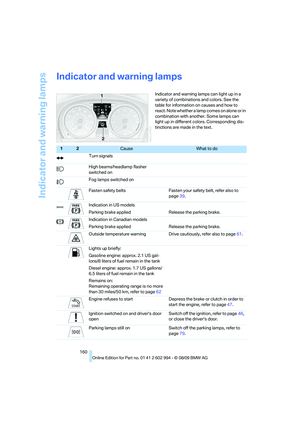 162
162 163
163 164
164 165
165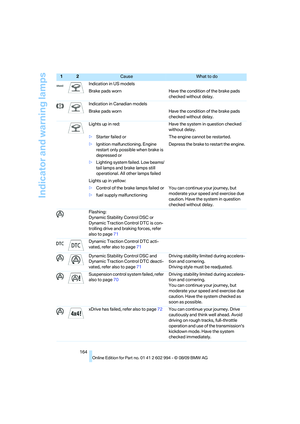 166
166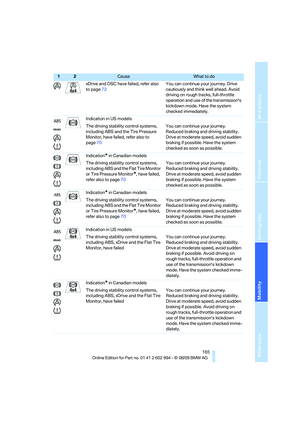 167
167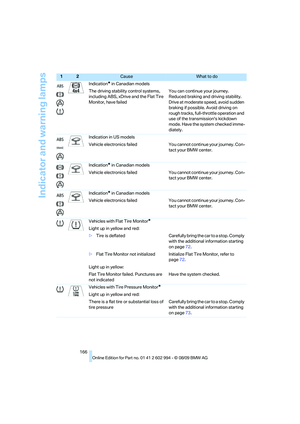 168
168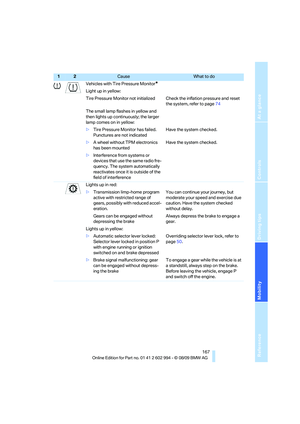 169
169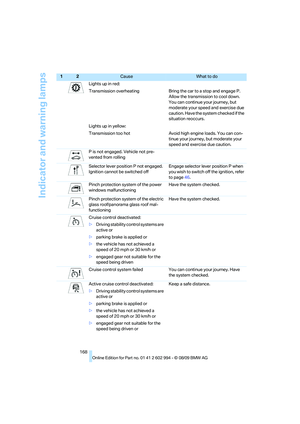 170
170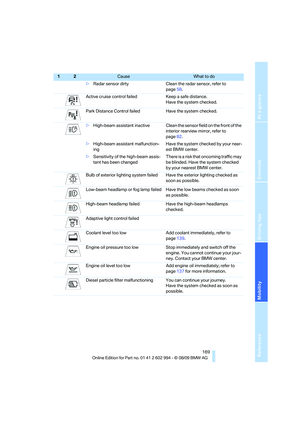 171
171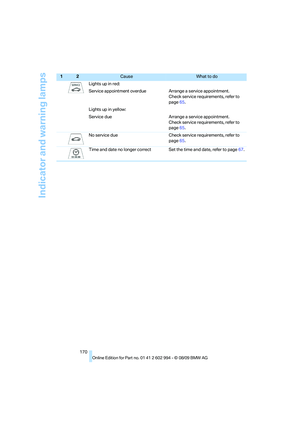 172
172 173
173 174
174 175
175 176
176 177
177 178
178 179
179 180
180 181
181 182
182 183
183 184
184 185
185 186
186 187
187 188
188 189
189 190
190 191
191 192
192 193
193 194
194 195
195