2010 BMW 650I CONVERTIBLE remote control
[x] Cancel search: remote controlPage 83 of 252
Controls
81Reference
At a glance
Driving tips
Communications
Navigation
Entertainment
Mobility
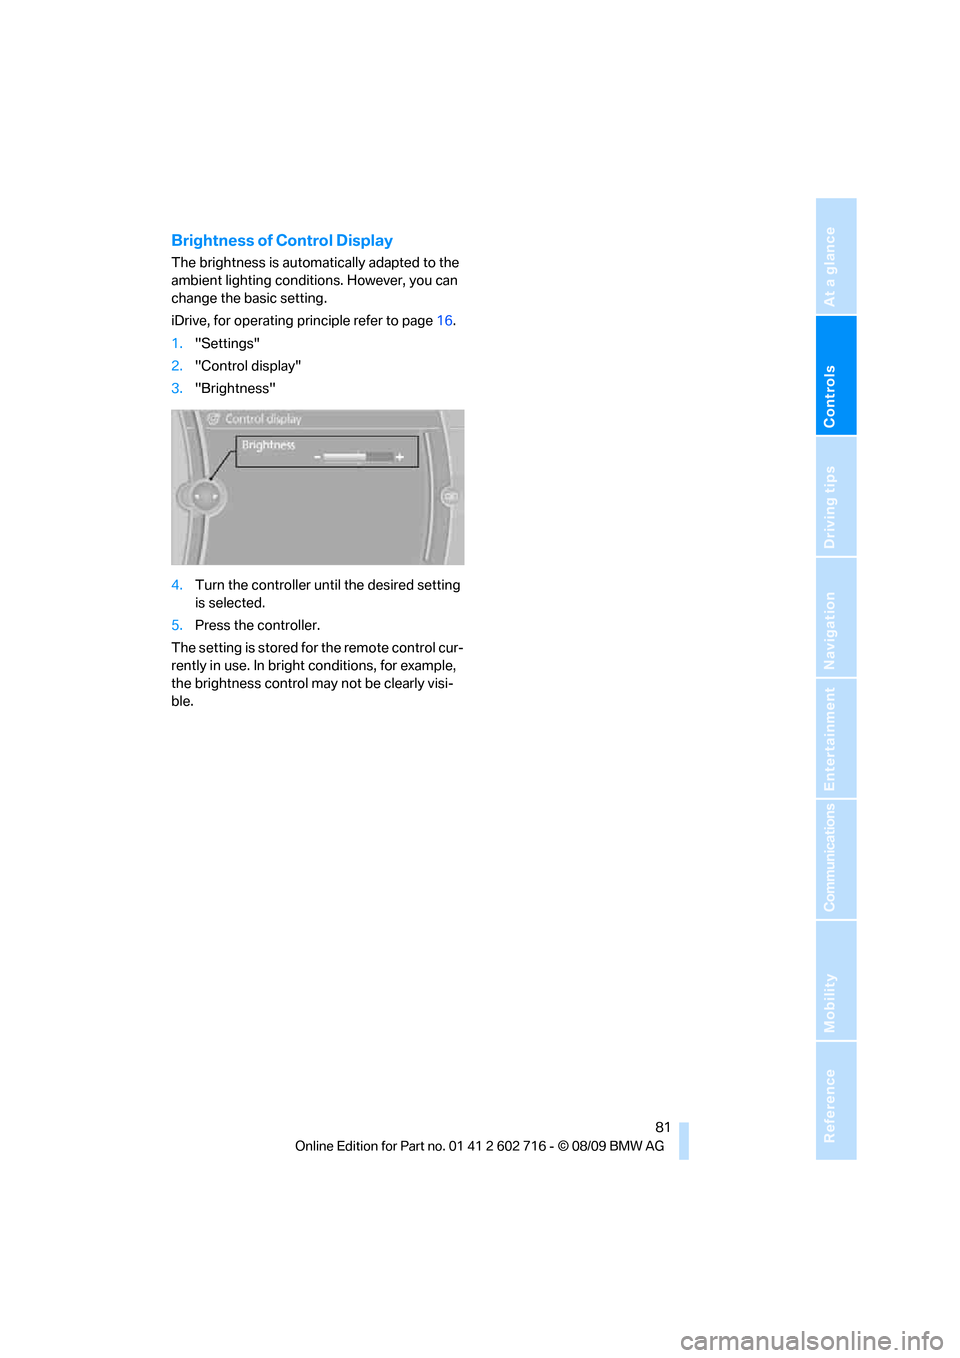
Brightness of Control Display
The brightness is automatically adapted to the
ambient lighting conditions. However, you can
change the basic setting.
iDrive, for operating principle refer to page16.
1."Settings"
2."Control display"
3."Brightness"
4.Turn the controller until the desired setting
is selected.
5.Press the controller.
The setting is stored for the remote control cur-
rently in use. In bright conditions, for example,
the brightness control may not be clearly visi-
ble.
Page 95 of 252
Controls
93Reference
At a glance
Driving tips
Communications
Navigation
Entertainment
Mobility
tem can lead to failure or malfunction.
For a system check and to ensure long-term
functioning, you must comply with the mainte-
nance intervals of the service requirements,
refer to page75.<
Head-up Display*
The concept
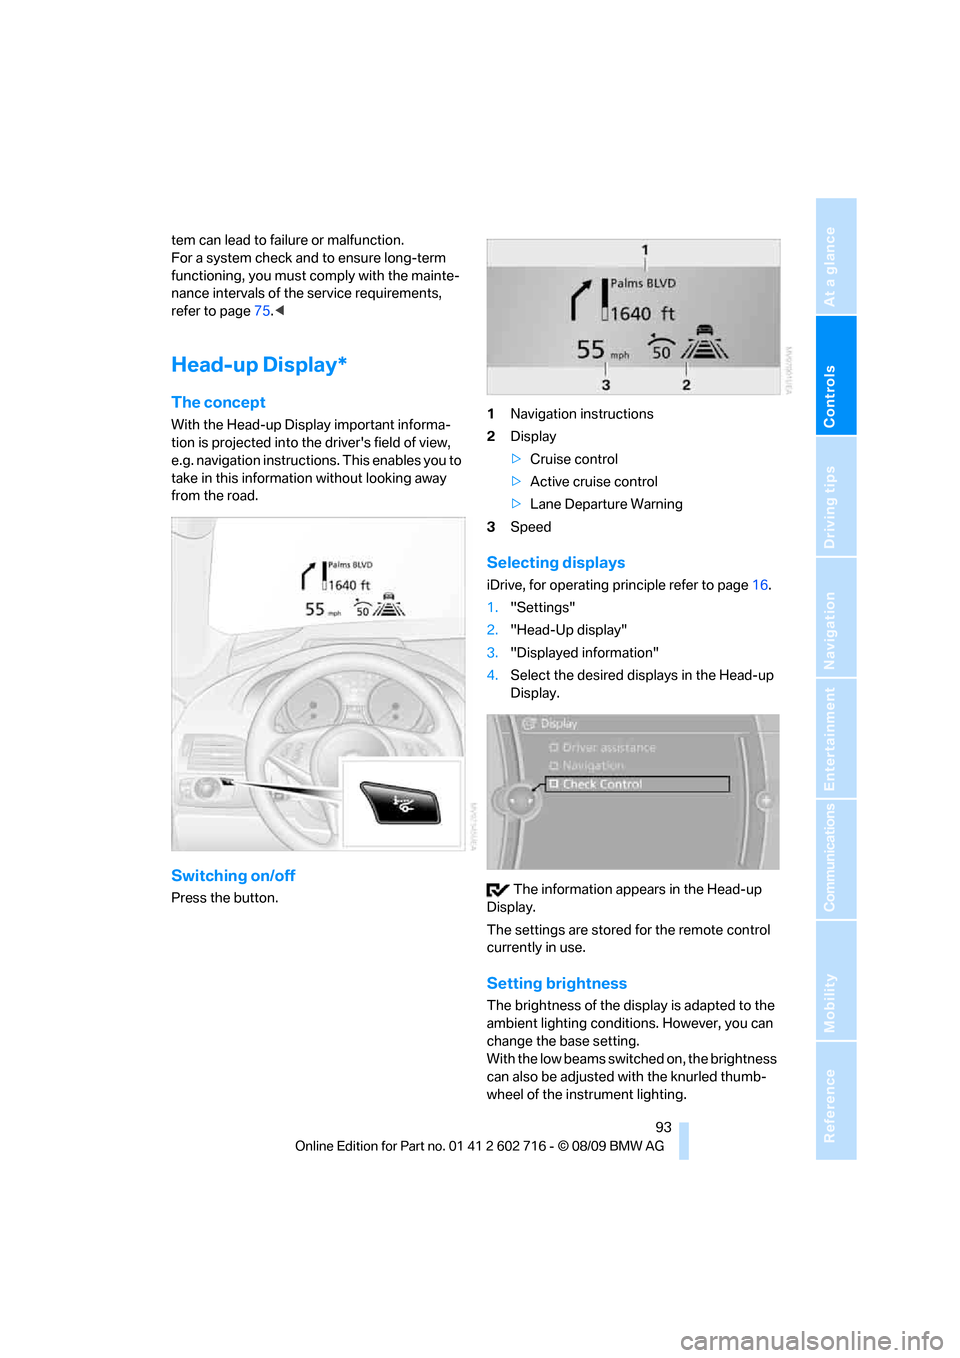
With the Head-up Display important informa-
tion is projected into the driver's field of view,
e.g. navigation instructions. This enables you to
take in this information without looking away
from the road.
Switching on/off
Press the button.1Navigation instructions
2Display
>Cruise control
>Active cruise control
>Lane Departure Warning
3Speed
Selecting displays
iDrive, for operating principle refer to page16.
1."Settings"
2."Head-Up display"
3."Displayed information"
4.Select the desired displays in the Head-up
Display.
The information appears in the Head-up
Display.
The settings are stored for the remote control
currently in use.
Setting brightness
The brightness of the display is adapted to the
ambient lighting conditions. However, you can
change the base setting.
With the low beams switched on, the brightness
can also be adjusted with the knurled thumb-
wheel of the instrument lighting.
Page 96 of 252
Technology for comfort, convenience and safety
94 iDrive, for operating principle refer to page16.
1."Settings"
2."Head-Up display"
3."Brightness"
4.Turn the controller.
The brightness is adjusted.
The setting is stored for the remote control cur-
rently in use.
Notes
The visibility of the displays in the Head-up Dis-
play is influenced by:
>Sunglasses with certain polarization filters
>Certain seating positions
>Objects on the cover of the Head-up Dis-
play
>Wet road surface and unfavorable lighting
conditions
If the image is distorted, please have the basic
setting checked at a BMW center.
Special windshield
The windshield is part of the system. The shape
of the windshield complies with the require-
ments of the Head-up Display to enable a pre-
cise display. A film in the windshield prevents
double images from being displayed.
Windshield replacement should be carried out
by a BMW center or a workshop that works
according to BMW repair procedures with cor-
respondingly trained personnel.
Care instructions
You can find valuable information on this topic
under Care, starting on page208.Only clean the cover of the Head-up Dis-
play with a soft, nonabrasive cloth or with
a display cleaning cloth; otherwise, you may
damage it.<
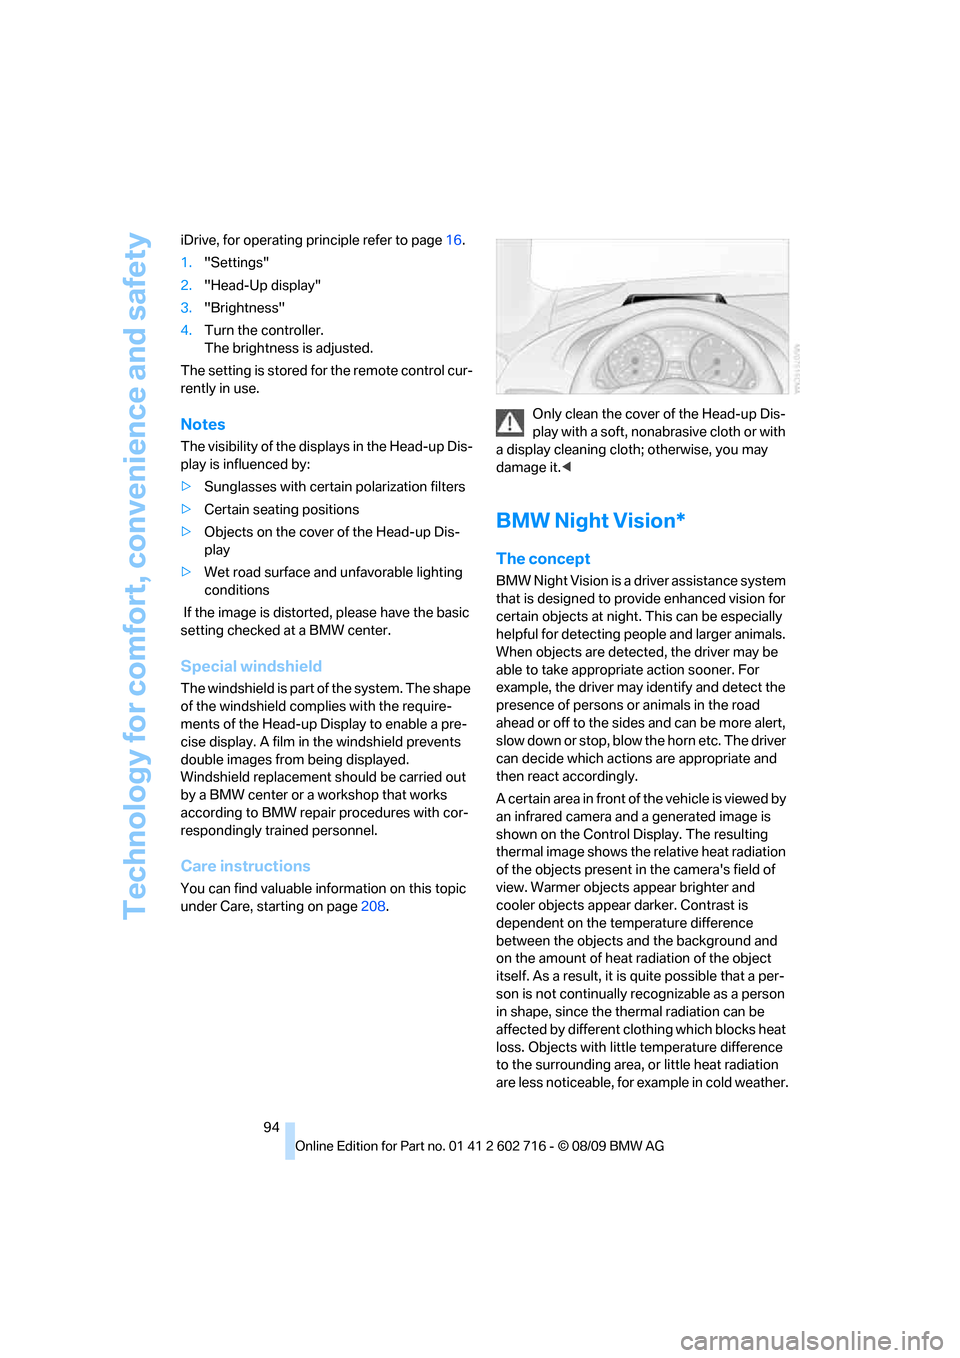
BMW Night Vision*
The concept
BMW Night Vision is a driver assistance system
that is designed to provide enhanced vision for
certain objects at night. This can be especially
helpful for detecting people and larger animals.
When objects are detected, the driver may be
able to take appropriate action sooner. For
example, the driver may identify and detect the
presence of persons or animals in the road
ahead or off to the sides and can be more alert,
slow down or stop, blow the horn etc. The driver
can decide which actions are appropriate and
then react accordingly.
A certain area in front of the vehicle is viewed by
an infrared camera and a generated image is
shown on the Control Display. The resulting
thermal image shows the relative heat radiation
of the objects present in the camera's field of
view. Warmer objects appear brighter and
cooler objects appear darker. Contrast is
dependent on the temperature difference
between the objects and the background and
on the amount of heat radiation of the object
itself. As a result, it is quite possible that a per-
son is not continually recognizable as a person
in shape, since the thermal radiation can be
affected by different clothing which blocks heat
loss. Objects with little temperature difference
to the surrounding area, or little heat radiation
are less noticeable, for example in cold weather.
Page 98 of 252

Technology for comfort, convenience and safety
96 Due to the system's need to adjust periodically,
a still image is displayed at certain intervals for
fractions of a second. This is normal and not an
indication of a problem.
To prevent driving without headlamps, at a
speed of more than approx. 3 mph/5 km/h and
when dark, the thermal image on the Control
Display is only shown when the low beams are
on.
Deactivating BMW Night Vision
>Press the button.
>Press the button.
>Via iDrive, refer to Selecting settings.
Selecting settings
iDrive, for explanation of principle, refer to
page16.
1.Activate BMW Night Vision.
2.Press the controller.
3.Open the desired menu item.
>"Brightness"
>"Contrast"
>"Zoom & Curve mode"
The settings are stored for the remote control
currently in use.To exit the menu:
The image automatically disappears after
approx. 5 seconds.
Cleaning camera
The function of the camera may be affected by
heavy rain and fog, dirt, snow or ice on the lens.
When this occurs, the displayed image on the
Control Display may become gray.
To minimize icing, the camera lens is automati-
cally heated. However, it may be necessary to
clean the camera lens manually under severe
weather conditions. When doing so, cautiously
remove any debris, ice or snow. To avoid dam-
age to the lens, do not use sharp or abrasive
instruments to clean ice, snow, or dirt off the
lens.
When the windshield is cleaned with the head-
lamps on, the camera lens area is automatically
sprayed as well. Refer to page62.
Lane Departure Warning*
The concept
This system warns you from a speed of approx.
40 mph/70 km/h when the vehicle is leaving the
lane you are currently in on roads with lane
demarcation lines. You feel this due to a slight
vibration of the steering wheel.
The system does not warn you if you signal
before leaving the lane.
It is best to use the system on well-developed
roads and freeways.
Page 101 of 252
Controls
99Reference
At a glance
Driving tips
Communications
Navigation
Entertainment
Mobility
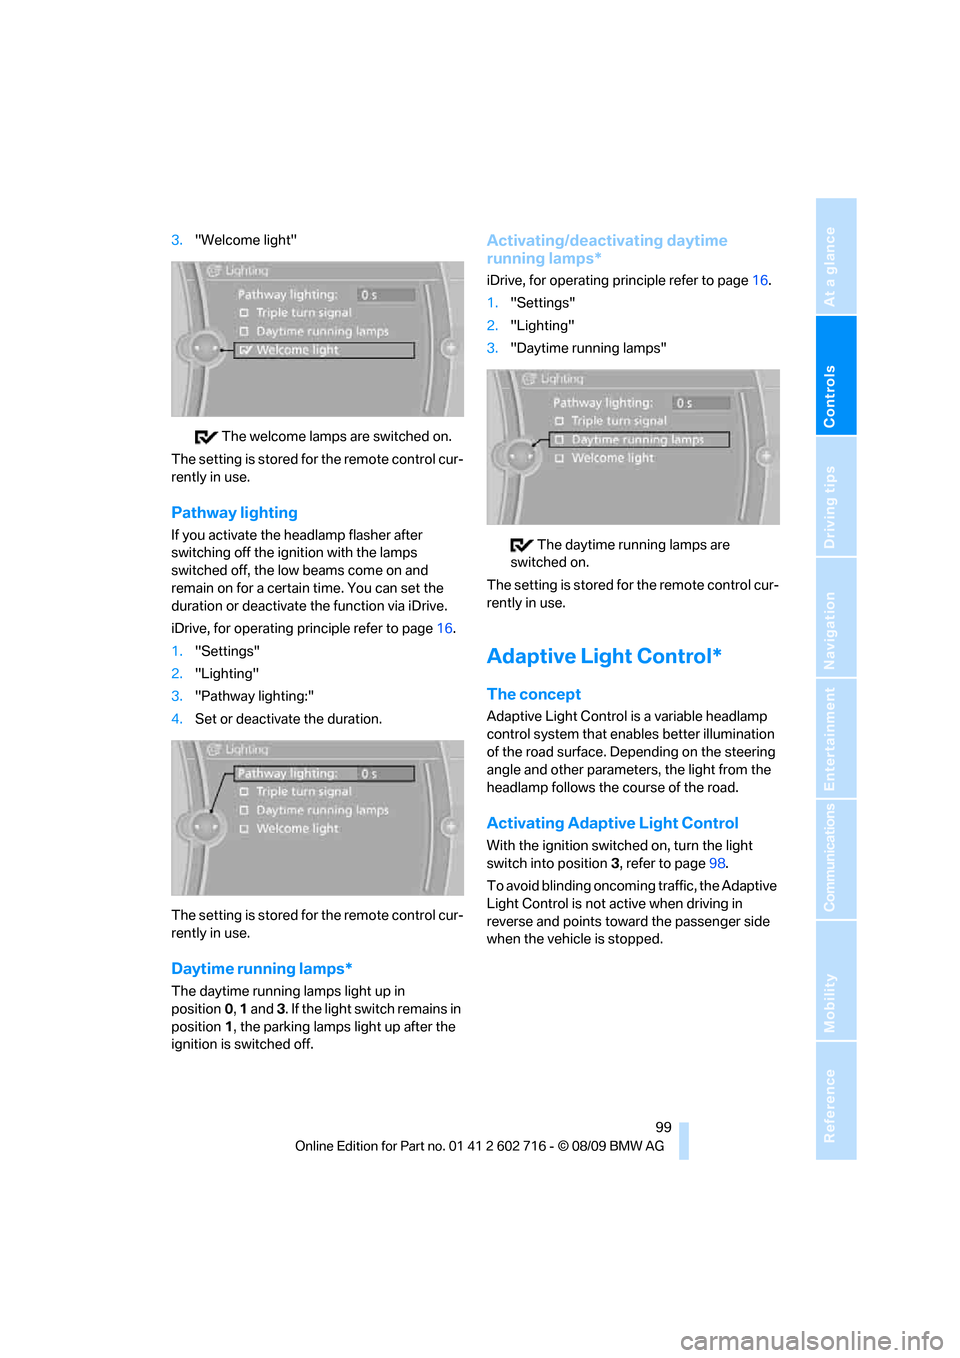
3."Welcome light"
The welcome lamps are switched on.
The setting is stored for the remote control cur-
rently in use.
Pathway lighting
If you activate the headlamp flasher after
switching off the ignition with the lamps
switched off, the low beams come on and
remain on for a certain time. You can set the
duration or deactivate the function via iDrive.
iDrive, for operating principle refer to page16.
1."Settings"
2."Lighting"
3."Pathway lighting:"
4.Set or deactivate the duration.
The setting is stored for the remote control cur-
rently in use.
Daytime running lamps*
The daytime running lamps light up in
position0, 1 and 3. If the light switch remains in
position1, the parking lamps light up after the
ignition is switched off.
Activating/deactivating daytime
running lamps*
iDrive, for operating principle refer to page16.
1."Settings"
2."Lighting"
3."Daytime running lamps"
The daytime running lamps are
switched on.
The setting is stored for the remote control cur-
rently in use.
Adaptive Light Control*
The concept
Adaptive Light Control is a variable headlamp
control system that enables better illumination
of the road surface. Depending on the steering
angle and other parameters, the light from the
headlamp follows the course of the road.
Activating Adaptive Light Control
With the ignition switched on, turn the light
switch into position 3, refer to page98.
To avoid blinding oncoming traffic, the Adaptive
Light Control is not active when driving in
reverse and points toward the passenger side
when the vehicle is stopped.
Page 103 of 252

Controls
101Reference
At a glance
Driving tips
Communications
Navigation
Entertainment
Mobility
System limits
The High-beam Assistant is designed to
maximize the amount of time that high
beams can be safely used and to quickly switch
back to low beams when traffic approaches.
The system cannot completely replace driver
intervention when unusual conditions are
encountered. For this reason, switch to low
beams when circumstances so dictate. Failure
to do so can pose a safety risk.<
Below are a few examples of situations in which
the system may not react or may only function
to a limited degree, requiring personal interven-
tion:
>in extremely unfavorable weather condi-
tions such as fog or heavy precipitation
>in sensing road users with poor inherent
illumination such as pedestrians, cyclists,
equestrians, horse-drawn vehicles, railroad
or shipping traffic close to the road, and at
deer crossings
>in tight curves, on steep crests or dips, with
cross-traffic, or with partially hidden
oncoming traffic on divided highways
>in poorly illuminated areas and in the pres-
ence of highly reflective signs
>in the low speed range
>when the windshield is fogged up, dirty or
covered with stickers, decals etc. in the area
of the inside rearview mirror
>when the sensor is dirty. Clean the sensor
on the front side of the inside rearview mir-
ror with a cloth slightly moistened with glass
cleaner
Moreover, no system can operate without limi-
tations. High-beam Assistant operation is sub-
ject to conditions that may reduce the system's
ability to recognize the difference between
actual vehicle head lamps or tail lamps and, for
example, highly reflective signs, markers, and
streetlights. To be on the safe side, the system
may periodically interpret these situations as
conditions that require low beams. Below are
some of the situations in which premature
switching to low beams can occur:>approaching large and/or highly reflective
signs
>approaching certain lights, such as drive-
way lighting and porch lights
>approaching certain traffic signals
>approaching large reflective markers
In these situations, the system may interpret
the above conditions as a vehicle ahead requir-
ing a switch to low beams. When the conditions
return to normal, the system will reactivate the
high beams.
The High-beam Assistant cannot replace the
driver's responsibility for complying with state
laws on high-beam switching or for adapting to
visibility and traffic conditions.
Switching off via iDrive
iDrive, for operating principle refer to page16.
1."Settings"
2."Lighting"
3."High beam assistant"
High beam assistant is activated and is
stored for the remote control currently in use.
Page 106 of 252

Climate
104 16Air grill for interior temperature sensor –
please keep clear and unobstructed
The current setting for air distribution is dis-
played on the Control Display.
A congenial climate
The AUTO program offers the optimum air dis-
tribution and air volume for virtually all condi-
tions, refer to AUTO program below. Now you
only need to select an interior temperature
comfortable for you.
The following sections contain more detailed
information on the available setting options.
Most settings are stored for the remote control
currently in use, also refer to Personal Profile
settings on page27.
AUTO program
The AUTO program handles the
adjustment of air volume and air
distribution to the windshield and
side windows, in the direction of
the upper body and in the footwell.
It also adapts your instructions for the tempera-
ture to outside influences throughout the year.
The cooling function is switched on along with
the AUTO program. At the same time, a con-
densation sensor controls the program in such
a way that window condensation is prevented
as much as possible.
Intensity of AUTO program
You can adjust the intensity of the AUTO pro-
gram by repeatedly pressing the AUTO button.
The respective current setting is briefly dis-
played on the Control Display when the button
is pressed.Select the intensity of the AUTO program using
the AUTO button:
>–Low
>–Medium
>–High
Convertible program*
When the convertible top is open, the convert-
ible program is active in addition. In the convert-
ible program, the automatic climate control is
optimized for driving with the convertible top
open. In addition, the air volume is increased as
the speed increases.
The effect of the convertible program can
be greatly enhanced if the wind deflector
is installed.<
Temperature
Set the desired temperature indi-
vidually on the driver's and front
passenger side.
The automatic climate control
achieves this temperature as quickly as possi-
ble at any time of year, if necessary with the
maximum cooling or heating capacity, and then
keeps it constant.
When changing between different tem-
perature settings in rapid succession, the
automatic climate control does not have suffi-
cient time to adjust the set temperature.<
In the highest setting you activate the maximum
heating output, regardless of the outside tem-
perature.
Page 111 of 252
Controls
109Reference
At a glance
Driving tips
Communications
Navigation
Entertainment
Mobility
Practical interior accessories
Integrated universal remote
control*
The concept
The integrated universal remote control can
replace as many as three hand-held transmit-
ters for various remote-controlled accessories,
such as garage and gate or lighting systems.
The integrated universal remote control regis-
ters and stores signals from the original hand-
held transmitters.
The signal of an original hand-held transmitter
can be programmed on one of the three mem-
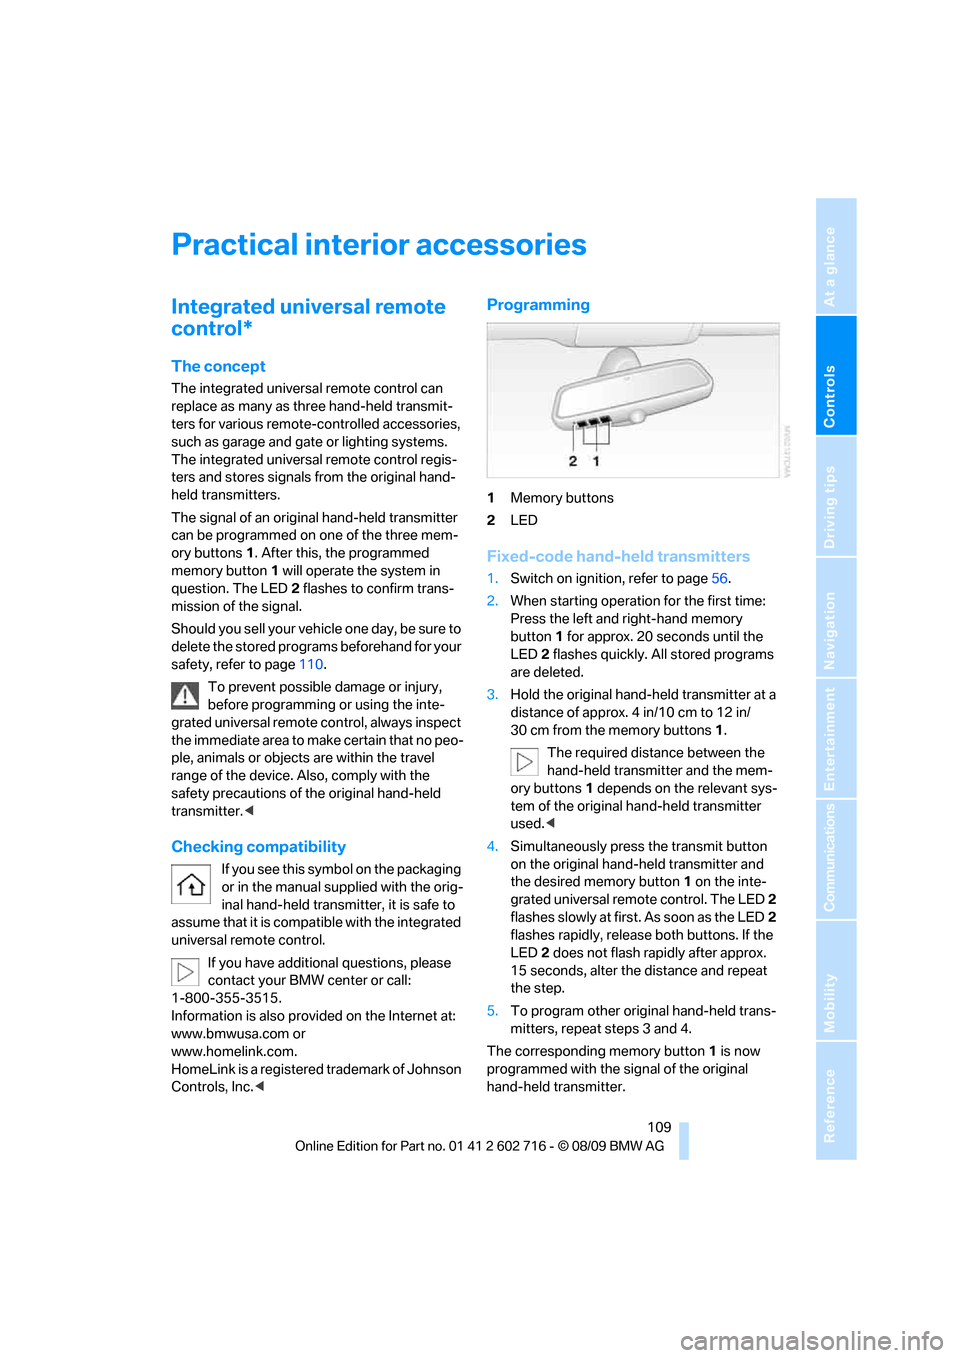
ory buttons1. After this, the programmed
memory button1 will operate the system in
question. The LED2 flashes to confirm trans-
mission of the signal.
Should you sell your vehicle one day, be sure to
delete the stored programs beforehand for your
safety, refer to page110.
To prevent possible damage or injury,
before programming or using the inte-
grated universal remote control, always inspect
the immediate area to make certain that no peo-
ple, animals or objects are within the travel
range of the device. Also, comply with the
safety precautions of the original hand-held
transmitter.<
Checking compatibility
If you see this symbol on the packaging
or in the manual supplied with the orig-
inal hand-held transmitter, it is safe to
assume that it is compatible with the integrated
universal remote control.
If you have additional questions, please
contact your BMW center or call:
1-800-355-3515.
Information is also provided on the Internet at:
www.bmwusa.com or
www.homelink.com.
HomeLink is a registered trademark of Johnson
Controls, Inc.<
Programming
1Memory buttons
2LED
Fixed-code hand-held transmitters
1.Switch on ignition, refer to page56.
2.When starting operation for the first time:
Press the left and right-hand memory
button1 for approx. 20 seconds until the
LED2 flashes quickly. All stored programs
are deleted.
3.Hold the original hand-held transmitter at a
distance of approx. 4 in/10 cm to 12 in/
30 cm from the memory buttons1.
The required distance between the
hand-held transmitter and the mem-
ory buttons1 depends on the relevant sys-
tem of the original hand-held transmitter
used.<
4.Simultaneously press the transmit button
on the original hand-held transmitter and
the desired memory button 1 on the inte-
grated universal remote control. The LED 2
flashes slowly at first. As soon as the LED2
flashes rapidly, release both buttons. If the
LED2 does not flash rapidly after approx.
15 seconds, alter the distance and repeat
the step.
5.To program other original hand-held trans-
mitters, repeat steps 3 and 4.
The corresponding memory button 1 is now
programmed with the signal of the original
hand-held transmitter.