2010 BMW 535I XDRIVE SEDAN brake
[x] Cancel search: brakePage 164 of 271
CD/DVD player and CD changer
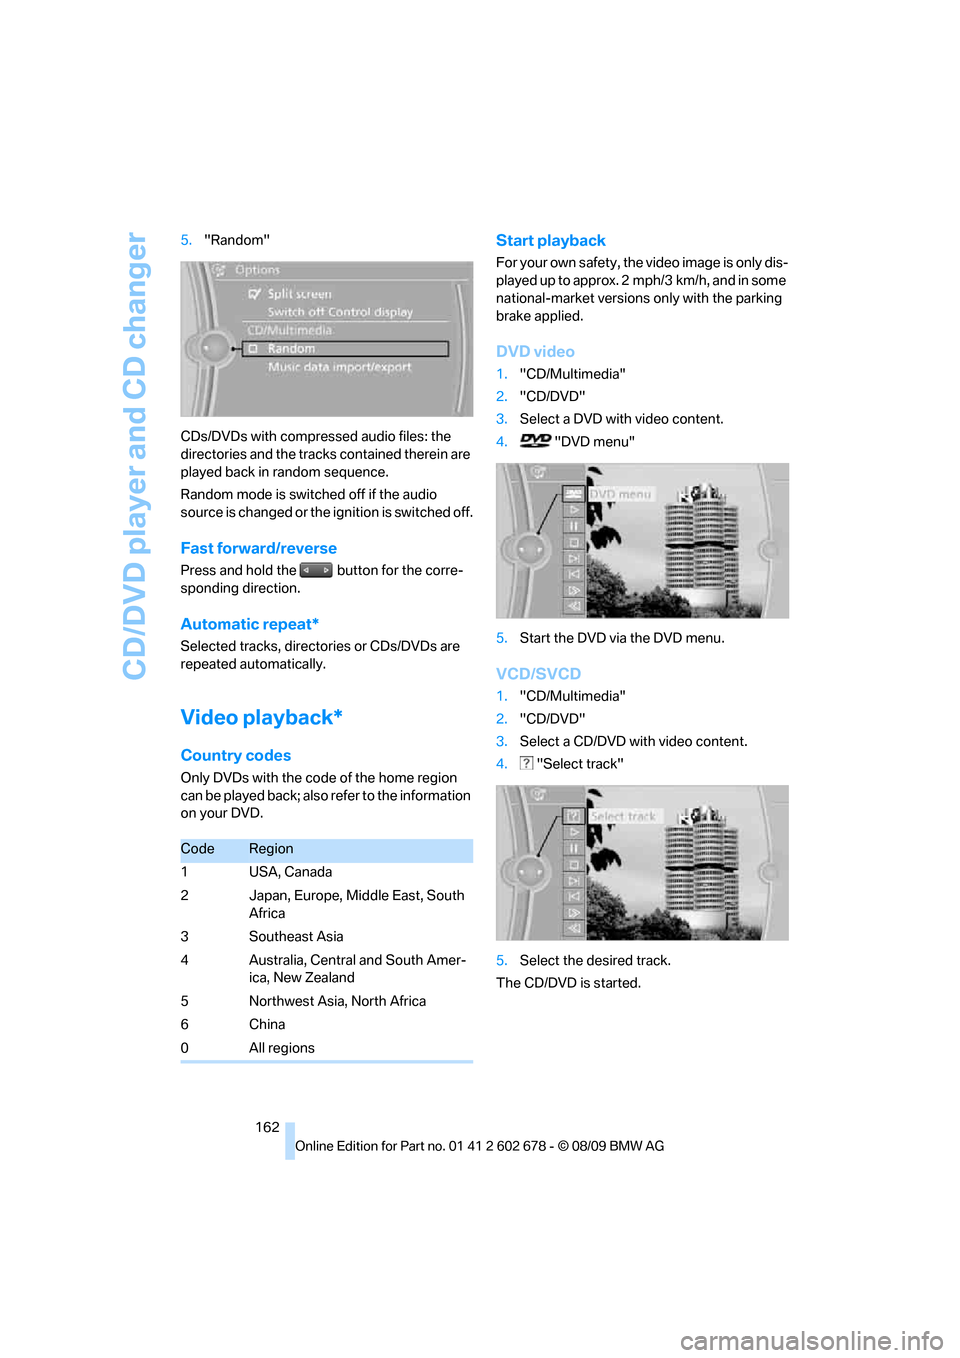
162 5."Random"
CDs/DVDs with compressed audio files: the
directories and the tracks contained therein are
played back in random sequence.
Random mode is switched off if the audio
source is changed or the ignition is switched off.
Fast forward/reverse
Press and hold the button for the corre-
sponding direction.
Automatic repeat*
Selected tracks, directories or CDs/DVDs are
repeated automatically.
Video playback*
Country codes
Only DVDs with the code of the home region
can be played back; also refer to the information
on your DVD.
Start playback
For your own safety, the video image is only dis-
played up to approx. 2 mph/3 km/h, and in some
national-market versions only with the parking
brake applied.
DVD video
1."CD/Multimedia"
2."CD/DVD"
3.Select a DVD with video content.
4. "DVD menu"
5.Start the DVD via the DVD menu.
VCD/SVCD
1."CD/Multimedia"
2."CD/DVD"
3.Select a CD/DVD with video content.
4. "Select track"
5.Select the desired track.
The CD/DVD is started.
CodeRegion
1USA, Canada
2 Japan, Europe, Middle East, South
Africa
3Southeast Asia
4 Australia, Central and South Amer-
ica, New Zealand
5 Northwest Asia, North Africa
6China
0All regions
Page 181 of 271
179
Entertainment
Reference
At a glance
Controls
Driving tips Communications
Navigation
Mobility
>Depending on the mobile phone, certain
settings may be necessary on the mobile
phone, e. g. via the following menu items:
>Bluetooth activated
>Connection must be allowed without
requiring further confirmation
>Reconnect
>Depending on the mobile phone model, the
setting energy saving mode can, for exam-
ple, result in vehicle failing to detect the
paired mobile phone.
>For pairing, define a 4- to 16-digit number
of your choice as the Bluetooth Passkey,
e.g. 25081107. A long and complex number
offers better protection against unautho-
rized access. This Bluetooth passkey is no
longer required following successful pair-
ing.
>The ignition is switched on.
Only pair the mobile phone with the vehi-
cle stopped, otherwise the passengers
and other road users can be endangered due to
a lack of attentiveness on the part of the
driver.<
Switching on ignition
1.Insert the remote control as far as possible
into the ignition lock.
2.Switch on the ignition by pressing the Start/
Stop button without depressing the brake
or clutch pedal.
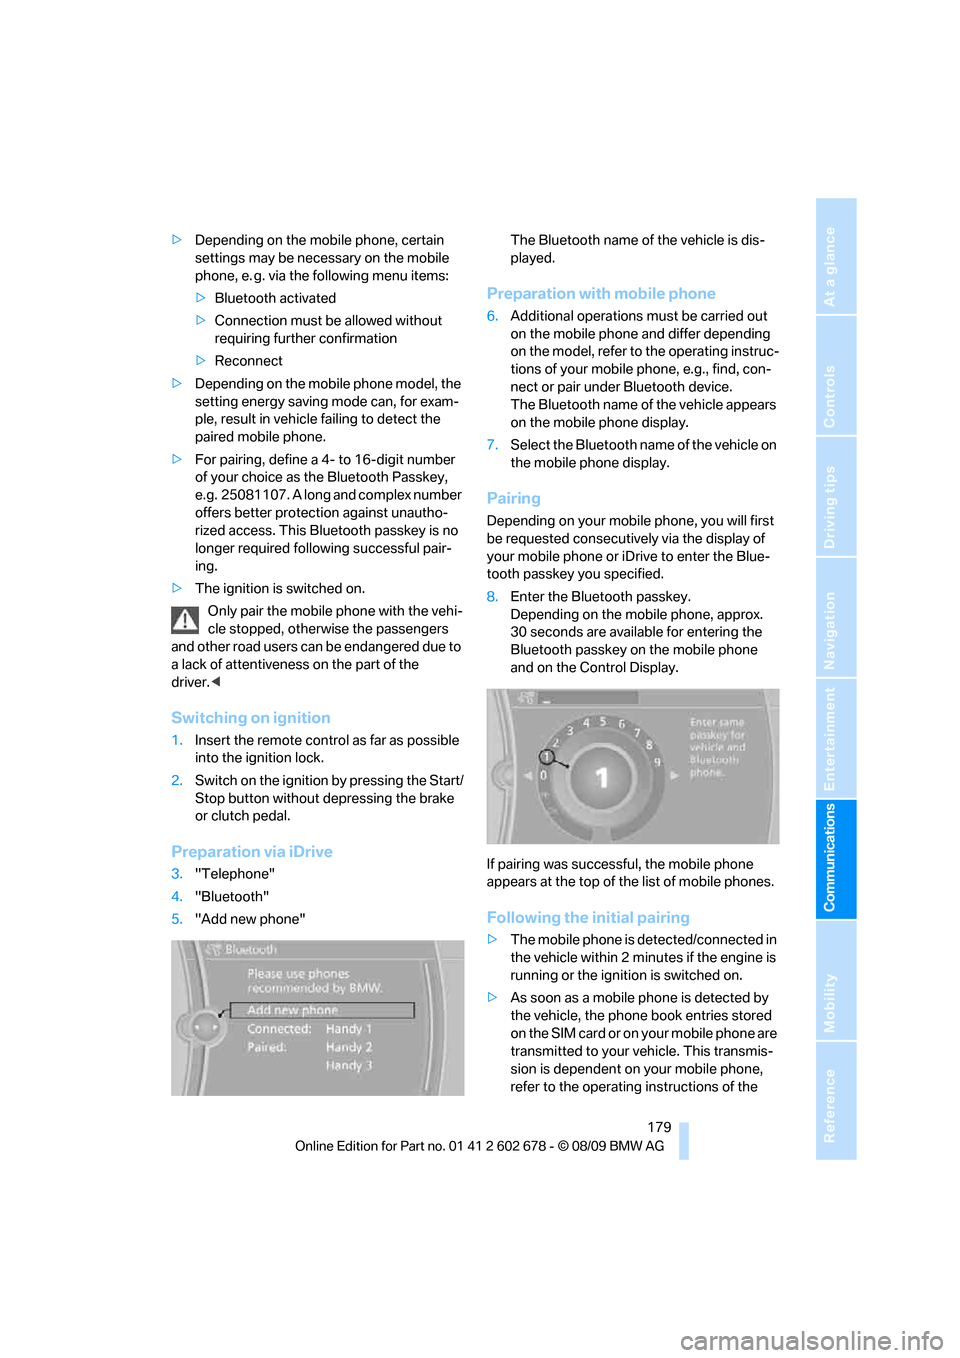
Preparation via iDrive
3."Telephone"
4."Bluetooth"
5."Add new phone"The Bluetooth name of the vehicle is dis-
played.
Preparation with mobile phone
6.Additional operations must be carried out
on the mobile phone and differ depending
on the model, refer to the operating instruc-
tions of your mobile phone, e.g., find, con-
nect or pair under Bluetooth device.
The Bluetooth name of the vehicle appears
on the mobile phone display.
7.Select the Bluetooth name of the vehicle on
the mobile phone display.
Pairing
Depending on your mobile phone, you will first
be requested consecutively via the display of
your mobile phone or iDrive to enter the Blue-
tooth passkey you specified.
8.Enter the Bluetooth passkey.
Depending on the mobile phone, approx.
30 seconds are available for entering the
Bluetooth passkey on the mobile phone
and on the Control Display.
If pairing was successful, the mobile phone
appears at the top of the list of mobile phones.
Following the initial pairing
>The mobile phone is detected/connected in
the vehicle within 2 minutes if the engine is
running or the ignition is switched on.
>As soon as a mobile phone is detected by
the vehicle, the phone book entries stored
on the SIM card or on your mobile phone are
transmitted to your vehicle. This transmis-
sion is dependent on your mobile phone,
refer to the operating instructions of the
Page 196 of 271
BMW Assist
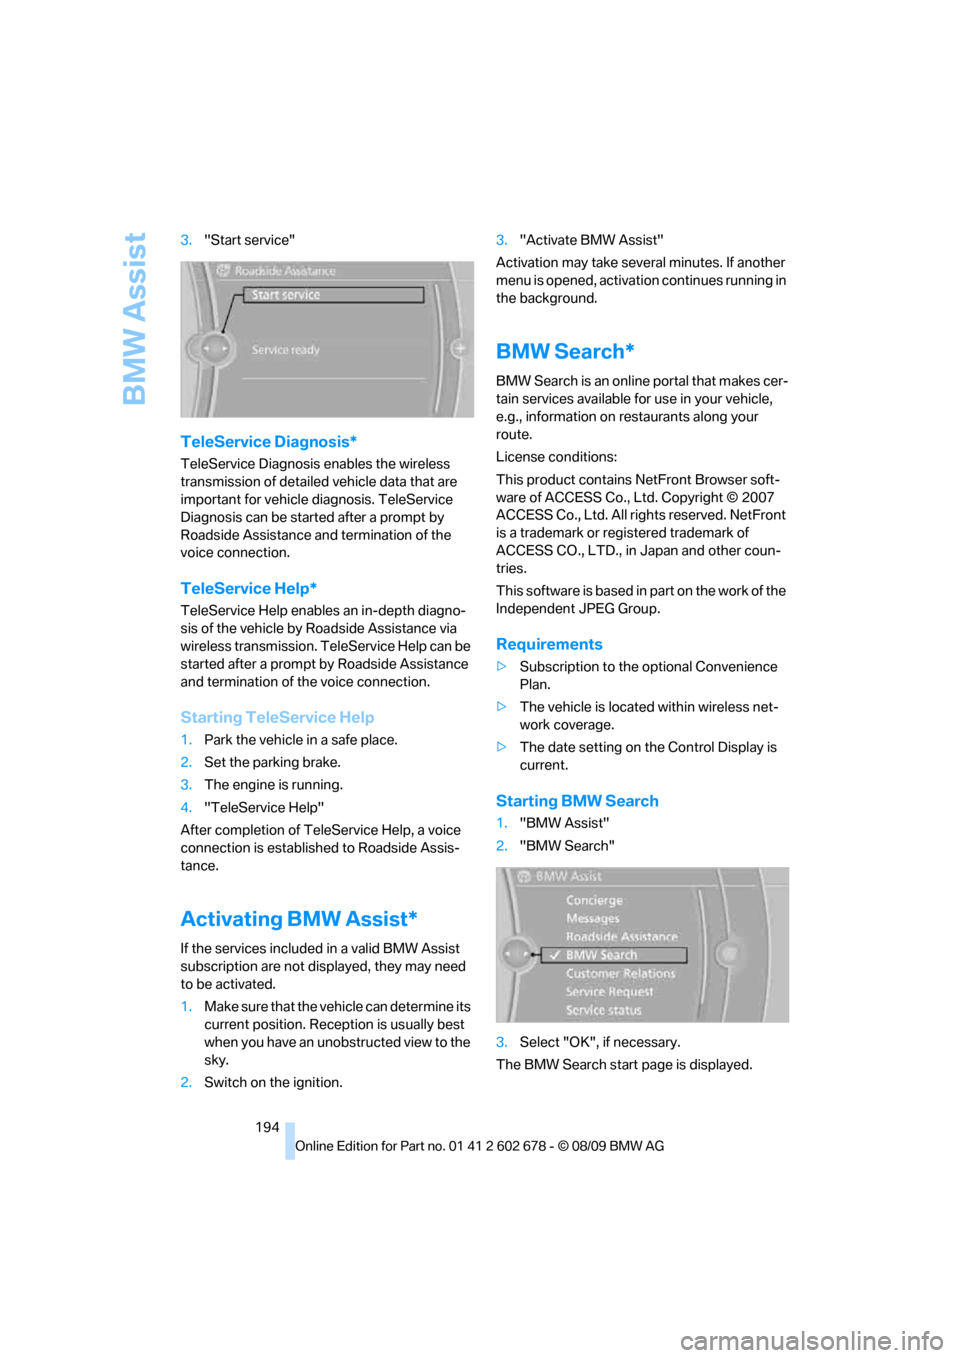
194 3."Start service"
TeleService Diagnosis*
TeleService Diagnosis enables the wireless
transmission of detailed vehicle data that are
important for vehicle diagnosis. TeleService
Diagnosis can be started after a prompt by
Roadside Assistance and termination of the
voice connection.
TeleService Help*
TeleService Help enables an in-depth diagno-
sis of the vehicle by Roadside Assistance via
wireless transmission. TeleService Help can be
started after a prompt by Roadside Assistance
and termination of the voice connection.
Starting TeleService Help
1.Park the vehicle in a safe place.
2.Set the parking brake.
3.The engine is running.
4."TeleService Help"
After completion of TeleService Help, a voice
connection is established to Roadside Assis-
tance.
Activating BMW Assist*
If the services included in a valid BMW Assist
subscription are not displayed, they may need
to be activated.
1.Make sure that the vehicle can determine its
current position. Reception is usually best
when you have an unobstructed view to the
sky.
2.Switch on the ignition.3."Activate BMW Assist"
Activation may take several minutes. If another
menu is opened, activation continues running in
the background.
BMW Search*
BMW Search is an online portal that makes cer-
tain services available for use in your vehicle,
e.g., information on restaurants along your
route.
License conditions:
This product contains NetFront Browser soft-
ware of ACCESS Co., Ltd. Copyright © 2007
ACCESS Co., Ltd. All rights reserved. NetFront
is a trademark or registered trademark of
ACCESS CO., LTD., in Japan and other coun-
tries.
T h i s s o f t w a r e is b a s e d in p a rt o n t he w o r k o f t h e
Independent JPEG Group.
Requirements
>Subscription to the optional Convenience
Plan.
>The vehicle is located within wireless net-
work coverage.
>The date setting on the Control Display is
current.
Starting BMW Search
1."BMW Assist"
2."BMW Search"
3.Select "OK", if necessary.
The BMW Search start page is displayed.
Page 217 of 271
Mobility
215Reference
At a glance
Controls
Driving tips
Communications
Navigation
Entertainment
Maintenance
BMW Maintenance System
The BMW Maintenance System supports the
preservation of the traffic and operating safety
of your BMW. The ultimate objective is to
ensure economical maintenance by providing
the ideal service for your vehicle.
Should the day come when you decide to sell
your BMW, a complete center service history
will prove to be an asset of inestimable value.
CBS Condition Based Service
Sensors and special algorithms take the differ-
ent driving conditions of your BMW into
account. Condition Based Service uses this to
determine the current and future service
requirements. By letting you define a service
and maintenance regimen that reflects your
own individual requirements, the system builds
the basis for trouble-free driving.
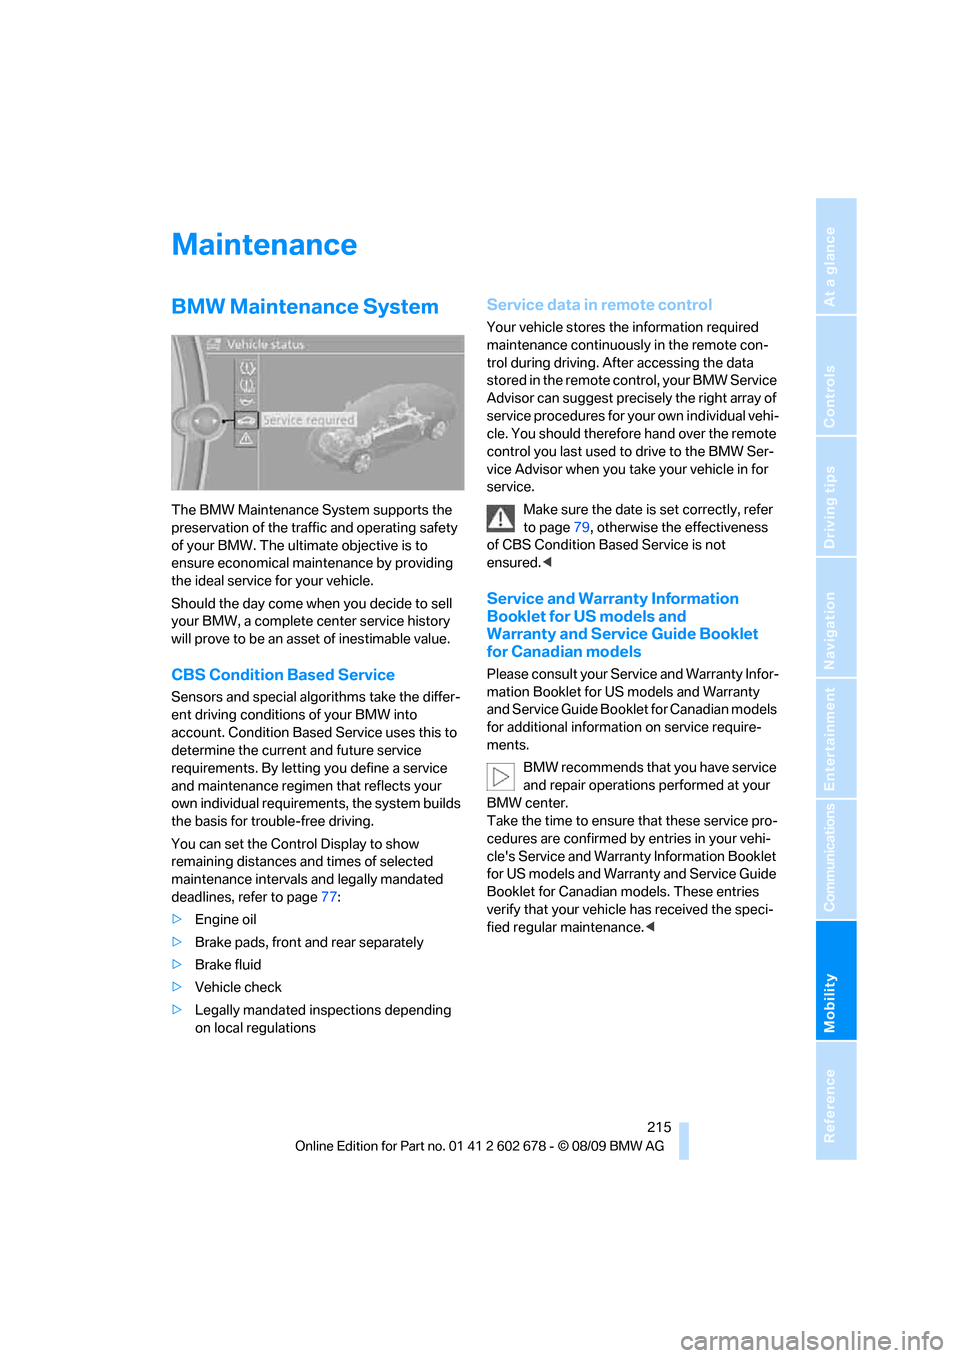
You can set the Control Display to show
remaining distances and times of selected
maintenance intervals and legally mandated
deadlines, refer to page77:
>Engine oil
>Brake pads, front and rear separately
>Brake fluid
>Vehicle check
>Legally mandated inspections depending
on local regulations
Service data in remote control
Your vehicle stores the information required
maintenance continuously in the remote con-
trol during driving. After accessing the data
stored in the remote control, your BMW Service
Advisor can suggest precisely the right array of
service procedures for your own individual vehi-
cle. You should therefore hand over the remote
control you last used to drive to the BMW Ser-
vice Advisor when you take your vehicle in for
service.
Make sure the date is set correctly, refer
to page79, otherwise the effectiveness
of CBS Condition Based Service is not
ensured.<
Service and Warranty Information
Booklet for US models and
Warranty and Service Guide Booklet
for Canadian models
Please consult your Service and Warranty Infor-
mation Booklet for US models and Warranty
and Service Guide Booklet for Canadian models
for additional information on service require-
ments.
BMW recommends that you have service
and repair operations performed at your
BMW center.
Take the time to ensure that these service pro-
cedures are confirmed by entries in your vehi-
cle's Service and Warranty Information Booklet
for US models and Warranty and Service Guide
Booklet for Canadian models. These entries
verify that your vehicle has received the speci-
fied regular maintenance.<
Page 219 of 271
Mobility
217Reference
At a glance
Controls
Driving tips
Communications
Navigation
Entertainment
Care
Car-care products
Regular cleaning and care make a significant
contribution to retaining your BMW's value.
For the cleaning and care of your vehicle, BMW
recommends using only products that BMW
has approved for this purpose.
Your BMW center will be glad to advise you
about products and services for the cleaning
and care of your BMW.
Genuine BMW Care Products are materi-
als tested, laboratory tested, and tested in
actual use. They offer optimum care and pro-
tection for your vehicle.<
Do not use cleaners that contain alcohol
or solvents; they can damage your vehi-
cle.<
Cleaning agents can contain substances
that are dangerous or pose health risks.
You should therefore heed the warnings and
hazard indications on the packaging. Open the
doors or windows on your vehicle whenever
cleaning the interior. Make sure there is suffi-
cient ventilation in enclosed spaces. Use only
products that are formulated for vehicle clean-
ing.<
Exterior care
Washing your vehicle
In the winter months, it is especially
important to ensure that the vehicle is
washed on a regular basis. Otherwise, signifi-
cant soiling and road salt can cause damage to
the vehicle.<
After washing the vehicle, apply the
brakes briefly to dry them. Failure to do so
may lead to a reduction in braking efficiency and
also to corrosion of the brake rotors.<
Car washes
Give preference to cloth car washes.Before driving into the car wash, make sure that
it is suitable for your BMW. Pay attention to the
following points:
>Dimensions of your vehicle, refer to
page239.
>If necessary, fold in the outside rearview
mirrors, refer to page51.
>Maximum permissible tire width.
Avoid car washes with rail heights over
4in/10cm, otherwise there is danger of
damaging chassis parts.<
Preparations for driving into the car wash:
>Deactivate rain sensor to prevent unwanted
wiper activation.
>Deactivate rear window wiper
* and protect
it from damage. Take appropriate protec-
tive measures; inquiring with the car wash
operator as needed.
>Remove additional add-on parts, e.g., spoil-
ers or phone antennas, if they could be
damaged.
Automatic transmission
Before driving into the car wash, make sure the
vehicle is able to roll by making sure to:
1.Insert the remote control into the ignition
lock, even with Comfort Access.
2.Shift into transmission position N.
3.Release the parking brake.
4.Switch off the engine.
5.Leave the remote control in the ignition lock
so that the vehicle can roll.
Steam jets/high-pressure washers
When using steam jets or high-pressure
washers, ensure that you maintain suffi-
cient clearance to the vehicle and do not exceed
a temperature of 1407/606.
Insufficient distance or excessive pressure or
temperature can damage parts of the vehicle or
can result in water penetration. Follow the oper-
Page 220 of 271
Care
218 ating instructions for the high-pressure clean-
ing jets.<
When using high-pressure cleaning jets,
do not remain in one place for a long time
and be sure to maintain a distance of at least
12 in/30 cm from sensors, e.g., Park Distance
Control sensors or radar sensors.<
Hand washing
When washing the vehicle by hand, use plenty
of water and car washing shampoo. Clean the
vehicle with gentle pressure using a sponge or a
washing brush.
Before cleaning the windshield, deacti-
vate the rain sensor or switch off the igni-
tion to prevent unwanted wiper operation.<
Follow local guidelines for washing vehi-
cles by hand.<
Headlamps
Do not rub dry and never use abrasives or
strong solvents to clean the covers.
Loosen dirt, e.g., insects, with shampoo or
insect remover and wash away with plenty of
water.
Use a window de icer to remove accumulated
ice and snow, not a scraper.
Windows
Use a glass cleaner to clean the inside and out-
side surfaces of the windows and the glass sur-
faces of the mirrors.
Do not use quartz-containing cleansers
to clean glass surfaces of the mirrors.<
Paintwork care
Regular care helps your vehicle retain its value
and protects the paint from the long-term
effects of aggressive substances.
Regionally occurring environmental factors can
affect and damage vehicle finish. It is therefore
important to tailor the frequency and extent of
your car care accordingly.
Immediately remove particularly aggressive
substances such as spilled fuel, oil, grease, brake fluid, tree resin, or bird droppings; other-
wise, they may damage your paint.
Repairing paint damage
Repair stone damage or scratches imme-
diately, depending on the severity of the
damage, to prevent the formation of rust.<
BMW recommends having paint damage pro-
fessionally repaired using Genuine BMW finish
materials in accordance with factory guidelines.
Waxing
Sealant is required when water no longer beads
on the clean surface of the paint. Use only prod-
ucts that contain carnauba wax or synthetic wax
to seal your finish.
Rubber gaskets
Treat only with water or a rubber care product.
To avoid noise or damage, do not use
products that contain silicone to care for
rubber gaskets.<
Chrome components
Particularly after exposure to road salt, thor-
oughly cleanse parts like the radiator grille, door
handles, or window frames with plenty of water
with shampoo added to it. For additional treat-
ment, use chrome polish.
Alloy wheels
Depending on your system, braking can gener-
ate dust, which settles on the light-alloy wheels.
Remove this dust regularly with acid-free wheel
cleaner.
Do not use aggressive, acid-containing,
strongly alkaline, or coarse cleansers and
do not use steam cleaners at temperatures
greater than 140 °F/606, otherwise you may
damage your vehicle.<
Outside sensors
Sensors on the outside of the vehicle, such as
Park Distance Control sensors or radar sensors,
should be kept clean and free of ice to retain
their full function.
Page 226 of 271
Replacing components
224 1.Remove the sealing cap, refer to Access to
lamps.
2.Push the locking bar to the side out of the
anchor and fold upward.
3.Remove the connector and take out the
bulb.
4.Replace the bulb and reinstall.
5.Fold down the locking bar and engage it.
6.Reconnect the connector.
7.Mount the sealing cap. Watch the markings
on the bulb when doing so.
Turn signals, front
21-watt bulb, PY21W
1.Turn the bulb holder to the left and remove.
2.Apply gentle pressure to the bulb while
turning it to the left for removal and replace-
ment.
Side-mounted turn signals
5-watt bulb, W5W1.Press back against the front edge of the
lamp with the tip of your finger, then pivot it
out.
2.Turn the bulb holder to the left and remove.
3.Remove the bulb for replacement.
Side marker lamps, front and rear
To replace, please go to your BMW center or a
workshop that works according to BMW repair
procedures with correspondingly trained per-
sonnel.
Tail lamps
Sedan
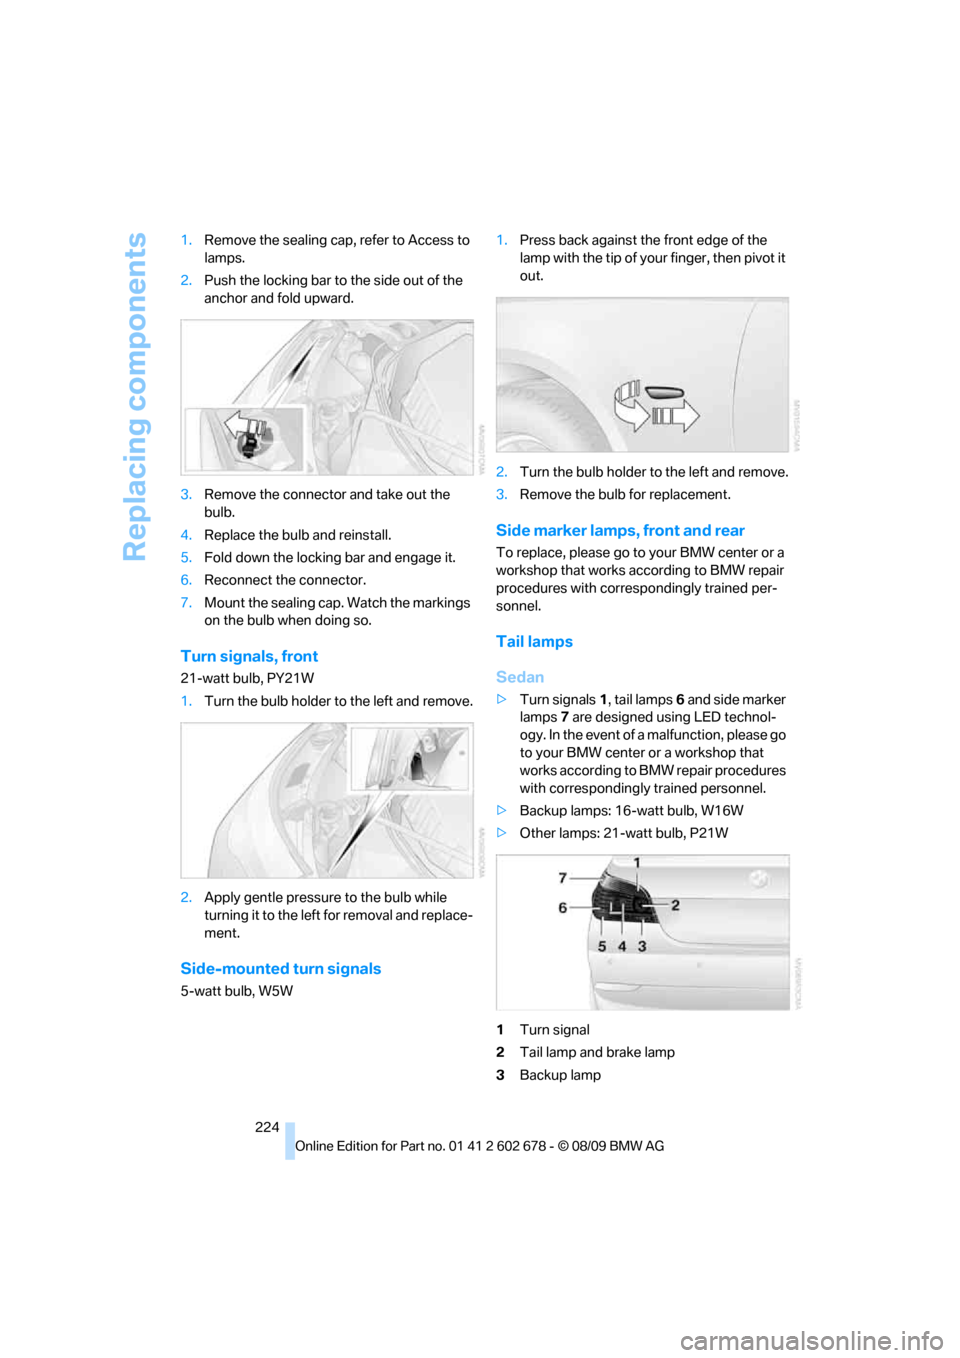
>Turn signals1, tail lamps6 and side marker
lamps7 are designed using LED technol-
ogy. In the event of a malfunction, please go
to your BMW center or a workshop that
works according to BMW repair procedures
with correspondingly trained personnel.
>Backup lamps: 16-watt bulb, W16W
>Other lamps: 21-watt bulb, P21W
1Turn signal
2Tail lamp and brake lamp
3Backup lamp
Page 227 of 271
Mobility
225Reference
At a glance
Controls
Driving tips
Communications
Navigation
Entertainment
4Brake lamp
5Reflector
6Tail lamp
7Side marker lamp
Sports Wagon
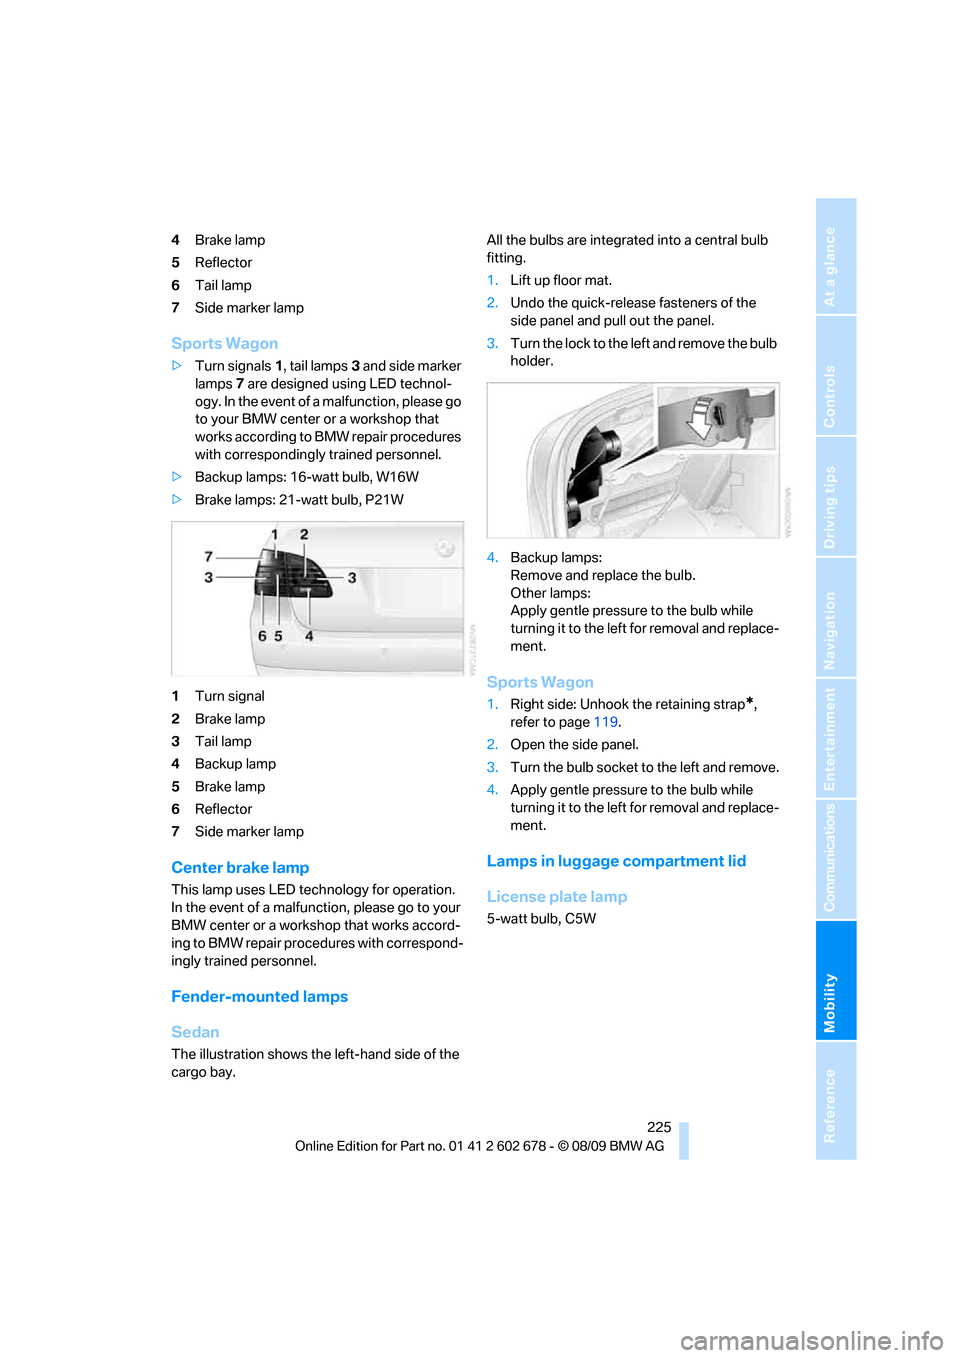
>Turn signals1, tail lamps3 and side marker
lamps7 are designed using LED technol-
ogy. In the event of a malfunction, please go
to your BMW center or a workshop that
works according to BMW repair procedures
with correspondingly trained personnel.
>Backup lamps: 16-watt bulb, W16W
>Brake lamps: 21-watt bulb, P21W
1Turn signal
2Brake lamp
3Tail lamp
4Backup lamp
5Brake lamp
6Reflector
7Side marker lamp
Center brake lamp
This lamp uses LED technology for operation.
In the event of a malfunction, please go to your
BMW center or a workshop that works accord-
ing to BMW repair procedures with correspond-
ingly trained personnel.
Fender-mounted lamps
Sedan
The illustration shows the left-hand side of the
cargo bay.All the bulbs are integrated into a central bulb
fitting.
1.Lift up floor mat.
2.Undo the quick-release fasteners of the
side panel and pull out the panel.
3.Turn the lock to the left and remove the bulb
holder.
4.Backup lamps:
Remove and replace the bulb.
Other lamps:
Apply gentle pressure to the bulb while
turning it to the left for removal and replace-
ment.
Sports Wagon
1.Right side: Unhook the retaining strap*,
refer to page119.
2.Open the side panel.
3.Turn the bulb socket to the left and remove.
4.Apply gentle pressure to the bulb while
turning it to the left for removal and replace-
ment.
Lamps in luggage compartment lid
License plate lamp
5-watt bulb, C5W