2010 BMW 535I XDRIVE SEDAN turn signal
[x] Cancel search: turn signalPage 85 of 271
Controls
83Reference
At a glance
Driving tips
Communications
Navigation
Entertainment
Mobility
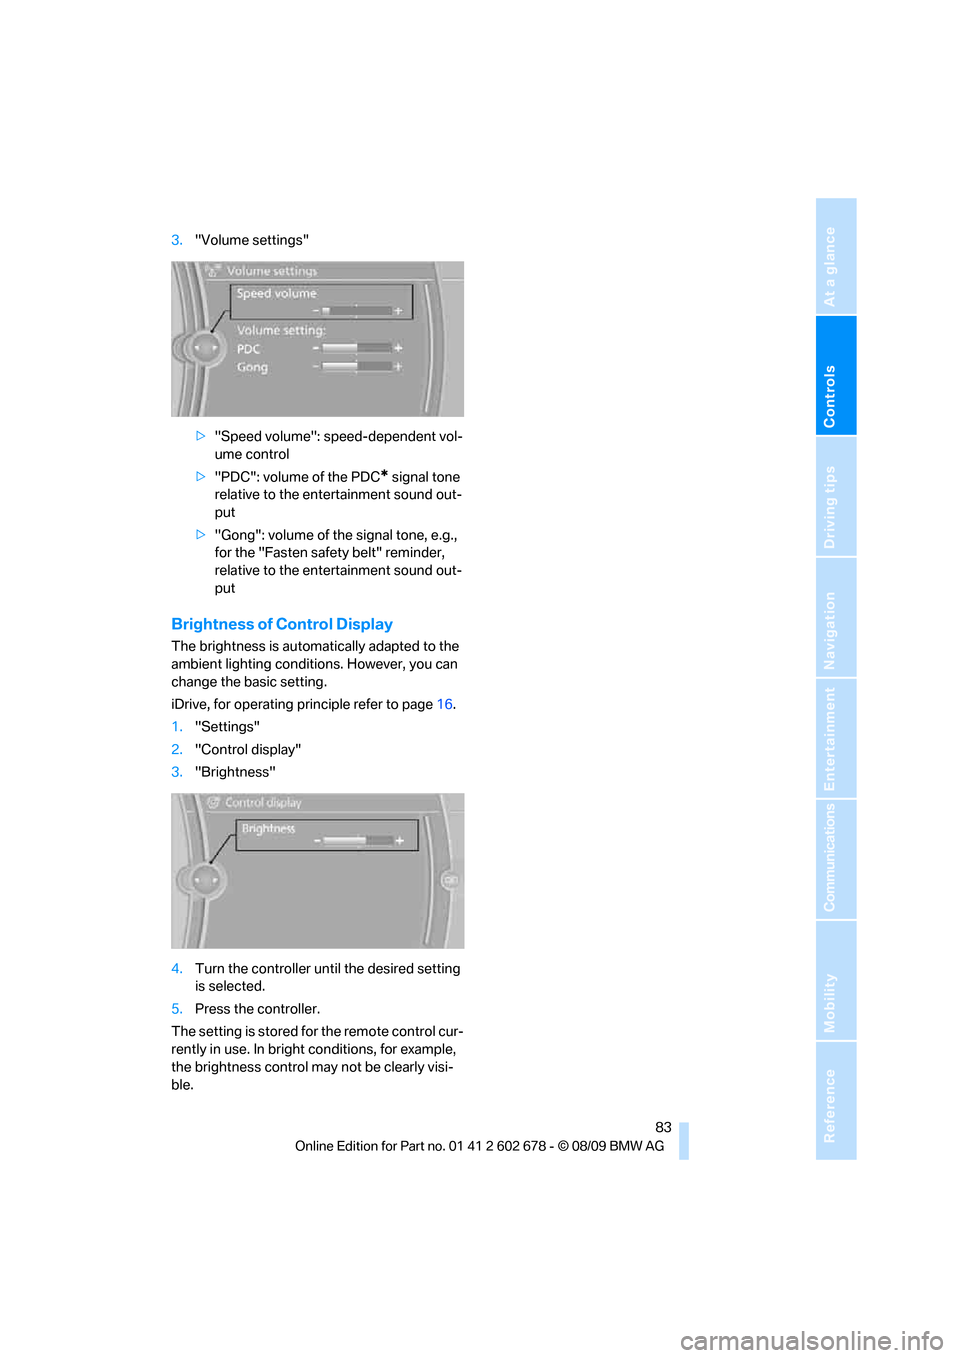
3."Volume settings"
>"Speed volume": speed-dependent vol-
ume control
>"PDC": volume of the PDC
* signal tone
relative to the entertainment sound out-
put
>"Gong": volume of the signal tone, e.g.,
for the "Fasten safety belt" reminder,
relative to the entertainment sound out-
put
Brightness of Control Display
The brightness is automatically adapted to the
ambient lighting conditions. However, you can
change the basic setting.
iDrive, for operating principle refer to page16.
1."Settings"
2."Control display"
3."Brightness"
4.Turn the controller until the desired setting
is selected.
5.Press the controller.
The setting is stored for the remote control cur-
rently in use. In bright conditions, for example,
the brightness control may not be clearly visi-
ble.
Page 94 of 271
Technology for comfort, convenience and safety
92 4 persons without luggage:
approx. 95 miles/150 km
>With a full load:
4 or more persons, cargo bay full:
approx. 30 miles/50 km
Drive reservedly and do not exceed a
speed of 50 mph/80 km/h. In the event of
pressure loss, vehicle handling changes. This
includes reduced tracking stability in braking,
extended braking distance and altered natural
steering characteristics.
If unusual vibrations or loud noises occur while
the vehicle is being driven, this can indicate final
failure of the damaged tire. Reduce speed and
stop at a suitable location as soon as possible,
otherwise pieces of the tire could become
detached and cause an accident. Do not con-
tinue driving, but instead contact your BMW
center.<
Malfunction
The yellow warning lamp flashes and
then lights up continuously. The tires
are shown in gray on the Control Dis-
play and a message is displayed. No flat tire can
be detected.
A message like this is displayed in the following
situations:
>In case of a malfunction;
have the system checked.
>If a wheel is mounted without TPM elec-
tronics.
>If TPM is temporarily interfered with by
other systems or devices which use the
same radio frequency.
Declaration according to NHTSA/
FMVSS 138 Tire Pressure Monitoring
Systems
Each tire, including the spare, should be
checked monthly when cold and inflated to the
inflation pressure recommended by the vehicle
manufacturer on the vehicle placard or tire infla-
tion pressure label. If your vehicle has tires of a
different size than the size indicated on the
vehicle placard or tire inflation pressure label,
you should determine the proper tire inflation pressure for those tires. As an added safety fea-
ture, your vehicle has been equipped with a tire
pressure monitoring system, TPMS, that illumi-
nates a low tire pressure telltale when one or
more of your tires are significantly underin-
flated. Accordingly, when the low tire pressure
telltale illuminates, you should stop and check
your tires as soon as possible, and inflate them
to the proper pressure. Driving on a significantly
underinflated tire causes the tire to overheat
and can lead to tire failure. Underinflation also
reduces fuel efficiency and tire tread life, and
may affect the vehicle's handling and stopping
ability. Please note that the TPMS is not a sub-
stitute for proper tire maintenance, and it is the
driver's responsibility to maintain correct tire
pressure, even if underinflation has not reached
the level to trigger illumination of the TPMS low
tire pressure telltale.
The TPMS malfunction indicator is combined
with the low tire pressure telltale. When the sys-
tem detects a malfunction, the telltale will flash
for approximately one minute and then remain
continuously illuminated. This sequence will
continue upon subsequent vehicle startups as
long as the malfunction exists. When the mal-
function indicator lights up, the system may not
be able to detect or signal low tire pressure as
intended. TPMS malfunctions may occur for a
variety of reasons, including the installation of
replacement or alternate tires or wheels on the
vehicle that prevent the TPMS from functioning
properly. Always check the TPMS malfunction
telltale after replacing one or more tires or
wheels on your vehicle to ensure that the
replacement or alternate tires and wheels allow
the TPMS to continue to function properly.
Active steering*
The concept
Active steering varies the turning angle of the
front wheels in relation to steering wheel move-
ments. It also varies the steering force required
to turn the wheels depending on the speed at
which you are driving.
Page 101 of 271
Controls
99Reference
At a glance
Driving tips
Communications
Navigation
Entertainment
Mobility
remove any debris, ice or snow. To avoid dam-
age to the lens, do not use sharp or abrasive
instruments to clean ice, snow, or dirt off the
lens.
When the windshield is cleaned with the head-
lamps on, the camera lens area is automatically
sprayed as well. Refer to page64.
Lane Departure Warning*
The concept
This system warns you from a speed of approx.
40 mph/70 km/h when the vehicle is leaving the
lane you are currently in on roads with lane limit
lines. You feel this due to a slight vibration of the
steering wheel.
The system does not warn you if you signal
before leaving the lane.
It is best to use the system on well-developed
roads and freeways.
Switching on/off
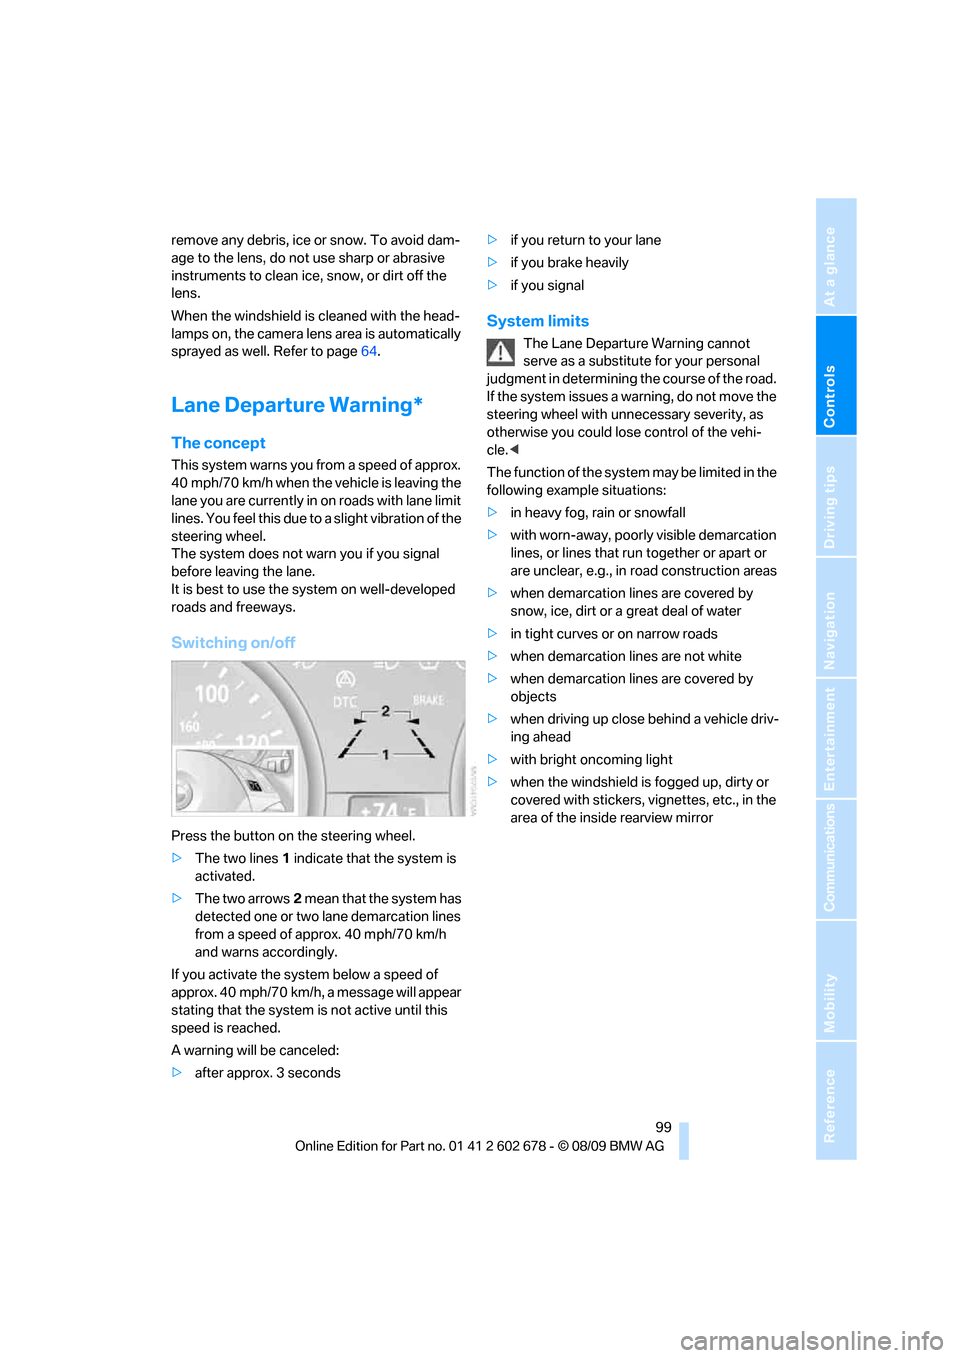
Press the button on the steering wheel.
>The two lines1 indicate that the system is
activated.
>The two arrows2 mean that the system has
detected one or two lane demarcation lines
from a speed of approx. 40 mph/70 km/h
and warns accordingly.
If you activate the system below a speed of
approx. 40 mph/70 km/h, a message will appear
stating that the system is not active until this
speed is reached.
A warning will be canceled:
>after approx. 3 seconds>if you return to your lane
>if you brake heavily
>if you signal
System limits
The Lane Departure Warning cannot
serve as a substitute for your personal
judgment in determining the course of the road.
If the system issues a warning, do not move the
steering wheel with unnecessary severity, as
otherwise you could lose control of the vehi-
cle.<
The function of the system may be limited in the
following example situations:
>in heavy fog, rain or snowfall
>with worn-away, poorly visible demarcation
lines, or lines that run together or apart or
are unclear, e.g., in road construction areas
>when demarcation lines are covered by
snow, ice, dirt or a great deal of water
>in tight curves or on narrow roads
>when demarcation lines are not white
>when demarcation lines are covered by
objects
>when driving up close behind a vehicle driv-
ing ahead
>with bright oncoming light
>when the windshield is fogged up, dirty or
covered with stickers, vignettes, etc., in the
area of the inside rearview mirror
Page 103 of 271
Controls
101Reference
At a glance
Driving tips
Communications
Navigation
Entertainment
Mobility
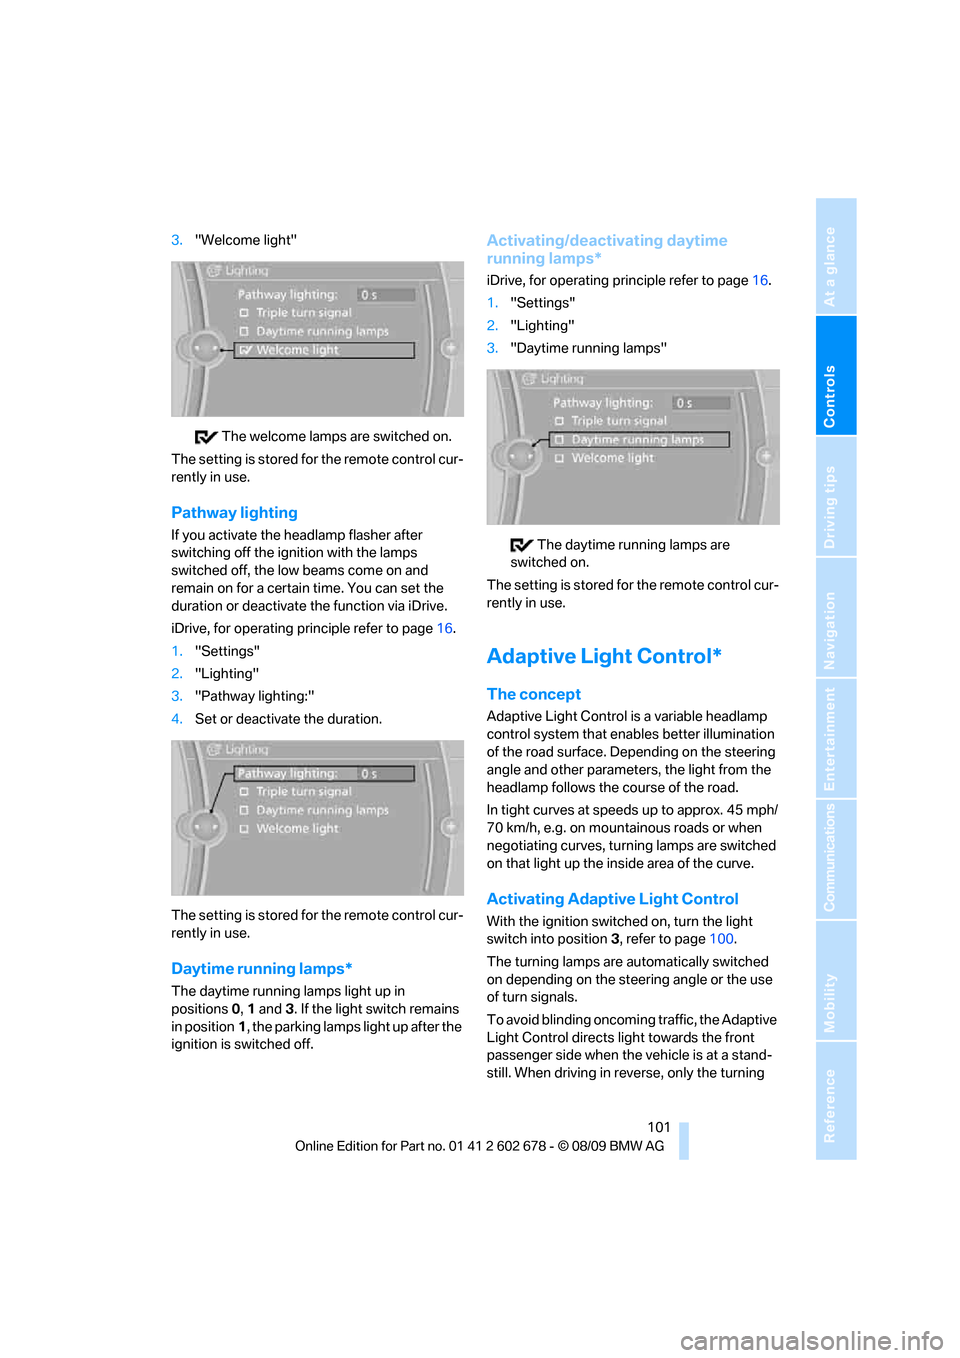
3."Welcome light"
The welcome lamps are switched on.
The setting is stored for the remote control cur-
rently in use.
Pathway lighting
If you activate the headlamp flasher after
switching off the ignition with the lamps
switched off, the low beams come on and
remain on for a certain time. You can set the
duration or deactivate the function via iDrive.
iDrive, for operating principle refer to page16.
1."Settings"
2."Lighting"
3."Pathway lighting:"
4.Set or deactivate the duration.
The setting is stored for the remote control cur-
rently in use.
Daytime running lamps*
The daytime running lamps light up in
positions0, 1 and 3. If the light switch remains
in position1, the parking lamps light up after the
ignition is switched off.
Activating/deactivating daytime
running lamps*
iDrive, for operating principle refer to page16.
1."Settings"
2."Lighting"
3."Daytime running lamps"
The daytime running lamps are
switched on.
The setting is stored for the remote control cur-
rently in use.
Adaptive Light Control*
The concept
Adaptive Light Control is a variable headlamp
control system that enables better illumination
of the road surface. Depending on the steering
angle and other parameters, the light from the
headlamp follows the course of the road.
In tight curves at speeds up to approx. 45 mph/
70 km/h, e.g. on mountainous roads or when
negotiating curves, turning lamps are switched
on that light up the inside area of the curve.
Activating Adaptive Light Control
With the ignition switched on, turn the light
switch into position 3, refer to page100.
The turning lamps are automatically switched
on depending on the steering angle or the use
of turn signals.
To avoid blinding oncoming traffic, the Adaptive
Light Control directs light towards the front
passenger side when the vehicle is at a stand-
still. When driving in reverse, only the turning
Page 104 of 271
Lamps
102 lamps are active and illuminate the outer area of
curves.
High beams/
roadside parking lamps
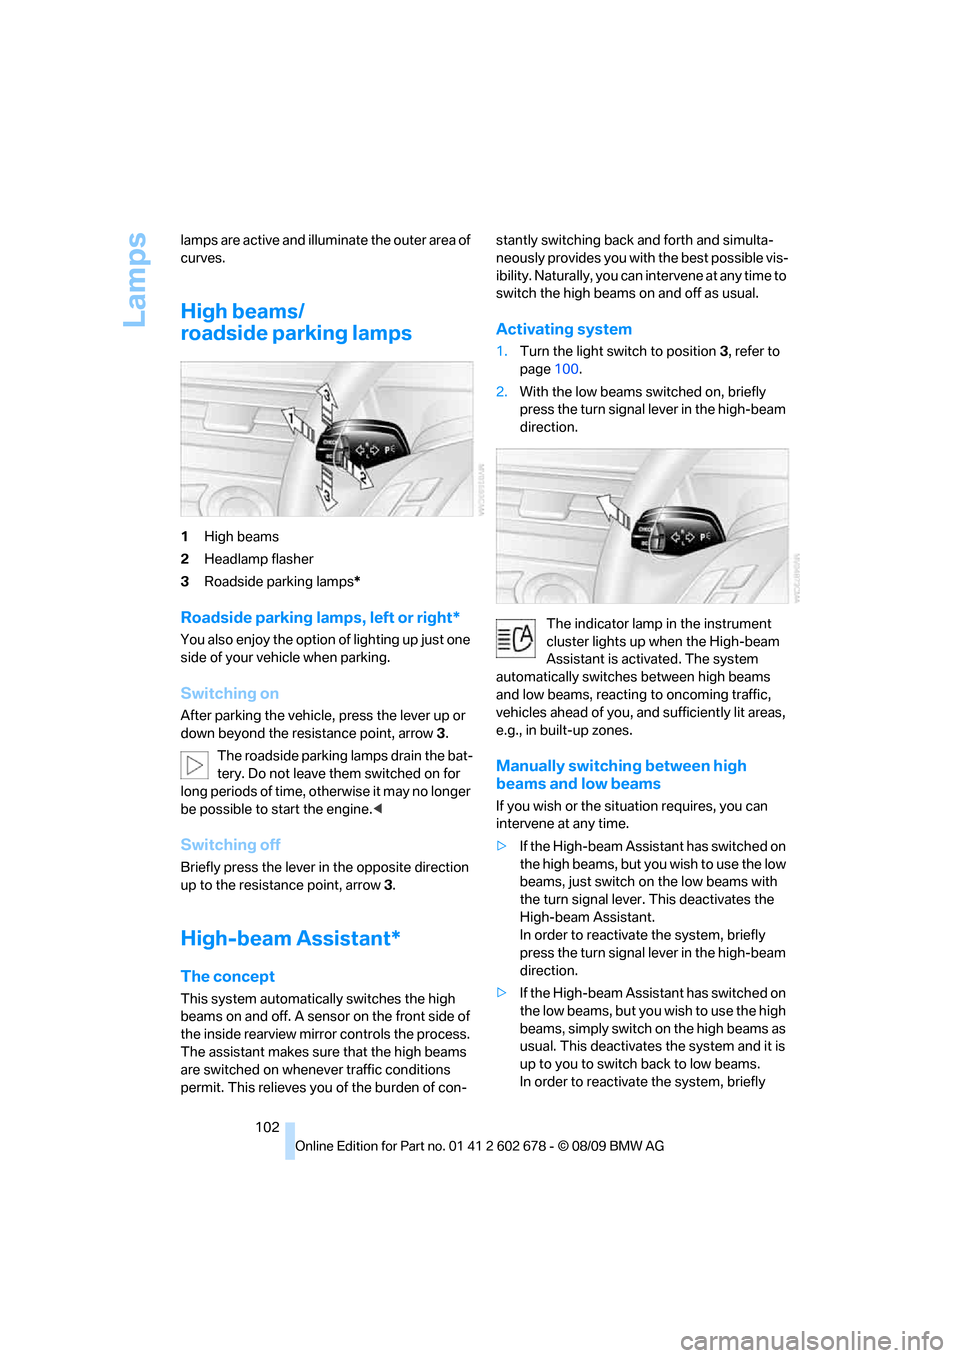
1High beams
2Headlamp flasher
3Roadside parking lamps*
Roadside parking lamps, left or right*
You also enjoy the option of lighting up just one
side of your vehicle when parking.
Switching on
After parking the vehicle, press the lever up or
down beyond the resistance point, arrow 3.
The roadside parking lamps drain the bat-
tery. Do not leave them switched on for
long periods of time, otherwise it may no longer
be possible to start the engine.<
Switching off
Briefly press the lever in the opposite direction
up to the resistance point, arrow3.
High-beam Assistant*
The concept
This system automatically switches the high
beams on and off. A sensor on the front side of
the inside rearview mirror controls the process.
The assistant makes sure that the high beams
are switched on whenever traffic conditions
permit. This relieves you of the burden of con-stantly switching back and forth and simulta-
neously provides you with the best possible vis-
ibility. Naturally, you can intervene at any time to
switch the high beams on and off as usual.
Activating system
1.Turn the light switch to position3, refer to
page100.
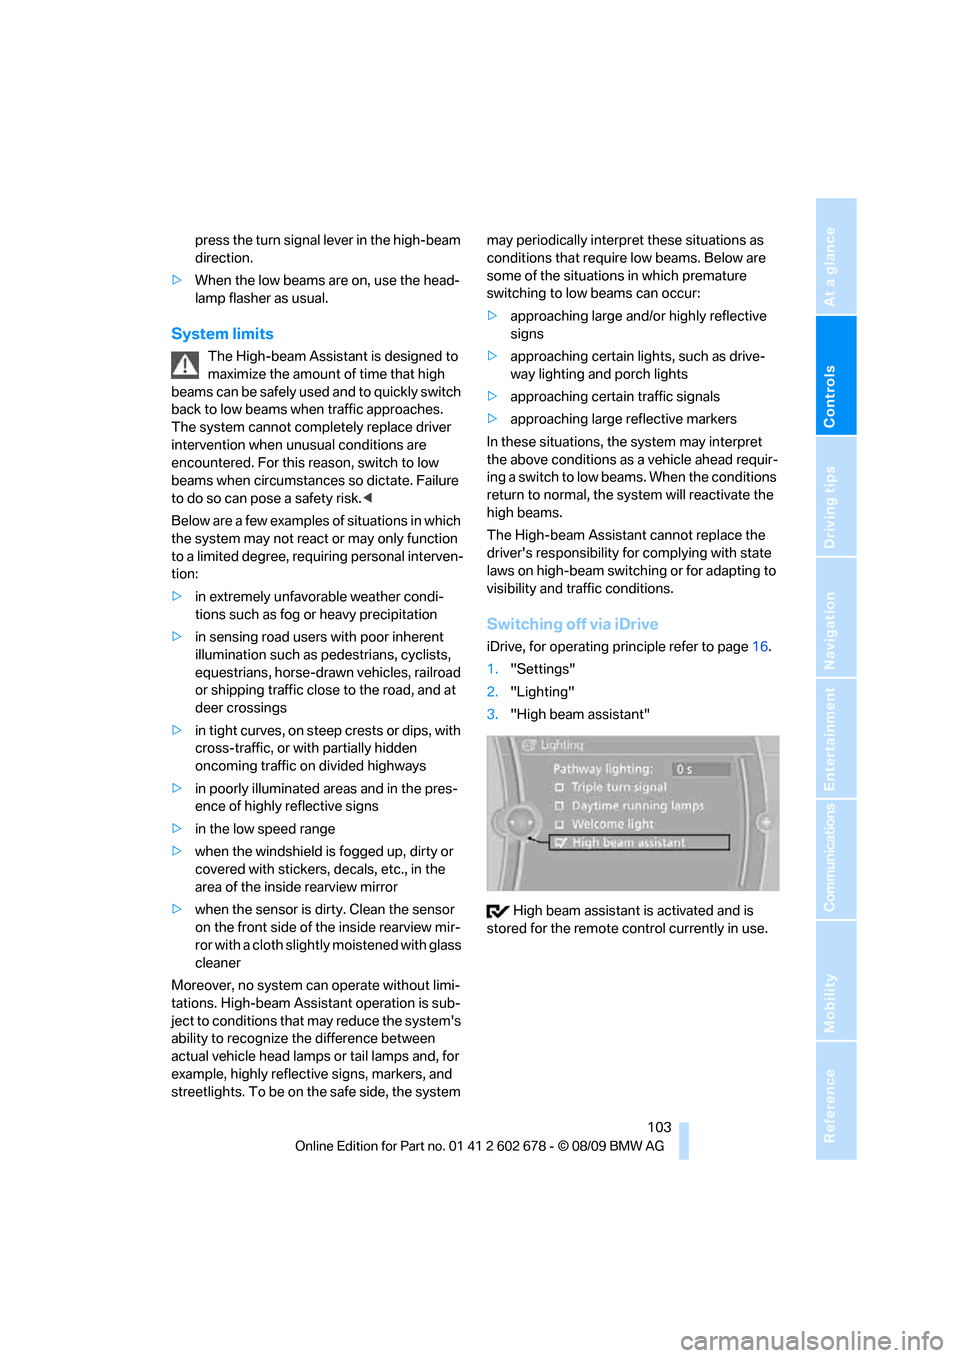
2.With the low beams switched on, briefly
press the turn signal lever in the high-beam
direction.
The indicator lamp in the instrument
cluster lights up when the High-beam
Assistant is activated. The system
automatically switches between high beams
and low beams, reacting to oncoming traffic,
vehicles ahead of you, and sufficiently lit areas,
e.g., in built-up zones.
Manually switching between high
beams and low beams
If you wish or the situation requires, you can
intervene at any time.
>If the High-beam Assistant has switched on
the high beams, but you wish to use the low
beams, just switch on the low beams with
the turn signal lever. This deactivates the
High-beam Assistant.
In order to reactivate the system, briefly
press the turn signal lever in the high-beam
direction.
>If the High-beam Assistant has switched on
the low beams, but you wish to use the high
beams, simply switch on the high beams as
usual. This deactivates the system and it is
up to you to switch back to low beams.
In order to reactivate the system, briefly
Page 105 of 271
Controls
103Reference
At a glance
Driving tips
Communications
Navigation
Entertainment
Mobility
press the turn signal lever in the high-beam
direction.
>When the low beams are on, use the head-
lamp flasher as usual.
System limits
The High-beam Assistant is designed to
maximize the amount of time that high
beams can be safely used and to quickly switch
back to low beams when traffic approaches.
The system cannot completely replace driver
intervention when unusual conditions are
encountered. For this reason, switch to low
beams when circumstances so dictate. Failure
to do so can pose a safety risk.<
Below are a few examples of situations in which
the system may not react or may only function
to a limited degree, requiring personal interven-
tion:
>in extremely unfavorable weather condi-
tions such as fog or heavy precipitation
>in sensing road users with poor inherent
illumination such as pedestrians, cyclists,
equestrians, horse-drawn vehicles, railroad
or shipping traffic close to the road, and at
deer crossings
>in tight curves, on steep crests or dips, with
cross-traffic, or with partially hidden
oncoming traffic on divided highways
>in poorly illuminated areas and in the pres-
ence of highly reflective signs
>in the low speed range
>when the windshield is fogged up, dirty or
covered with stickers, decals, etc., in the
area of the inside rearview mirror
>when the sensor is dirty. Clean the sensor
on the front side of the inside rearview mir-
ror with a cloth slightly moistened with glass
cleaner
Moreover, no system can operate without limi-
tations. High-beam Assistant operation is sub-
ject to conditions that may reduce the system's
ability to recognize the difference between
actual vehicle head lamps or tail lamps and, for
example, highly reflective signs, markers, and
streetlights. To be on the safe side, the system may periodically interpret these situations as
conditions that require low beams. Below are
some of the situations in which premature
switching to low beams can occur:
>approaching large and/or highly reflective
signs
>approaching certain lights, such as drive-
way lighting and porch lights
>approaching certain traffic signals
>approaching large reflective markers
In these situations, the system may interpret
the above conditions as a vehicle ahead requir-
ing a switch to low beams. When the conditions
return to normal, the system will reactivate the
high beams.
The High-beam Assistant cannot replace the
driver's responsibility for complying with state
laws on high-beam switching or for adapting to
visibility and traffic conditions.
Switching off via iDrive
iDrive, for operating principle refer to page16.
1."Settings"
2."Lighting"
3."High beam assistant"
High beam assistant is activated and is
stored for the remote control currently in use.
Page 155 of 271
Navigation
Entertainment
Driving tips
153Reference
At a glance
Controls
Communications
Mobility
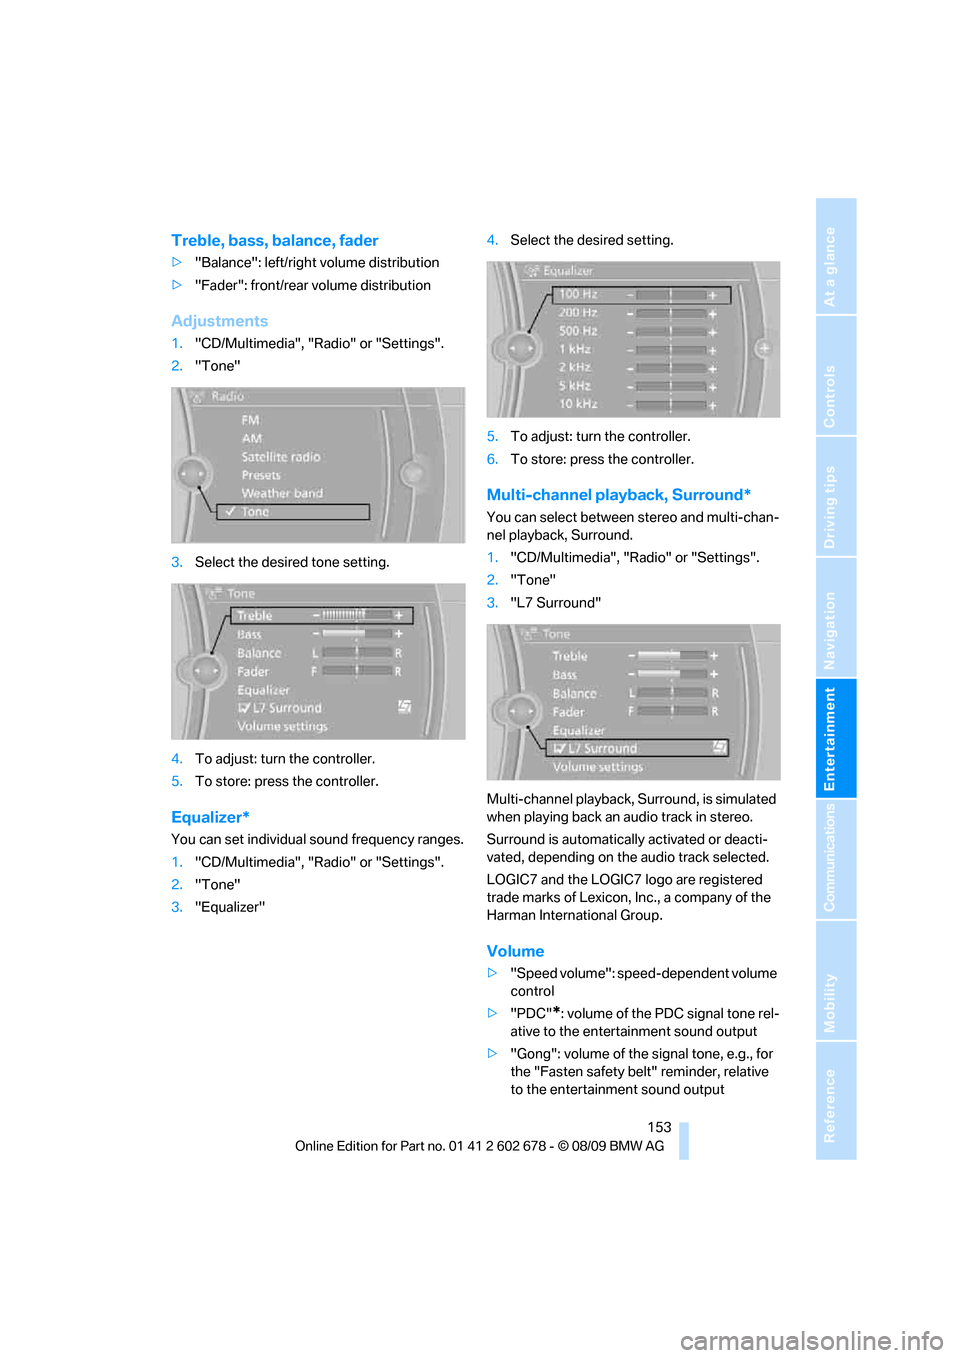
Treble, bass, balance, fader
>"Balance": left/right volume distribution
>"Fader": front/rear volume distribution
Adjustments
1."CD/Multimedia", "Radio" or "Settings".
2."Tone"
3.Select the desired tone setting.
4.To adjust: turn the controller.
5.To store: press the controller.
Equalizer*
You can set individual sound frequency ranges.
1."CD/Multimedia", "Radio" or "Settings".
2."Tone"
3."Equalizer"4.Select the desired setting.
5.To adjust: turn the controller.
6.To store: press the controller.
Multi-channel playback, Surround*
You can select between stereo and multi-chan-
nel playback, Surround.
1."CD/Multimedia", "Radio" or "Settings".
2."Tone"
3."L7 Surround"
Multi-channel playback, Surround, is simulated
when playing back an audio track in stereo.
Surround is automatically activated or deacti-
vated, depending on the audio track selected.
LOGIC7 and the LOGIC7 logo are registered
trade marks of Lexicon, Inc., a company of the
Harman International Group.
Volume
>"Speed volume": speed-dependent volume
control
>"PDC"
*: volume of the PDC signal tone rel-
ative to the entertainment sound output
>"Gong": volume of the signal tone, e.g., for
the "Fasten safety belt" reminder, relative
to the entertainment sound output
Page 188 of 271
Telephone
186 activation system supports you by making
announcements and asking questions.
>{...} Verbal instructions to use with the voice
activation system.
Requirements
The same prerequisites as for operation via
iDrive apply, refer to page181.
Voice commands
Activating voice activation system
1.Briefly press the button on the steering
wheel.
An acoustic signal indicates that you can
say commands.
2.Say the command.
Ending/canceling operation by voice
Briefly press the button on the steering
wheel orIn dialogs where text is spoken, e.g., a name
rather than a command, canceling is only possi-
ble using the button on the steering wheel.
Having possible commands read aloud
The system understands default commands
that must be spoken word for word.
You can have the possible commands spoken
by the system at any point:
The system recognizes digits from zero to nine.
You can say each digit individually or group
them into a sequence to accelerate the input.
Using alternative commands
There are often a number of commands to run a
function, for instance:
Example: Dialing phone numbers
To start the dialog:
Press the button on the steering wheel.
Setting volume of instructions
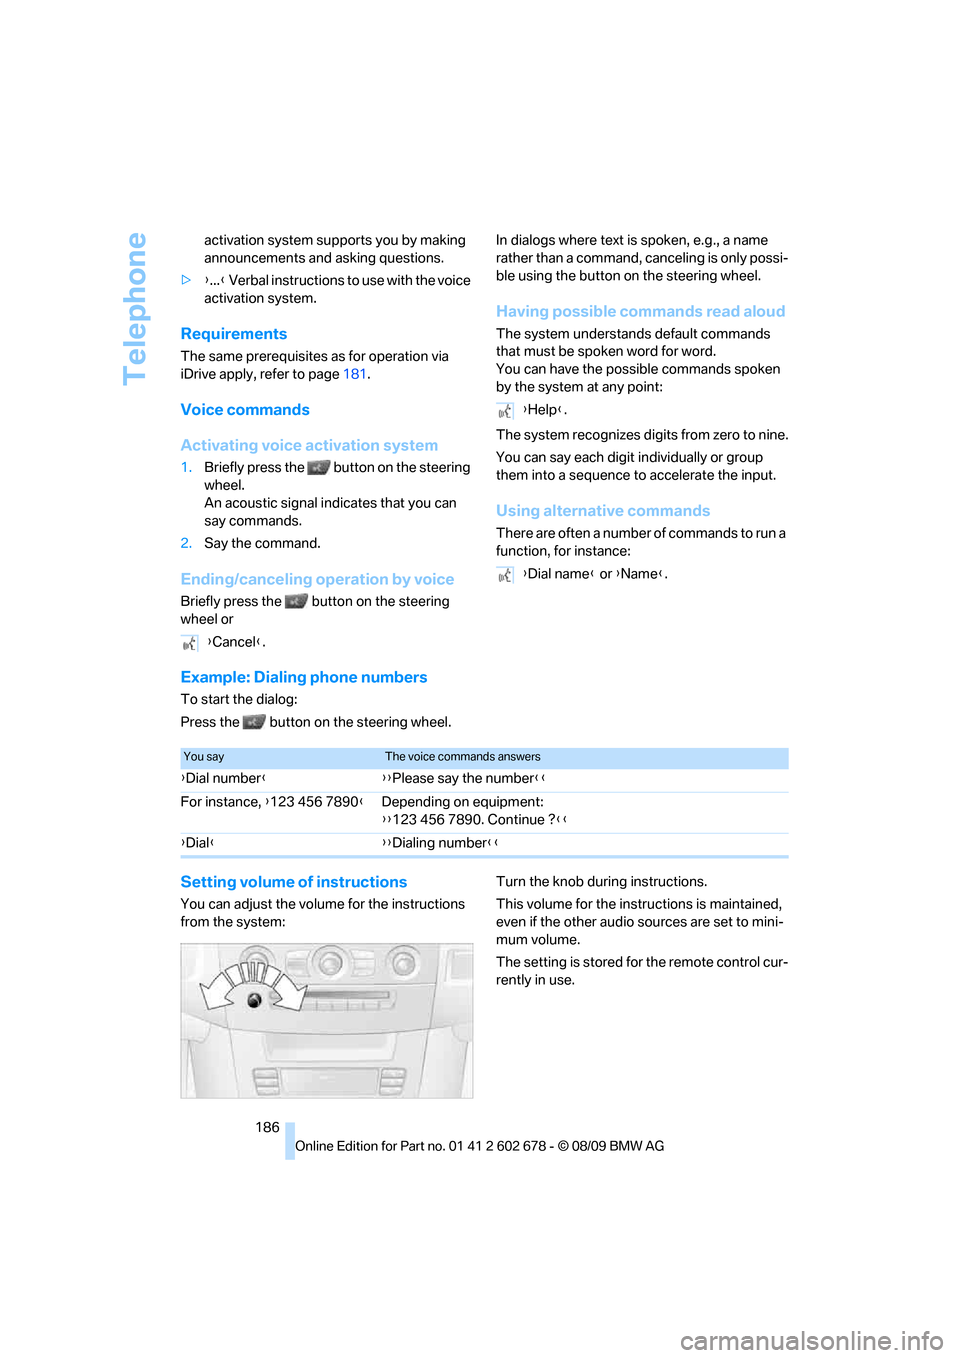
You can adjust the volume for the instructions
from the system:Turn the knob during instructions.
This volume for the instructions is maintained,
even if the other audio sources are set to mini-
mum volume.
The setting is stored for the remote control cur-
rently in use. {Cancel}.
{Help}.
{Dial name} or {Name}.
You sayThe voice commands answers
{Dial number}{{Please say the number}}
For instance, {123 456 7890}Depending on equipment:
{{123 456 7890. Continue ?}}
{Dial}{{Dialing number}}