2010 BMW 528I XDRIVE SEDAN light
[x] Cancel search: lightPage 130 of 271
Things to remember when driving
128 >Do not pile objects higher than the top edge
of the backrest.
>Sports Wagon:
Use the partition net to protect the occu-
pants, refer to page118. Make sure that
objects cannot penetrate through the parti-
tion net.
Wrap sharp-edged or pointed objects
which could strike the rear window while
driving.
Securing cargo
>Use the luggage net*, luggage straps, or
securing straps to hold down small and
lightweight luggage and cargo.
>Heavy-duty cargo straps
* for securing
larger and heavier objects are available at
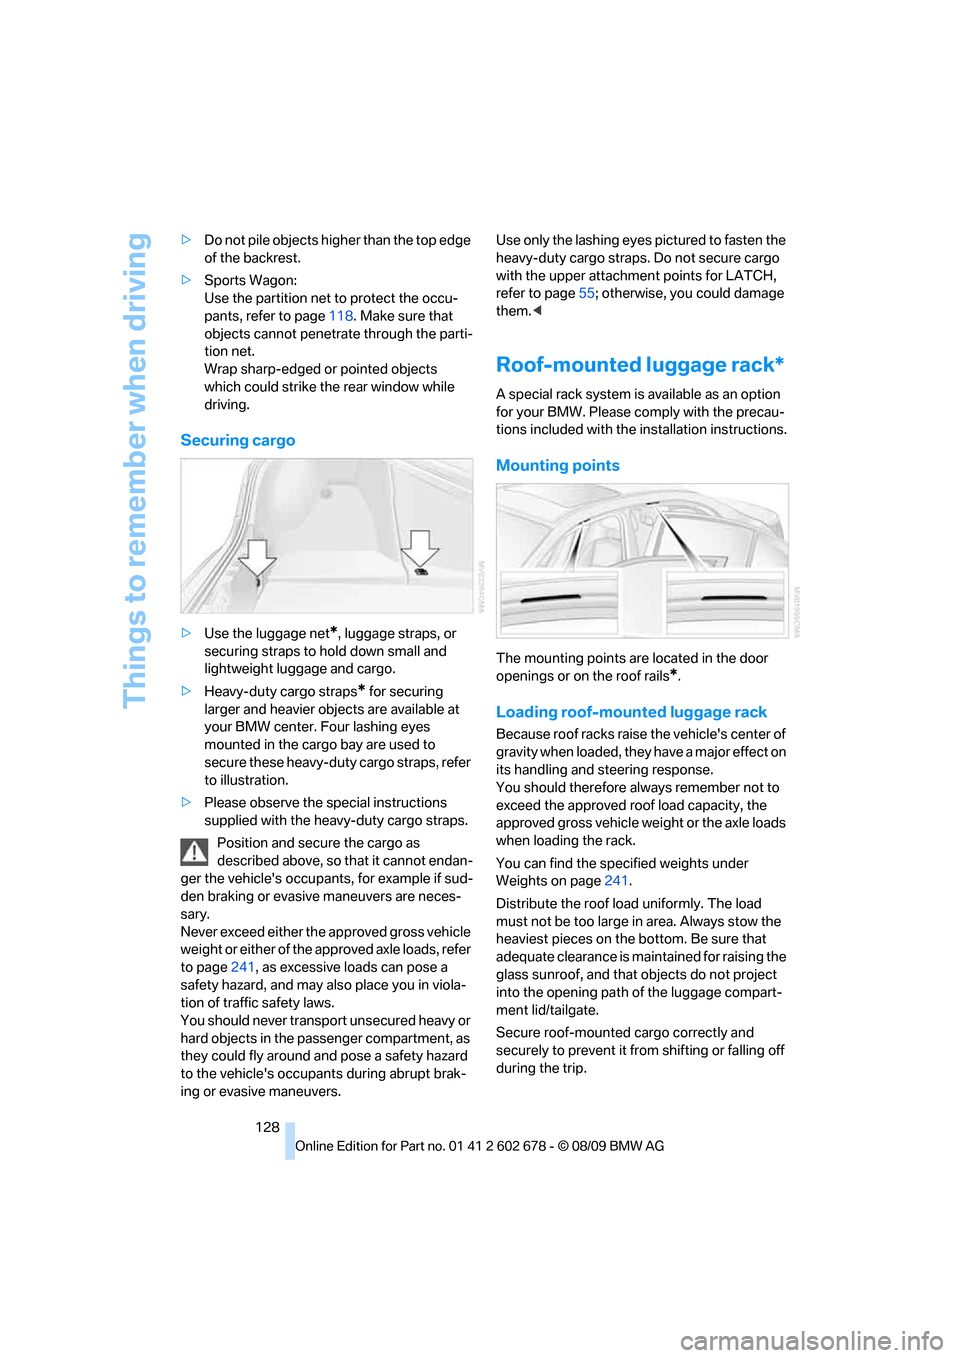
your BMW center. Four lashing eyes
mounted in the cargo bay are used to
secure these heavy-duty cargo straps, refer
to illustration.
>Please observe the special instructions
supplied with the heavy-duty cargo straps.
Position and secure the cargo as
described above, so that it cannot endan-
ger the vehicle's occupants, for example if sud-
den braking or evasive maneuvers are neces-
sary.
Never exceed either the approved gross vehicle
weight or either of the approved axle loads, refer
to page241, as excessive loads can pose a
safety hazard, and may also place you in viola-
tion of traffic safety laws.
You should never transport unsecured heavy or
hard objects in the passenger compartment, as
they could fly around and pose a safety hazard
to the vehicle's occupants during abrupt brak-
ing or evasive maneuvers.Use only the lashing eyes pictured to fasten the
heavy-duty cargo straps. Do not secure cargo
with the upper attachment points for LATCH,
refer to page55; otherwise, you could damage
them.<
Roof-mounted luggage rack*
A special rack system is available as an option
for your BMW. Please comply with the precau-
tions included with the installation instructions.
Mounting points
The mounting points are located in the door
openings or on the roof rails
*.
Loading roof-mounted luggage rack
Because roof racks raise the vehicle's center of
gravity when loaded, they have a major effect on
its handling and steering response.
You should therefore always remember not to
exceed the approved roof load capacity, the
approved gross vehicle weight or the axle loads
when loading the rack.
You can find the specified weights under
Weights on page241.
Distribute the roof load uniformly. The load
must not be too large in area. Always stow the
heaviest pieces on the bottom. Be sure that
adequate clearance is maintained for raising the
glass sunroof, and that objects do not project
into the opening path of the luggage compart-
ment lid/tailgate.
Secure roof-mounted cargo correctly and
securely to prevent it from shifting or falling off
during the trip.
Page 134 of 271
Navigation system
132
Navigation system
General information
With the help of satellites, the navigation sys-
tem is able to ascertain the precise position of
the vehicle and guide you reliably to any desti-
nation you enter.
Enter data only when the vehicle is sta-
tionary, and always give priority to the
applicable traffic regulations in the event of any
contradiction between traffic and road condi-
tions and the instructions issued by the naviga-
tion system. Failure to take to this precaution
can place you in violation of the law and put
vehicle occupants and other road users in dan-
ger.<
Navigation data
General information
Navigation data are stored in the vehicle and
can be updated.
Navigation data and authorization codes are
available from your BMW center.
Depending on the data volume, a data update
may take several hours.
>The data are updated while you are driving.
>The update is resumed automatically when
a trip is continued after an interruption.
>All functions are available during the trip.
>The data are stored in the vehicle.
>After the update, the system restarts.
>The medium that holds the navigation data
can be removed after the update is com-
pleted.
Updating the navigation data
Inserting the navigation DVD
1.Insert the navigation DVD into the DVD
player with the labeled side facing up.
2.Follow the instructions on the Control Dis-
play.3.Enter the authorization code of the naviga-
tion DVD and change the DVD if needed.
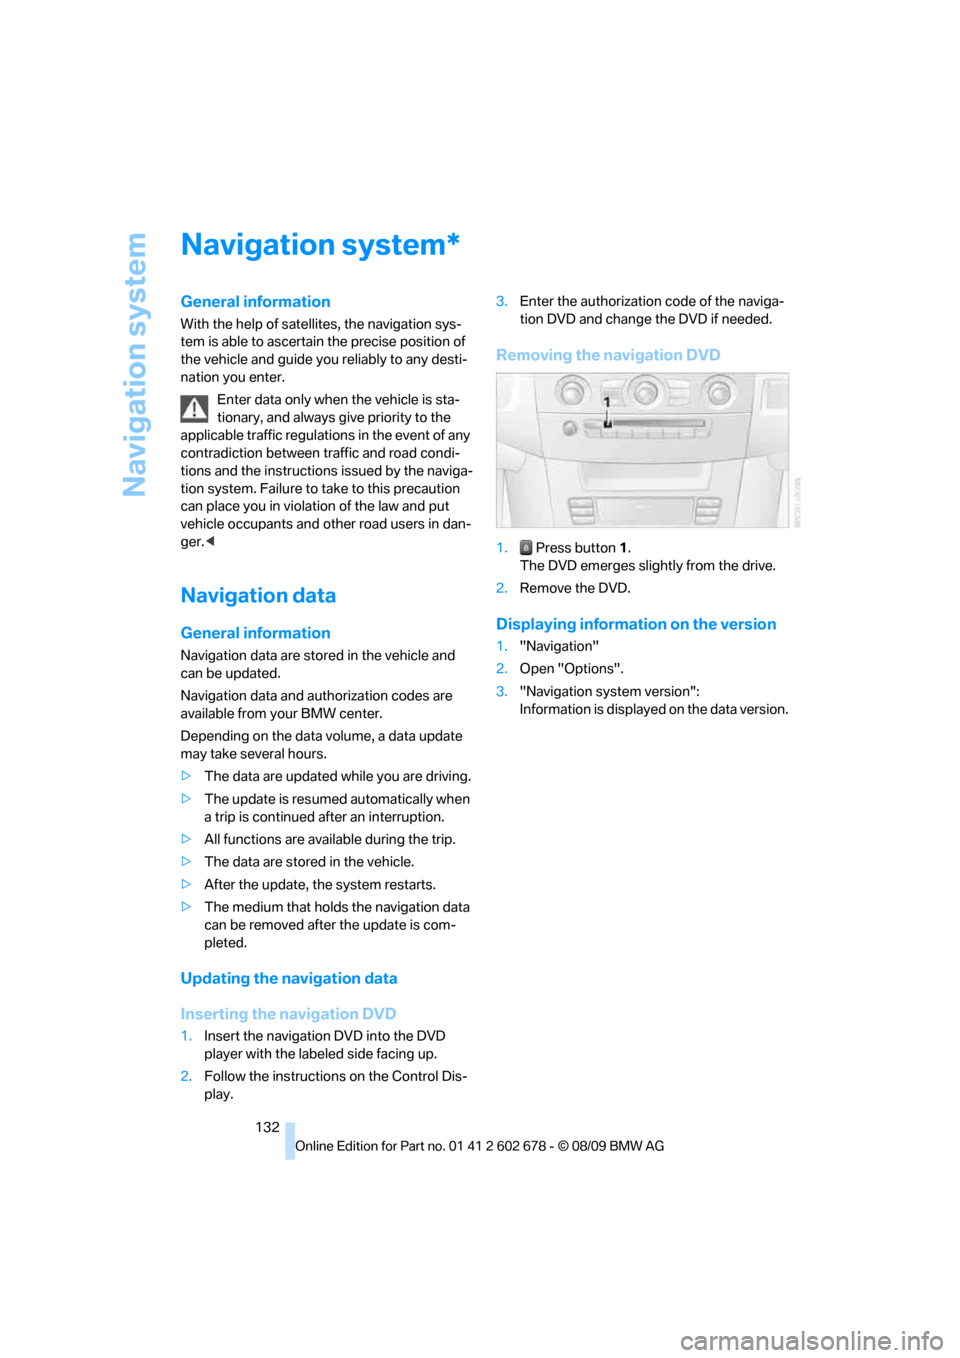
Removing the navigation DVD
1. Press button 1.
The DVD emerges slightly from the drive.
2.Remove the DVD.
Displaying information on the version
1."Navigation"
2.Open "Options".
3."Navigation system version":
Information is displayed on the data version.
*
Page 136 of 271
Destination entry
134 To delete letters:
>To delete individual letters:
Turn the controller to select , and
then press the controller.
>To delete all letters:
Turn the controller to select , and
then press the controller for an extended
period.
To enter spaces:
>Select the symbol.
The list gradually grows smaller each time
you enter a new letter.
3.Move the controller to the right.
4.Select the name of the town/city from the
list.
If there are several towns/cities with the same
name:
1.Change to the list of town/city names.
2.Highlight the town/city: a preview map is
displayed.
3.Select the town/city.
Entering the postal code
1.Select "Town/City/Postal Code" or the dis-
played town/city.
2.Select the symbol.
3.Select the digits.
4.Change to the list of postal codes and
towns/cities.
5.Highlight the postal code: a preview map is
displayed.
6.Select the postal code.
Entering street and intersection
1.Select "Street" or the displayed street.
2.Enter a street and intersection as you would
the town/city.
After the street you can also enter the intersec-
tion or the house number.
If there are several streets with the same name:1.Change to the list of street names.
2.Highlight the street: a preview map is dis-
played.
3.Select the street.
Entering a street without a destination
town/city
You can also enter a street without specifying a
town/city. In this case all streets of the entered
country are offered for selection. The related
town/city is displayed after the street name.
If a town/city has already been entered, you can
undo this entry. This may be practical if the
desired street does not exist in the entered des-
tination, because, for example, it belongs to
another part of the town/city.
1."Navigation"
2."Enter address"
3.Select "Street" or the displayed street.
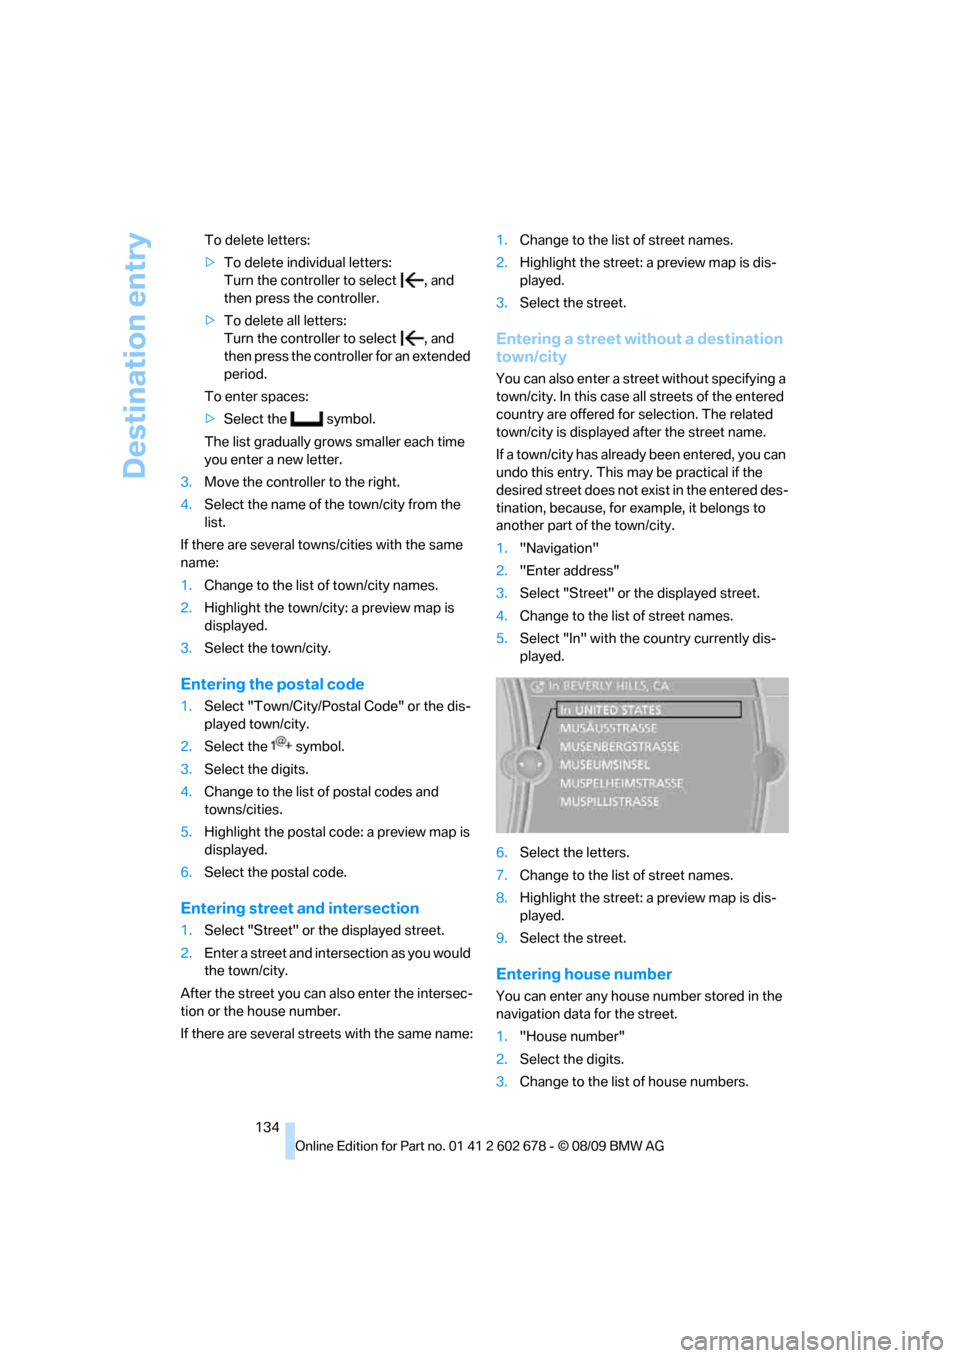
4.Change to the list of street names.
5.Select "In" with the country currently dis-
played.
6.Select the letters.
7.Change to the list of street names.
8.Highlight the street: a preview map is dis-
played.
9.Select the street.
Entering house number
You can enter any house number stored in the
navigation data for the street.
1."House number"
2.Select the digits.
3.Change to the list of house numbers.
Page 138 of 271
Destination entry
136 3.Highlight the entry.
4.Open "Options".
5."Edit in Contacts" or "Delete entry".
Using home address as destination
The home address must be stored as a destina-
tion. Refer to Specifying a contact as the home
address, page190.
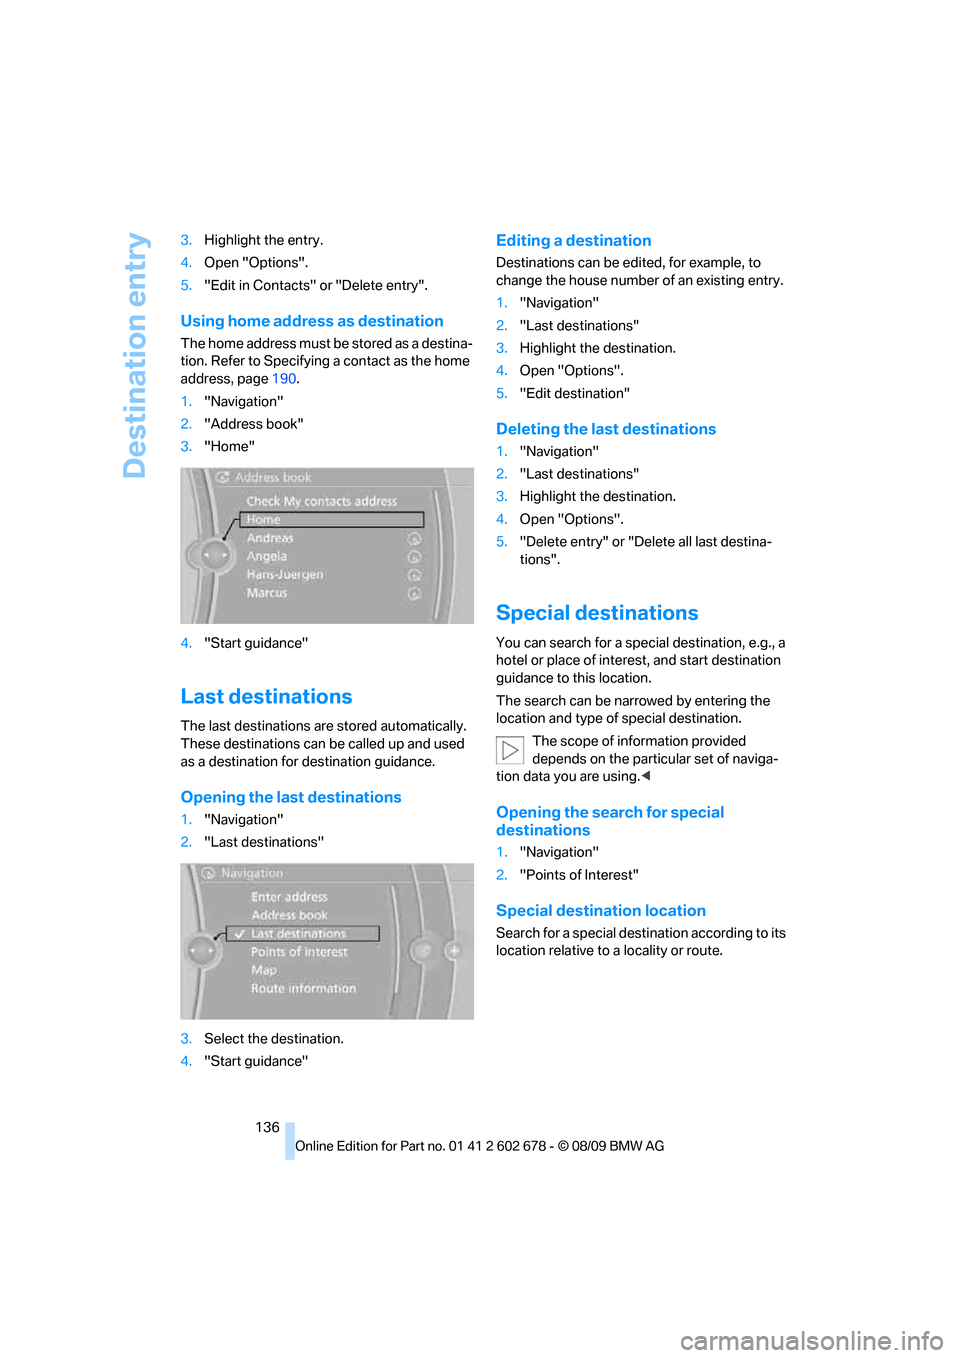
1."Navigation"
2."Address book"
3."Home"
4."Start guidance"
Last destinations
The last destinations are stored automatically.
These destinations can be called up and used
as a destination for destination guidance.
Opening the last destinations
1."Navigation"
2."Last destinations"
3.Select the destination.
4."Start guidance"
Editing a destination
Destinations can be edited, for example, to
change the house number of an existing entry.
1."Navigation"
2."Last destinations"
3.Highlight the destination.
4.Open "Options".
5."Edit destination"
Deleting the last destinations
1."Navigation"
2."Last destinations"
3.Highlight the destination.
4.Open "Options".
5."Delete entry" or "Delete all last destina-
tions".
Special destinations
You can search for a special destination, e.g., a
hotel or place of interest, and start destination
guidance to this location.
The search can be narrowed by entering the
location and type of special destination.
The scope of information provided
depends on the particular set of naviga-
tion data you are using.<
Opening the search for special
destinations
1."Navigation"
2."Points of Interest"
Special destination location
Search for a special destination according to its
location relative to a locality or route.
Page 139 of 271
Navigation
Driving tips
137Reference
At a glance
Controls
Communications
Entertainment
Mobility
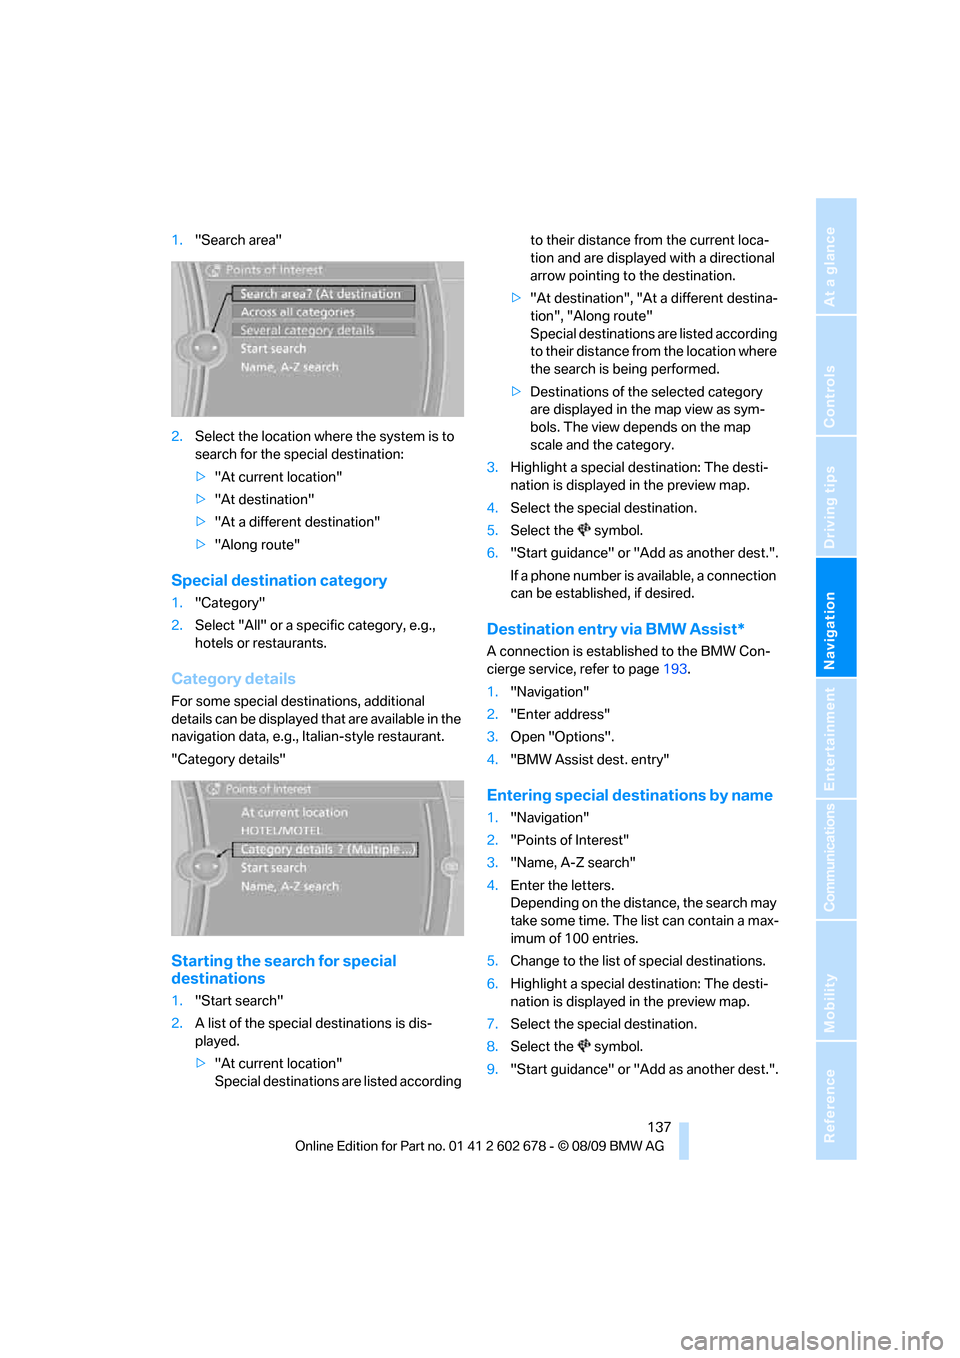
1."Search area"
2.Select the location where the system is to
search for the special destination:
>"At current location"
>"At destination"
>"At a different destination"
>"Along route"
Special destination category
1."Category"
2.Select "All" or a specific category, e.g.,
hotels or restaurants.
Category details
For some special destinations, additional
details can be displayed that are available in the
navigation data, e.g., Italian-style restaurant.
"Category details"
Starting the search for special
destinations
1."Start search"
2.A list of the special destinations is dis-
played.
>"At current location"
Special destinations are listed according to their distance from the current loca-
tion and are displayed with a directional
arrow pointing to the destination.
>"At destination", "At a different destina-
tion", "Along route"
Special destinations are listed according
to their distance from the location where
the search is being performed.
>Destinations of the selected category
are displayed in the map view as sym-
bols. The view depends on the map
scale and the category.
3.Highlight a special destination: The desti-
nation is displayed in the preview map.
4.Select the special destination.
5.Select the symbol.
6."Start guidance" or "Add as another dest.".
If a phone number is available, a connection
can be established, if desired.
Destination entry via BMW Assist*
A connection is established to the BMW Con-
cierge service, refer to page193.
1."Navigation"
2."Enter address"
3.Open "Options".
4."BMW Assist dest. entry"
Entering special destinations by name
1."Navigation"
2."Points of Interest"
3."Name, A-Z search"
4.Enter the letters.
Depending on the distance, the search may
take some time. The list can contain a max-
imum of 100 entries.
5.Change to the list of special destinations.
6.Highlight a special destination: The desti-
nation is displayed in the preview map.
7.Select the special destination.
8.Select the symbol.
9."Start guidance" or "Add as another dest.".
Page 145 of 271
Navigation
Driving tips
143Reference
At a glance
Controls
Communications
Entertainment
Mobility
Dynamic destination guidance
"Dynamic guidance" is switched on:
The route is automatically changed in the event
of traffic obstructions. The system does not
point out traffic obstructions along the original
route.
Depending on the type of road and the nature
and length of the traffic obstruction, the route
can also be calculated so that you travel
through the traffic obstruction.
1."Navigation"
2.Open "Options".
3."Dynamic guidance"
If the "Avoid highways", "Avoid toll roads"
or "Avoid ferries" route criteria are
selected, route calculation may take consider-
ably longer.<
Route
General information
Depending on the equipment in your vehicle,
different views of the route are available during
destination guidance:
>List of streets and towns/cities
>Map view, refer to page144
>Arrow view in the Head-up Display
*
Displaying a list of the streets or towns/
cities on the route
When destination guidance is started, a list of
the streets and towns/cities on the route is dis-
played. The driving distances and traffic bulle-
tins are displayed for each route section.
1."Navigation"
2."Route information"
3.Highlight a section.
The section is displayed in the preview map.
Bypassing a section of the route
During destination guidance, you can revise the
navigation system's route recommendations to
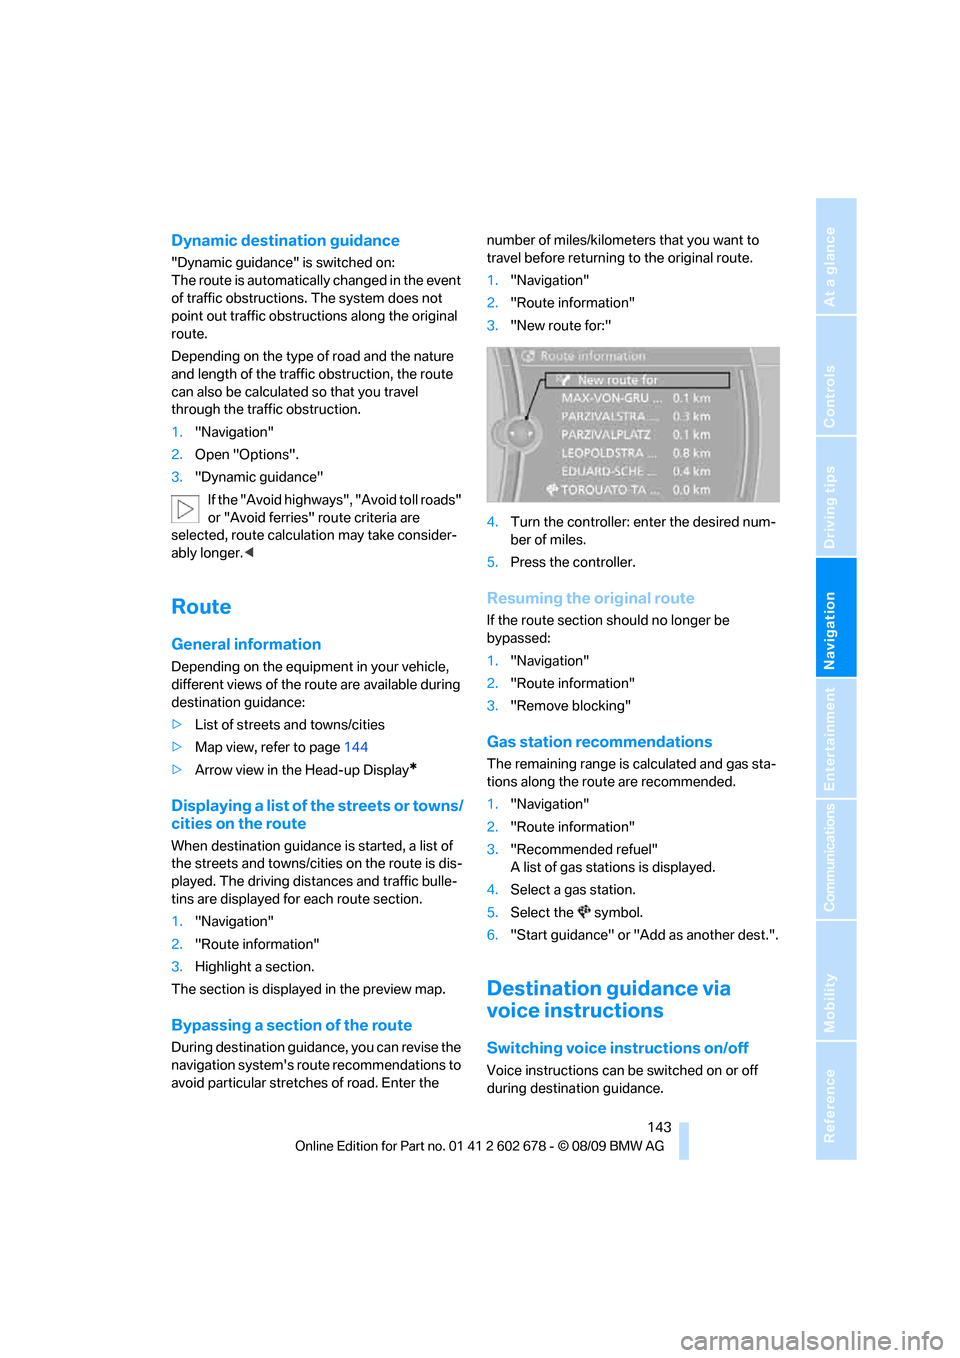
avoid particular stretches of road. Enter the number of miles/kilometers that you want to
travel before returning to the original route.
1."Navigation"
2."Route information"
3."New route for:"
4.Turn the controller: enter the desired num-
ber of miles.
5.Press the controller.
Resuming the original route
If the route section should no longer be
bypassed:
1."Navigation"
2."Route information"
3."Remove blocking"
Gas station recommendations
The remaining range is calculated and gas sta-
tions along the route are recommended.
1."Navigation"
2."Route information"
3."Recommended refuel"
A list of gas stations is displayed.
4.Select a gas station.
5.Select the symbol.
6."Start guidance" or "Add as another dest.".
Destination guidance via
voice instructions
Switching voice instructions on/off
Voice instructions can be switched on or off
during destination guidance.
Page 146 of 271
Destination guidance
144 1."Navigation"
2."Map"
3. Select the symbol.
For rapid access, the feature can be stored on a
programmable memory key, refer to page20.
Repeating a voice instruction
1."Navigation"
2."Map"
3. Highlight the symbol.
4.Press the controller twice.
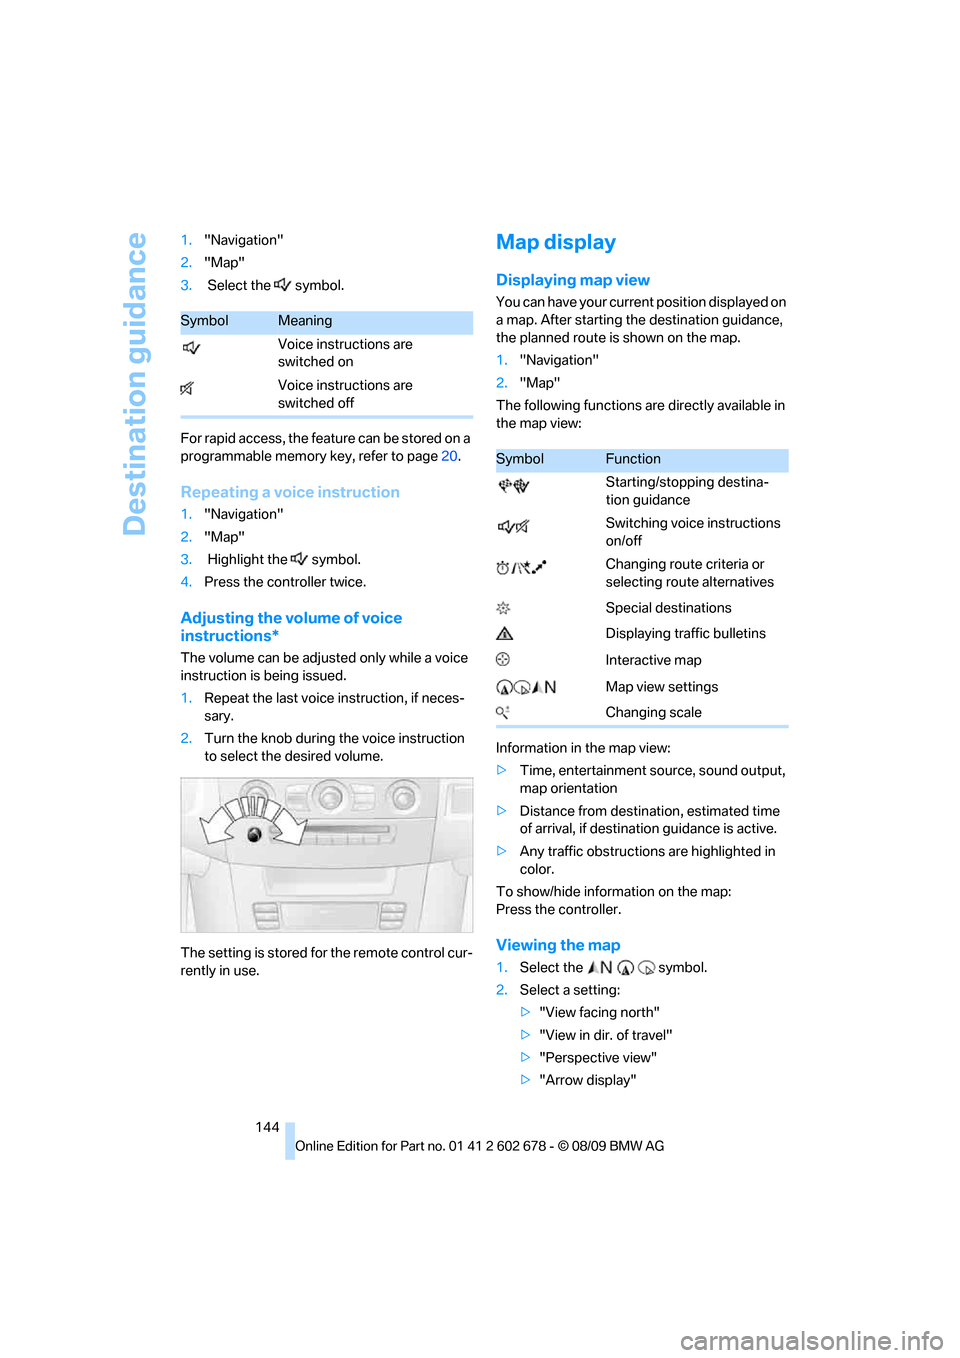
Adjusting the volume of voice
instructions*
The volume can be adjusted only while a voice
instruction is being issued.
1.Repeat the last voice instruction, if neces-
sary.
2.Turn the knob during the voice instruction
to select the desired volume.
The setting is stored for the remote control cur-
rently in use.
Map display
Displaying map view
You can have your current position displayed on
a map. After starting the destination guidance,
the planned route is shown on the map.
1."Navigation"
2."Map"
The following functions are directly available in
the map view:
Information in the map view:
>Time, entertainment source, sound output,
map orientation
>Distance from destination, estimated time
of arrival, if destination guidance is active.
>Any traffic obstructions are highlighted in
color.
To show/hide information on the map:
Press the controller.
Viewing the map
1.Select the symbol.
2.Select a setting:
>"View facing north"
>"View in dir. of travel"
>"Perspective view"
>"Arrow display"
SymbolMeaning
Voice instructions are
switched on
Voice instructions are
switched off
SymbolFunction
Starting/stopping destina-
tion guidance
Switching voice instructions
on/off
Changing route criteria or
selecting route alternatives
Special destinations
Displaying traffic bulletins
Interactive map
Map view settings
Changing scale
Page 147 of 271
Navigation
Driving tips
145Reference
At a glance
Controls
Communications
Entertainment
Mobility
3.Press the controller.
Changing the map section
Select the interactive map.
>To shift the map: move the controller in the
required direction.
>To shift the map diagonally: move the con-
troller in the required direction and turn it.
Changing scale
1.Select the symbol.
2.Turn the controller to adjust the scale.
Automatic scaling of the map
In the map view facing north, turn the controller
in any direction until AUTO is displayed as the
map scale.
The map shows the entire range from your loca-
tion to the destination.
Settings for the map view
The map is shown on the Control Display.
1.Open "Options".
2."Settings"
3.Set the optimized map view.
>"Day/night mode"
Select and create the necessary settings
depending on the light conditions. When
the traffic bulletin map is activated, this
setting is disregarded.
>"Satellite images"
Satellite images
* are displayed depend-
ing on availability and resolution.
>"Perspective view in 3D"
Displays a spatial view. Prominent areas
that are contained in the navigation data
are displayed on the map in 3D.
>"Traffic Info map"
The map is optimized for displaying traf-
fic bulletins. Symbols for the special
destinations are no longer displayed.
Map view for the split screen display
The map view for the split screen can be
selected separately from the main screen.1.Open "Options".
2."Split screen"
The split screen is switched on.
3.Move the controller to the right repeatedly
until the split screen content is selected.
4.Select the map view:
>"Arrow display"
>"Map facing north"
>"Map direction of travel"
>"Map view with perspective"
>"Exit ramp view"
Changing scale
1.Move the controller to the right until the
split screen is selected.
2.turn the controller.
Traffic information*
You can display the traffic bulletins from radio
stations that broadcast the TMC (Traffic Mes-
sage Channel) of a traffic information service.
This information from the traffic information
service is continuously updated on the basis of
measurement data from traffic control centers
and information on traffic congestion.
During destination guidance, traffic bulletins
that are relevant to areas along the route are
automatically displayed and taken into account
in the route planning. You can open all traffic
bulletins manually via iDrive.
The traffic bulletins are shown in the map view.
Real Time Traffic Information End-User
Provisions
Certain BMW models equipped with navigation
have the capability to display real-time traffic
information. If your system has this capability
the following additional terms and conditions
apply:
An End-User shall no longer have the right to
use the Traffic Data in the event that the End-
User is in material breach of the terms and con-
ditions contained herein.