2010 BMW 528I XDRIVE SEDAN tow
[x] Cancel search: towPage 119 of 271
Controls
117Reference
At a glance
Driving tips
Communications
Navigation
Entertainment
Mobility
ing braking or evasive maneuvers and endanger
the vehicle occupants.<
2.Release the latch plate from the bracket on
the rear window shelf and insert it into the
buckle of the center safety belt. Make sure
the latch plate audibly engages.
The lashing eyes in the cargo bay provide you
with a way to attach cargo-bay nets
* or luggage
straps for securing suitcases and luggage, refer
to page128.
Sports Wagon: cargo bay
Luggage compartment roller cover
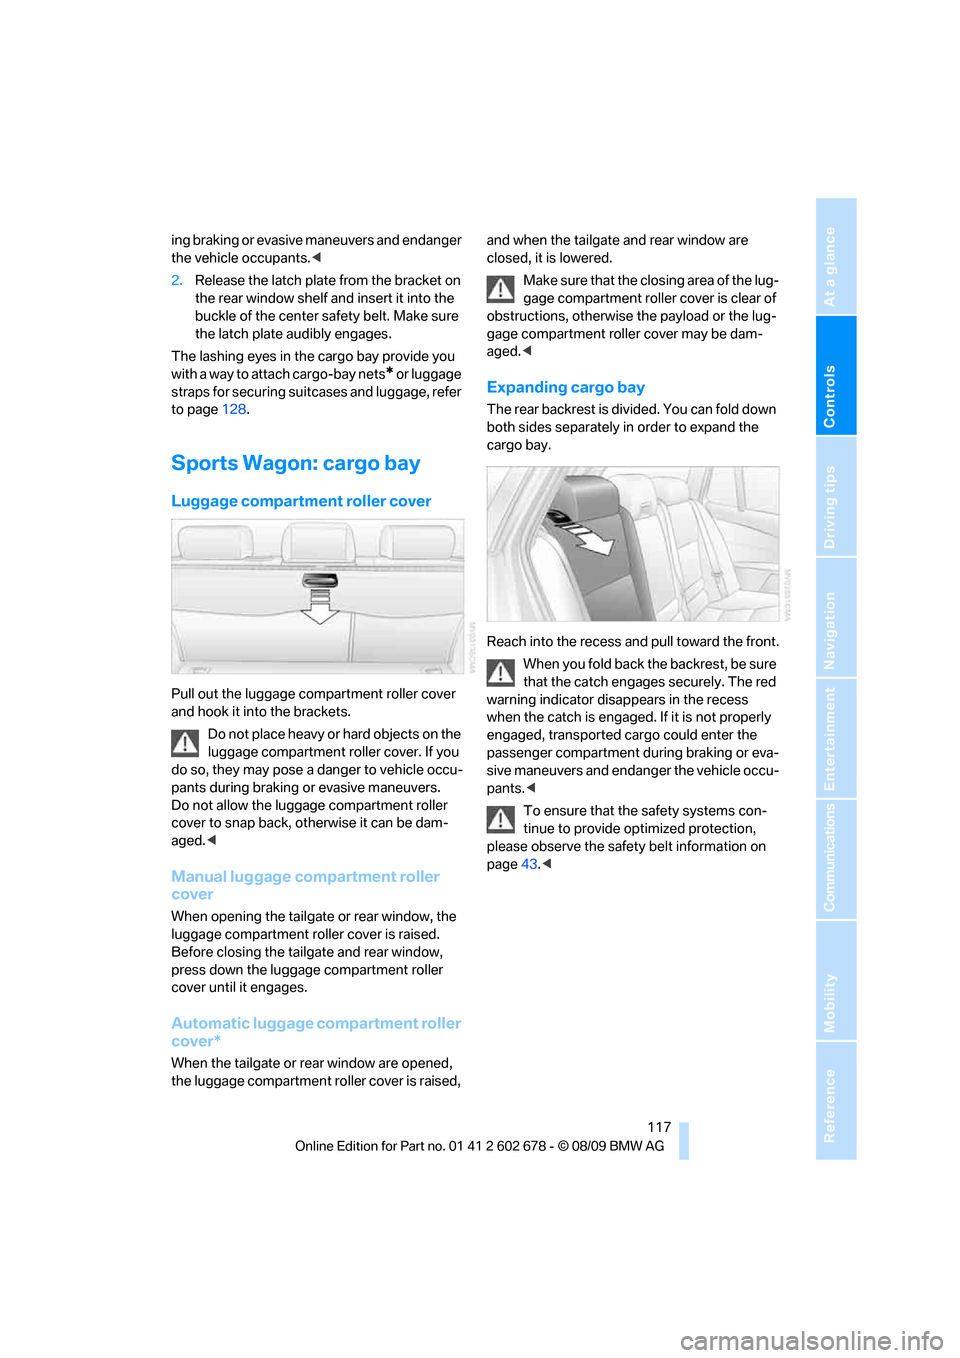
Pull out the luggage compartment roller cover
and hook it into the brackets.
Do not place heavy or hard objects on the
luggage compartment roller cover. If you
do so, they may pose a danger to vehicle occu-
pants during braking or evasive maneuvers.
Do not allow the luggage compartment roller
cover to snap back, otherwise it can be dam-
aged.<
Manual luggage compartment roller
cover
When opening the tailgate or rear window, the
luggage compartment roller cover is raised.
Before closing the tailgate and rear window,
press down the luggage compartment roller
cover until it engages.
Automatic luggage compartment roller
cover*
When the tailgate or rear window are opened,
the luggage compartment roller cover is raised, and when the tailgate and rear window are
closed, it is lowered.
Make sure that the closing area of the lug-
gage compartment roller cover is clear of
obstructions, otherwise the payload or the lug-
gage compartment roller cover may be dam-
aged.<
Expanding cargo bay
The rear backrest is divided. You can fold down
both sides separately in order to expand the
cargo bay.
Reach into the recess and pull toward the front.
When you fold back the backrest, be sure
that the catch engages securely. The red
warning indicator disappears in the recess
when the catch is engaged. If it is not properly
engaged, transported cargo could enter the
passenger compartment during braking or eva-
sive maneuvers and endanger the vehicle occu-
pants.<
To ensure that the safety systems con-
tinue to provide optimized protection,
please observe the safety belt information on
page43.<
Page 121 of 271
Controls
119Reference
At a glance
Driving tips
Communications
Navigation
Entertainment
Mobility
The partitions in the compartment can be rear-
ranged.
Folding up spare tire cover
1.Swing up the cover.
2.Detach the hook from the bracket and hook
into the floor panel flap.
Before swinging down, return the hook to its
original position.
Storage area loading options*
Retaining straps
You can unhook the right-hand retaining strap,
e.g., to open the side panel. To unhook at the
rear end, pull downward; to hook in, press it into
the opening. In addition, it can also be secured
in the center. This makes it possible to secure
objects of different sizes.
Hooks
Two hooks can be used to secure smaller
objects.
Press at bottom and fold out until they lock.
Compartments in floor
Front compartment:
To open the flap, pull upward on the handle.
To close the flap, press downward until it locks.
Rear compartment:
To open, reach into the recess and swing up the
handle.
The rear flap can be locked.
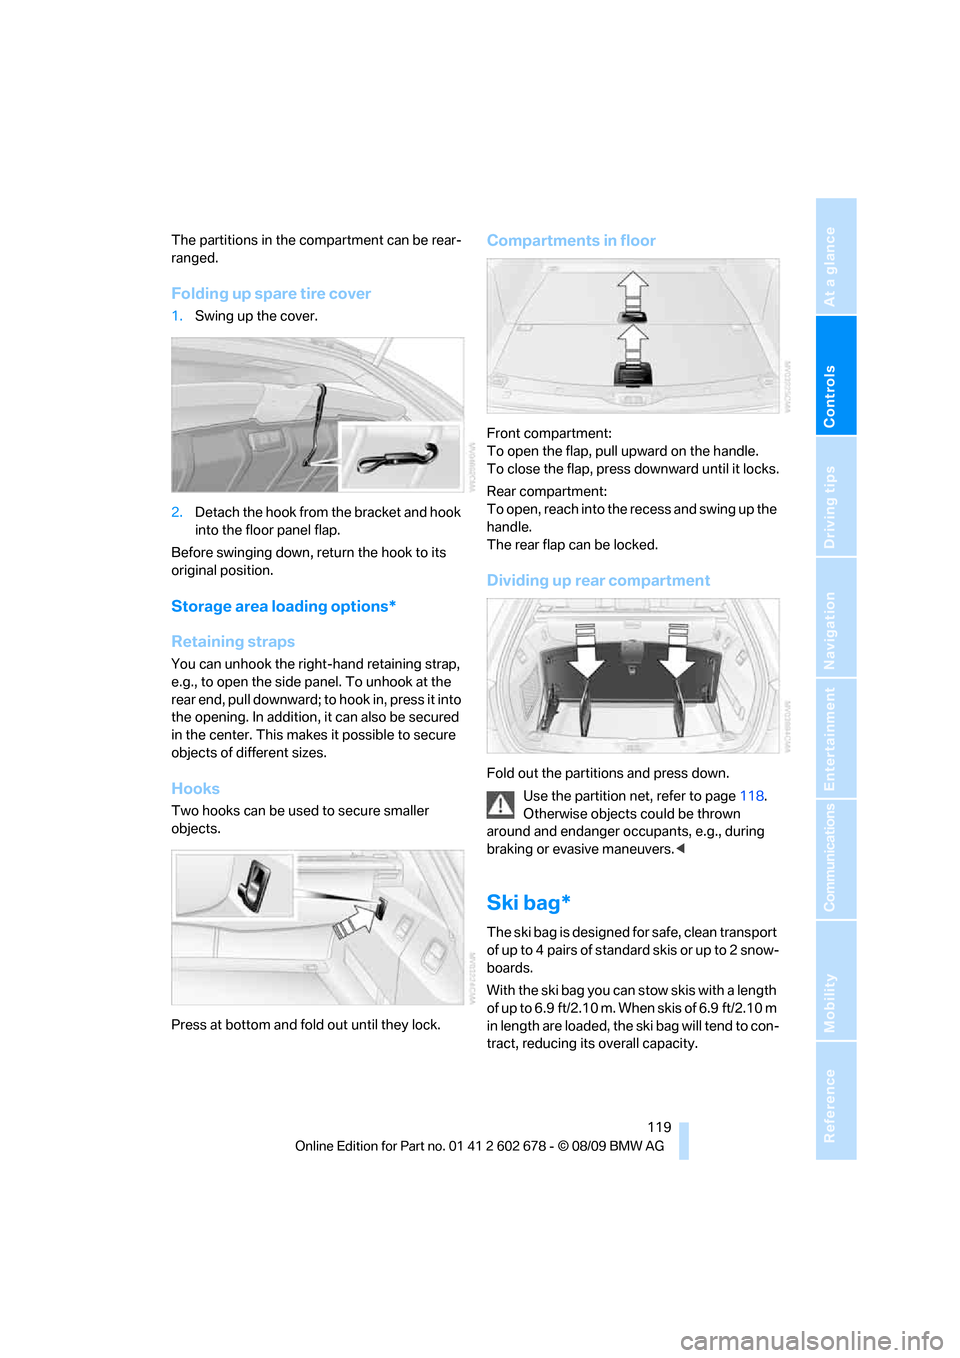
Dividing up rear compartment
Fold out the partitions and press down.
Use the partition net, refer to page118.
Otherwise objects could be thrown
around and endanger occupants, e.g., during
braking or evasive maneuvers.<
Ski bag*
The ski bag is designed for safe, clean transport
of up to 4 pa irs of s tandard s kis or up to 2 snow-
boards.
With the ski bag you can stow skis with a length
o f u p t o 6 . 9 f t / 2 . 1 0 m . W h e n s k i s o f 6 . 9 f t / 2 . 1 0 m
in length are loaded, the ski bag will tend to con-
tract, reducing its overall capacity.
Page 122 of 271
Practical interior accessories
120
Loading
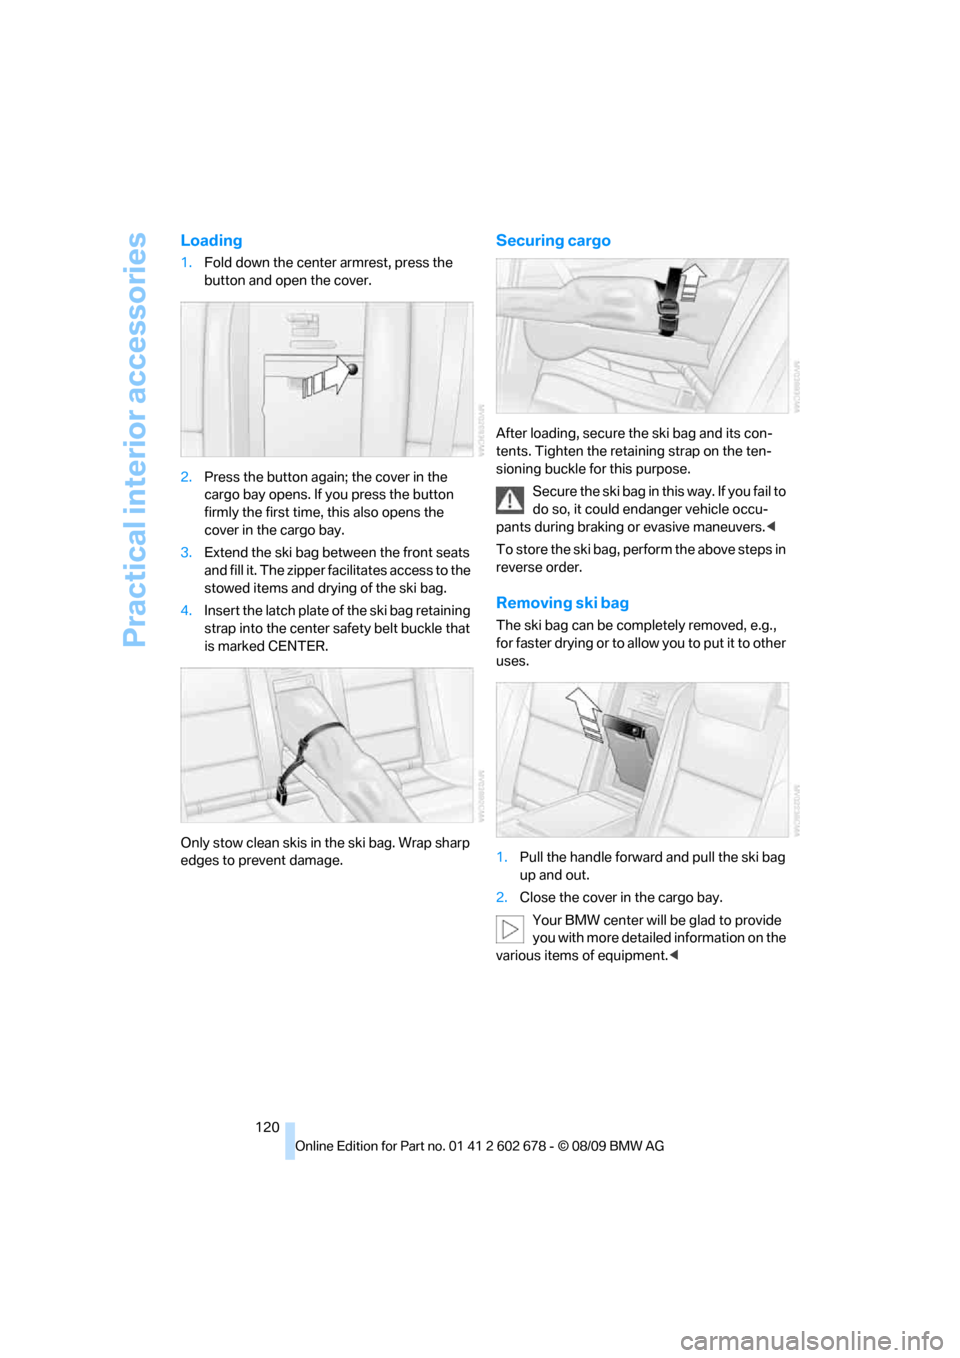
1.Fold down the center armrest, press the
button and open the cover.
2.Press the button again; the cover in the
cargo bay opens. If you press the button
firmly the first time, this also opens the
cover in the cargo bay.
3.Extend the ski bag between the front seats
and fill it. The zipper facilitates access to the
stowed items and drying of the ski bag.
4.Insert the latch plate of the ski bag retaining
strap into the center safety belt buckle that
is marked CENTER.
Only stow clean skis in the ski bag. Wrap sharp
edges to prevent damage.
Securing cargo
After loading, secure the ski bag and its con-
tents. Tighten the retaining strap on the ten-
sioning buckle for this purpose.
Secure the ski bag in this way. If you fail to
do so, it could endanger vehicle occu-
pants during braking or evasive maneuvers.<
To store the ski bag, perform the above steps in
reverse order.
Removing ski bag
The ski bag can be completely removed, e.g.,
for faster drying or to allow you to put it to other
uses.
1.Pull the handle forward and pull the ski bag
up and out.
2.Close the cover in the cargo bay.
Your BMW center will be glad to provide
you with more detailed information on the
various items of equipment.<
Page 129 of 271
Driving tips
127Reference
At a glance
Controls
Communications
Navigation
Entertainment
Mobility
heating and increases the rate at which damage
develops inside the tires. The ultimate result
can assume the form of a sudden blow out.<
Make sure that no fluids leak in the cargo
bay; otherwise the vehicle could be dam-
aged.<
Determining loading limit
1.Locate the following statement on your
vehicle's placard
*:
The combined weight of occupants
and cargo should never exceed
XXX lbs. or YYY kg, as otherwise the vehicle
may be damaged and unstable driving con-
ditions may result.<
2.Determine the combined weight of the
driver and passengers that will be riding in
your vehicle.
3.Subtract the combined weight of the driver
and passengers from XXX lbs. or YYY kg.
4.The resulting figure equals the available
amount of cargo and luggage load capacity.
For example, if the XXX amount equals
1,400 lbs. and there will be five 150-lb. pas-
sengers in your vehicle, the amount of avail-
able cargo and luggage load capacity is
650 lbs.:
1,400 lbs. minus 750 lbs. = 650 lbs.
5.Determine the combined weight of luggage
and cargo being loaded on the vehicle. That
weight may not safely exceed the available
cargo and luggage load capacity calculated
in step 4.
6.If your vehicle will be towing a trailer, part of
the load from your trailer will be transferred
to your vehicle. Consult the manual for
transporting a trailer to determine how this may reduce the available cargo and luggage
load capacity of your vehicle.
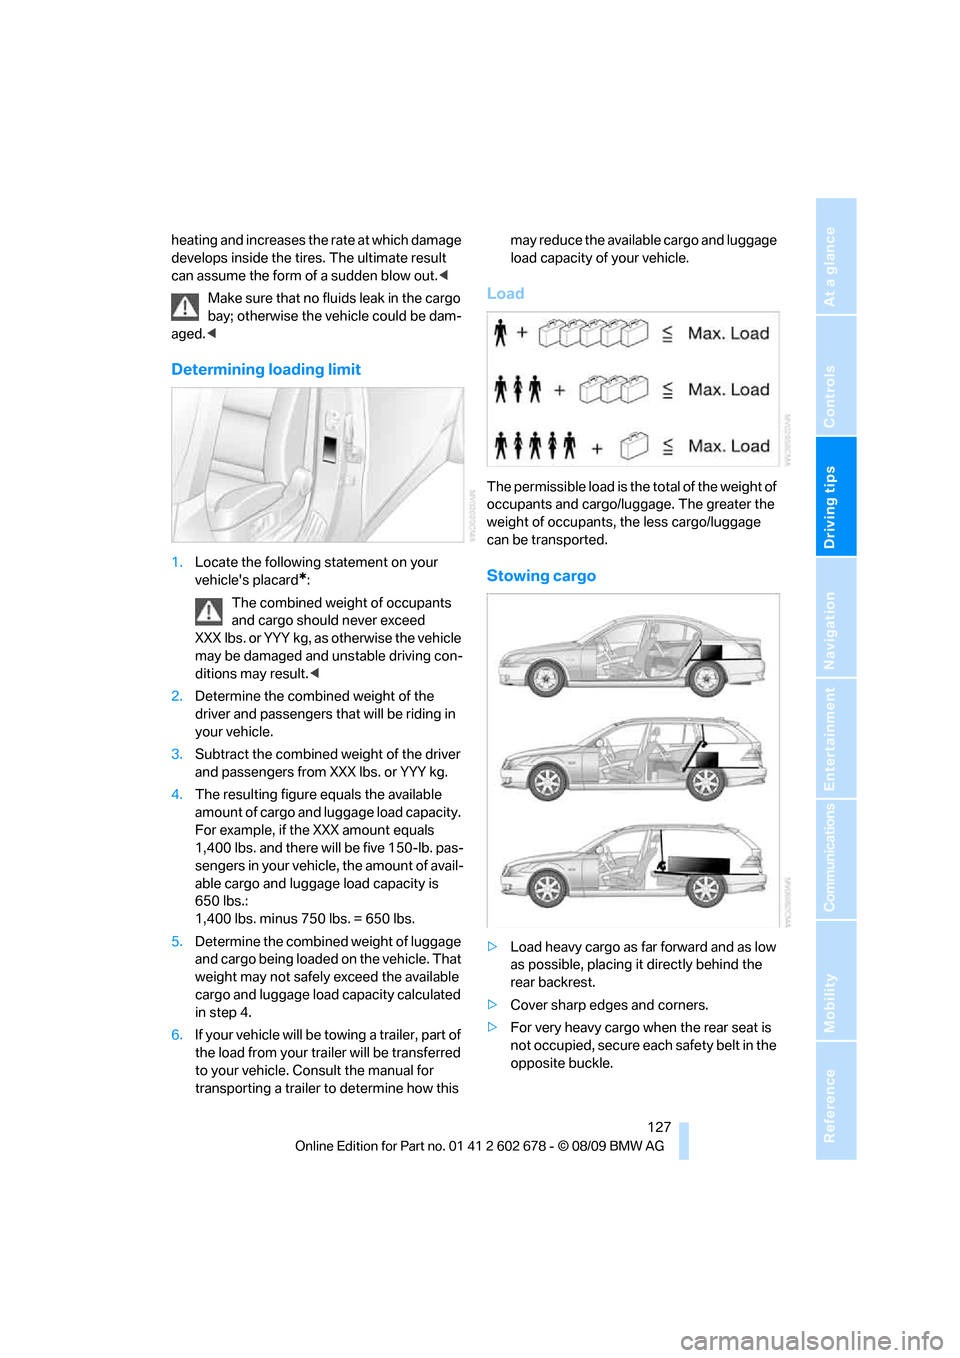
Load
The permissible load is the total of the weight of
occupants and cargo/luggage. The greater the
weight of occupants, the less cargo/luggage
can be transported.
Stowing cargo
>Load heavy cargo as far forward and as low
as possible, placing it directly behind the
rear backrest.
>Cover sharp edges and corners.
>For very heavy cargo when the rear seat is
not occupied, secure each safety belt in the
opposite buckle.
Page 130 of 271
Things to remember when driving
128 >Do not pile objects higher than the top edge
of the backrest.
>Sports Wagon:
Use the partition net to protect the occu-
pants, refer to page118. Make sure that
objects cannot penetrate through the parti-
tion net.
Wrap sharp-edged or pointed objects
which could strike the rear window while
driving.
Securing cargo
>Use the luggage net*, luggage straps, or
securing straps to hold down small and
lightweight luggage and cargo.
>Heavy-duty cargo straps
* for securing
larger and heavier objects are available at
your BMW center. Four lashing eyes
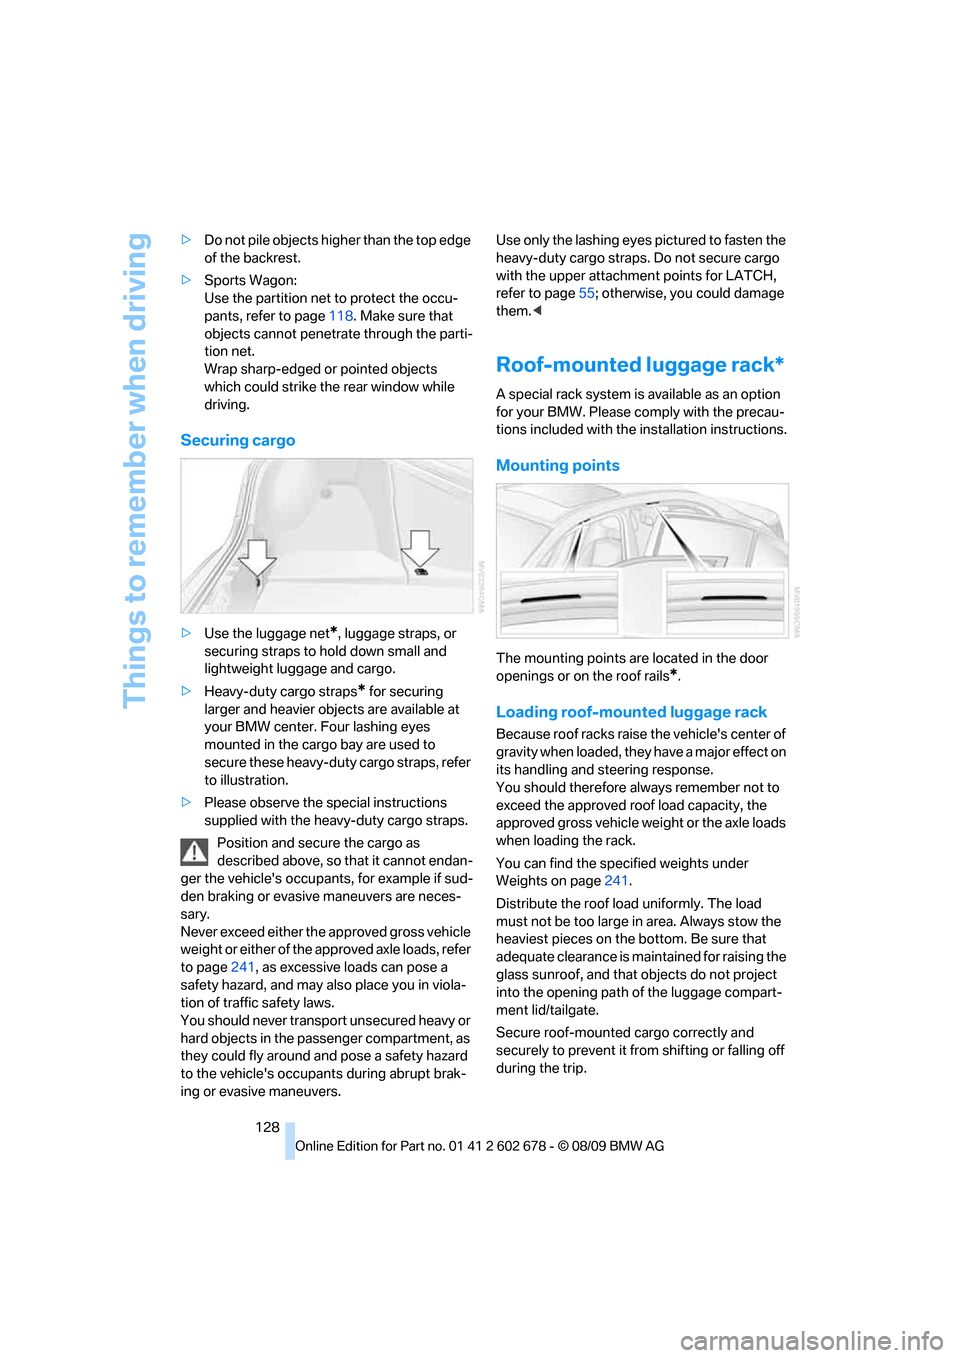
mounted in the cargo bay are used to
secure these heavy-duty cargo straps, refer
to illustration.
>Please observe the special instructions
supplied with the heavy-duty cargo straps.
Position and secure the cargo as
described above, so that it cannot endan-
ger the vehicle's occupants, for example if sud-
den braking or evasive maneuvers are neces-
sary.
Never exceed either the approved gross vehicle
weight or either of the approved axle loads, refer
to page241, as excessive loads can pose a
safety hazard, and may also place you in viola-
tion of traffic safety laws.
You should never transport unsecured heavy or
hard objects in the passenger compartment, as
they could fly around and pose a safety hazard
to the vehicle's occupants during abrupt brak-
ing or evasive maneuvers.Use only the lashing eyes pictured to fasten the
heavy-duty cargo straps. Do not secure cargo
with the upper attachment points for LATCH,
refer to page55; otherwise, you could damage
them.<
Roof-mounted luggage rack*
A special rack system is available as an option
for your BMW. Please comply with the precau-
tions included with the installation instructions.
Mounting points
The mounting points are located in the door
openings or on the roof rails
*.
Loading roof-mounted luggage rack
Because roof racks raise the vehicle's center of
gravity when loaded, they have a major effect on
its handling and steering response.
You should therefore always remember not to
exceed the approved roof load capacity, the
approved gross vehicle weight or the axle loads
when loading the rack.
You can find the specified weights under
Weights on page241.
Distribute the roof load uniformly. The load
must not be too large in area. Always stow the
heaviest pieces on the bottom. Be sure that
adequate clearance is maintained for raising the
glass sunroof, and that objects do not project
into the opening path of the luggage compart-
ment lid/tailgate.
Secure roof-mounted cargo correctly and
securely to prevent it from shifting or falling off
during the trip.
Page 135 of 271
Navigation
Driving tips
133Reference
At a glance
Controls
Communications
Entertainment
Mobility
Destination entry
In entering your destination you can select from
among the following options:
>Entering a destination manually, see below
>Selecting destination from address book,
refer to page135
>Last destinations, refer to page136
>Special destinations, refer to page136
>Entering a destination on the map, refer to
page138
>Selecting home address, refer to page136
>Entering a destination by voice com-
mands*, refer to page139
>Destination entry via BMW Assist*, refer to
page137
You can also store a navigation destination on
the programmable memory buttons, refer to
page20.
Enter data only when the vehicle is sta-
tionary, and always give priority to the
applicable traffic regulations in the event of any
contradiction between traffic and road condi-
tions and the instructions issued by the naviga-
tion system. If you do not observe this precau-
tion, you can endanger the vehicle occupants
and other road users.<
Entering a destination
manually
The system's word-matching principle makes it
easier for you to enter the names of streets or
towns, refer to page141. This allows you to
enter different spellings and completes your
entry automatically so that stored names can be
called up quickly.
1.Press the MENU button.
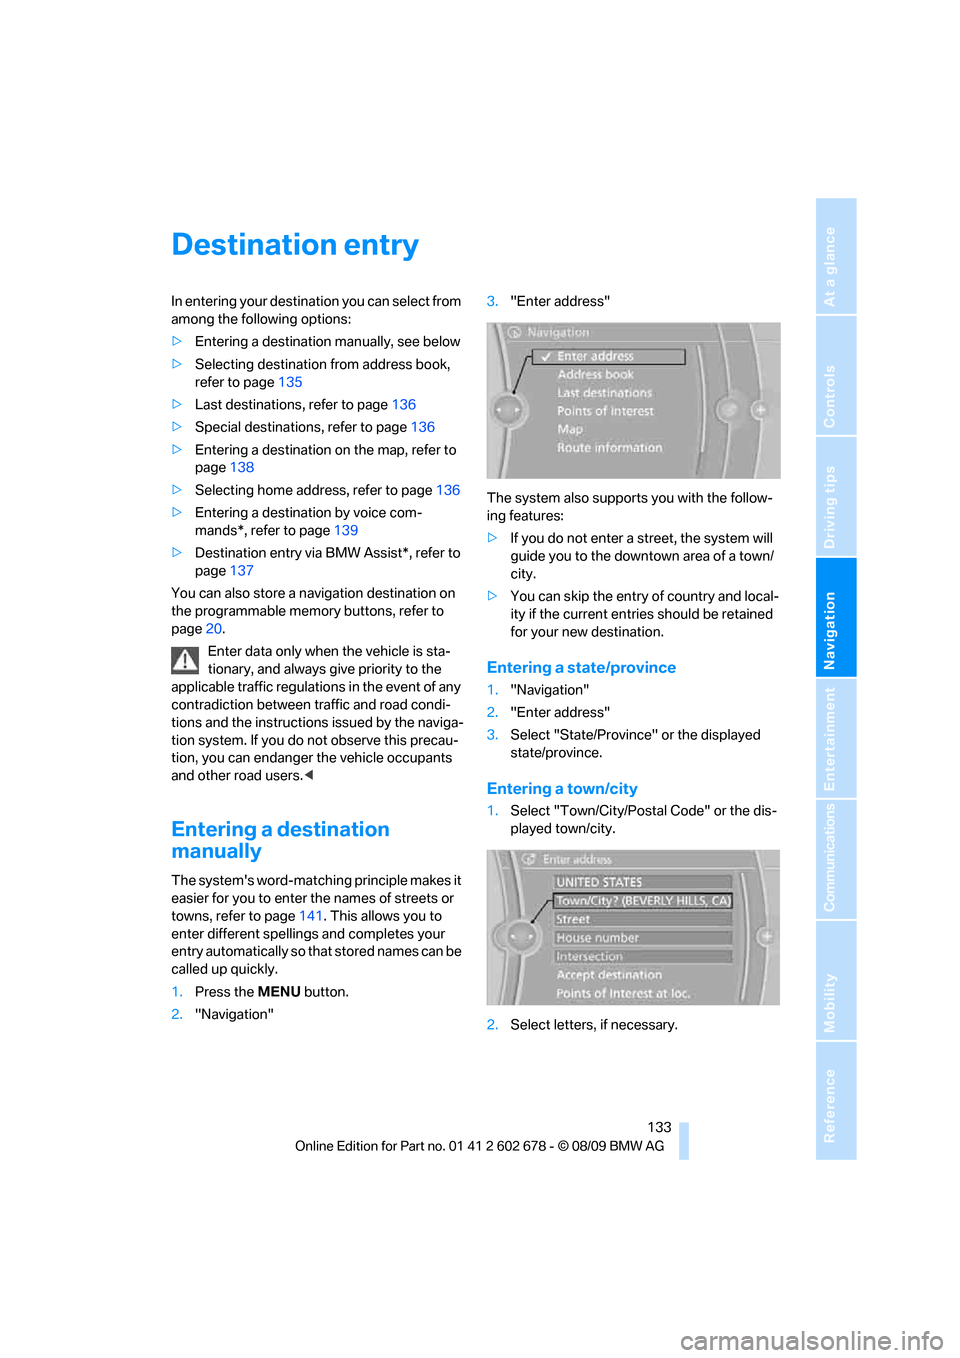
2."Navigation"3."Enter address"
The system also supports you with the follow-
ing features:
>If you do not enter a street, the system will
guide you to the downtown area of a town/
city.
>You can skip the entry of country and local-
ity if the current entries should be retained
for your new destination.
Entering a state/province
1."Navigation"
2."Enter address"
3.Select "State/Province" or the displayed
state/province.
Entering a town/city
1.Select "Town/City/Postal Code" or the dis-
played town/city.
2.Select letters, if necessary.
Page 136 of 271
Destination entry
134 To delete letters:
>To delete individual letters:
Turn the controller to select , and
then press the controller.
>To delete all letters:
Turn the controller to select , and
then press the controller for an extended
period.
To enter spaces:
>Select the symbol.
The list gradually grows smaller each time
you enter a new letter.
3.Move the controller to the right.
4.Select the name of the town/city from the
list.
If there are several towns/cities with the same
name:
1.Change to the list of town/city names.
2.Highlight the town/city: a preview map is
displayed.
3.Select the town/city.
Entering the postal code
1.Select "Town/City/Postal Code" or the dis-
played town/city.
2.Select the symbol.
3.Select the digits.
4.Change to the list of postal codes and
towns/cities.
5.Highlight the postal code: a preview map is
displayed.
6.Select the postal code.
Entering street and intersection
1.Select "Street" or the displayed street.
2.Enter a street and intersection as you would
the town/city.
After the street you can also enter the intersec-
tion or the house number.
If there are several streets with the same name:1.Change to the list of street names.
2.Highlight the street: a preview map is dis-
played.
3.Select the street.
Entering a street without a destination
town/city
You can also enter a street without specifying a
town/city. In this case all streets of the entered
country are offered for selection. The related
town/city is displayed after the street name.
If a town/city has already been entered, you can
undo this entry. This may be practical if the
desired street does not exist in the entered des-
tination, because, for example, it belongs to
another part of the town/city.
1."Navigation"
2."Enter address"
3.Select "Street" or the displayed street.
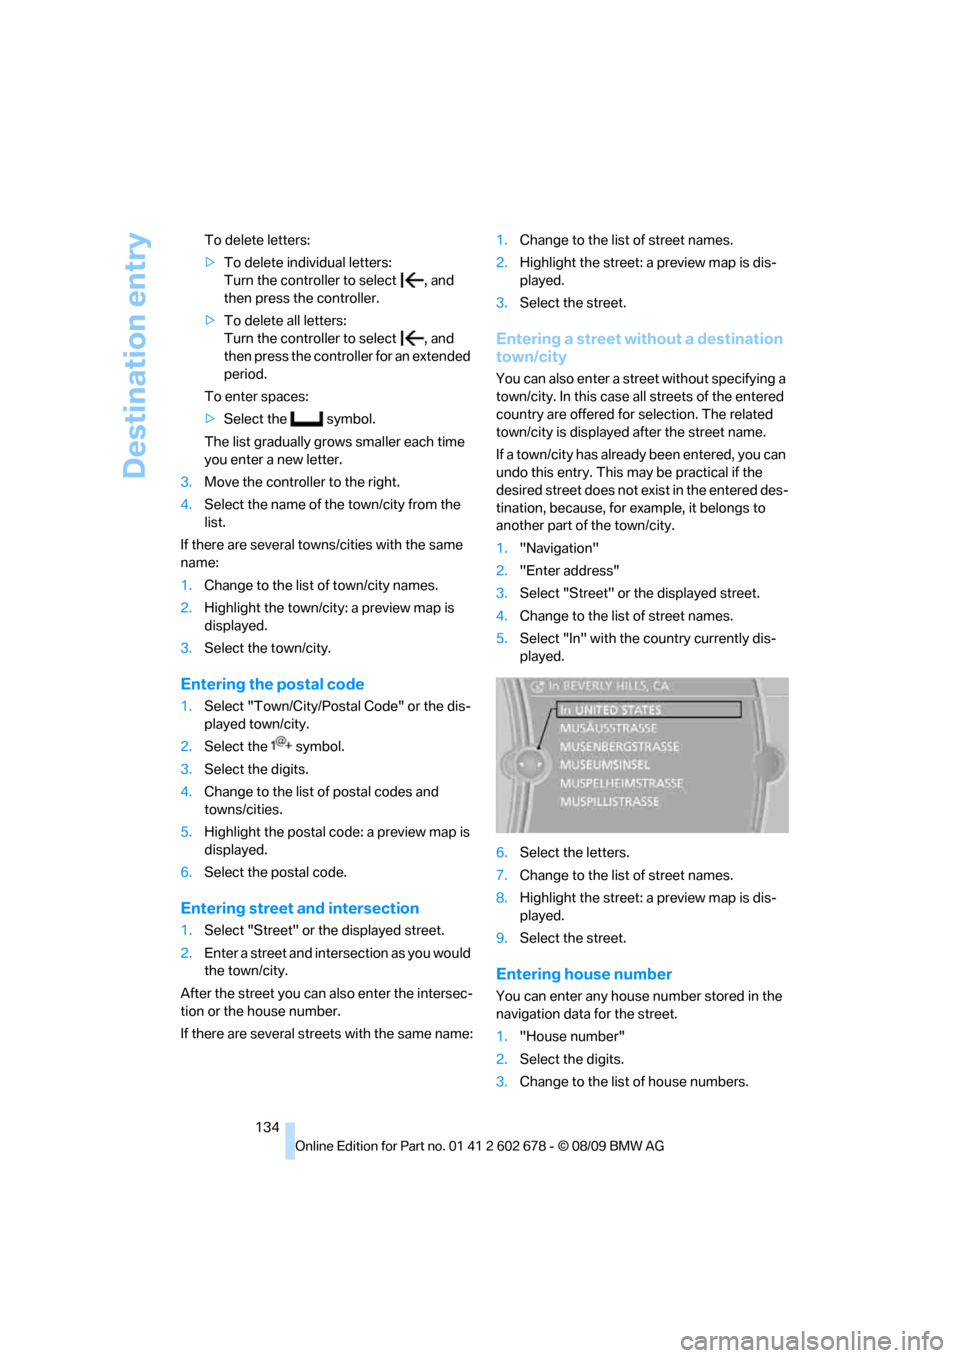
4.Change to the list of street names.
5.Select "In" with the country currently dis-
played.
6.Select the letters.
7.Change to the list of street names.
8.Highlight the street: a preview map is dis-
played.
9.Select the street.
Entering house number
You can enter any house number stored in the
navigation data for the street.
1."House number"
2.Select the digits.
3.Change to the list of house numbers.
Page 140 of 271
Destination entry
138
Displaying special destinations in the
map
To display symbols of the special destinations
in the map:
1."Navigation"
2."Map"
3.Open "Options".
4."Display Points of Interest"
5.Select the settings.
Entering the destination via
the map
If you only know the location of the town or
street, you can enter the destination using the
map.
Opening the map
1."Navigation"
2."Map"
A map section is displayed on the Control Dis-
play. The map shows the current position of the
vehicle.
Selecting the destination
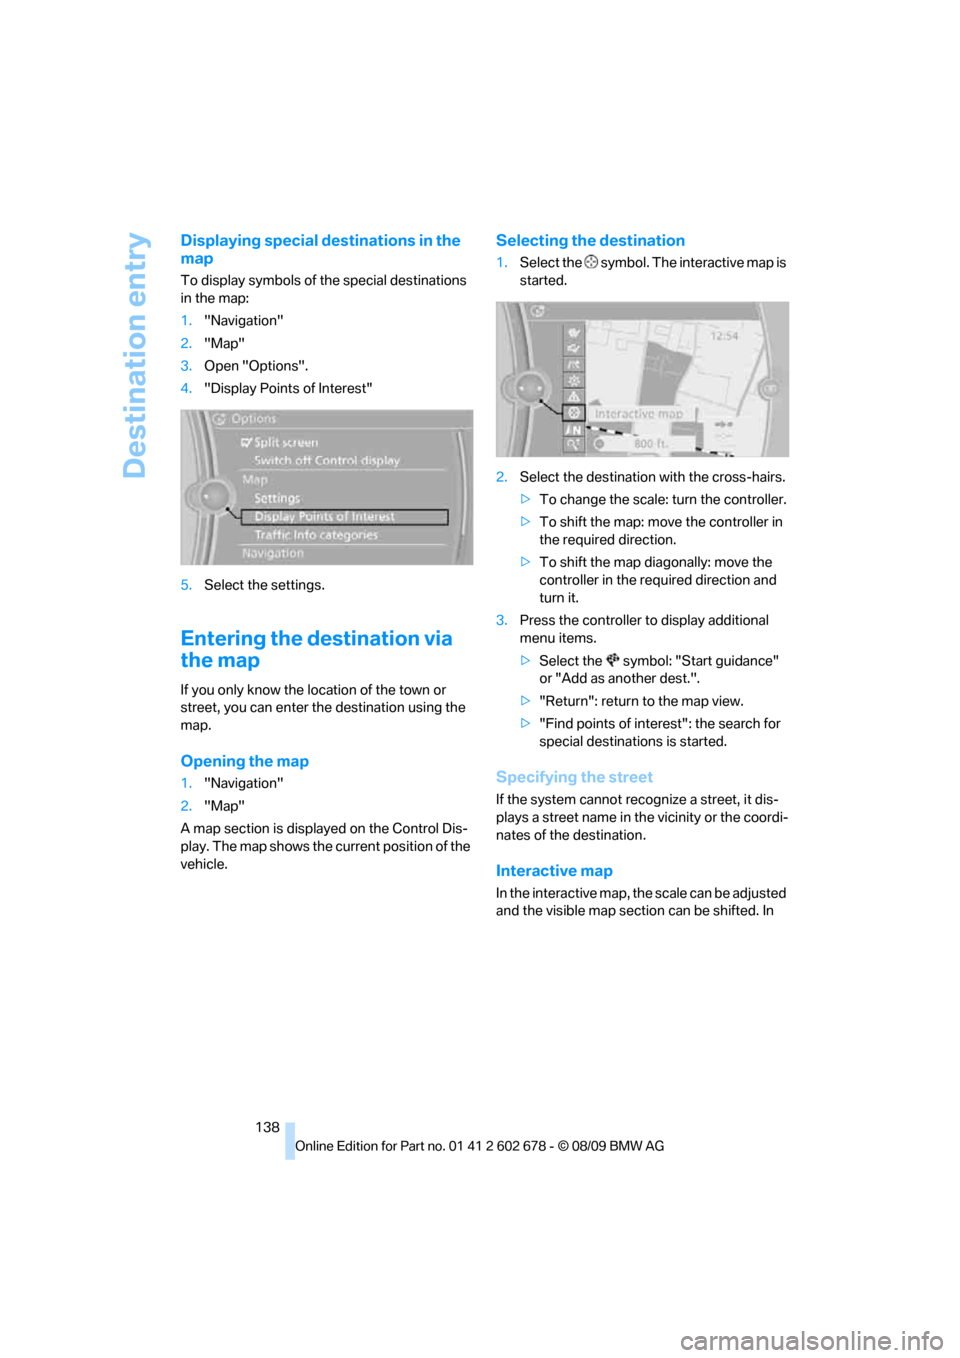
1.Select the symbol. The interactive map is
started.
2.Select the destination with the cross-hairs.
>To change the scale: turn the controller.
>To shift the map: move the controller in
the required direction.
>To shift the map diagonally: move the
controller in the required direction and
turn it.
3.Press the controller to display additional
menu items.
>Select the symbol: "Start guidance"
or "Add as another dest.".
>"Return": return to the map view.
>"Find points of interest": the search for
special destinations is started.
Specifying the street
If the system cannot recognize a street, it dis-
plays a street name in the vicinity or the coordi-
nates of the destination.
Interactive map
In the interactive map, the scale can be adjusted
and the visible map section can be shifted. In