2010 BMW 528I SEDAN lock
[x] Cancel search: lockPage 121 of 271
Controls
119Reference
At a glance
Driving tips
Communications
Navigation
Entertainment
Mobility
The partitions in the compartment can be rear-
ranged.
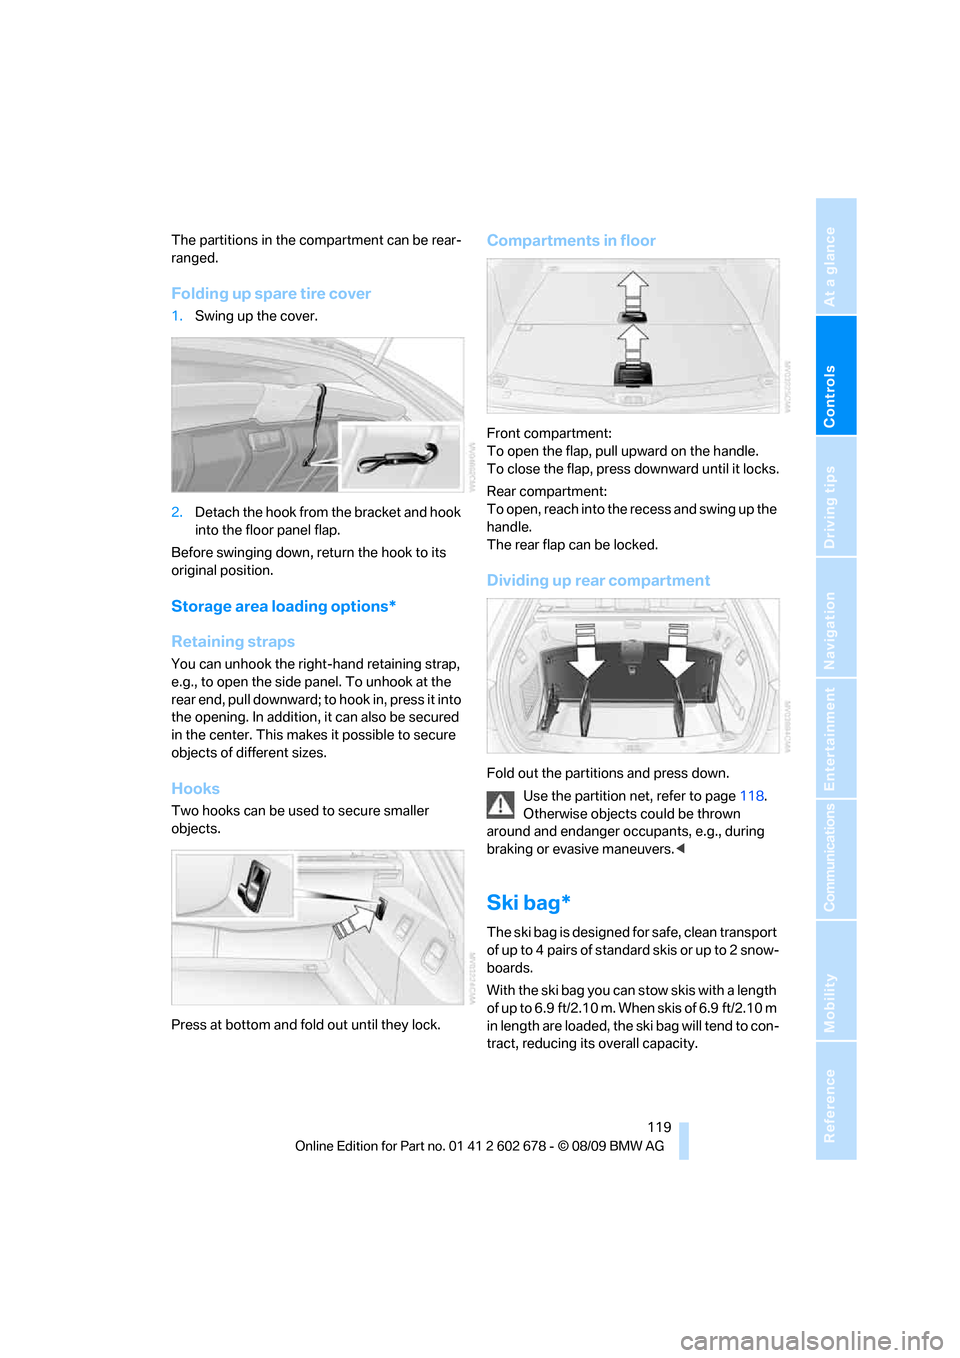
Folding up spare tire cover
1.Swing up the cover.
2.Detach the hook from the bracket and hook
into the floor panel flap.
Before swinging down, return the hook to its
original position.
Storage area loading options*
Retaining straps
You can unhook the right-hand retaining strap,
e.g., to open the side panel. To unhook at the
rear end, pull downward; to hook in, press it into
the opening. In addition, it can also be secured
in the center. This makes it possible to secure
objects of different sizes.
Hooks
Two hooks can be used to secure smaller
objects.
Press at bottom and fold out until they lock.
Compartments in floor
Front compartment:
To open the flap, pull upward on the handle.
To close the flap, press downward until it locks.
Rear compartment:
To open, reach into the recess and swing up the
handle.
The rear flap can be locked.
Dividing up rear compartment
Fold out the partitions and press down.
Use the partition net, refer to page118.
Otherwise objects could be thrown
around and endanger occupants, e.g., during
braking or evasive maneuvers.<
Ski bag*
The ski bag is designed for safe, clean transport
of up to 4 pa irs of s tandard s kis or up to 2 snow-
boards.
With the ski bag you can stow skis with a length
o f u p t o 6 . 9 f t / 2 . 1 0 m . W h e n s k i s o f 6 . 9 f t / 2 . 1 0 m
in length are loaded, the ski bag will tend to con-
tract, reducing its overall capacity.
Page 145 of 271
Navigation
Driving tips
143Reference
At a glance
Controls
Communications
Entertainment
Mobility
Dynamic destination guidance
"Dynamic guidance" is switched on:
The route is automatically changed in the event
of traffic obstructions. The system does not
point out traffic obstructions along the original
route.
Depending on the type of road and the nature
and length of the traffic obstruction, the route
can also be calculated so that you travel
through the traffic obstruction.
1."Navigation"
2.Open "Options".
3."Dynamic guidance"
If the "Avoid highways", "Avoid toll roads"
or "Avoid ferries" route criteria are
selected, route calculation may take consider-
ably longer.<
Route
General information
Depending on the equipment in your vehicle,
different views of the route are available during
destination guidance:
>List of streets and towns/cities
>Map view, refer to page144
>Arrow view in the Head-up Display
*
Displaying a list of the streets or towns/
cities on the route
When destination guidance is started, a list of
the streets and towns/cities on the route is dis-
played. The driving distances and traffic bulle-
tins are displayed for each route section.
1."Navigation"
2."Route information"
3.Highlight a section.
The section is displayed in the preview map.
Bypassing a section of the route
During destination guidance, you can revise the
navigation system's route recommendations to
avoid particular stretches of road. Enter the number of miles/kilometers that you want to
travel before returning to the original route.
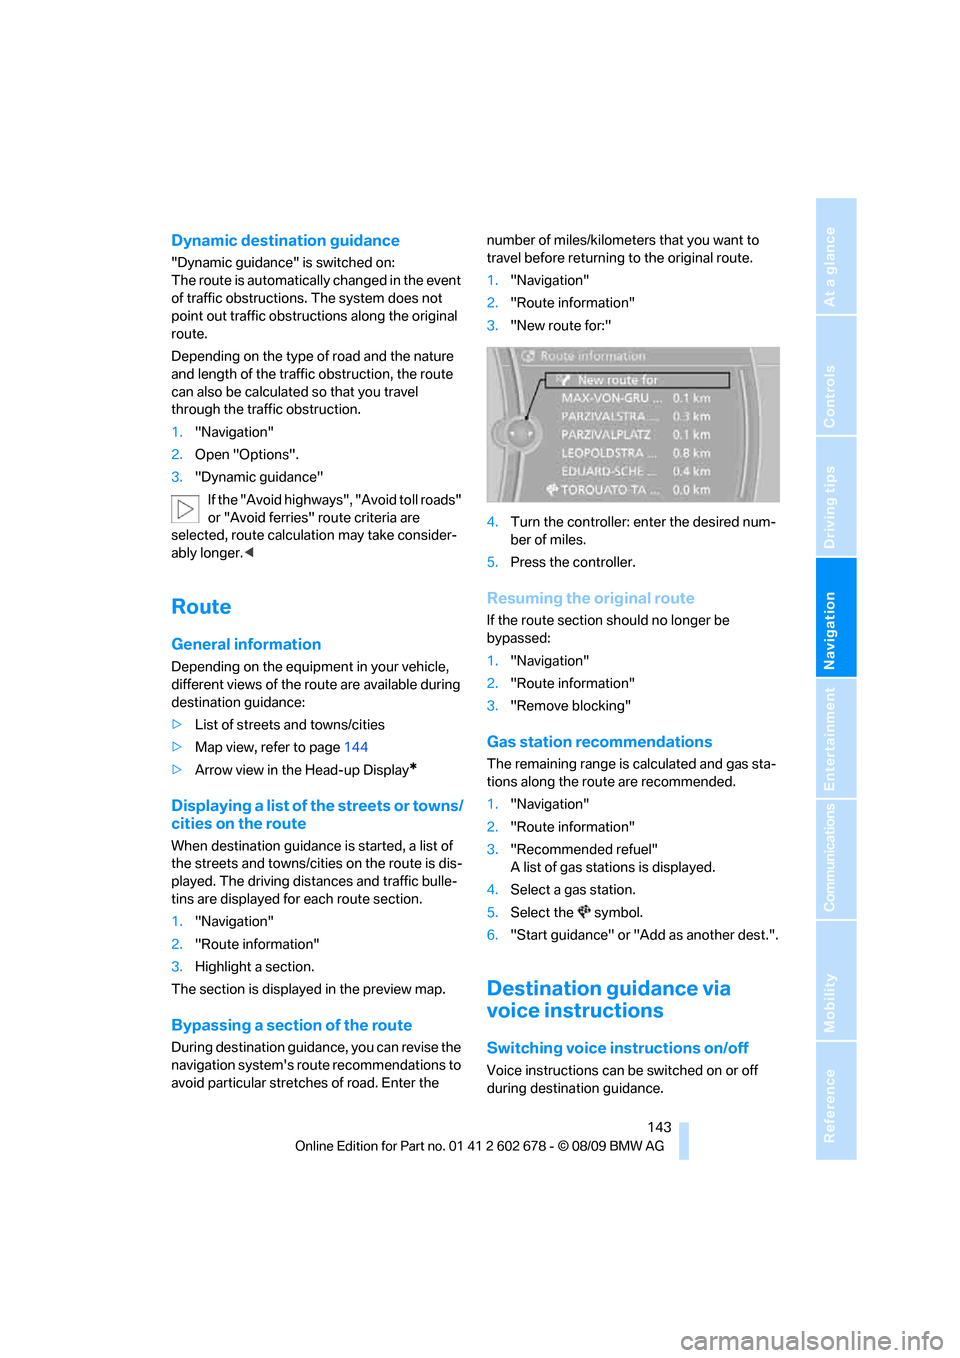
1."Navigation"
2."Route information"
3."New route for:"
4.Turn the controller: enter the desired num-
ber of miles.
5.Press the controller.
Resuming the original route
If the route section should no longer be
bypassed:
1."Navigation"
2."Route information"
3."Remove blocking"
Gas station recommendations
The remaining range is calculated and gas sta-
tions along the route are recommended.
1."Navigation"
2."Route information"
3."Recommended refuel"
A list of gas stations is displayed.
4.Select a gas station.
5.Select the symbol.
6."Start guidance" or "Add as another dest.".
Destination guidance via
voice instructions
Switching voice instructions on/off
Voice instructions can be switched on or off
during destination guidance.
Page 181 of 271
179
Entertainment
Reference
At a glance
Controls
Driving tips Communications
Navigation
Mobility
>Depending on the mobile phone, certain
settings may be necessary on the mobile
phone, e. g. via the following menu items:
>Bluetooth activated
>Connection must be allowed without
requiring further confirmation
>Reconnect
>Depending on the mobile phone model, the
setting energy saving mode can, for exam-
ple, result in vehicle failing to detect the
paired mobile phone.
>For pairing, define a 4- to 16-digit number
of your choice as the Bluetooth Passkey,
e.g. 25081107. A long and complex number
offers better protection against unautho-
rized access. This Bluetooth passkey is no
longer required following successful pair-
ing.
>The ignition is switched on.
Only pair the mobile phone with the vehi-
cle stopped, otherwise the passengers
and other road users can be endangered due to
a lack of attentiveness on the part of the
driver.<
Switching on ignition
1.Insert the remote control as far as possible
into the ignition lock.
2.Switch on the ignition by pressing the Start/
Stop button without depressing the brake
or clutch pedal.
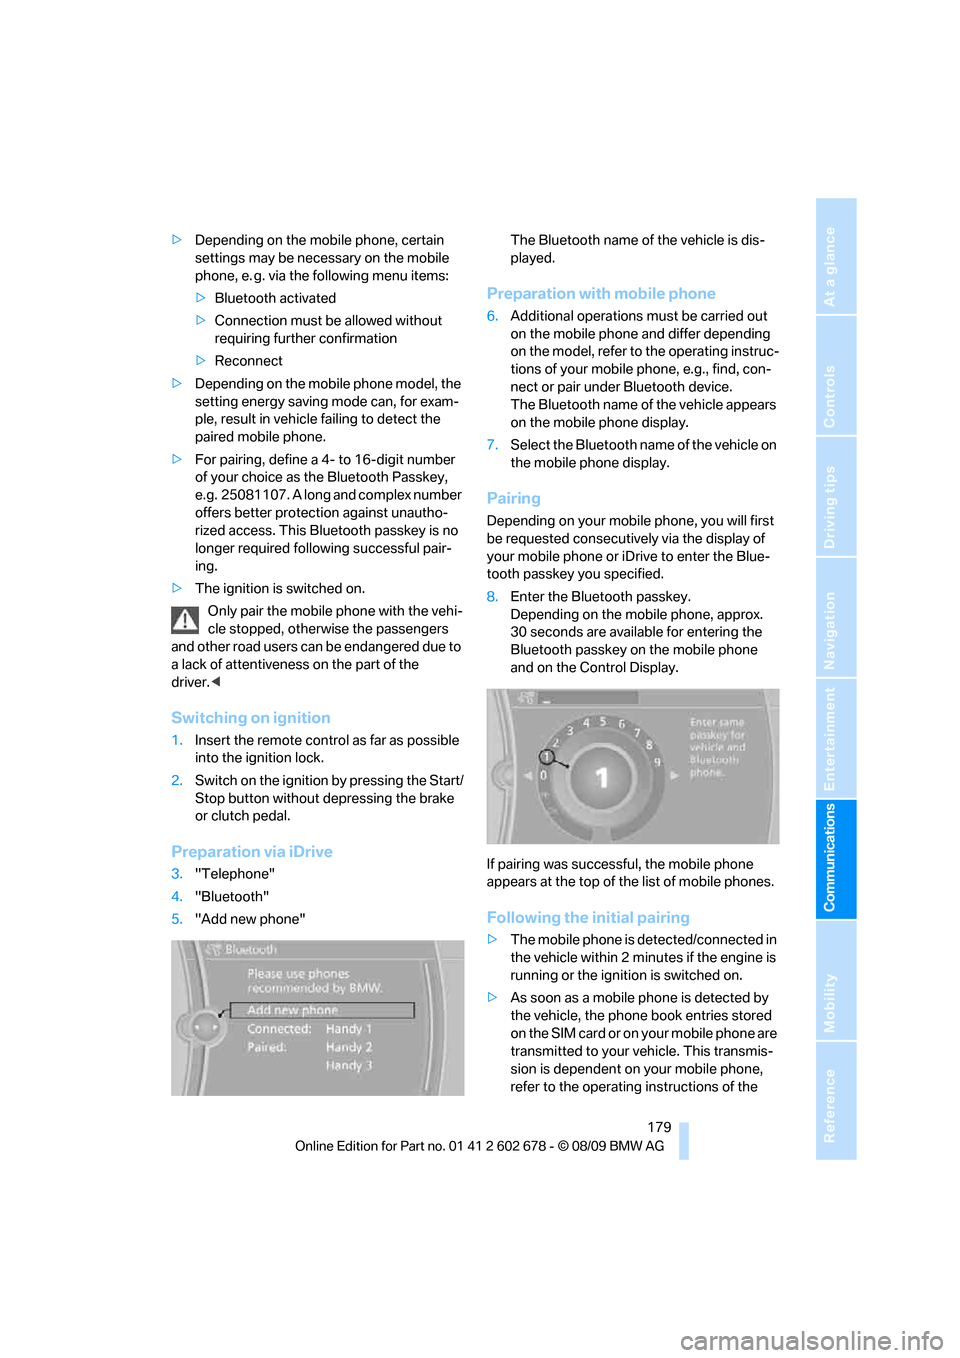
Preparation via iDrive
3."Telephone"
4."Bluetooth"
5."Add new phone"The Bluetooth name of the vehicle is dis-
played.
Preparation with mobile phone
6.Additional operations must be carried out
on the mobile phone and differ depending
on the model, refer to the operating instruc-
tions of your mobile phone, e.g., find, con-
nect or pair under Bluetooth device.
The Bluetooth name of the vehicle appears
on the mobile phone display.
7.Select the Bluetooth name of the vehicle on
the mobile phone display.
Pairing
Depending on your mobile phone, you will first
be requested consecutively via the display of
your mobile phone or iDrive to enter the Blue-
tooth passkey you specified.
8.Enter the Bluetooth passkey.
Depending on the mobile phone, approx.
30 seconds are available for entering the
Bluetooth passkey on the mobile phone
and on the Control Display.
If pairing was successful, the mobile phone
appears at the top of the list of mobile phones.
Following the initial pairing
>The mobile phone is detected/connected in
the vehicle within 2 minutes if the engine is
running or the ignition is switched on.
>As soon as a mobile phone is detected by
the vehicle, the phone book entries stored
on the SIM card or on your mobile phone are
transmitted to your vehicle. This transmis-
sion is dependent on your mobile phone,
refer to the operating instructions of the
Page 191 of 271
189
Entertainment
Reference
At a glance
Controls
Driving tips Communications
Navigation
Mobility
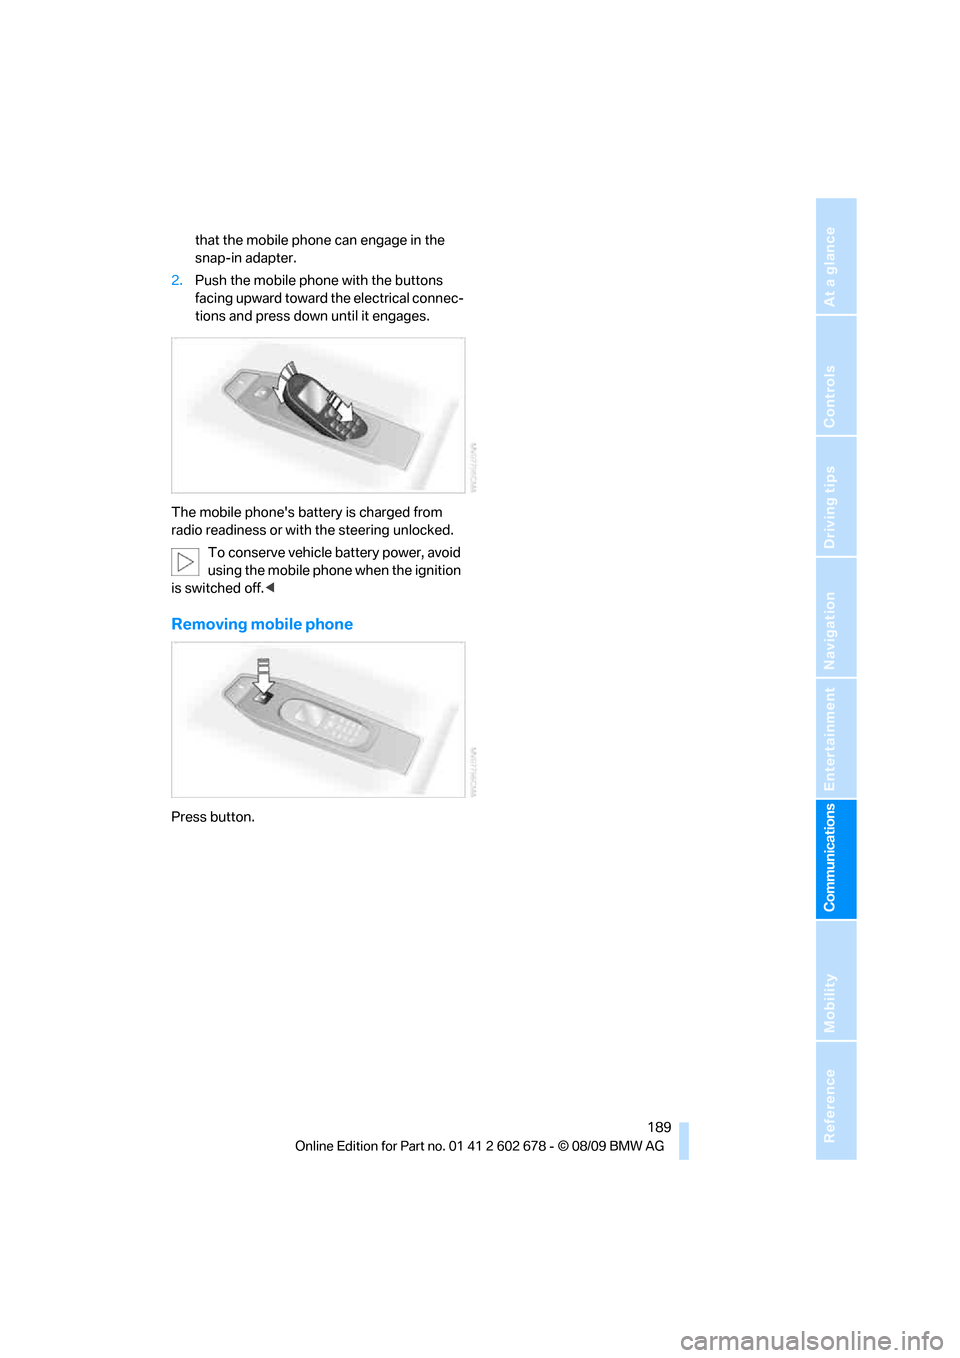
that the mobile phone can engage in the
snap-in adapter.
2.Push the mobile phone with the buttons
facing upward toward the electrical connec-
tions and press down until it engages.
The mobile phone's battery is charged from
radio readiness or with the steering unlocked.
To conserve vehicle battery power, avoid
using the mobile phone when the ignition
is switched off.<
Removing mobile phone
Press button.
Page 194 of 271
BMW Assist
192
BMW Assist
BMW Assist*
BMW Assist provides a number of different ser-
vices. For example, the position data of the
vehicle can be transmitted to the BMW Assist
Response Center when an Emergency
Request
* is sent.
Many BMW Assist services depend on the indi-
vidually agreed contract.
After your contract has expired, the BMW
Assist system will be deactivated by the BMW
Assist Response Center without you having to
visit a BMW center. After the BMW Assist sys-
tem has been deactivated, no BMW Assist ser-
vice will be available. The BMW Assist system
can be reactivated by a BMW center after sign-
ing a new contract.
Requirements
>The installed BMW Assist system is logged
on to a mobile phone network. This network
must be capable of transmitting the ser-
vices.
>To transmit position data, the vehicle must
be able to determine the current position.
>To activate and update BMW Assist, a GPS
signal must be available.
>The BMW Assist service contract was
signed with your BMW center or with the
BMW Assist Response Center. Activation
must be completed.
>BMW Assist is activated.
Offered services
>Emergency Request: when you press the
SOS button, a connection is established to
the BMW Assist Response Center. The
BMW Assist Response Center then speaks
with you and takes further steps to help you.
>Automatic collision notification: under cer-
tain conditions, a connection is established
to the BMW Assist Response Center after a
serious accident. If possible, the BMW Assist Response Center then speaks with
you and takes further steps to help you.
>Enhanced Roadside Assistance: BMW
Roadside Assistance
* can be contacted if
assistance is needed in the event of a
breakdown. If possible, the vehicle data and
position data are transmitted during this
time.
>BMW Customer Relations: connection with
Customer Relations for information on all
aspects of your vehicle.
>TeleService: data on your vehicle's service
status or required inspections are transmit-
ted to your BMW center, either automati-
cally before a service due date or when you
request a BMW service appointment.
>Remote door unlock: the BMW Assist
Response Center provides assistance if, for
example, the remote control is not available
and the vehicle needs to be opened.
>Stolen vehicle recovery: after you report to
the police that your vehicle was stolen, the
BMW Assist Response Center can deter-
mine its position.
>In addition to these services, the optional
Convenience Plan offers Concierge service
and information for route planning, traffic
and weather. A limited number of calls can
be made via the BMW Assist Response
Center with Critical Calling, such as when
the mobile phone is not available or dis-
charged.
Press the SOS button to contact the BMW
Assist Response Center.
TeleService*
TeleService supports communication with your
BMW center.
>Data on the vehicle's service requirements
can be sent directly to the BMW center. In
this way, the BMW center can plan its work
*
Page 202 of 271
Refueling
200
Refueling
Switch off the engine before refueling;
otherwise no fuel can be filled into the
tank and a message is displayed.<
When handling fuel, always observe all
applicable precautionary measures and
regulations. Never transport reserve fuel con-
tainers in the vehicle. These could become
leaky and cause an explosion or a fire in an acci-
dent.<
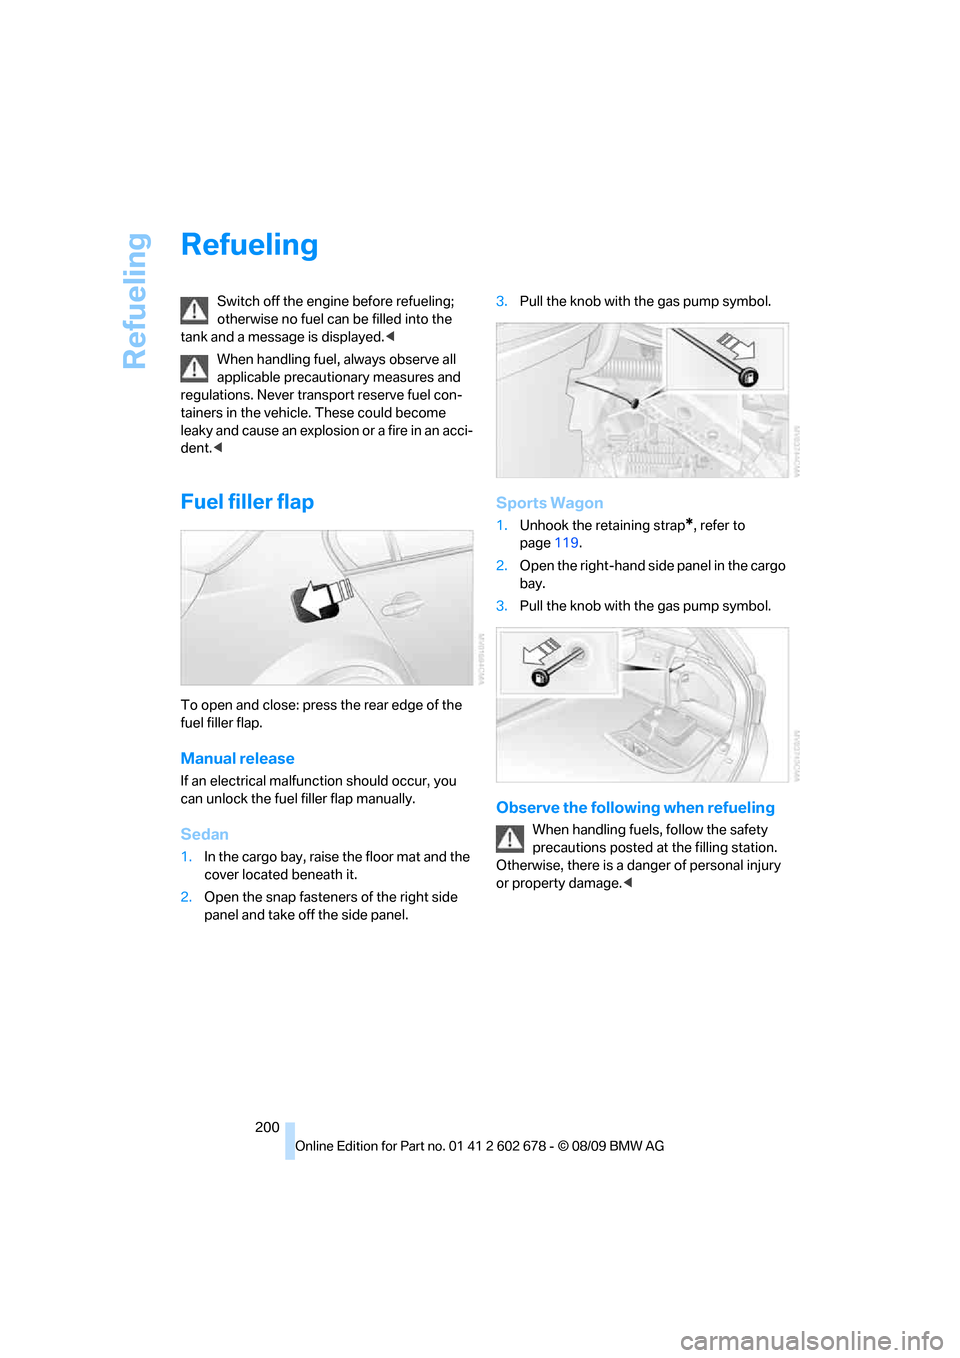
Fuel filler flap
To open and close: press the rear edge of the
fuel filler flap.
Manual release
If an electrical malfunction should occur, you
can unlock the fuel filler flap manually.
Sedan
1.In the cargo bay, raise the floor mat and the
cover located beneath it.
2.Open the snap fasteners of the right side
panel and take off the side panel.3.Pull the knob with the gas pump symbol.
Sports Wagon
1.Unhook the retaining strap*, refer to
page119.
2.Open the right-hand side panel in the cargo
bay.
3.Pull the knob with the gas pump symbol.
Observe the following when refueling
When handling fuels, follow the safety
precautions posted at the filling station.
Otherwise, there is a danger of personal injury
or property damage.<
Page 203 of 271
Mobility
201Reference
At a glance
Controls
Driving tips
Communications
Navigation
Entertainment
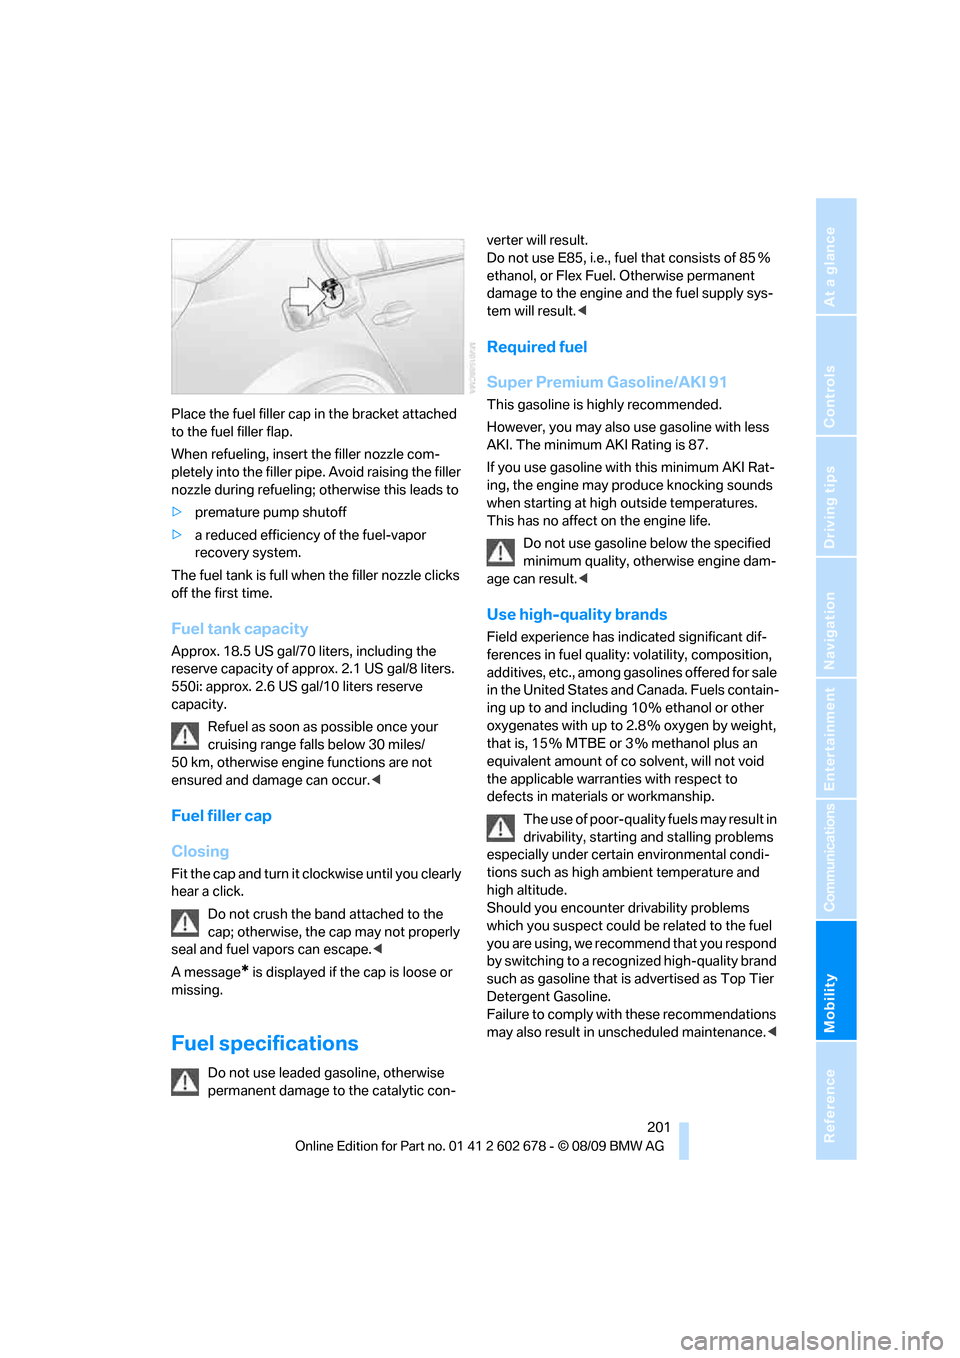
Place the fuel filler cap in the bracket attached
to the fuel filler flap.
When refueling, insert the filler nozzle com-
pletely into the filler pipe. Avoid raising the filler
nozzle during refueling; otherwise this leads to
>premature pump shutoff
>a reduced efficiency of the fuel-vapor
recovery system.
The fuel tank is full when the filler nozzle clicks
off the first time.
Fuel tank capacity
Approx. 18.5 US gal/70 liters, including the
reserve capacity of approx. 2.1 US gal/8 liters.
550i: approx. 2.6 US gal/10 liters reserve
capacity.
Refuel as soon as possible once your
cruising range falls below 30 miles/
50 km, otherwise engine functions are not
ensured and damage can occur.<
Fuel filler cap
Closing
Fit the cap and turn it clockwise until you clearly
hear a click.
Do not crush the band attached to the
cap; otherwise, the cap may not properly
seal and fuel vapors can escape.<
A message
* is displayed if the cap is loose or
missing.
Fuel specifications
Do not use leaded gasoline, otherwise
permanent damage to the catalytic con-verter will result.
Do not use E85, i.e., fuel that consists of 85%
ethanol, or Flex Fuel. Otherwise permanent
damage to the engine and the fuel supply sys-
tem will result.<
Required fuel
Super Premium Gasoline/AKI 91
This gasoline is highly recommended.
However, you may also use gasoline with less
AKI. The minimum AKI Rating is 87.
If you use gasoline with this minimum AKI Rat-
ing, the engine may produce knocking sounds
when starting at high outside temperatures.
This has no affect on the engine life.
Do not use gasoline below the specified
minimum quality, otherwise engine dam-
age can result.<
Use high-quality brands
Field experience has indicated significant dif-
ferences in fuel quality: volatility, composition,
additives, etc., among gasolines offered for sale
in the United States and Canada. Fuels contain-
ing up to and including 10 % ethanol or other
oxygenates with up to 2.8 % oxygen by weight,
that is, 15 % MTBE or 3 % methanol plus an
equivalent amount of co solvent, will not void
the applicable warranties with respect to
defects in materials or workmanship.
The use of poor-quality fuels may result in
drivability, starting and stalling problems
especially under certain environmental condi-
tions such as high ambient temperature and
high altitude.
Should you encounter drivability problems
which you suspect could be related to the fuel
you are using, we recommend that you respond
by switching to a recognized high-quality brand
such as gasoline that is advertised as Top Tier
Detergent Gasoline.
Failure to comply with these recommendations
may also result in unscheduled maintenance.<
Page 216 of 271
Under the hood
214 These oils can be used for driving at all outside
temperatures.
Coolant
Do not add coolant to the cooling system
when the engine is hot. Escaping coolant
can cause burns.<
Coolant is composed of equal parts water and a
coolant additive. Not all commercially available
additives are suitable for your BMW. Ask your
BMW center for suitable additives.
Only use suitable additives, otherwise
engine damage may result. The additives
present a health hazard; observe the instruc-
tions on the containers.<
Comply with the appropriate environ-
mental protection regulations when dis-
posing of coolant additives.<
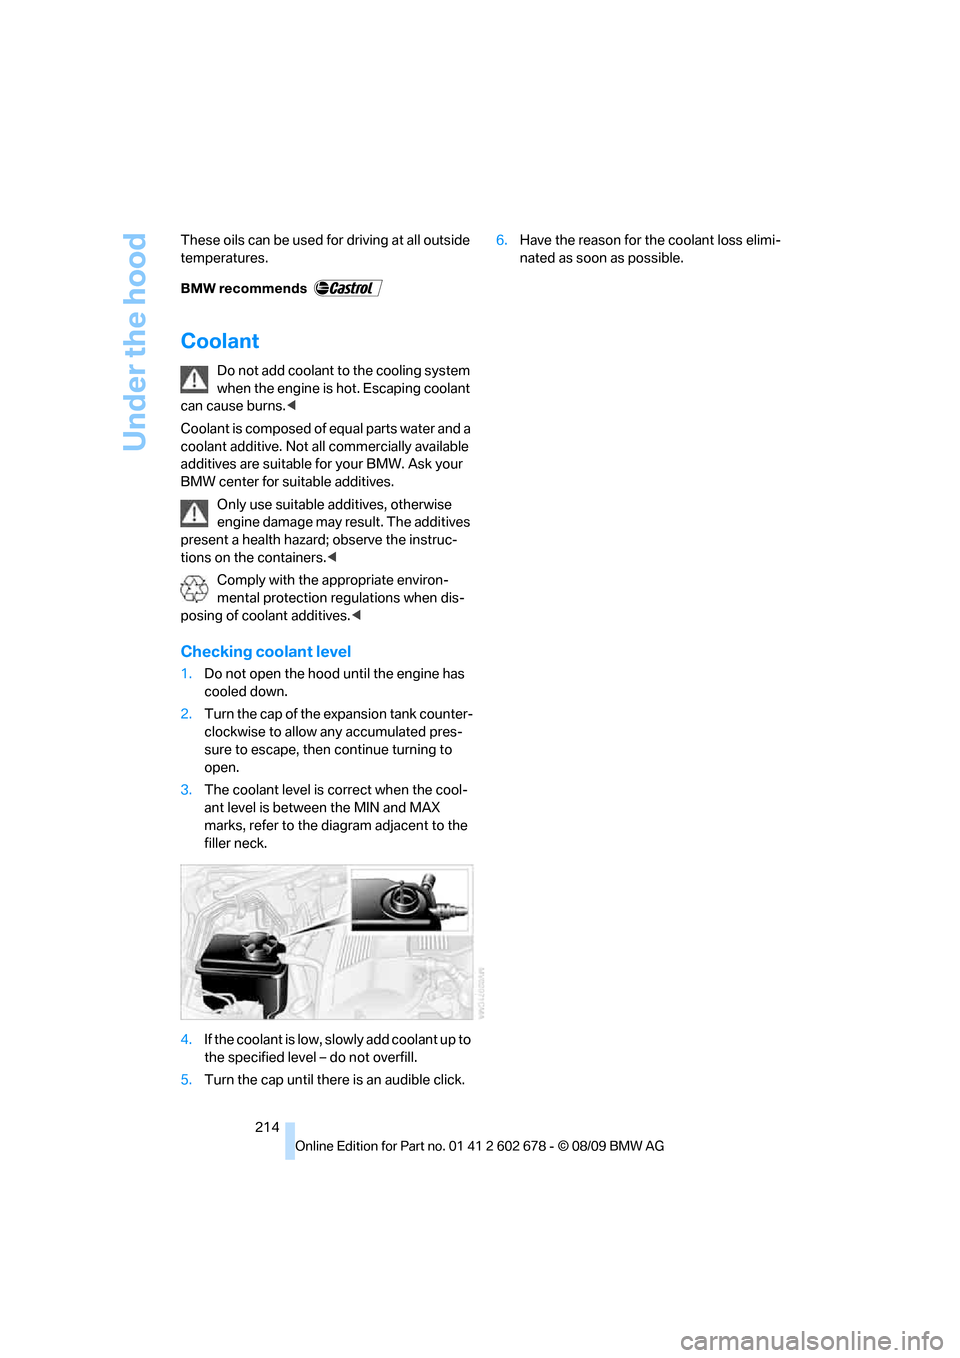
Checking coolant level
1.Do not open the hood until the engine has
cooled down.
2.Turn the cap of the expansion tank counter-
clockwise to allow any accumulated pres-
sure to escape, then continue turning to
open.
3.The coolant level is correct when the cool-
ant level is between the MIN and MAX
marks, refer to the diagram adjacent to the
filler neck.
4.If the coolant is low, slowly add coolant up to
the specified level – do not overfill.
5.Turn the cap until there is an audible click.6.Have the reason for the coolant loss elimi-
nated as soon as possible.