2010 BMW 335I CONVERTIBLE battery
[x] Cancel search: batteryPage 99 of 266

Controls
97Reference
At a glance
Driving tips
Communications
Navigation
Entertainment
Mobility
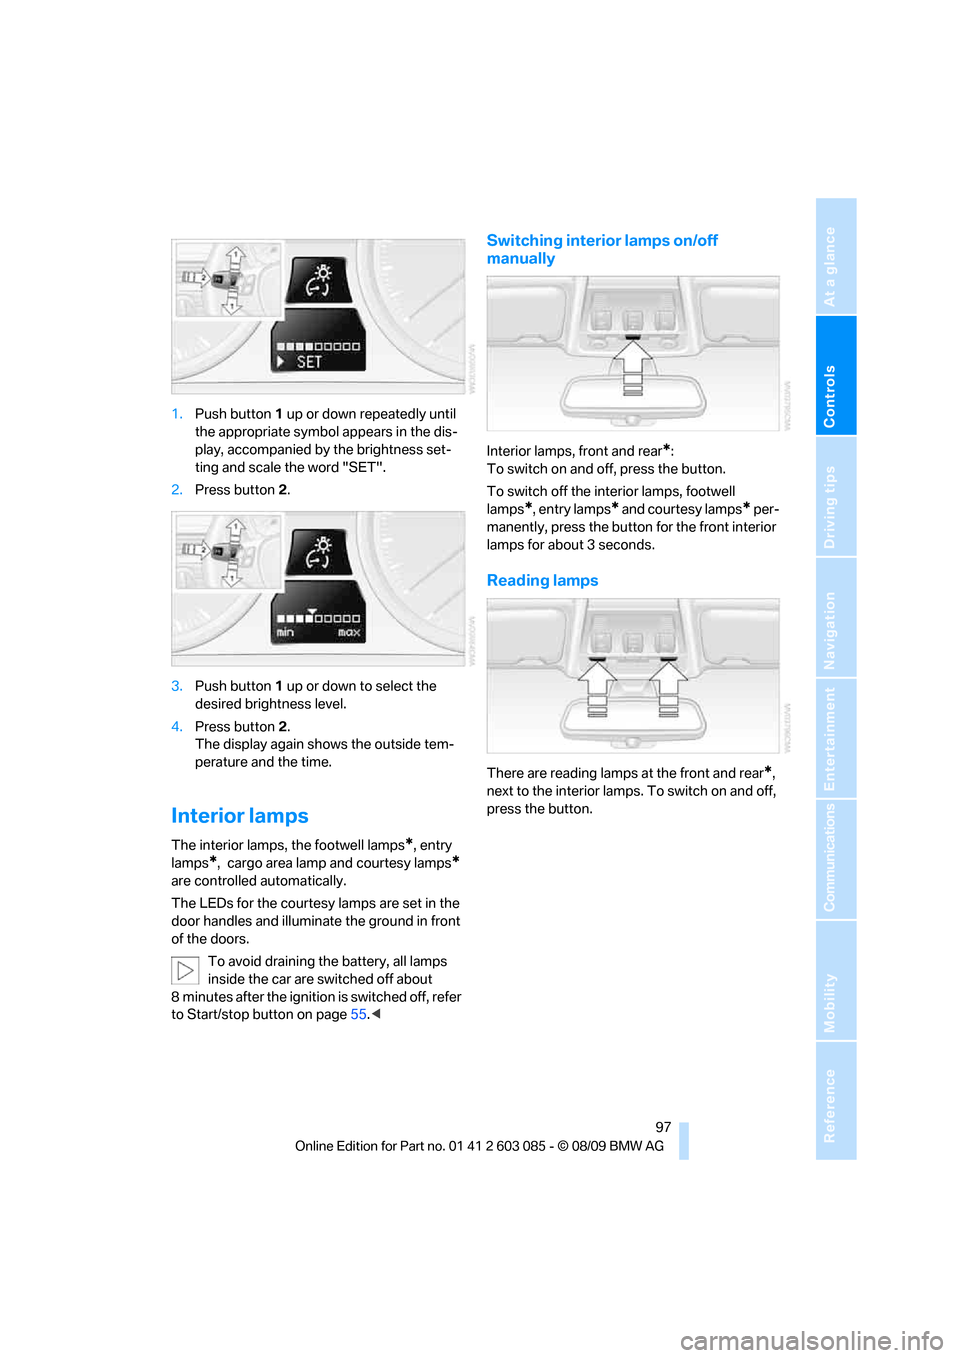
1.Push button 1 up or down repeatedly until
the appropriate symbol appears in the dis-
play, accompanied by the brightness set-
ting and scale the word "SET".
2.Press button 2.
3.Push button 1 up or down to select the
desired brightness level.
4.Press button 2.
The display again shows the outside tem-
perature and the time.
Interior lamps
The interior lamps, the footwell lamps*, entry
lamps
*, cargo area lamp and courtesy lamps*
are controlled automatically.
The LEDs for the courtesy lamps
are set in the
door handles and illuminate the ground in front
of the doors.
To avoid draining the battery, all lamps
inside the car are switched off about
8 minutes after the ignition is switched off, refer
to Start/stop button on page55.<
Switching interior lamps on/off
manually
Interior lamps, front and rear*:
To switch on and off, press the button.
To switch off the interior lamps, footwell
lamps
*, entry lamps* and courtesy lamps* per-
manently, press the button for the front interior
lamps for about 3 seconds.
Reading lamps
There are reading lamps at the front and rear*,
next to the interior lamps. To switch on and off,
press the button.
Page 102 of 266

Climate
100 automatic climate control is optimized for driv-
ing with the hardtop open. In addition, the air
volume is increased as vehicle speed increases.
The effectiveness of the Convertible pro-
gram can be enhanced considerably by
installing the wind deflector.<
Adjusting air volume manually
To be able to manually adjust the air volume,
switch off the AUTO program first.
Press the left side of the button to
reduce the air volume. Press the
right side of the button to increase
it.
The air volume may be reduced or the blower
may be switched off entirely to save on battery
power. The display remains the same.
Automatic recirculated-air control
AUC/Recirculated-air mode
You can respond to unpleasant odors or pollut-
ants in the immediate environment by tempo-
rarily suspending the supply of outside air. The
system then recirculates the air currently within
the vehicle.
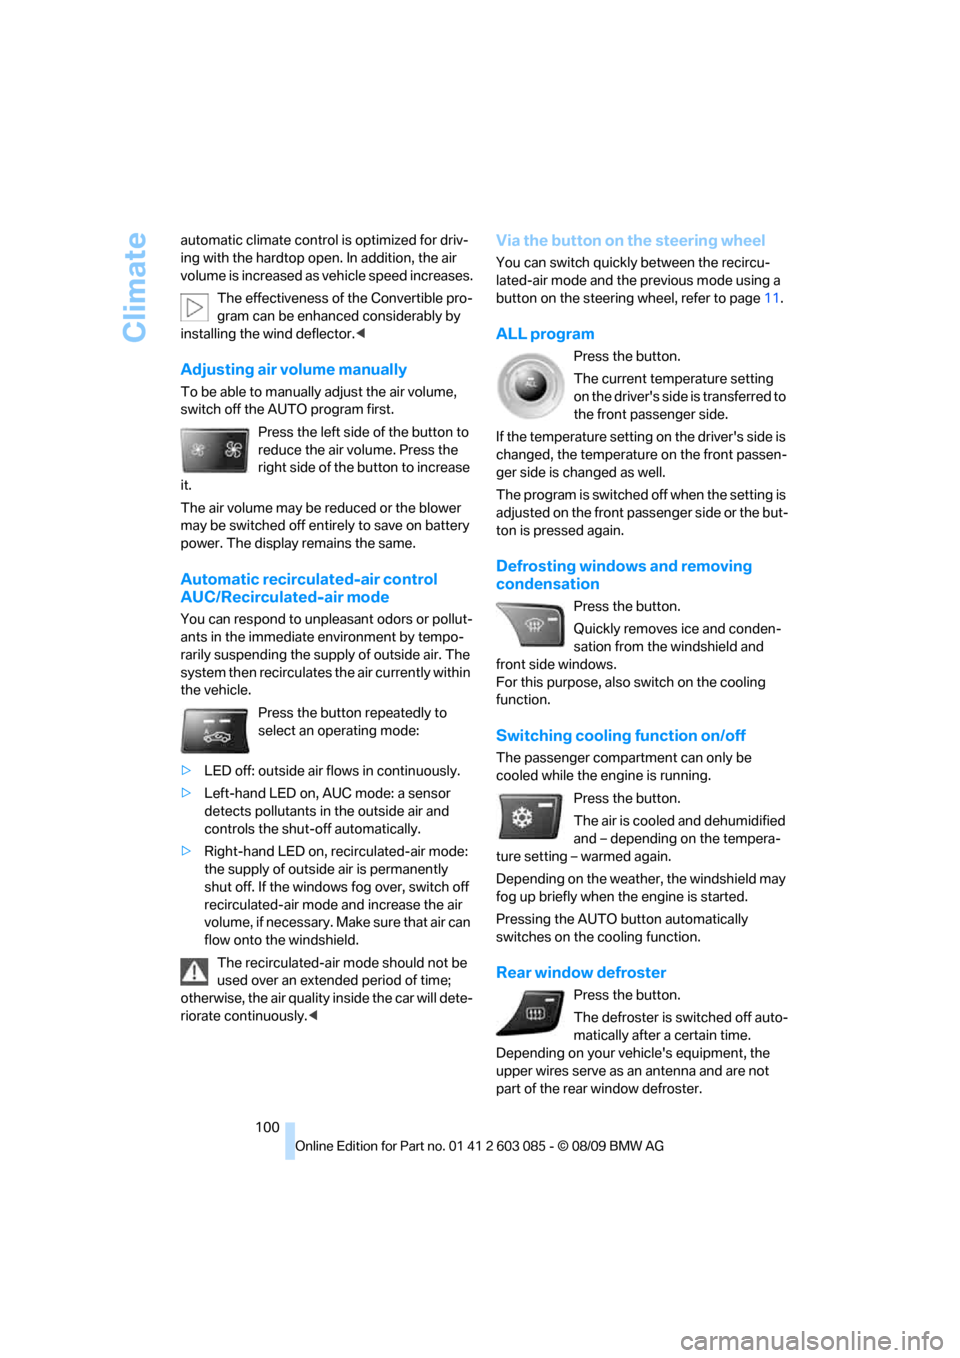
Press the button repeatedly to
select an operating mode:
>LED off: outside air flows in continuously.
>Left-hand LED on, AUC mode: a sensor
detects pollutants in the outside air and
controls the shut-off automatically.
>Right-hand LED on, recirculated-air mode:
the supply of outside air is permanently
shut off. If the windows fog over, switch off
recirculated-air mode and increase the air
volume, if necessary. Make sure that air can
flow onto the windshield.
The recirculated-air mode should not be
used over an extended period of time;
otherwise, the air quality inside the car will dete-
riorate continuously.<
Via the button on the steering wheel
You can switch quickly between the recircu-
lated-air mode and the previous mode using a
button
on the steering wheel, refer to page11.
ALL program
Press the button.
The current temperature setting
on the driver's side is transferred to
the front passenger side.
If the temperature setting on the driver's side is
changed, the temperature on the front passen-
ger side is changed as well.
The program is switched off when the setting is
adjusted on the front passenger side or the but-
ton is pressed again.
Defrosting windows and removing
condensation
Press the button.
Quickly removes ice and conden-
sation from the windshield and
front side windows.
For this purpose, also switch on the cooling
function.
Switching cooling function on/off
The passenger compartment can only be
cooled while the engine is running.
Press the button.
The air is cooled and dehumidified
and – depending on the tempera-
ture setting – warmed again.
Depending on the weather, the windshield may
fog up briefly when the engine is started.
Pressing the AUTO button automatically
switches on the cooling function.
Rear window defroster
Press the button.
The defroster is switched off auto-
matically after a certain time.
Depending on your vehicle's equipment, the
upper wires serve as an antenna and are not
part of the rear window defroster.
Page 103 of 266

Controls
101Reference
At a glance
Driving tips
Communications
Navigation
Entertainment
Mobility
Switching the system on/off
Switching off
With the blower at its lowest set-
ting, press the left side of the but-
ton to switch off the automatic cli-
mate control.
All displays are cleared except for the rear win-
dow defroster if it is switched on.
The outside air supply is blocked when
the automatic climate control is switched
off. If the air quality deteriorates or the window
fogs over, switch the system back on and
increase the air volume.<
Switching on
Press any button except the ALL or the rear
window defroster button to reactivate the auto-
matic climate control.
Ventilation
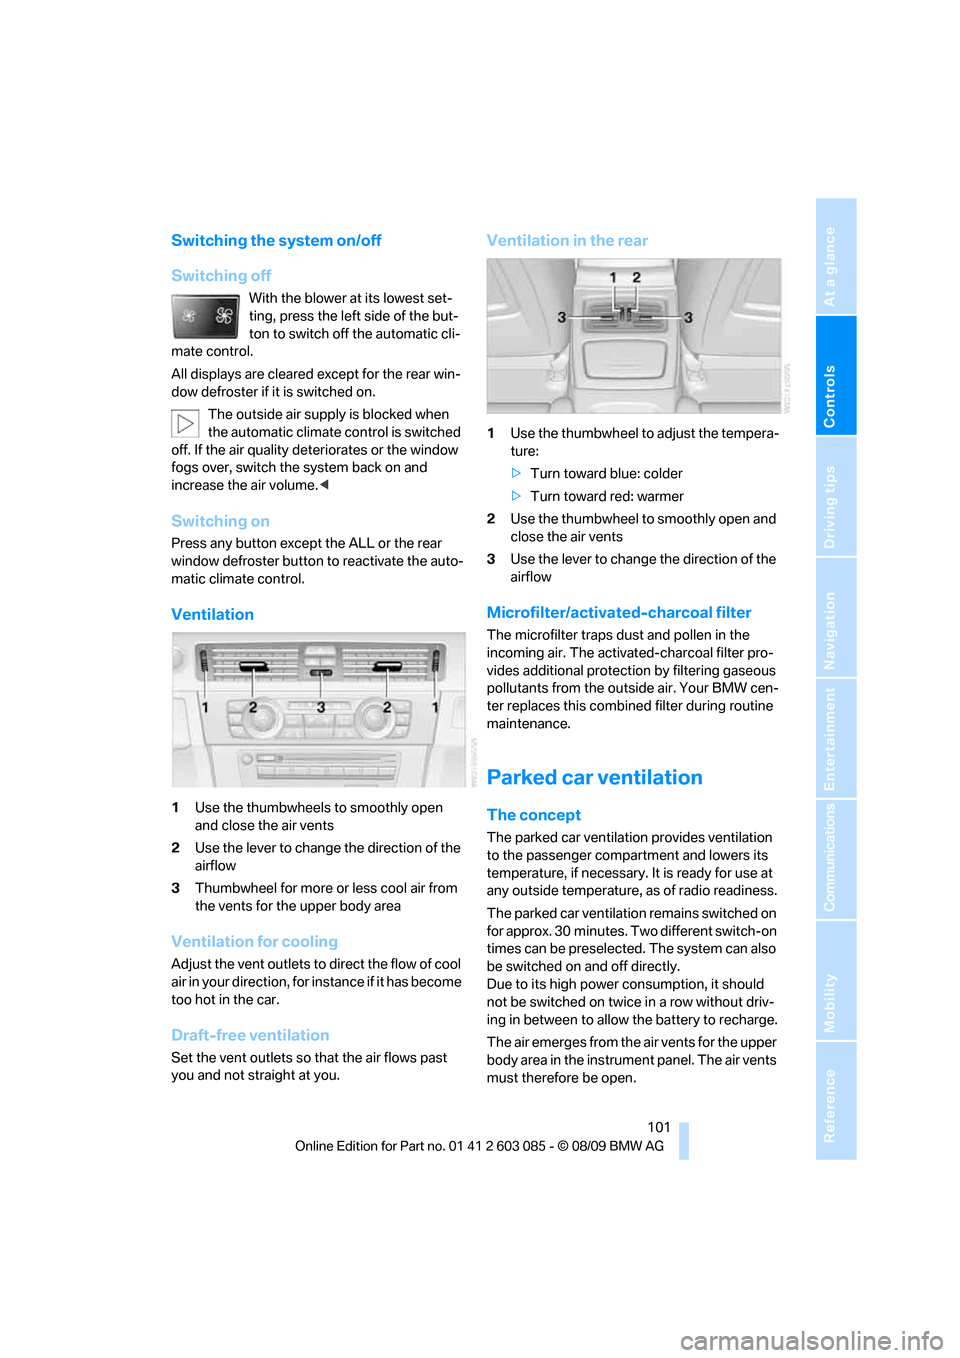
1Use the thumbwheels to smoothly open
and close the air vents
2Use the lever to change the direction of the
airflow
3Thumbwheel for more or less cool air from
the vents for the upper body area
Ventilation for cooling
Adjust the vent outlets to direct the flow of cool
air in your direction, for instance if it has become
too hot in the car.
Draft-free ventilation
Set the vent outlets so that the air flows past
you and not straight at you.
Ventilation in the rear
1Use the thumbwheel to adjust the tempera-
ture:
>Turn toward blue: colder
>Turn toward red: warmer
2Use the thumbwheel to smoothly open and
close the air vents
3Use the lever to change the direction of the
airflow
Microfilter/activated-charcoal filter
The microfilter traps dust and pollen in the
incoming air. The activated-charcoal filter pro-
vides additional protection by filtering gaseous
pollutants from the outside air. Your BMW cen-
ter replaces this combined filter during routine
maintenance.
Parked car ventilation
The concept
The parked car ventilation provides ventilation
to the passenger compartment and lowers its
temperature, if necessary. It is ready for use at
any outside temperature, as of radio readiness.
The parked car ventilation remains switched on
for approx. 30 minutes. Two different switch-on
times can be preselected. The system can also
be switched on and off directly.
Due to its high power consumption, it should
not be switched on twice in a row without driv-
ing in between to allow the battery to recharge.
The air emerges from the air vents for the upper
body area in the instrument panel. The air vents
must therefore be open.
Page 178 of 266

Telephone
176
Telephone
The concept
Your BMW is equipped with a full preparation
package mobile phone. After pairing a suitable
mobile phone with the vehicle once, you can
operate the mobile phone via the iDrive, the
buttons on the steering wheel or using voice
commands
*.
Once a mobile phone has been paired with your
vehicle, it is automatically recognized as soon
as it is inside the vehicle while the engine is run-
ning or the ignition is switched on. You can
store the pairing data for up to four mobile
phones simultaneously. If several mobile
phones are detected at the same time, the
mobile phone last paired can be operated via
the vehicle.
Using the telephone inside
the vehicle
Using the snap-in adapter*
The so-called snap-in adapter, a holder for
mobile phones, allows you to charge the mobile
phone's battery and connect the mobile phone
to your vehicle's outside antenna. This ensures
better network reception and consistent repro-
duction quality. Please contact your
BMW center to find out for which mobile
phones there are snap-in adapters available.
For your safety
A car phone makes life more convenient in
many ways, and can even save lives in an emer-
gency. While you should consult your mobile
phone's separate operating instructions for a
detailed description of safety precautions and
information, we request that you direct your
particular attention to the following:
Only make entries when the traffic situa-
tion allows you to do so. Do not hold the
mobile phone in your hand while you are driving;
use the hands-free system instead. If you do not observe this precaution, your being dis-
tracted can endanger vehicle occupants and
other road users.<
Suitable mobile phones
Please ask your BMW center which mobile
phones with Bluetooth interface are supported
by the mobile phone preparation package and
which mobile phones are compatible with the
snap-in adapter. By virtue of their particular
software versions, these mobile phones sup-
port the functions described in this Owner's
Manual. Malfunctions may occur with other
mobile phones.
Operating options
You can operate the mobile phone using:
>Buttons on the steering wheel, refer to
page10
>iDrive, refer to page16
>Voice commands
*, refer to page183
>Programmable memory keys, refer to
page20
Avoid operating a mobile phone recognized by
the vehicle via the mobile phone's keypad; oth-
erwise, malfunctions may result.
Start-up
Pairing the mobile phone with the
vehicle
The following prerequisites must be met:
>Compatible mobile phone: the mobile
phone is supported by the full preparation
package mobile phone. You can obtain
information on the Internet at:
www.bmw.com/bluetooth
>The mobile phone is ready to operate.
*
Page 189 of 266

187
Entertainment
Reference
At a glance
Controls
Driving tips Communications
Navigation
Mobility
tact points and press it downward until it
engages.
The mobile phone's battery is charged as soon
as the vehicle is in radio readiness or the steer-
ing is unlocked.
To conserve vehicle battery power, you
should avoid using the mobile phone
when the ignition is switched off.<
Removing mobile phone
Press the button.
Page 230 of 266

Replacing components
228
Jack mounting points
The jacking points are at the positions shown in
the illustration.
Vehicle battery
Battery care
The battery is 100 % maintenance-free, the
electrolyte will last for the life of the battery
when the vehicle is operated in a temperate cli-
ma te. Your BM W center will be glad to advise in
all matters concerning the battery.
Replacing the battery
Only use vehicle batteries that have been
approved for your vehicle by the manu-
facturer; otherwise, the vehicle could be dam-
aged and systems or functions may not be fully
available.<
After a battery replacement, have the battery
registered on the vehicle by your service center
to ensure that all comfort functions are fully
available.
Charging the battery
Only charge the battery in the vehicle via the
terminals in the engine compartment with the
engine off. Connections, refer to Jump-starting
on page231.
Disposal
Have old batteries disposed of by your
BMW center or bring them to a recycling
center. Maintain the battery in an upright posi-
tion for transport and storage. Always secure the battery against tipping over during trans-
port.<
Power failure
After a temporary power loss, the functioning of
some equipment may be limited and require
reinitialization. Individual settings may likewise
have been lost and will have to be programmed:
>Time and date
These values must be updated, refer to
page75.
>Radio
In some cases, stations may have to be
stored again, refer to page149.
>Navigation system
Operability must be waited for, refer to
page126.
>Glass roof
It may happen that the roof can only be
raised. The system must be initialized.
Please contact your BMW center.
>Seat and mirror memory
The positions must be stored again, refer to
page47.
>Inside rearview mirror with digital compass
The system must be calibrated, refer to
page105.
>Active steering
The system automatically initializes itself
briefly during a trip. The system is deacti-
vated during this time, refer to page88.
>xDrive
The system automatically initializes itself
during a trip. Indicator lamps light up during
this time. If the lamps do not go out during
the current trip, have the system checked.
Fuses
Never attempt to repair a blown fuse and
do not replace a defective fuse with a sub-
stitute of another color or amperage rating; oth-
erwise, this could lead to a circuit overload, ulti-
mately resulting in a fire in the vehicle.<
Page 233 of 266

Mobility
231Reference
At a glance
Controls
Driving tips
Communications
Navigation
Entertainment
ularly and replace any items in good time, if nec-
essary.
Coupe
The first aid pouch is located on the right-hand
side of the cargo area in a storage area.
Convertible
The first aid pouch is located in a compartment
under the front passenger seat.
To open: press the button and fold the cover
down.
To close: fold the cover back up and press it into
the catch.
Warning triangle*
Coupe
The warning triangle is located on the left-hand
side of the cargo area. Press the tab to take it
out.
Convertible
The warning triangle is located in a holder in the
trunk lid. Press the tabs to take it out.
Jump-starting
If the car's own battery is flat, your BMW's
engine can be started by connecting two
jumper cables to another vehicle's battery. You
can also use the same method to help start
another vehicle. Only use jumper cables with
fully-insulated clamp handles.
Do not touch any electrically live parts
when the engine is running, or a fatal acci-
dent may occur. Carefully adhere to the follow-
ing sequence, both to prevent damage to one or
both vehicles, and to guard against possible
personal injuries.<
Page 234 of 266

Giving and receiving assistance
232
Preparation
1.Check whether the battery of the other
vehicle has a voltage of 12 volts and
approximately the same capacitance in Ah.
This information can be found on the bat-
tery.
2.Switch off the engine of the assisting vehi-
cle.
3.Switch off any consumers in both vehicles.
There must not be any contact between
the bodies of the two vehicles; otherwise,
there is a danger of shorting.<
Connecting jumper cables
Connect the jumper cables in the correct
order, so that no sparks which could
cause injury occur.<
Your BMW has a jump-starting connection in
the engine compartment which acts as the bat-
tery's positive terminal, refer also to the Engine
compartment overview on page213. The cap is
marked with +.
1.Pull the cap of the BMW jump-starting con-
nection up to remove.
2.Attach one terminal clamp of the plus/+
jumper cable to the positive terminal of the
battery or a starting-aid terminal of the vehi-
cle providing assistance.
3.Attach the second terminal clamp of the
plus/+ jumper cable to the positive terminal
of the battery or a starting-aid terminal of
the vehicle to be started.
4.Attach one terminal clamp of the minus/–
jumper cable to the negative terminal of the
battery or to an engine or body ground of
the assisting vehicle. Your BMW has a special nut as body ground
or negative pole.
5.Attach the second terminal clamp of the
minus/– jumper cable to the negative termi-
nal of the battery or to the engine or body
ground of the vehicle to be started.
Starting the engine
1.Start the engine of the donor vehicle and
allow it to run for a few minutes at slightly
increased idle speed.
2.Start the engine on the other vehicle in the
usual way.
If the first start attempt is not successful,
wait a few minutes before another attempt
in order to allow the discharged battery to
recharge.
3.Let the engines run for a few minutes.
4.Disconnect the jumper cables by reversing
the above connecting sequence.
If necessary, have the battery checked and
recharged.
Never use spray fluids to start the
engine.<
Tow-starting, towing away
Observe the applicable laws and regula-
tions for tow-starting and towing vehi-
cles.<
Do not transport any passengers other
than the driver in a vehicle that is being
towed.<