2010 BMW 335I CONVERTIBLE page 38
[x] Cancel search: page 38Page 140 of 266

Destination guidance
138 1."Navigation"
2."Map"
3.Select the symbol.
For rapid access, the feature can be stored on a
programmable memory key, refer to page20.
Repeating a voice instruction
1."Navigation"
2."Map"
3.Highlight the symbol.
4.Press the controller twice.
Adjusting the volume of voice
instructions*
The volume can be adjusted only while a voice
instruction is being issued.
1.Have the last voice instruction repeated, if
necessary.
2.Turn the button during the voice instruction
to select the desired volume.
The setting is stored for the remote control cur-
rently in use.
Map view
Displaying the map view
You can have your current position displayed on
a map. After starting the destination guidance,
the planned route is shown on the map.
1."Navigation"
2."Map"
The following functions are directly available in
the map view:
Information in the map view:
>Time, entertainment source, sound output,
map orientation
>Distance from destination, estimated time
of arrival, if destination guidance is active.
>Any traffic obstructions are highlighted in
color.
To show/hide information on the map:
Press the controller.
Viewing the map
1.Select the symbol.
2.Select a setting:
>"View facing north"
>"View in dir. of travel"
>"Perspective view"
>"Arrow display"
SymbolMeaning
Voice instructions are
switched on
Voice instructions are
switched off
SymbolFunction
Starting/stopping destina-
tion guidance
Switching voice instructions
on/off
Changing route criteria or
selecting route alternatives
Special destinations
Displaying traffic bulletins
Interactive map
Map view settings
Changing scale
Page 143 of 266
Navigation
Driving tips
141Reference
At a glance
Controls
Communications
Entertainment
Mobility
Traffic bulletins in the map
When the traffic bulletin map is activated, the
Control Display changes to a grayscale display.
This enables a better view of the traffic bulle-
tins. The day/night mode is disregarded in this
setting. The symbols for the special destina-
tions are no longer displayed.
1."Navigation"
2."Map"
3.Open "Options".
4."Settings"
5."Traffic Info map"
Symbols in the map view
Depending on the scale of the map and the
location of the traffic obstruction along the
route, the symbols for the traffic obstructions
are displayed.
Additional information in the map view
Depending on the map scale, a traffic obstruc-
tion's length, direction and impact are displayed
on the map using triangles or gray bars along
the calculated route.
Filtering of traffic bulletins
You can filter which traffic bulletins are to be
displayed by the system:
1."Navigation"
2."Map"
3.Open "Options".
4."Traffic Info categories"
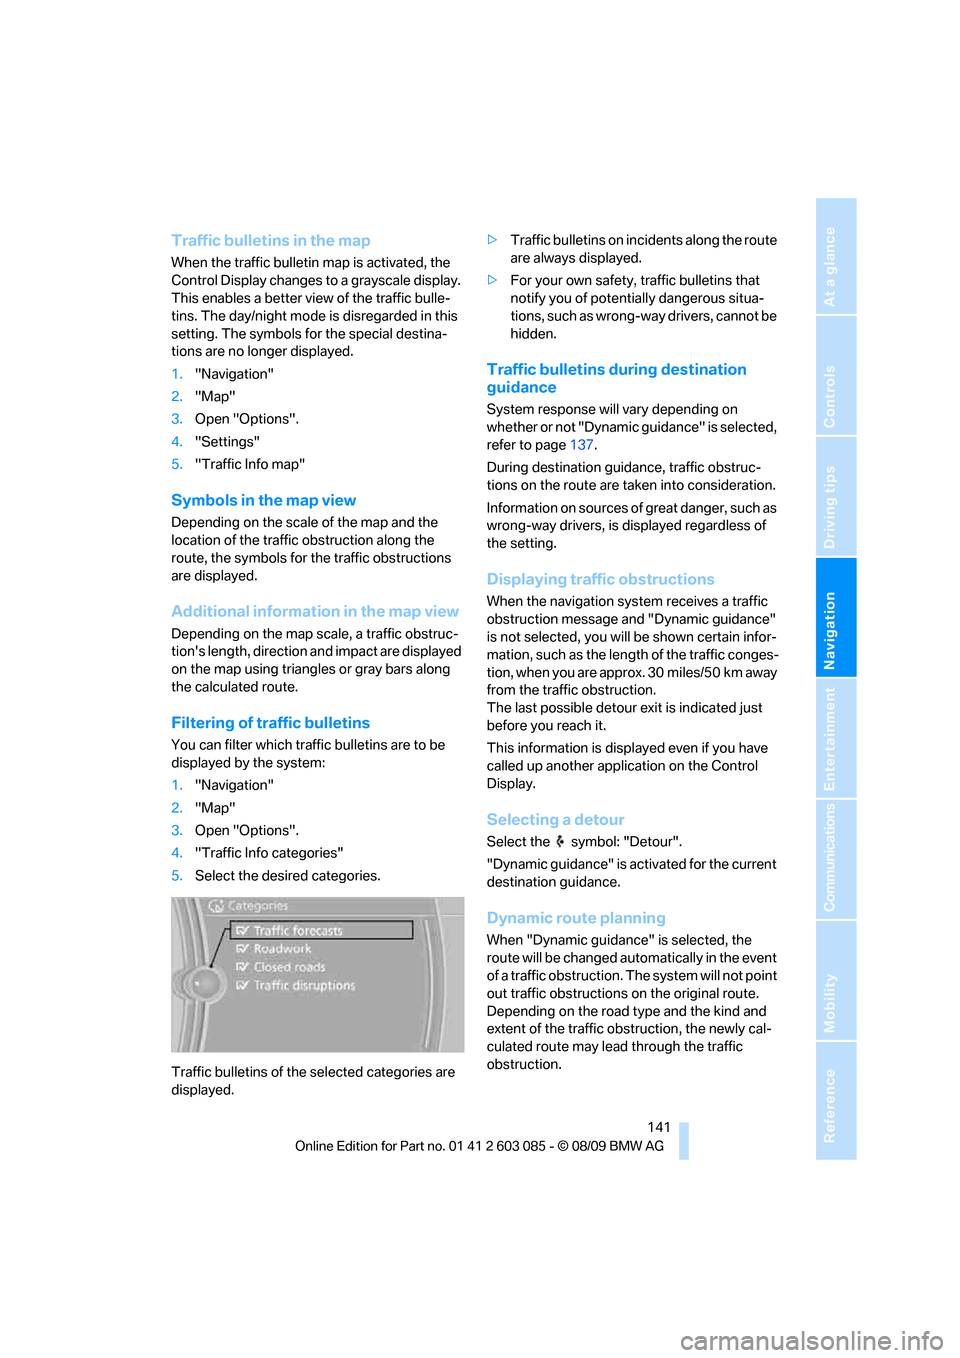
5.Select the desired categories.
Traffic bulletins of the selected categories are
displayed.>Traffic bulletins on incidents along the route
are always displayed.
>For your own safety, traffic bulletins that
notify you of potentially dangerous situa-
tions, such as wrong-way drivers, cannot be
hidden.
Traffic bulletins during destination
guidance
System response will vary depending on
whether or not "Dynamic guidance" is selected,
refer to page137.
During destination guidance, traffic obstruc-
tions on the route are taken into consideration.
Information on sources of great danger, such as
wrong-way drivers, is displayed regardless of
the setting.
Displaying traffic obstructions
When the navigation system receives a traffic
obstruction message and "Dynamic guidance"
is not selected, you will be shown certain infor-
mation, such as the length of the traffic conges-
tion, when you are approx. 30 miles/50 km away
from the traffic obstruction.
The last possible detour exit is indicated just
before you reach it.
This information is displayed even if you have
called up another application on the Control
Display.
Selecting a detour
Select the symbol: "Detour".
"Dynamic guidance" is activated for the current
destination guidance.
Dynamic route planning
When "Dynamic guidance" is selected, the
route will be changed automatically in the event
of a traffic obstruction. The system will not point
out traffic obstructions on the original route.
Depending on the road type and the kind and
extent of the traffic obstruction, the newly cal-
culated route may lead through the traffic
obstruction.
Page 148 of 266

On/off and tone
146
On/off and tone
The following audio and video sources share
the same control elements and adjustments:
>Radio
>CD/DVD player
>CD changer
*
>Video*
>External devices, e.g. MP3 player
Controls
The audio and video sources can be controlled
using the:
>Buttons near the CD/DVD player
>iDrive
>Buttons on the steering wheel, refer to
page10
>Programmable memory keys, refer to
page20
>Voice activation system
Buttons in the area of the CD/DVD
player
1Sound output for entertainment on/off, vol-
ume
>Press: switch on/off
When you switch on the unit, the last set
radio station or track is played.
>Turn: adjusting the volume
2 Eject the CD/DVD
3CD/DVD drive
*
4FM/AM: change the radio station wave-
band
5MODE: change the audio and video
sources
6 Station scan/track search
>Change the radio station
>Select the track for the CD/DVD player,
CD changer and certain multimedia
devices
Switching on/off
To switch the entertainment audio output on or
off:
Press button1 next to the CD/DVD player.
This symbol on the Control Display indicates
that sound output is switched off.
The sound output is available for approx.
20 minutes after the ignition was switched off.
For sound output, switch the unit back on.
Adjusting volume
Turn button1 next to the CD/DVD player until
the desired volume is obtained.
You can also adjust the volume with buttons on
the steering wheel, refer to page10.
Tone control
You can alter various tone settings, e.g. treble
and bass or the speed-dependent volume
increase.
The tone settings are applied to all audio
sources.
The settings are stored for the remote control
currently in use.
Treble, bass, balance, fader
>"Balance": left/right volume distribution
Page 151 of 266
Navigation
Entertainment
Driving tips
149Reference
At a glance
Controls
Communications
Mobility
Radio
Your radio is designed for reception of the fol-
lowing stations:
>FM and AM
>HD Radio
*
>Satellite radio*
Selecting a station
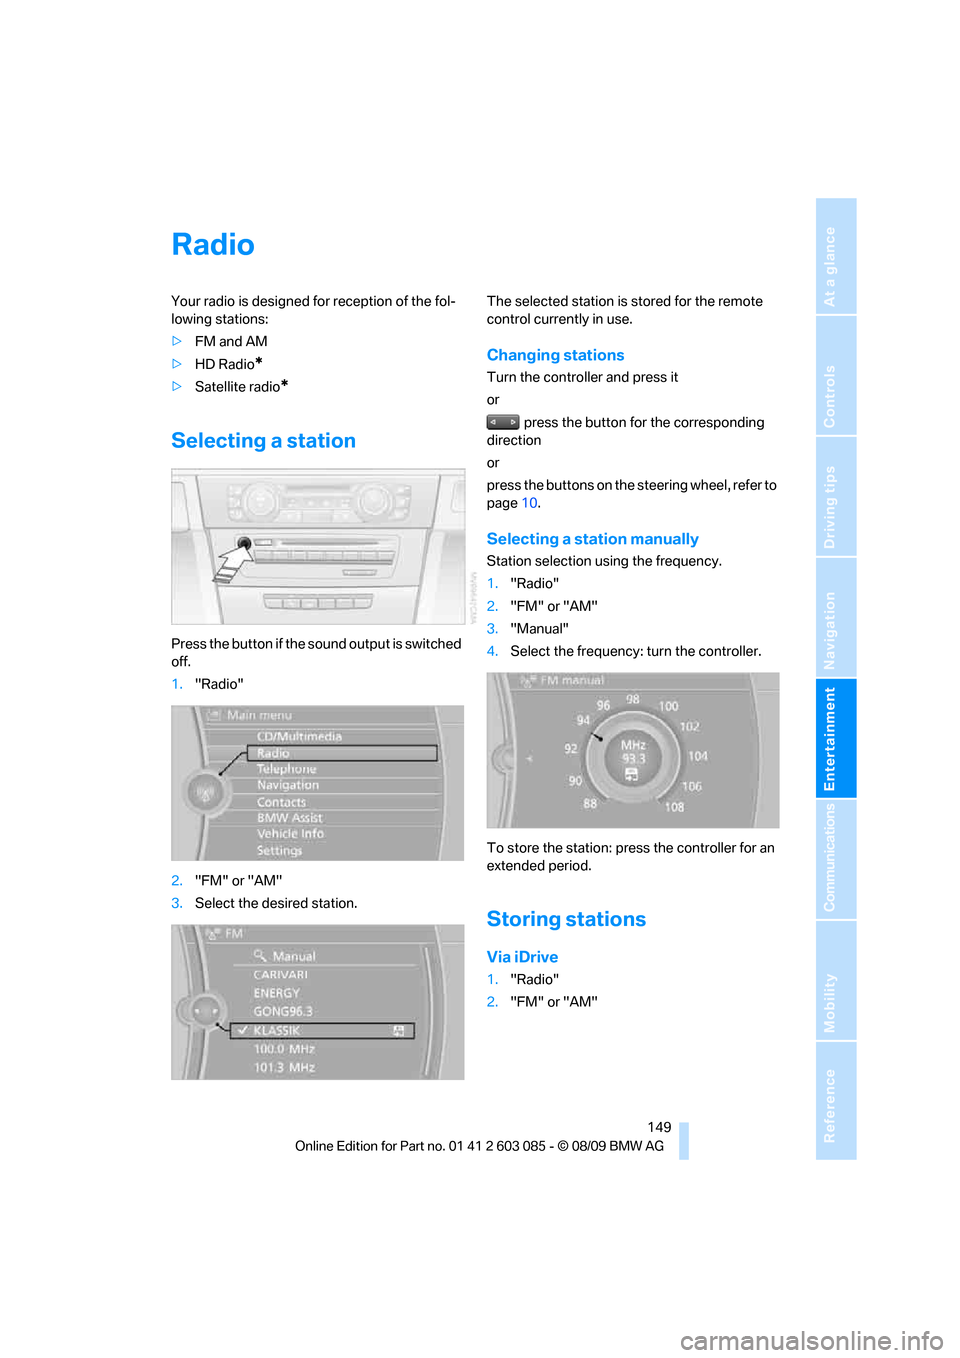
Press the button if the sound output is switched
off.
1."Radio"
2."FM" or "AM"
3.Select the desired station.The selected station is stored for the remote
control currently in use.
Changing stations
Turn the controller and press it
or
press the button for the corresponding
direction
or
press the buttons on the steering wheel, refer to
page10.
Selecting a station manually
Station selection using the frequency.
1."Radio"
2."FM" or "AM"
3."Manual"
4.Select the frequency: turn the controller.
To store the station: press the controller for an
extended period.
Storing stations
Via iDrive
1."Radio"
2."FM" or "AM"
Page 152 of 266
Radio
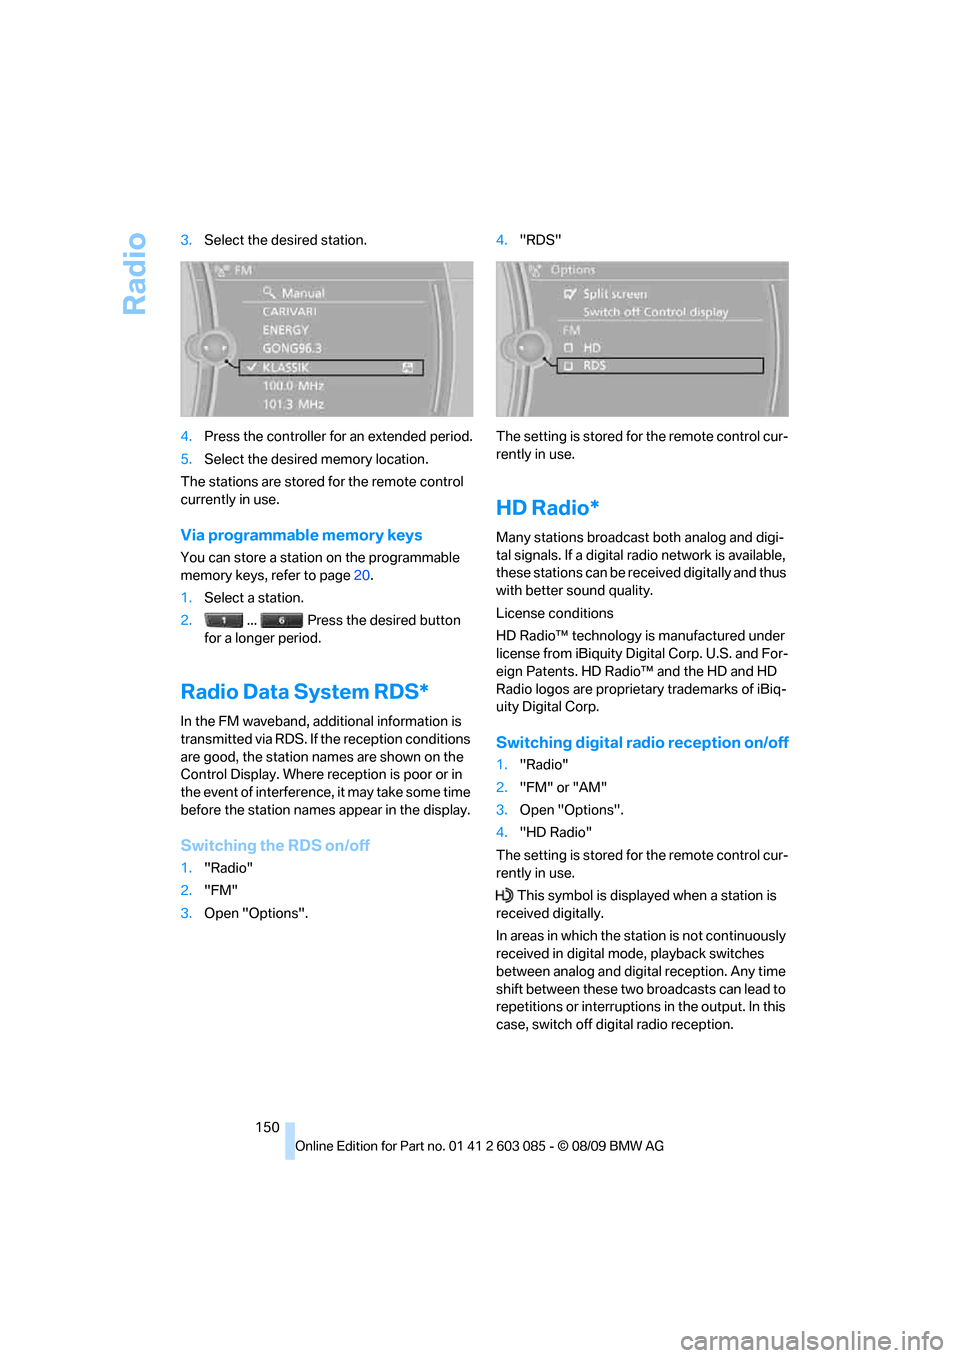
150 3.Select the desired station.
4.Press the controller for an extended period.
5.Select the desired memory location.
The stations are stored for the remote control
currently in use.
Via programmable memory keys
You can store a station on the programmable
memory keys, refer to page20.
1.Select a station.
2. ... Press the desired button
for a longer period.
Radio Data System RDS*
In the FM waveband, additional information is
transmitted via RDS. If the reception conditions
are good, the station names are shown on the
Control Display. Where reception is poor or in
the event of interference, it may take some time
before the station names appear in the display.
Switching the RDS on/off
1."Radio"
2."FM"
3.Open "Options".4."RDS"
The setting is stored for the remote control cur-
rently in use.
HD Radio*
Many stations broadcast both analog and digi-
tal signals. If a digital radio network is available,
these stations can be received digitally and thus
with better sound quality.
License conditions
HD Radio™ technology is manufactured under
license from iBiquity Digital Corp. U.S. and For-
eign Patents. HD Radio™ and the HD and HD
Radio logos are proprietary trademarks of iBiq-
uity Digital Corp.
Switching digital radio reception on/off
1."Radio"
2."FM" or "AM"
3.Open "Options".
4."HD Radio"
The setting is stored for the remote control cur-
rently in use.
This symbol is displayed when a station is
received digitally.
In areas in which the station is not continuously
received in digital mode, playback switches
between analog and digital reception. Any time
shift between these two broadcasts can lead to
repetitions or interruptions in the output. In this
case, switch off digital radio reception.
Page 153 of 266
Navigation
Entertainment
Driving tips
151Reference
At a glance
Controls
Communications
Mobility
Displaying additional information
Some stations broadcast additional information
on the current track, such as the name of the
artist.
1.Select the desired station.
2.Open "Options".
3."Station info"
Selecting a substation
1.Select the desired station.
2.Press the controller.
3.Select the substation.
Presets
It is possible to store up to 40 stations.
Calling up a station
1."Radio"
2."Presets"
3.Select the desired station.
Storing a station
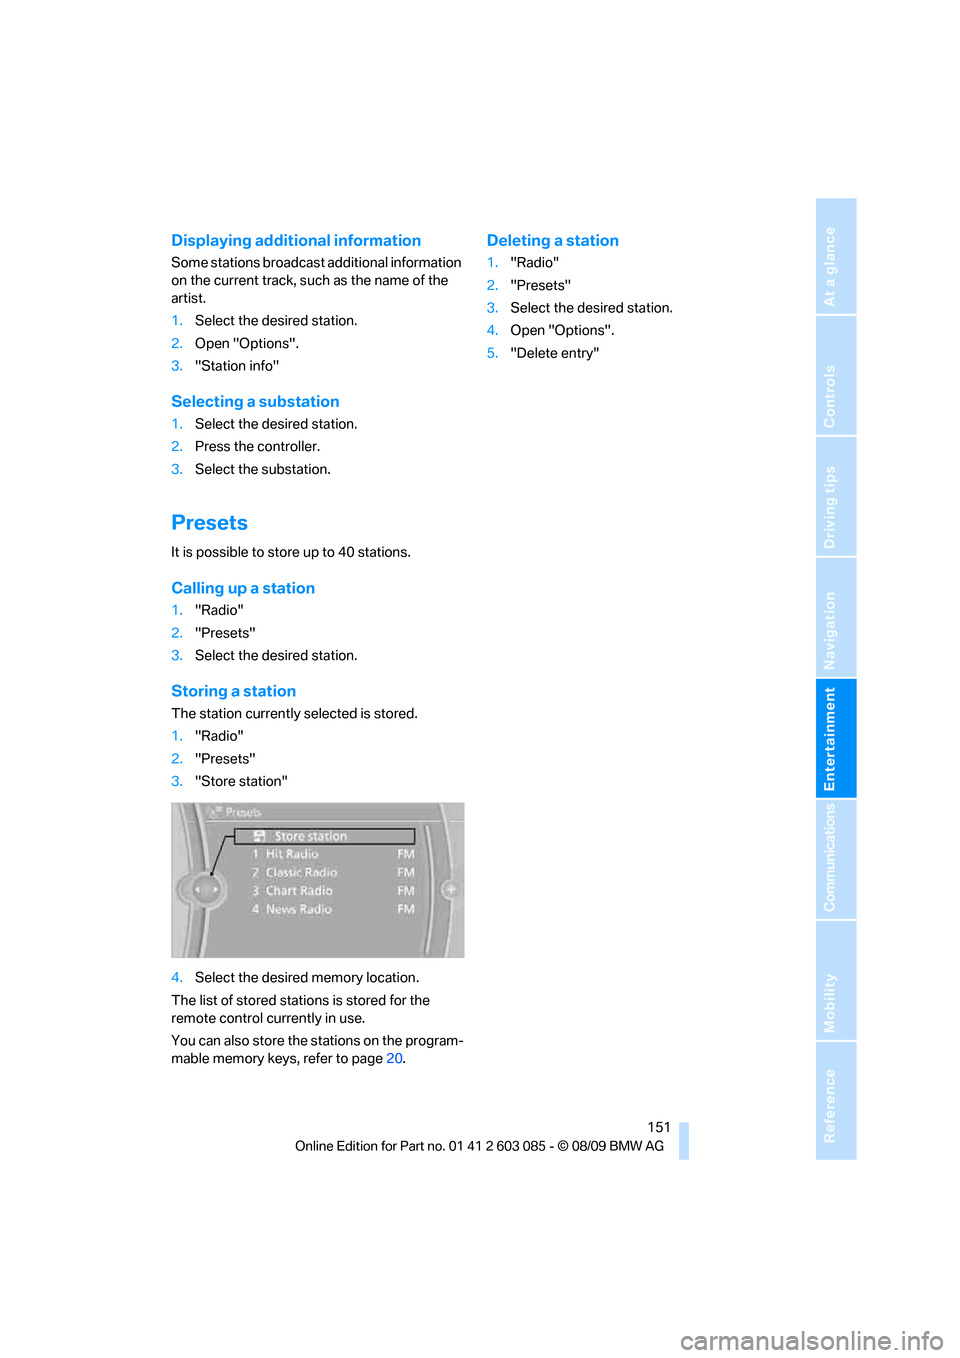
The station currently selected is stored.
1."Radio"
2."Presets"
3."Store station"
4.Select the desired memory location.
The list of stored stations is stored for the
remote control currently in use.
You can also store the stations on the program-
mable memory keys, refer to page20.
Deleting a station
1."Radio"
2."Presets"
3.Select the desired station.
4.Open "Options".
5."Delete entry"
Page 154 of 266
Satellite radio
152
Satellite radio
General information
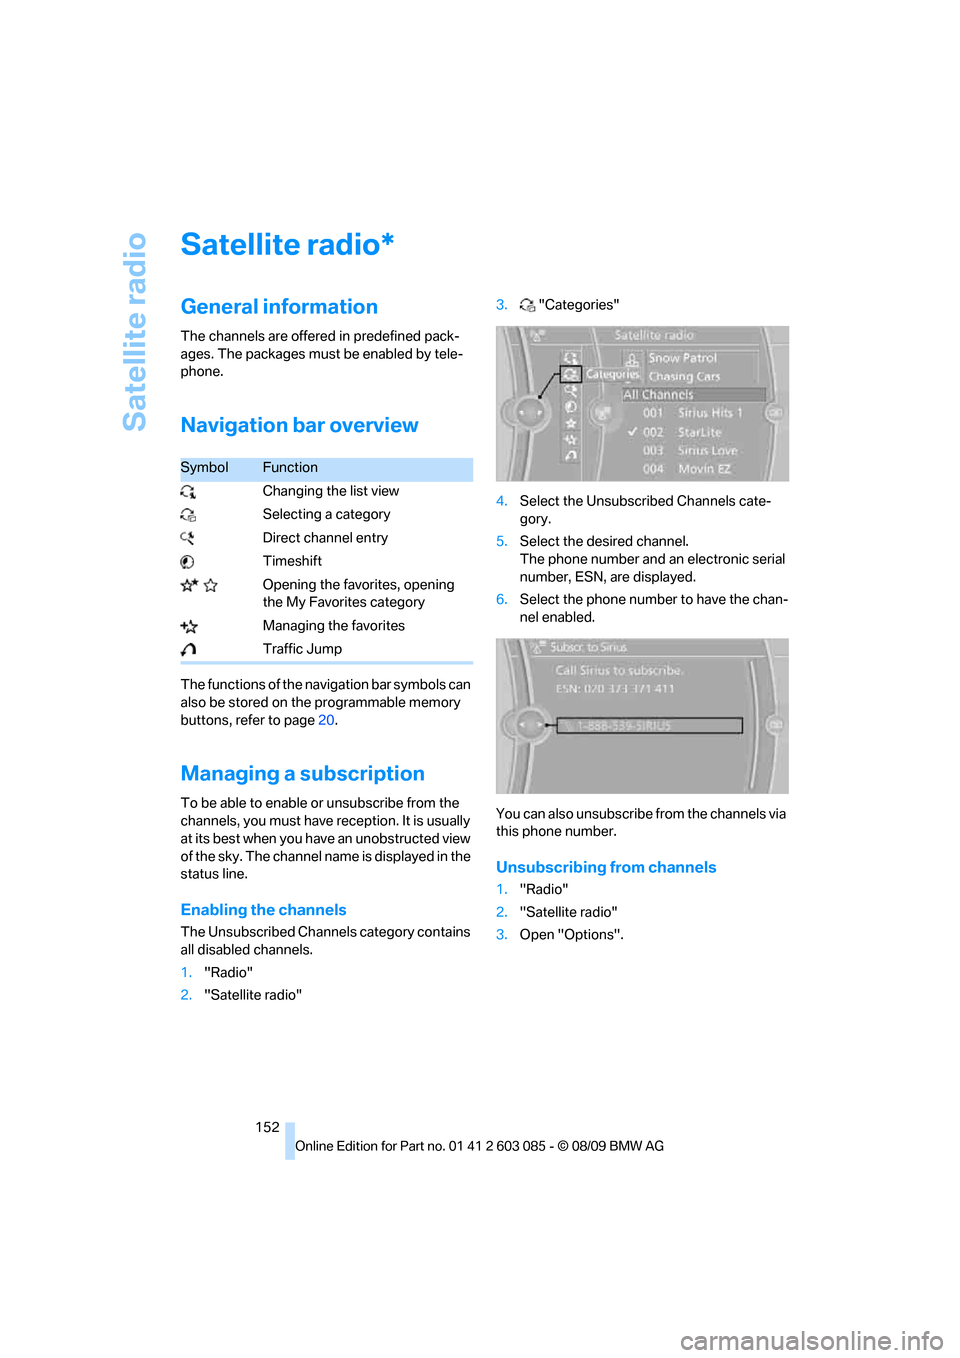
The channels are offered in predefined pack-
ages. The packages must be enabled by tele-
phone.
Navigation bar overview
The functions of the navigation bar symbols can
also be stored on the programmable memory
buttons, refer to page20.
Managing a subscription
To be able to enable or unsubscribe from the
channels, you must have reception. It is usually
at its best when you have an unobstructed view
of the sky. The channel name is displayed in the
status line.
Enabling the channels
The Unsubscribed Channels category contains
all disabled channels.
1."Radio"
2."Satellite radio"3."Categories"
4.Select the Unsubscribed Channels cate-
gory.
5.Select the desired channel.
The phone number and an electronic serial
number, ESN, are displayed.
6.Select the phone number to have the chan-
nel enabled.
You can also unsubscribe from the channels via
this phone number.
Unsubscribing from channels
1."Radio"
2."Satellite radio"
3.Open "Options".
*
SymbolFunction
Changing the list view
Selecting a category
Direct channel entry
Timeshift
Opening the favorites, opening
the My Favorites category
Managing the favorites
Traffic Jump
Page 155 of 266

Navigation
Entertainment
Driving tips
153Reference
At a glance
Controls
Communications
Mobility
4."Manage subscription"
The phone number and an electronic serial
number, ESN, are displayed.
5.Call Sirius to unsubscribe from the chan-
nels.
Selecting a channel
You can only listen to enabled channels.
The selected channel is stored for the remote
control currently in use.
Via iDrive
1."Radio"
2."Satellite radio"
3.Select "All Channels" or the desired cate-
gory.
4.Select the desired channel.
Via the button in the area of the CD/
DVD player
Press the button for the corresponding
direction.
The next channel is selected.
Via direct channel entry
1."Radio"
2."Satellite radio"
3."Select channel"
4.Turn the controller until the desired channel
is reached and press the controller.
Storing a channel
1."Radio"
2."Satellite radio"
3.If necessary, open "All Channels" or the
desired category.
4.Select the desired channel.
5.Press the controller again.
6.Press the controller again to confirm the
highlighted channel.
7.Select the desired memory location.
The channels are stored for the remote control
currently in use.
You can also store the channels on the pro-
grammable memory keys, refer to page20.
Changing the list view
The list view changes every time the first sym-
bol on the navigation bar is pressed.
Information on the channel is displayed.
SymbolFunction
Channel name
Artist
Track