Page 130 of 250
Destination guidance
128 3.Select the symbol.
For rapid access, the feature can be stored on a
programmable memory key, refer to page20.
Repeating a voice instruction
1."Navigation"
2."Map"
3.Highlight the symbol.
4.Press the controller twice.
Adjusting the volume of voice
instructions*
The volume can be adjusted only while a voice
instruction is being issued.
1.Have the last voice instruction repeated, if
necessary.
2.Turn the button during the voice instruction
to select the desired volume.
The setting is stored for the remote control cur-
rently in use.
Map view
Displaying the map view
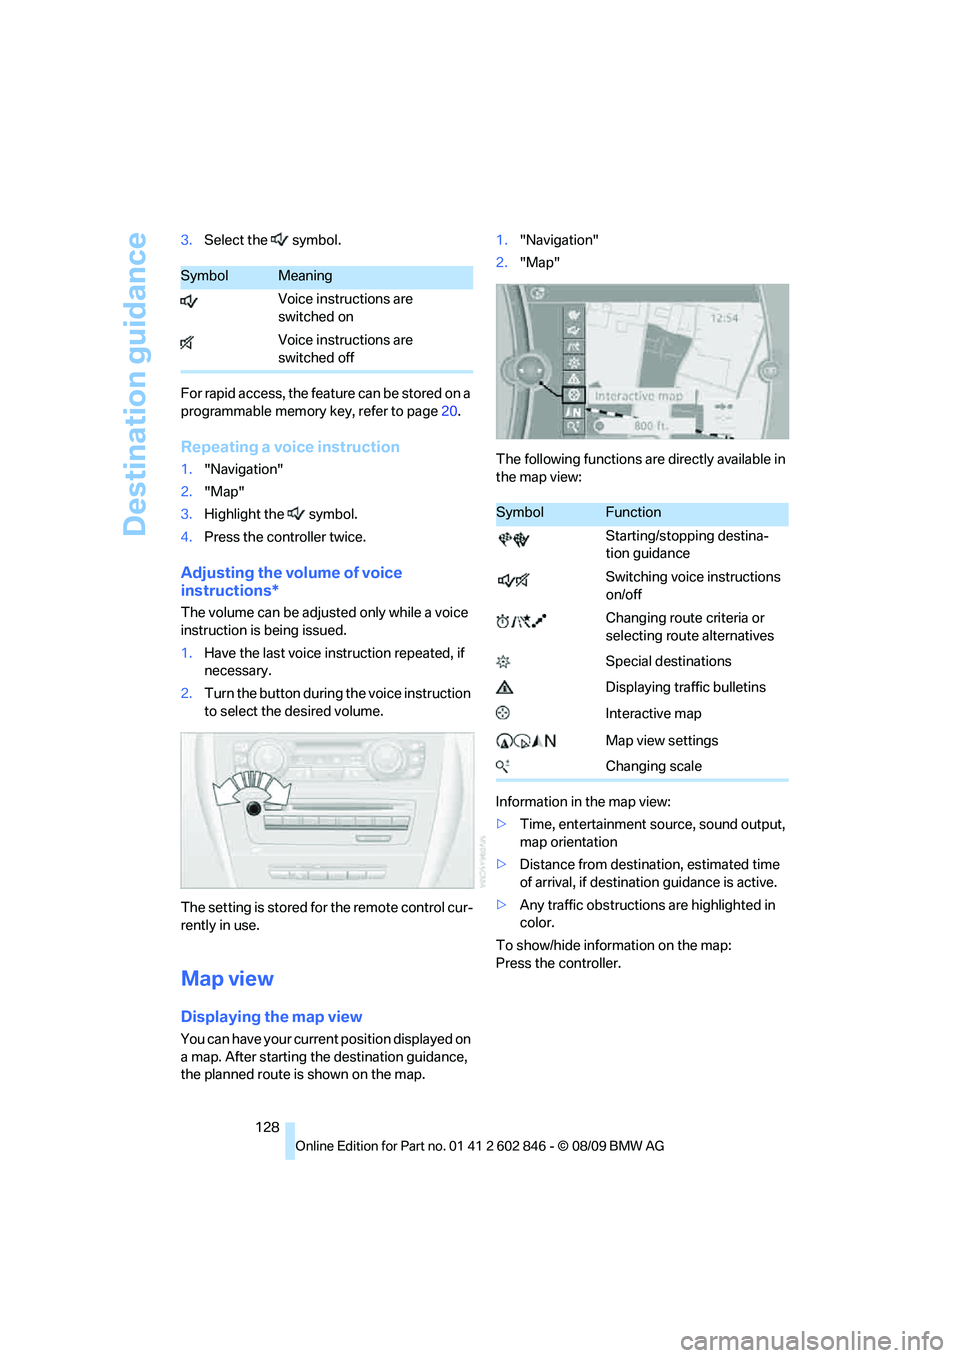
You can have your current position displayed on
a map. After starting the destination guidance,
the planned route is shown on the map.1."Navigation"
2."Map"
The following functions are directly available in
the map view:
Information in the map view:
>Time, entertainment source, sound output,
map orientation
>Distance from destination, estimated time
of arrival, if destination guidance is active.
>Any traffic obstructions are highlighted in
color.
To show/hide information on the map:
Press the controller.
SymbolMeaning
Voice instructions are
switched on
Voice instructions are
switched off
SymbolFunction
Starting/stopping destina-
tion guidance
Switching voice instructions
on/off
Changing route criteria or
selecting route alternatives
Special destinations
Displaying traffic bulletins
Interactive map
Map view settings
Changing scale
Page 135 of 250
Navigation
Driving tips
133Reference
At a glance
Controls
Communications
Entertainment
Mobility
What to do if …
What to do if …
>The current position cannot be displayed?
The position is in an unrecognized region, in
a poor reception area, or the system is in the
process of determining the position.
Reception is generally available when you
are in the open.
>The destination guidance does not accept
an address without the street name?
A downtown area cannot be determined for
the town or city that has been entered. Input
any street in the selected town/city and
start destination guidance.
>The destination guidance does not accept a
destination?
The destination data is not contained in the
navigation data. Choose a destination as
close as possible to the original one.
>The letters for a destination cannot be
selected during destination entry?
The stored data do not contain the data of
the destination. Select a destination that is
as close as possible to the original.
>The map view is displayed in grayscale?
When the traffic bulletin map is activated,
the Control Display changes to a grayscale
display. This enables a better view of the
traffic bulletins.
>Voice instructions are no longer issued
before intersections during destination
guidance?
The area has not been fully recorded yet, or
you have left the recommended route and
the system requires a few seconds to calcu-
late a new route suggestion.
Page 149 of 250
Navigation
Entertainment
Driving tips
147Reference
At a glance
Controls
Communications
Mobility
CD/DVD player and CD changer
CD/DVD playback
Inserting a CD / DVD
Insert the CD/DVD into the drive with the
labeled side facing up. The CD/DVD is drawn in
automatically.
Playback starts automatically if the sound out-
put is on. For CDs/DVDs with compressed
audio files, it can take several minutes to read in
the data, depending on the directory structure.
Playable formats
CD/DVD player
>DVD: DVD-ROM, DVD-R, DVD+R, DVD-
RW, DVD+RW, DVD-R DL, DVD+R DL, DVD
audio (video part only), DVD video
>CD: CD-ROM, CD-R, CD-RW, CD-DA,
VCD, SVCD
>Compressed audio files: MP3, WMA, AAC
CD changer
*
>CD: CD-ROM, CD-R, CD-RW, CD-DA
Starting playback
Via iDrive
Fill the CD/DVD magazine and insert it, refer to
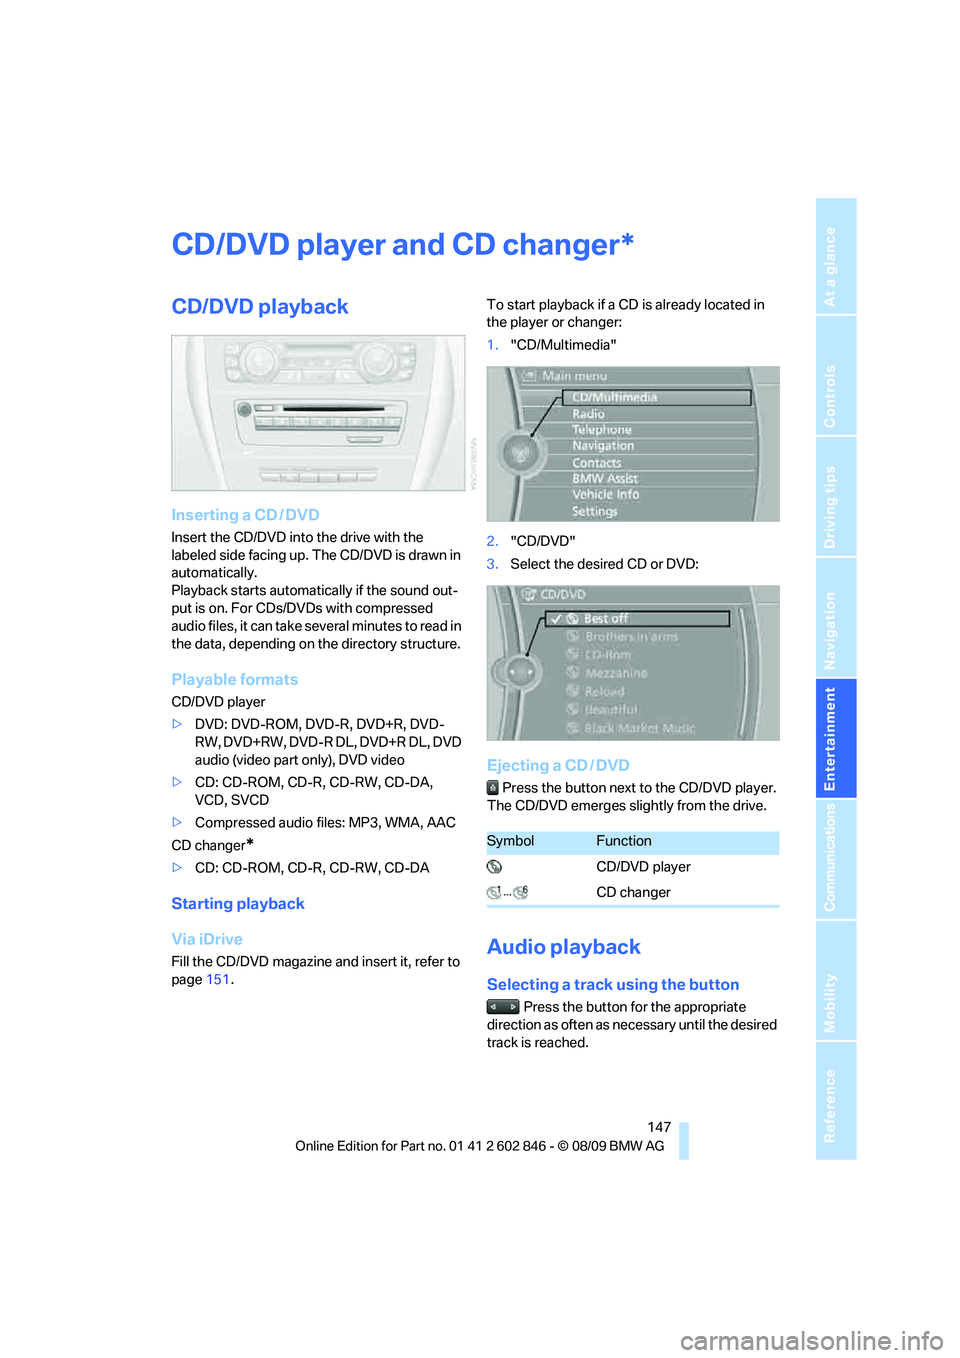
page151.To start playback if a CD is already located in
the player or changer:
1."CD/Multimedia"
2."CD/DVD"
3.Select the desired CD or DVD:
Ejecting a CD / DVD
Press the button next to the CD/DVD player.
The CD/DVD emerges slightly from the drive.
Audio playback
Selecting a track using the button
Press the button for the appropriate
direction as often as necessary until the desired
track is reached.
*
SymbolFunction
CD/DVD player
CD changer
Page 151 of 250
Navigation
Entertainment
Driving tips
149Reference
At a glance
Controls
Communications
Mobility
5."Random"
CDs/DVDs with compressed audio files: the
directories and the tracks contained therein are
played back in random sequence.
Random mode is switched off when the audio
source is changed or the ignition is switched off.
Fast forward/reverse
Press and hold the button for the corre-
sponding direction.
Automatic repeat*
Selected tracks, directories or CDs/DVDs are
repeated automatically.
Video playback*
Country codes
Only DVDs with the code of the home region
can be played back; also refer to the information
on your DVD.
Starting playback
For your own safety, the video image is only dis-
played up to approx. 2 mph/3 km/h, and in some
market-specific versions only with the parking
brake applied.
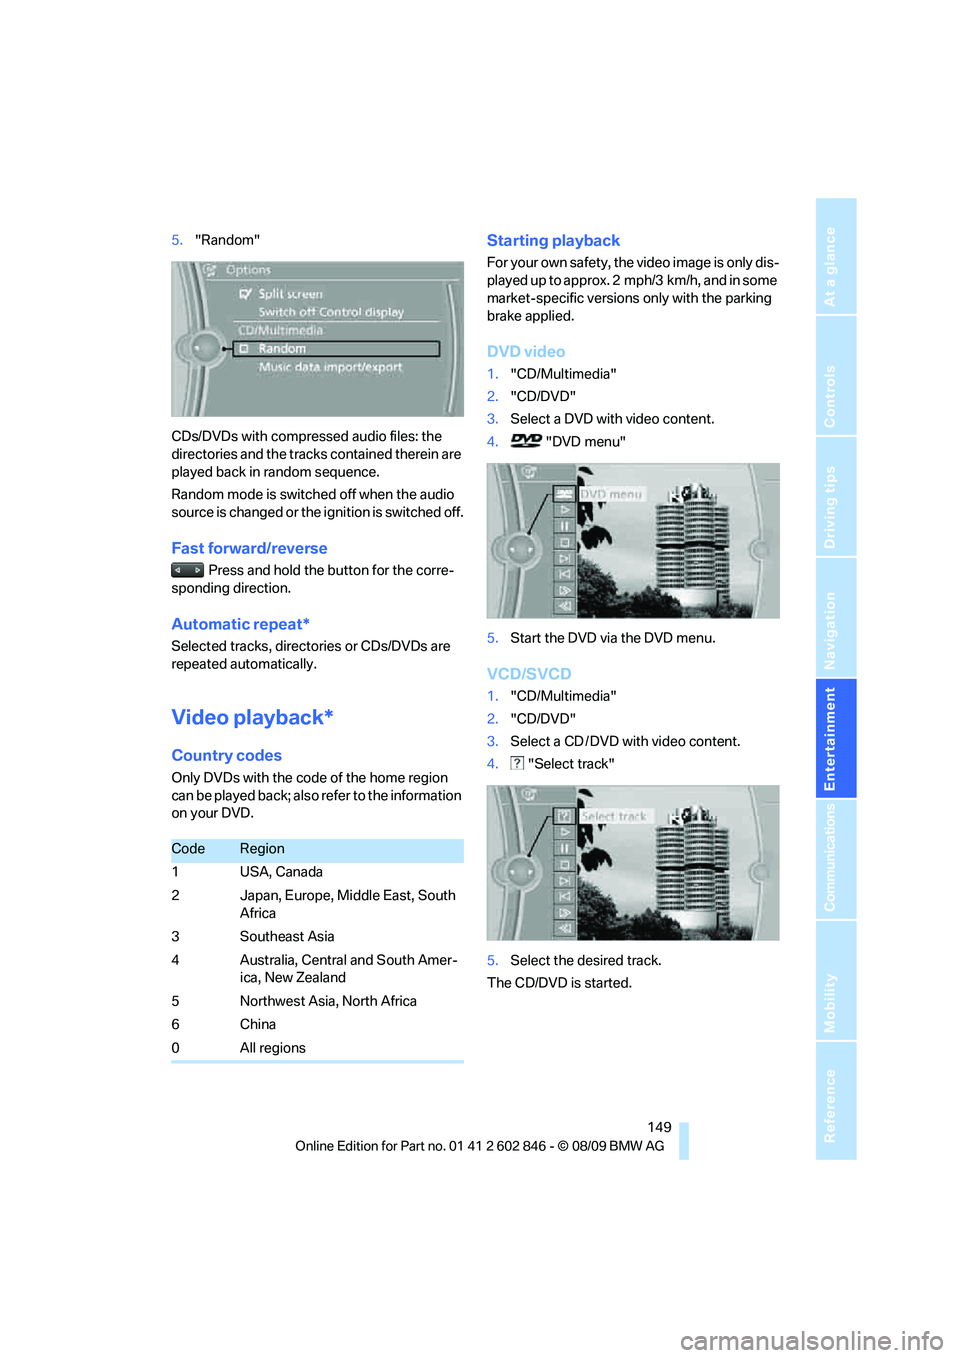
DVD video
1."CD/Multimedia"
2."CD/DVD"
3.Select a DVD with video content.
4. "DVD menu"
5.Start the DVD via the DVD menu.
VCD/SVCD
1."CD/Multimedia"
2."CD/DVD"
3.Select a CD / DVD with video content.
4. "Select track"
5.Select the desired track.
The CD/DVD is started.
CodeRegion
1USA, Canada
2 Japan, Europe, Middle East, South
Africa
3Southeast Asia
4 Australia, Central and South Amer-
ica, New Zealand
5Northwest Asia, North Africa
6China
0All regions
Page 152 of 250
CD/DVD player and CD changer
150
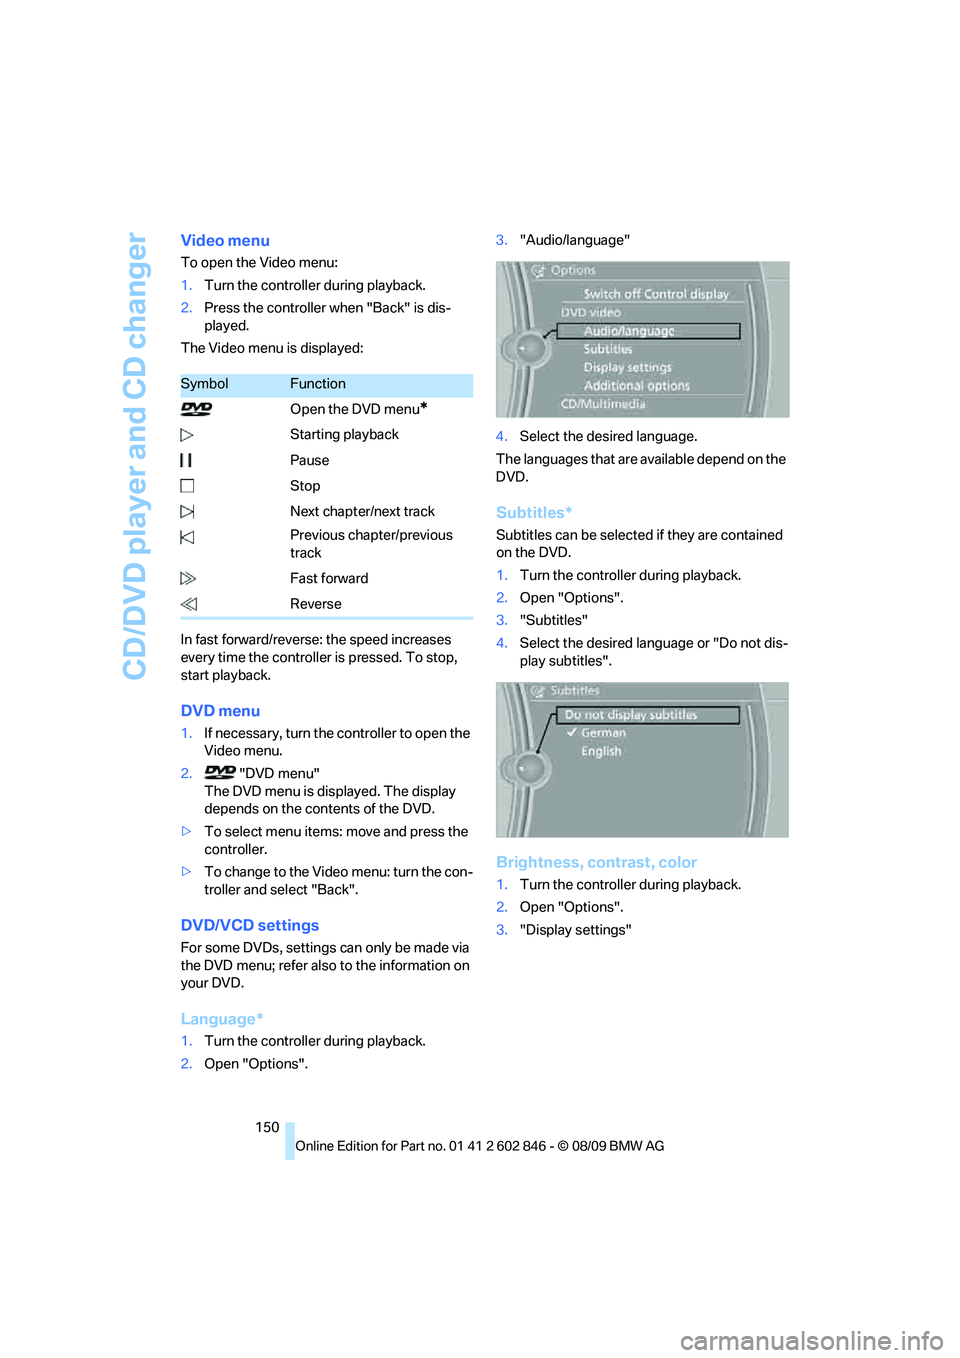
Video menu
To open the Video menu:
1.Turn the controller during playback.
2.Press the controller when "Back" is dis-
played.
The Video menu is displayed:
In fast forward/reverse: the speed increases
every time the controller is pressed. To stop,
start playback.
DVD menu
1.If necessary, turn the controller to open the
Video menu.
2. "DVD menu"
The DVD menu is displayed. The display
depends on the contents of the DVD.
>To select menu items: move and press the
controller.
>To change to the Video menu: turn the con-
troller and select "Back".
DVD/VCD settings
For some DVDs, settings can only be made via
the DVD menu; refer also to the information on
your DVD.
Language*
1.Turn the controller during playback.
2.Open "Options".3."Audio/language"
4.Select the desired language.
The languages that are available depend on the
DVD.
Subtitles*
Subtitles can be selected if they are contained
on the DVD.
1.Turn the controller during playback.
2.Open "Options".
3."Subtitles"
4.Select the desired language or "Do not dis-
play subtitles".
Brightness, contrast, color
1.Turn the controller during playback.
2.Open "Options".
3."Display settings"
SymbolFunction
Open the DVD menu
*
Starting playback
Pause
Stop
Next chapter/next track
Previous chapter/previous
track
Fast forward
Reverse
Page 158 of 250
Music collection
156 4.Select the desired category.
5.To select the desired entry:
>Open "A-Z search" and enter the
desired entry.
or
>select the desired entry from the list.
6.Select additional categories if desired.
The tracks found are listed in alphabetical
order.
Not all categories need to be selected. For
example, to search for all tracks by a certain
artist, call up that artist only. All of the tracks
by that artist are then displayed.
7."Start play"
Restarting the music search
"New search"
Music search by voice*
For instructions on the voice activation system,
refer to page22.
1.Press the button on the steering wheel.
To select a track directly:
Say the voice command and the name of the
desired track in one sentence.
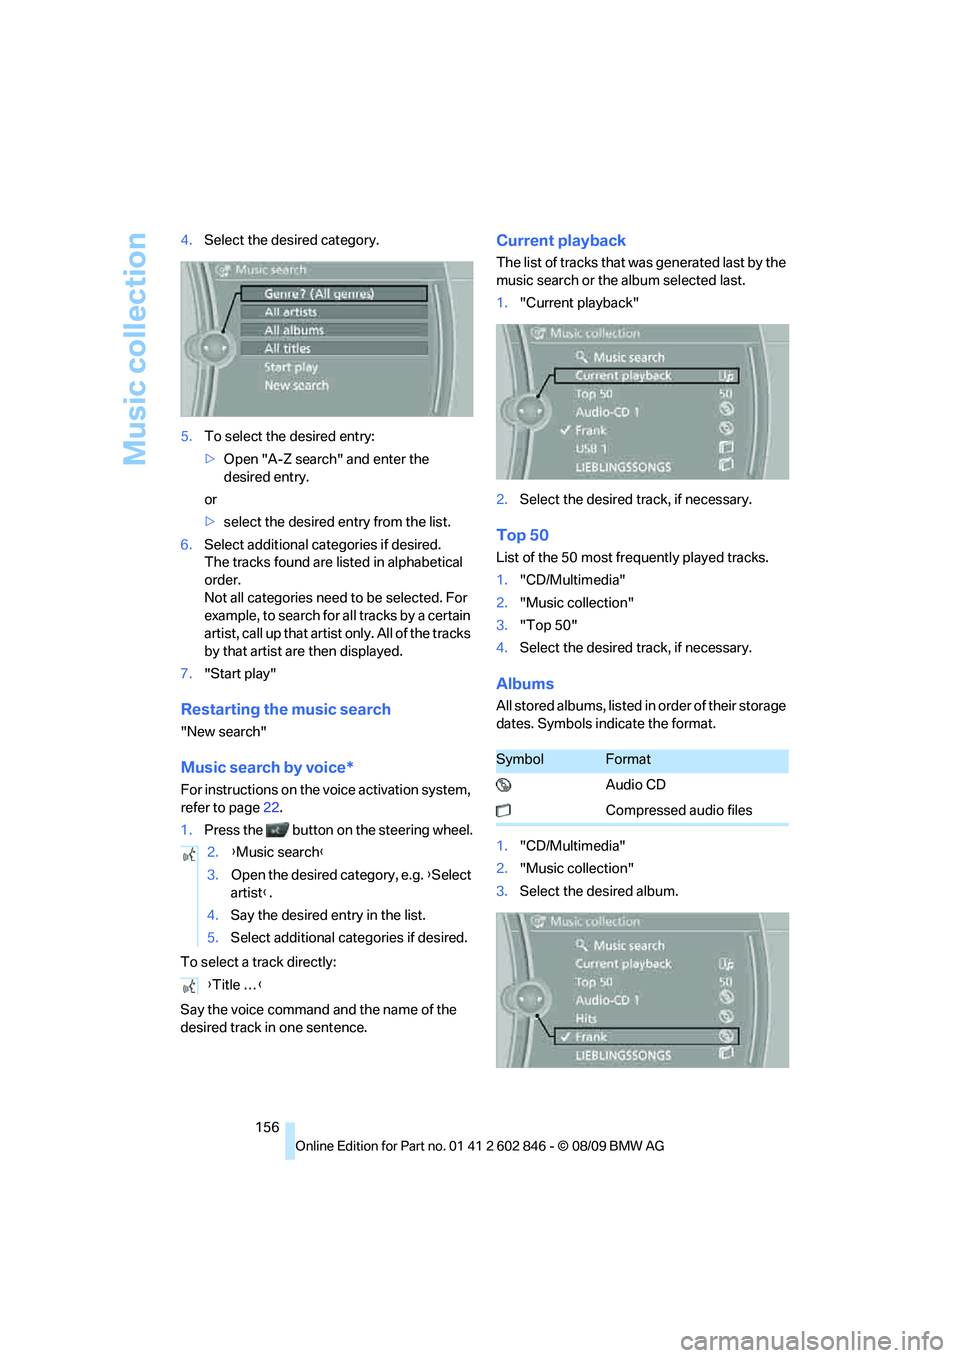
Current playback
The list of tracks that was generated last by the
music search or the album selected last.
1."Current playback"
2.Select the desired track, if necessary.
Top 50
List of the 50 most frequently played tracks.
1."CD/Multimedia"
2."Music collection"
3."Top 50"
4.Select the desired track, if necessary.
Albums
All stored albums, listed in order of their storage
dates. Symbols indicate the format.
1."CD/Multimedia"
2."Music collection"
3.Select the desired album. 2.{Music search}
3.Open the desired category, e.g. {Select
artist}.
4.Say the desired entry in the list.
5.Select additional categories if desired.
{Title …}
SymbolFormat
Audio CD
Compressed audio files
Page 160 of 250
Music collection
158
Music collection
Backing up the music collection
The entire music collection can be stored on a
USB medium. Make sure there is enough free
memory capacity on the USB device.
Depending on the number of tracks, backing up
the music collection may take several hours.
Therefore, it is best to perform the backup dur-
ing a long trip.
1.Start the engine.
2.Connect the USB device to the USB inter-
face in the glove compartment.
3."CD/Multimedia"
4."Music collection"
5.Open "Options".
6."Music data import/export"
7."Backup music on USB"
Restoring the music collection in the
vehicle
When storing from the USB device, the
music collection existing in the vehicle is
replaced.<
1."CD/Multimedia"
2."Music collection"3.Open "Options".
4."Music data import/export"
5."Restore music from USB"
Deleting the music collection
1."CD/Multimedia"
2."Music collection"
3.Open "Options".
4."Delete music collection"
Page 161 of 250
Navigation
Entertainment
Driving tips
159Reference
At a glance
Controls
Communications
Mobility
External devices
AUX-IN port
You can connect an external audio device, for
instance an MP3 player, and play audio tracks
over the car's loudspeaker system. You can
adjust the tone using iDrive.
Connecting
Lift up the center armrest.
Connection for audio playback:
TRS connector 1/8 in/3.5 mm
To play audio tracks over the car's loudspeaker
system, connect the headset or line-out port of
the external device to the AUX-IN port.
Starting audio playback
Connect the audio device, switch it on and
select a track. Operate the system on the audio
device.
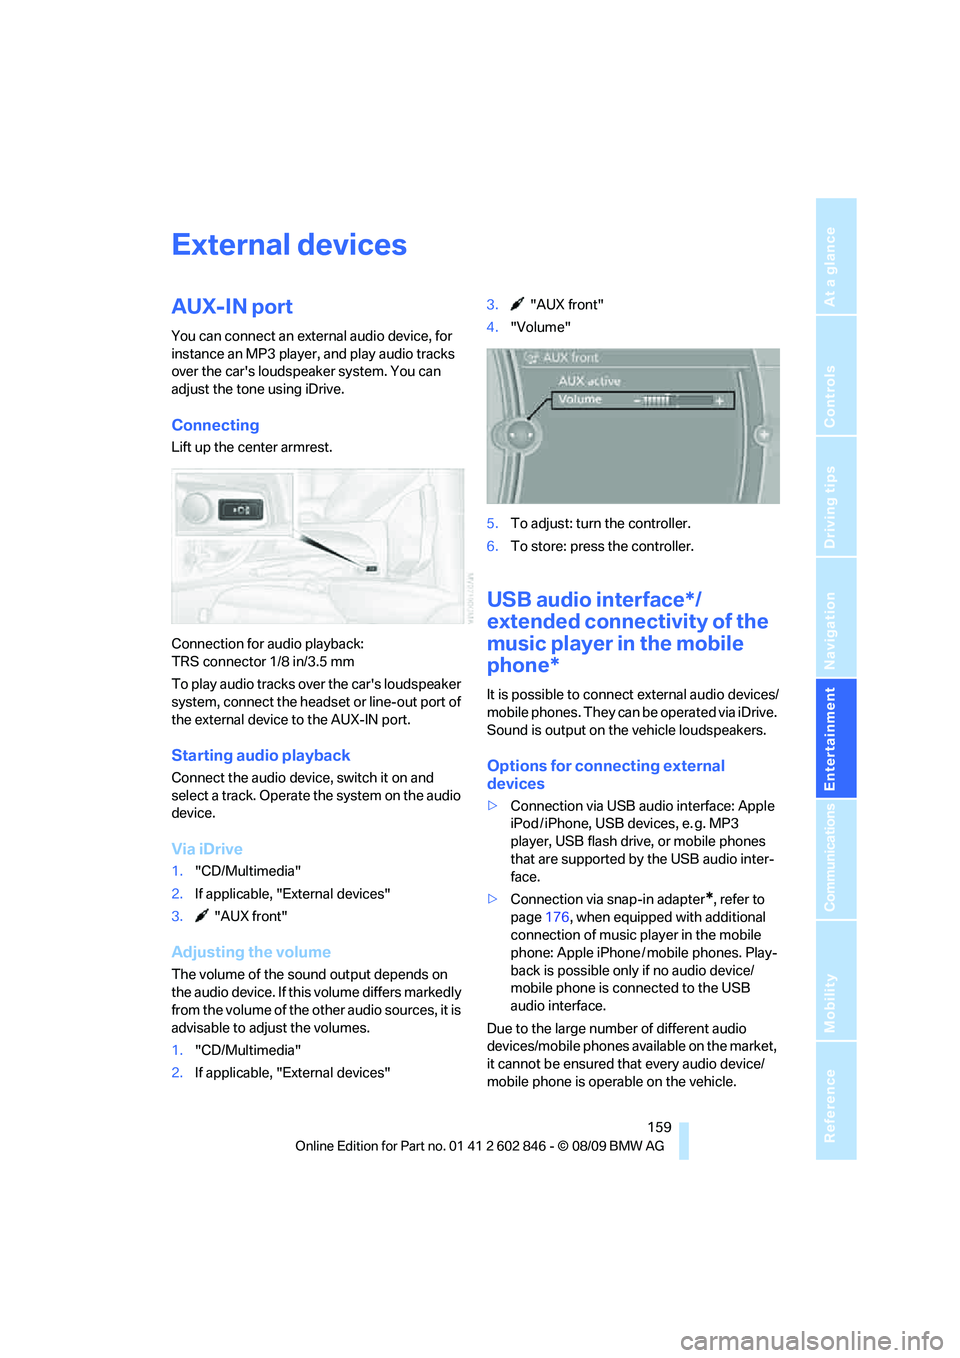
Via iDrive
1."CD/Multimedia"
2.If applicable, "External devices"
3. "AUX front"
Adjusting the volume
The volume of the sound output depends on
the audio device. If this volume differs markedly
from the volume of the other audio sources, it is
advisable to adjust the volumes.
1."CD/Multimedia"
2.If applicable, "External devices"3. "AUX front"
4."Volume"
5.To adjust: turn the controller.
6.To store: press the controller.
USB audio interface*/
extended connectivity of the
music player in the mobile
phone*
It is possible to connect external audio devices/
mobile phones. They can be operated via iDrive.
Sound is output on the vehicle loudspeakers.
Options for connecting external
devices
>Connection via USB audio interface: Apple
iPod / iPhone, USB devices, e. g. MP3
player, USB flash drive, or mobile phones
that are supported by the USB audio inter-
face.
>Connection via snap-in adapter
*, refer to
page176, when equipped with additional
connection of music player in the mobile
phone: Apple iPhone / mobile phones. Play-
back is possible only if no audio device/
mobile phone is connected to the USB
audio interface.
Due to the large number of different audio
devices/mobile phones available on the market,
it cannot be ensured that every audio device/
mobile phone is operable on the vehicle.