2010 BMW 128I radio
[x] Cancel search: radioPage 86 of 250
Technology for driving comfort and safety
84 Before transporting a child on the front
passenger seat, read the safety precau-
tions and handling instructions under Trans-
porting children safely, refer to page52.
The front and side airbags can also be deacti-
vated by adolescents and adults sitting in cer-
tain positions; the indicator lamp for the front
passenger airbags comes on. In such cases, the
passenger should change his or her sitting
position so that the front passenger airbags are
activated and the indicator lamp goes out. If the
desired airbag status cannot be achieved by
changing the sitting position, transport the rele-
vant passenger on a rear seat. Do not attach
seat covers, seat cushion padding, ball mats or
other items to the front passenger seat unless
they are specifically recommended by BMW.
Do not place any items under the seat which
could press against the seat from below. Other-
wise, a correct analysis of the seat cushion is
not ensured.<
Status of front passenger airbags
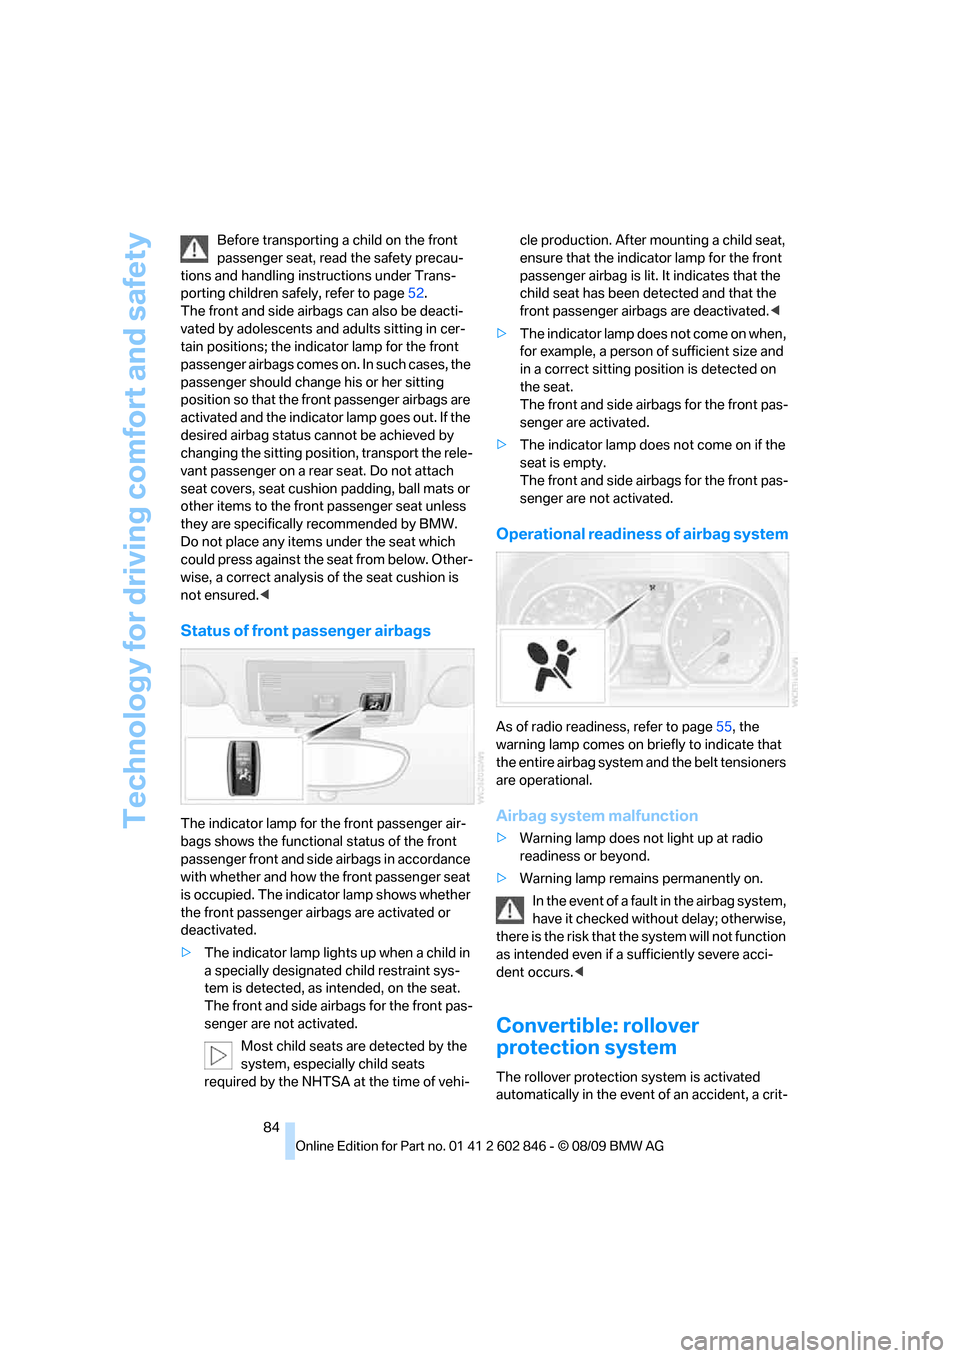
The indicator lamp for the front passenger air-
bags shows the functional status of the front
passenger front and side airbags in accordance
with whether and how the front passenger seat
is occupied. The indicator lamp shows whether
the front passenger airbags are activated or
deactivated.
>The indicator lamp lights up when a child in
a specially designated child restraint sys-
tem is detected, as intended, on the seat.
The front and side airbags for the front pas-
senger are not activated.
Most child seats are detected by the
system, especially child seats
required by the NHTSA at the time of vehi-cle production. After mounting a child seat,
ensure that the indicator lamp for the front
passenger airbag is lit. It indicates that the
child seat has been detected and that the
front passenger airbags are deactivated.<
>The indicator lamp does not come on when,
for example, a person of sufficient size and
in a correct sitting position is detected on
the seat.
The front and side airbags for the front pas-
senger are activated.
>The indicator lamp does not come on if the
seat is empty.
The front and side airbags for the front pas-
senger are not activated.
Operational readiness of airbag system
As of radio readiness, refer to page55, the
warning lamp comes on briefly to indicate that
the entire airbag system and the belt tensioners
are operational.
Airbag system malfunction
>Warning lamp does not light up at radio
readiness or beyond.
>Warning lamp remains permanently on.
In the event of a fault in the airbag system,
have it checked without delay; otherwise,
there is the risk that the system will not function
as intended even if a sufficiently severe acci-
dent occurs.<
Convertible: rollover
protection system
The rollover protection system is activated
automatically in the event of an accident, a crit-
Page 98 of 250

Practical interior accessories
96
Practical interior accessories
Integrated universal remote
control*
The concept
The integrated universal remote control can
replace as many as three hand-held transmit-
ters for various remote-controlled devices,
such as garage doors and gates or lighting sys-
tems. The integrated universal remote control
registers and stores signals from the original
hand-held transmitters.
The signal of an original hand-held transmitter
can be programmed on one of the three mem-
ory buttons1. After this, the programmed
memory button1 will operate the system in
question. The LED2 flashes to confirm trans-
mission of the signal.
Should you sell your vehicle one day, be sure to
delete the stored programs beforehand for your
safety, refer to page97.
To prevent possible damage or injury,
before programming or using the inte-
grated universal remote control, always inspect
the immediate area to make certain that no peo-
ple, animals or objects are within the pivoting or
travel range of the device being operated. Com-
ply also with the safety instructions supplied
with the original hand-held transmitter.<
Checking compatibility
If this symbol appears on the package
or in the instructions supplied with the
original hand-held transmitter, you can
assume that the radio remote control device will
be compatible with the integrated universal
remote control.
For additional information, please contact your
BMW center or call: 1-800-355-3515.
You can also obtain information on the Internet
at:
www.bmwusa.com or
www.homelink.com. HomeLink is a registered trademark of Johnson
Controls, Inc.
Programming
1Memory buttons
2LED
Fixed-code hand-held transmitters
1.Switch on the ignition, refer to page55.
2.When starting operation for the first time:
press the left and right memory buttons1
for approx. 20 seconds until the LED2
flashes rapidly. The three memory buttons
are cleared.
3.Hold the original hand-held transmitter at a
distance of approx. 4 to 12 in/10 to 30 cm
from the memory buttons1.
The required distance between the
hand-held transmitter and the mem-
ory buttons1 depends on the system of the
respective original hand-held transmitter
used.<
4.Simultaneously press the transmit key on
the original hand-held transmitter and the
desired memory button 1 on the integrated
universal remote control. The LED 2 flashes
slowly at first. As soon as the LED2 flashes
rapidly, release both buttons. If the LED2
does not flash rapidly after approx. 15 sec-
onds, alter the distance and repeat this
step.
5.To program other original hand-held trans-
mitters, repeat steps 3 and 4.
Page 131 of 250
Navigation
Driving tips
129Reference
At a glance
Controls
Communications
Entertainment
Mobility
Viewing the map
1.Select the symbol.
2.Select a setting:
>"View facing north"
>"View in dir. of travel"
>"Perspective view"
>"Arrow display"
3.Press the controller.
Changing the map section
Select the interactive map.
>To shift the map: move the controller in the
required direction.
>To shift the map diagonally: move the con-
troller in the required direction and turn it.
Changing scale
1.Select the symbol.
2.Turn the controller to adjust the scale.
Automatic scaling of the map
In the map view facing north, turn the controller
in any direction until AUTO is displayed as the
map scale.
The map shows the entire range from your loca-
tion to the destination.
Settings for the map view
The map is shown on the Control Display.
1.Open "Options".
2."Settings"
3.Set the optimized map view.
>"Day/night mode"
Select and create the necessary settings
depending on the light conditions. When
the traffic bulletin map is activated, this
setting is disregarded.
>"Satellite images"
Satellite images
* are displayed depend-
ing on availability and resolution.
>"Perspective view in 3D"
Displays a spatial view. Prominent areas that are contained in the navigation data
are displayed on the map in 3D.
>"Traffic Info map"
The map is optimized for displaying traf-
fic bulletins. Symbols for the special
destinations are no longer displayed.
Map view for the split screen display
The map view for the split screen can be
selected separately from the main screen.
1.Open "Options".
2."Split screen"
The split screen is switched on.
3.Move the controller to the right repeatedly
until the split screen content is selected.
4.Select the map view:
>"Arrow display"
>"Map facing north"
>"Map direction of travel"
>"Map view with perspective"
>"Exit ramp view"
Changing scale
1.Move the controller to the right until the
split screen is selected.
2.Turn the controller.
Traffic bulletins*
You can display the traffic bulletins from radio
stations that broadcast the TMC (Traffic Mes-
sage Channel) of a traffic information service.
This information from the traffic information
service is continuously updated on the basis of
measurement data from traffic control centers
and information on traffic congestion.
During destination guidance, traffic bulletins
that are relevant to areas along the route are
automatically displayed and taken into account
in the route planning. You can open all traffic
bulletins manually via iDrive.
The traffic bulletins are shown in the map view.
Page 132 of 250
Destination guidance
130
Real Time Traffic Information End-User
Provisions
Certain BMW models equipped with navigation
have the capability to display real-time traffic
information. If your system has this capability
the following additional terms and conditions
apply:
An End-User shall no longer have the right to
use the Traffic Data in the event that the End-
User is in material breach of the terms and con-
ditions contained herein.
A. Total Traffic Network, a division of Clear
Channel Broadcasting, Inc. ("Total Traffic Net-
work") holds the rights to the traffic incident
data and RDS-TMC network through which it is
delivered. You may not modify, copy, scan or
use any other method to reproduce, duplicate,
republish, transmit or distribute in any way any
portion of traffic incident data. You agree to
indemnify, defend and hold harmless BMW of
North America, LLC. ("BMW NA") and Total
Traffic Network, Inrix, Inc (and their affiliates)
against any and all claims, damages, costs or
other expenses that arise directly or indirectly
out of (a) your unauthorized use of the traffic
incident data or the RDS-TMC network, (b) your
violation of this directive and/or (c) any unautho-
rized or unlawful activities by you in connection
herewith.
B. Total Traffic Network traffic data is informa-
tional only. User assumes all risk of use. Total
Traffic Network, BMW NA, and their suppliers
make no representations about content, traffic
and road conditions, route usability, or speed.
C. The licensed material is provided to license
"as is," and "where is". Total Traffic Network,
including, but not limited to, any and all third
party providers of any of the licensed material,
expressly disclaims, to the fullest extent permit-
ted by law, all warranties or representations
with respect to the licensed material (including,
without limitation, that the licensed material will
be error-free, will operate without interruption
or that the traffic data will be accurate), express,
implied or statutory, including, without limita-
tion, the implied warranties of merchantability,
non-infringement fitness for a particular pur-pose, or those arising from a course of dealing
or usage of trade.
D. Neither Total Traffic Network, Inrix, Inc. nor
BMW NA will be liable to you for any indirect,
special, consequential, exemplary, or incidental
damages (including, without limitation, lost rev-
enues, anticipated revenues, or profits relating
to the same) arising from any claim relating
directly or indirectly to use of the traffic data,
and even if Total Traffic Network, Inrix, Inc., or
BMW NA are aware of the possibility of such
damages. These limitations apply to all claims,
including, without limitation, claims in contract
and tort (such as negligence, product liability
and strict liability). Some states do not allow the
exclusion or limitation of incidental or conse-
quential damages, so those particular limita-
tions may not apply to you.
Activating/deactivating reception
1."Navigation"
2.Open "Options".
3.Activate/deactivate "Receive Traffic Info".
In many metropolitan areas you can receive
traffic information broadcast by radio stations.
The traffic conditions are monitored by traffic
control centers and the traffic information is
updated periodically.
During destination guidance, the traffic bulle-
tins relevant to your planned route are automat-
ically shown. Whether destination guidance is
active or not, you can have the traffic bulletins
displayed in the map view or in the traffic info
list.
Traffic bulletins in a list
A list of the traffic bulletins can be opened via
the menu or map view.
Opening traffic bulletins
1."Navigation"
2."Map"
3.Move the controller to the left, if necessary.
4.Select the symbol: "Traffic Info"
First, the traffic bulletins on the planned
route are displayed. The traffic bulletins are
Page 137 of 250
Entertainment
Operation of the radio, CD equipment and
external audio devices as well as their tone
settings are described in this chapter.
Entertainment
Page 138 of 250

On/off and tone
136
On/off and tone
The following audio and video sources share
the same control elements and adjustments:
>Radio
>CD/DVD player
>CD changer
*
>Video*
>External devices, e.g. MP3 player
Controls
The audio and video sources can be controlled
using the:
>Buttons near the CD/DVD player
>iDrive
>Buttons on the steering wheel, refer to
page10
>Programmable memory keys, refer to
page20
>Voice activation system
Buttons in the area of the CD/DVD
player
1Sound output for entertainment on/off, vol-
ume
>Press: switch on/off
When you switch on the unit, the last set
radio station or track is played.
>Turn: adjust volume
2 Eject the CD/DVD
3CD/DVD drive
*
4FM/AM: change the radio station wave-
band
5MODE: change the audio and video
sources
6 Station scan/track search
>Change the radio station
>Select the track for the CD/DVD player,
CD changer and certain multimedia
devices
Switching on/off
To switch the entertainment audio output on or
off:
Press button1 next to the CD / DVD player.
This symbol on the Control Display indicates
that sound output is switched off.
The sound output is available for approx.
20 minutes after the ignition was switched off.
For sound output, switch the unit back on.
Adjusting volume
Turn button1 next to the CD / DVD player until
the desired volume is obtained.
You can also adjust the volume with buttons on
the steering wheel, refer to page10.
Tone control
You can alter various tone settings, e.g. treble
and bass or the speed-dependent volume
increase.
The tone settings are applied to all audio
sources.
The settings are stored for the remote control
currently in use.
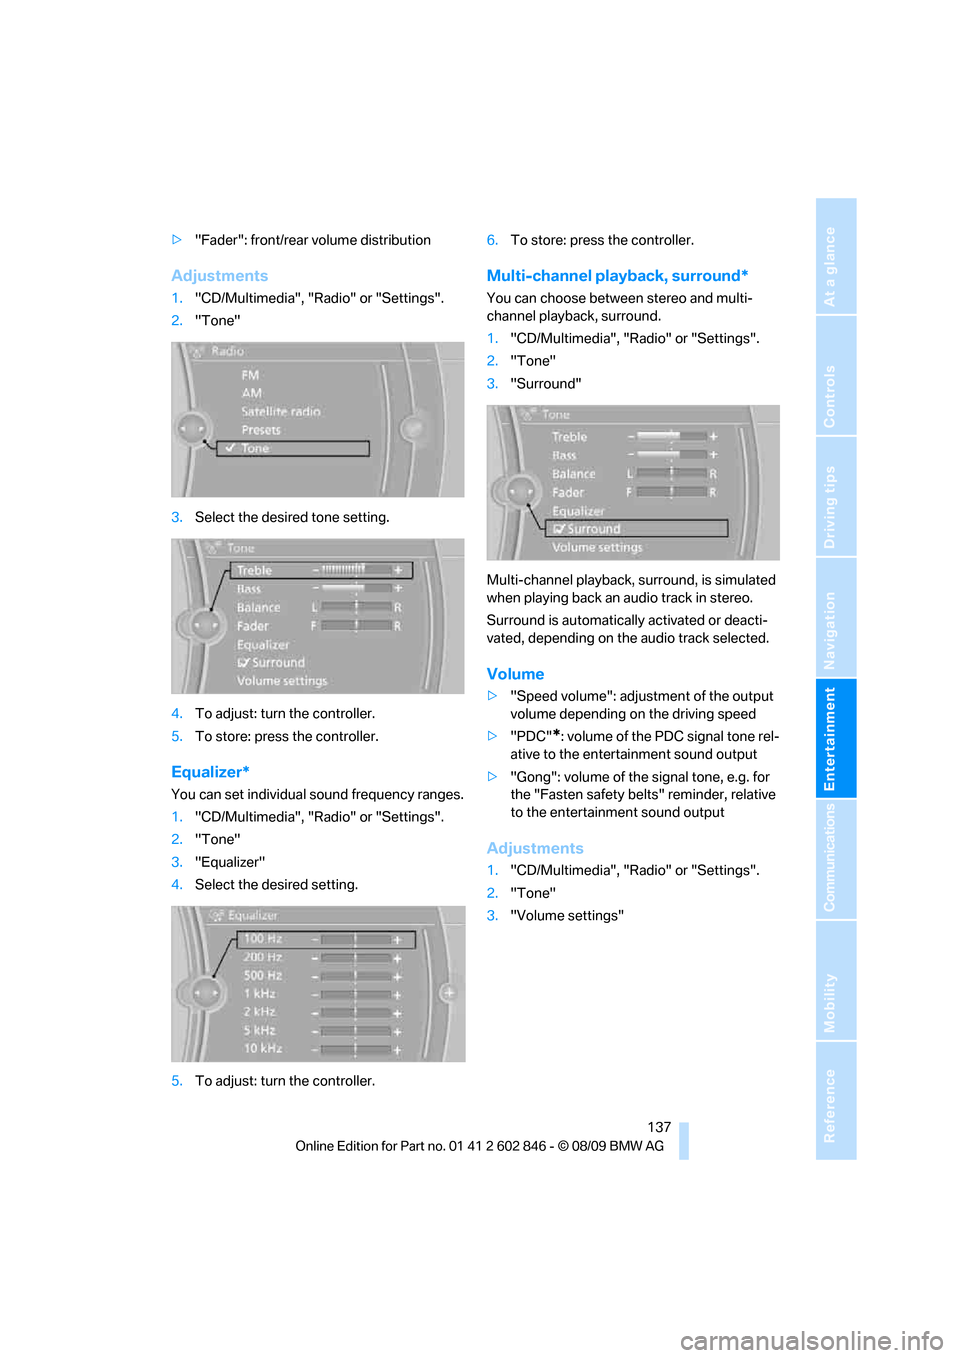
Treble, bass, balance, fader
>"Balance": left/right volume distribution
Page 139 of 250
Navigation
Entertainment
Driving tips
137Reference
At a glance
Controls
Communications
Mobility
>"Fader": front/rear volume distribution
Adjustments
1."CD/Multimedia", "Radio" or "Settings".
2."Tone"
3.Select the desired tone setting.
4.To adjust: turn the controller.
5.To store: press the controller.
Equalizer*
You can set individual sound frequency ranges.
1."CD/Multimedia", "Radio" or "Settings".
2."Tone"
3."Equalizer"
4.Select the desired setting.
5.To adjust: turn the controller.6.To store: press the controller.
Multi-channel playback, surround*
You can choose between stereo and multi-
channel playback, surround.
1."CD/Multimedia", "Radio" or "Settings".
2."Tone"
3."Surround"
Multi-channel playback, surround, is simulated
when playing back an audio track in stereo.
Surround is automatically activated or deacti-
vated, depending on the audio track selected.
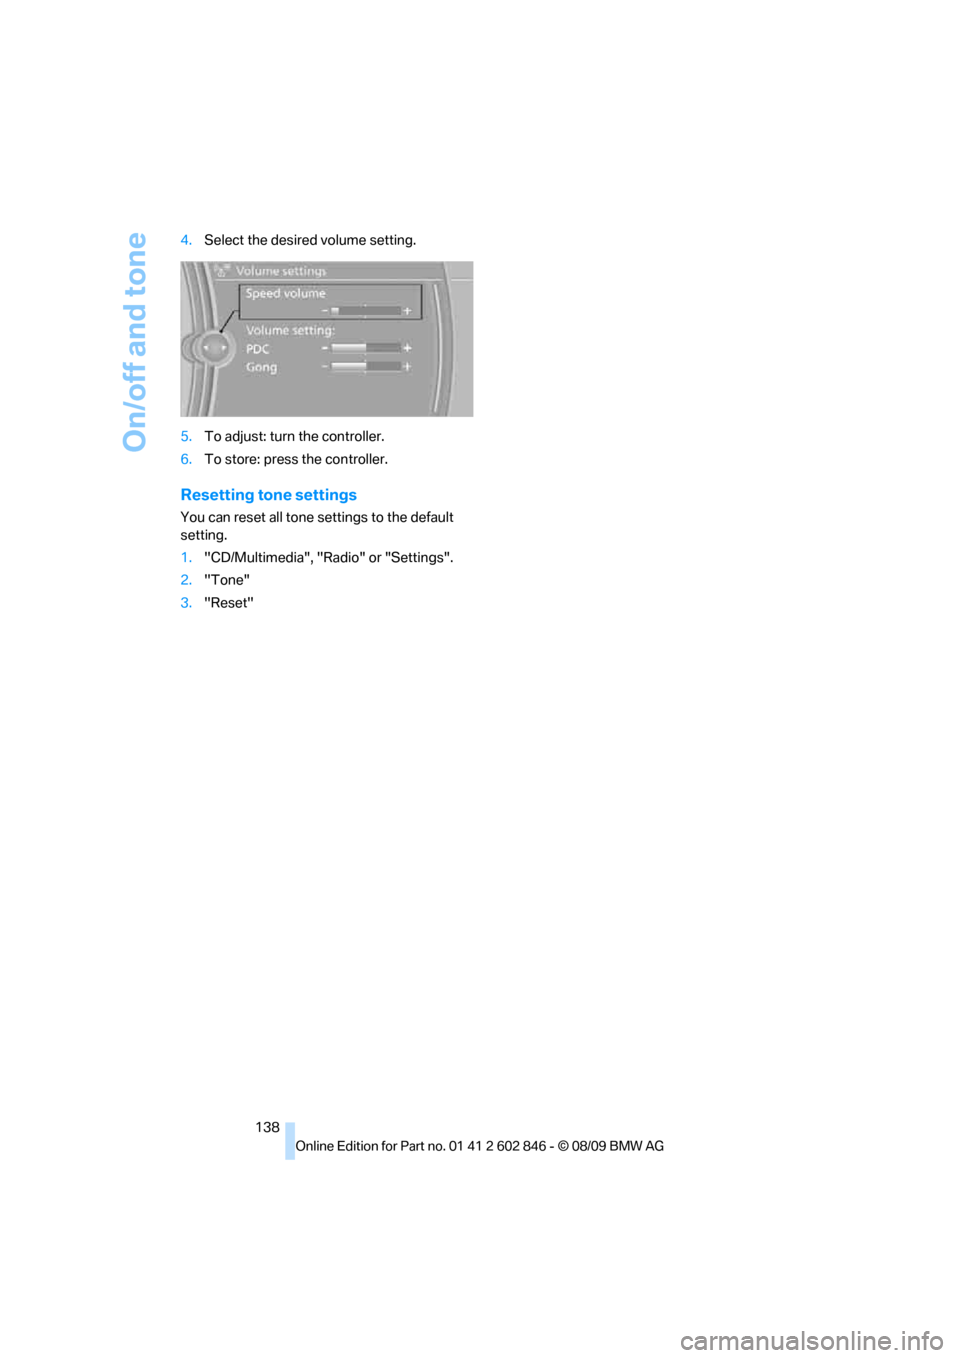
Volume
>"Speed volume": adjustment of the output
volume depending on the driving speed
>"PDC"
*: volume of the PDC signal tone rel-
ative to the entertainment sound output
>"Gong": volume of the signal tone, e.g. for
the "Fasten safety belts" reminder, relative
to the entertainment sound output
Adjustments
1."CD/Multimedia", "Radio" or "Settings".
2."Tone"
3."Volume settings"
Page 140 of 250
On/off and tone
138 4.Select the desired volume setting.
5.To adjust: turn the controller.
6.To store: press the controller.
Resetting tone settings
You can reset all tone settings to the default
setting.
1."CD/Multimedia", "Radio" or "Settings".
2."Tone"
3."Reset"