2010 AUDI S6 child seat
[x] Cancel search: child seatPage 4 of 368

Table of contents
Table of contents
Vehicle literature ..... .
About this Owner's Manual .......... ....... .. .
Controls and
equipment .............. .
Instruments and controls ... .
General illustration ........... .
Instruments and
warning/indicator Lights ..... . Instruments ... ... .......... .
Warning/indicator ligh ts ..... . .
Driver information display ... .
Introduction ...... ......... . .
On-Board Diagno stic sy ste m
(OBD) . ..... ....... .......... .
Auto Ch eck Control ........... .
Speed warning system ........ .
Tr ip computer ............ ... .
Opening and closing ......... . Keys ............ ............ .
Power locking system ........ .
Rear lid .... ..... ............ .
Child safety Lock ............. .
Convenience key ............. .
Anti-theft alarm sys tem ...... .
Power windows .............. .
Sliding/tilting power sunroof .. .
Clear vision .. .... ............ .
L ights ... .. ........ ......... .
Interior ligh ts ... ... .. ....... .
4
5
6
7
7
8
8
12
19
19
23
24
32
34
37
3 7
41
46
47
47
49
so
53
58
58
63 Vi
sion .................... .. .
Wiper and washer system Mirrors ... ............... ... .
Digital compass ............. .
Seats and storage ........ ... .
General recommendations .... .
Power seat . ................. .
S eat m emory ............... . .
Rear sea ts ... ... .. .......... .
Head res train ts ........... ... .
Armrest .. .. ................ .
Luggage compar tm en t ..... .. .
Roof ra ck . .... .... .......... .
Cupholder .................. .
Ashtray .. ................... .
Cigarette Lighter/socket ...... .
S torag e ................ .. .. .
Warm and cold .... .......... .
Cl imate control ....... ... .... .
Ba sic se tt ings ............... .
On the road ... .... .......... .
S tee ring .................... .
Igni tion lock and ignition swi tch
Start ing and stopp ing the engine
Start ing and stopping the engine
with Convenience key ......... .
E lectromechanical parking brake
Cru ise control ............... .
Adaptive Cruise Control ..... . Speed and distance con trol
sys tem .............. ....... .
Dr iver information ........... .
Syst em Limitations ........... .
Audi Lane assist ........... .. .
Lane ass ist .... .. ............ . 64
66
69
73
75
75
76
79
80
81
82
83
87
89
91
92
93
96
96
104
106
106
108
109
110
113
116
119
119
12 7
131
134
134 Audi side assist ...............
137
Lane Change Assistant ......... 137
No tes ....... .... ............. 144
Automatic transmission 146
tiptronic ® (6-sp eed au toma tic
tr ansmission) . . . . . . . . . . . . . . . . . 146
multitronic ® ............ ...... 152
Park assist . . . . . . . . . . . . . . . . . . . . 160
Park ing system (rear, with rear
view camera) . . . . . . . . . . . . . . . . . 160
Adaptive Air Suspension .. ... . 166
Adaptive Air Su spens ion and
Damping . . . . . . . . . . . . . . . . . . . . . 166
Homelink ® ............. ... ... 169
Univ ersal r emot e control 169
Safety first ............ ... 174
Driving Safely .. ............... 174
G eneral n otes ......... ........ 174
Proper occupant seating
po sition s . . . . . . . . . . . . . . . . . . . . . 176
Pedal area . . . . . . . . . . . . . . . . . . . . 180
S towing Luggage .............. 181
Report ing Safety Defects . . . . . . . 183
Safety belts . . . . . . . . . . . . . . . . . . . 185
General no tes . . . . . . . . . . . . . . . . . 185
Why safety belts? ............ . 186
Safe ty b elts . . . . . . . . . . . . . . . . . . . 189
Safety bel t pre ten sioner s . . . . . . . 193
Airbag system ................ 195
Im portan t thing s to kn ow ...... 195
F ront airbags .............. ... 199
Page 5 of 368

Table of contents
Monitoring the Advanced Airbag Vehicle care .............. 258 Emergency towing with
System ...................... 206 commercial tow truck ........ .
Side airbags ... ......... ...... 211
Cleaning and protection ...... 258 Lift
ing vehicle ............... . 334
336
Side curtain airbags . . . . . . . . . . . . 214
Child Safety .. .. .......... ..... 217
Important things to know . . . . . . 217
Child safety seats . . . . . . . . . . . . . 222
Installing a child safety seat .. .. 227
LATCH Lower anchorages and
tethers for children . . . . . . . . . . . . 230
Additional Information 237
Vehicle operation ...... 240
Intelligent technology ........ 240
Notice abou t data recorded by
vehicle control modules . . . . . . . . 240
E lectronic Stabilization Program
(ESP) ........................ 240
Braking ...................... 243
Servo tronic® -advanced power
steering system . . . . . . . . . . . . . . . 245
Driving with your quattro® . . . . . . 246
Energy management ........... 247
Driving and environment ...... 249
The first 1,000 miles (1,500 km)
and afterwards . . . . . . . . . . . . . . . 249
Avoid damaging the veh icle . . . . . 250
Driving through water on roads . 250
Catalytic converter . . . . . . . . . . . . 250
Operate your vehicle economically
and minimize pollution ......... 251
Trailer towing ................. 254
Driving with a trailer . . . . . . . . . . . 254
T railer towing tips . . . . . . . . . . . . . 256
Controls and equip
ment Safety first
General informa
tion . . . . . . . . . . . 258
Care of exterior . . . . . . . . . . . . . . . 258
Care of interior . . . . . . . . . . . . . . . 265
Fuel supply and filling your fuel
tank ..........................
271
Gasoline . . . . . . . . . . . . . . . . . . . . . 271
Fuel tank . . . . . . . . . . . . . . . . . . . . . 272
Checking and filling . . . . . . . . . . . 276
Technical data
General information
Explanation of technical data .. .
Vehicle ident ification ......... .
Weights ................... . .
Dimensions ............... .. . 338
338
338
338
339
339
Engine hood . . . . . . . . . . . . . . . . . . 276
Data . . . . . . . . . . . . . . . . . . . . . . . . . . 341
Engine oil . . . . . . . . . . . . . . . . . . . . 279 300 hp, 3.0 liter, 6-cylinder
Engine cooling system . . . . . . . . . 284
Brake fluid . . . . . . . . . . . . . . . . . . . 287
Ba ttery . . . . . . . . . . . . . . . . . . . . . . 288
Windshield/headlight washer container . . . . . . . . . . . . . . . . . . . . 292
Tires and wheels . . . . . . . . . . . . . . 293 engine ......................
.
265 hp, 3.2 liter , 6-cylinder
engine ......... ..... ........ .
350 hp, a-cylinder engine ..... .
Consumer Information ...... .
Warranty coverages .......... . 341
342
343
344
344
T ires ........................ 293 Operating your vehicle outside the
T ire pressure monitoring system 312
Do-it-yourself service . 316
What do I do now? ........... 316
Trunk escape handle ........... 316
Jack, tools and spare wheel ..... 316
Changing a wheel . . . . . . . . . . . . . 318
Fuses and bulbs . . . . . . . . . . . . . . 325
F u ses ........... ............. 325 U.S.A
. or Canada ............. .
Audi Service Repair Manuals and
Literature ................... .
Maintenance ................ .
Additional accessories, modifications and parts replacement ............... . .
Declaration of Compliance,
T elecommunications and
Electronic Systems .......... . .
Bulbs ........................ 329
Alphabetical index ....
Emergency situations ......... 331
General . . . . . . . . . . . . . . . . . . . . . . 331
Starting by pushing or towing 331
Starting with jumper cables .... 331
Use of jumper cables . . . . . . . . . . 332
Vehicle operation Vehicle care Do-it-yourself service
344
344
344
346
347
350
Technical data
Page 77 of 368

Seats and storage
General recommendations
Why is your seat adjustment so important?
The safety belts and the airbag system can only provide
maximum protection if the front seats are correctly
adju sted.
Th ere a re various ways of adjusting t he front seats to provide safe and
comfortable support for the driver and the front passenger . Ad just
your seat properly so that :
• you can easily and quickly reach a ll the switc hes and contro ls in the
ins trumen t pa nel
• your body is properly supported thus reducing phys ica l stress and
fatigue
• the safety be lts and airbag system can offer maximum protection
=>
page 195 .
In the following sections, you w ill see exact ly how you can best ad just
your sea ts .
Th ere are special regulations a nd instr uctions for install ing a child
safety seat on the front passenger's sea t. Always follow the informa
tion regarding child safety p rovided in=>
page 217, "Child Safety ".
& WARNING
Incorrect seating posit ion of the dri ver and all other passengers
can result in seriou s personal injury.
• Always keep your feet on the floor when the vehicle is in
motion -never put your feet on top of the instrument panel, out
of the window o r on top of the seat cush ion. This applies especially
to the passengers.
If your seating po sition is incorrect, you
increase the ri sk of injury in the case of sudden braking or an acci-
Controls and equip
ment Safety first
Seats and storage
& WARNING
(con tinu ed)
dent . If the airbag inflates and the seating position is incorrect ,
this could result in per sonal injury or even death .
• It is important for both the dri ver and front passenger to keep
a distan ce of at least 10 inche s (25 cm) between themselves and
the steering wheel and /or instrument panel. If you 're sitting any
closer than this , the airbag system cannot protect you properly. In
addition, the front seats and head restraints must be adjusted to
your body height so that they can give you maximum protection .
• Always try to keep as much distance as possible between your
self and the steering wheel or instrument panel.
• Do not adjust the driver's or front passenger 's seat while the
vehicle is moving. You r seat may move unexpectedly , causing
sudden loss of vehicle control and personal injury . If you adjust
your seat while the vehicle is moving , you are out of position. •
Driver's seat
The correct seat position is important for saf e and
re lax ed driving.
W e recomme nd that you a djust the drive r's sea t in the
f ollowing man ner :
- Ad just the seat in fore and aft direction so that you can
easily pus h the pedals to the floor w hile keeping your
knees slightly bent=>
& in "Why is yo ur seat a djus tme nt
so importa nt?" .
- Adjust the seatback so that when yo u sit with yo ur back
agai nst t he seatback , you can st ill grasp t he top of the
steering w heel. ..,
Vehicle care Technical data
Page 79 of 368
& WARNING (co ntinued )
• Be careful when adjusting the seat height. Check to see that no
one is in the way, or serious injury could re sult!
• Becau se the seats can be ele ctrically adjusted with the ignition
key removed, never leave children unattended in the v ehicle.
Unsupervised use of the electric seat adjustments may cau se
serious injury .•
Seat adjustment
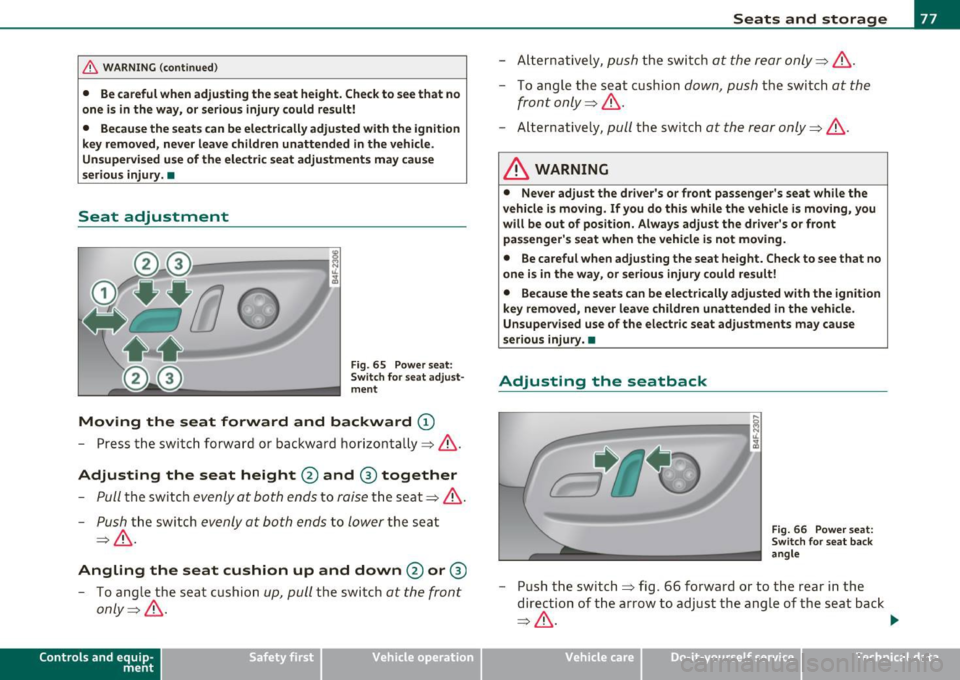
Fi g. 65 P ower s ea t:
Swit ch f or sea t adjust·
ment
Moving the seat forward and backward ©
- Press th e switc h forwa rd or backward horizonta lly=>& .
Adjusting the seat height@ and ® together
-Pull the switch evenly at both ends to raise th e seat=> &.
-Push the switch evenly at both ends to lower the seat
=> & .
Angling the seat cushion up and down@ or®
-To a ngle t he seat c ushio n up, pull the switch at the front
only =>& .
Cont rols a nd e quip
m en t Vehicle
OP-eration
Seats and storage
-Alternative ly, push the sw itch at the rear only=>& .
-To angle t he seat cushion down, push the switch at the
front only=>& .
-Alternative ly, pull the sw itch at the rear only=>& .
& WARNING
• Never adjust the driver' s or front passenger's seat while the
vehicle is moving . If you do this while the vehicle is moving , you
will be out of position. Always adjust the dri ver's or front
pa ssenger 's seat when the vehicle is not moving.
• Be careful when adjusting the seat he ight. Check to see that no
one i s in the way , or seriou s injury could result!
• Be cause the seats can be ele ctrically ad justed with the ignition
key removed, never leave children unattended in the veh icle.
Unsupervised use of the electric seat adjustments may cause
serious injury. •
Adjusting the seatback
,.._
----:-:----:--=-=-=-=-1~ jg
Fig. 66 Power s eat:
Sw itch for sea t bac k
an gle
- Push the switch => fig . 66 forward or to the rear i n the
direction of the arrow to adjust the angle of the seat back
=> & . ...
Vehicle care Do-it-yourselt service iTechnical data
Page 84 of 368
Seats and storage
Adjusting the head restraints
- To move the hea d restraint up, hold it at the sides and
slide it upwar d unt il it la tches .
- To move the head restra int down , press the button©
~ page 81, fig. 70 and slide the head restra int dow nward.
Removing the head restraints
- Slide t he head restrai nt all th e way up.
- Press the release butto n© and pu ll the h ead restraint out
and cl ear o f the se at.
Installing the head restraints
-Slide t he posts on the head restraint down into the gu ides
until the posts c lick into p lace. You s hou ld not be ab le to
pull the head restraint out of the backrest.
So that the driver can have a better view to the rear, the head
restra in ts should be pushed down comple tely when t he rea r seats are
not occupied .
& WARNING
• Only remove the rear seat head restraint s when necessary in
order to in stall a child seat . In stall the head restraint again imme
diately once the chi ld seat is removed. Driving w ithout head
restraint s or with head res traints that are not properly adjusted
increases the risk of serious or fatal neck injury dramatically .
• Read and heed all WARNINGS=>
page 179
(I) Tips
Cor rect ly adjus ted head restraints and safety belts are an ext reme ly
effective comb ination of safety features. •
Appli es to veh icles : w ith front a rm res t
Armrest
The armrest can be adjusted to s everal positions and
contains a storage compartment.
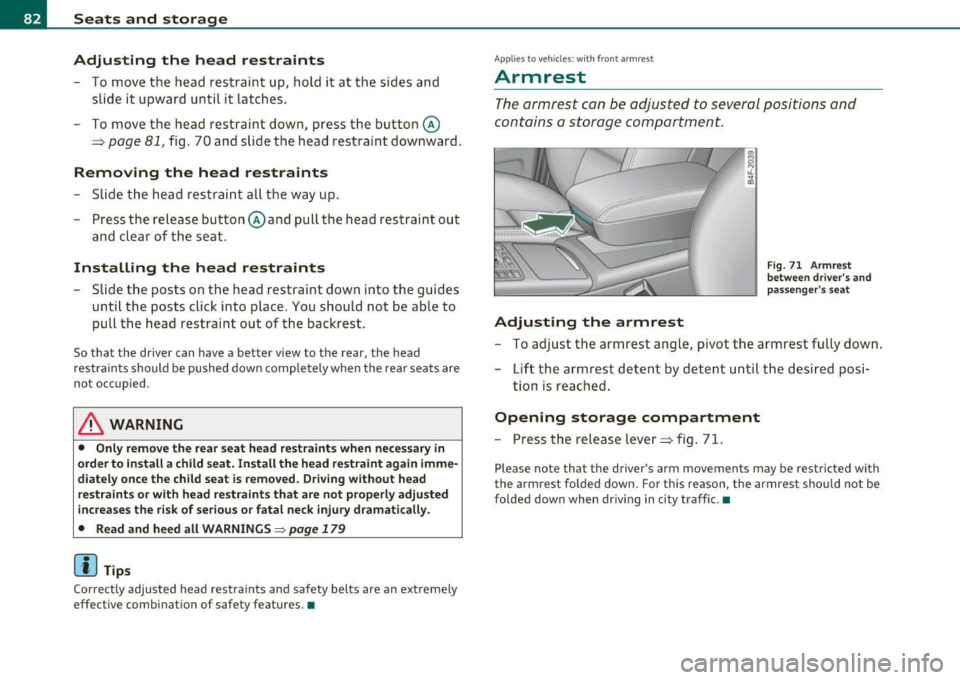
Adjusting the armrest
Fig. 71 Armre st
b etw een driver's and
pa ssenge r's se at
-To adjust the armrest angle, pivot the armrest fu lly dow n.
- Lift the a rmrest detent by de ten t until th e desi red posi-
tion is rea ched.
Opening storage compartment
- Press the release lever~ fig. 71.
Please note that the driver's arm movements may be restricted with
t he arm rest folded down. For th is reason, t he armrest s ho ul d not be
folded down when driving in city traff ic. •
Page 86 of 368
Seats and storage
& WARNING (continued )
• Torn or frayed safety belts can tear and damaged belt hardware
c an break in a crash . Inspect the belts periodically. Belts showing
damage to webbing , bindings, buckles, or retractors must be
replaced.
& WARNING
Always read and heed WARNINGS=> & in "Loading the luggage
compartment " on
page 181.
(D Note
When folding the back rest back into place, make sure t he safety be lt
do es not get caught, because it ca n be damaged. A damage d belt can
fa il to prov ide safe restra int. •
Fastening eyelets
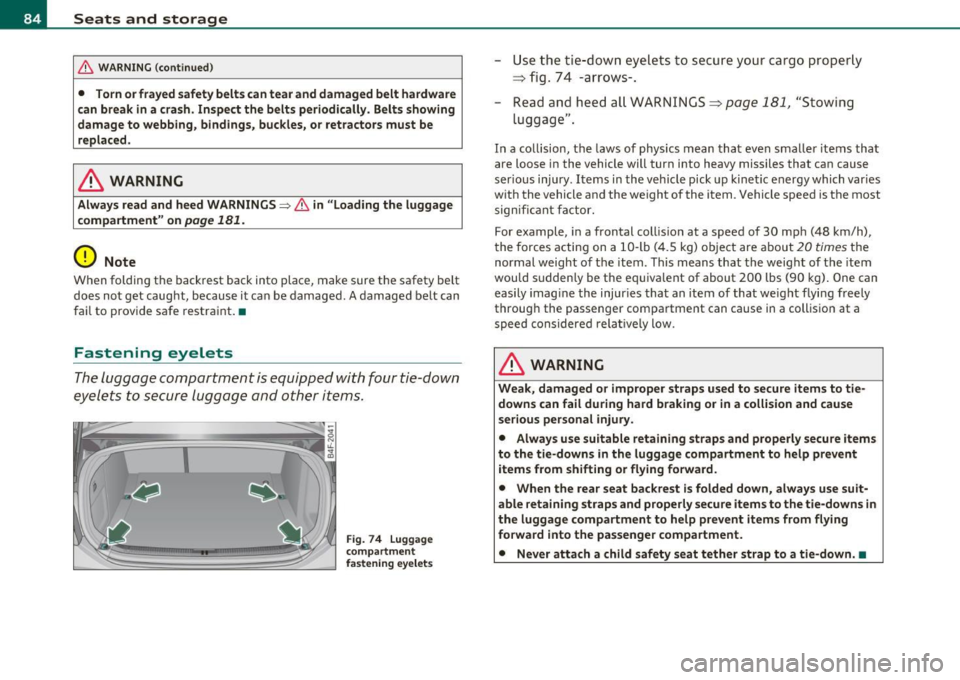
The luggag e com partme nt is equ ipped wi th f our tie-do wn
e y ele ts t o se cure luggag e and oth er it ems.
Fig . 74 Lu ggage
c ompa rtme nt
fas tening eyelet s
-Use th e t ie-down eye lets to se cu re your ca rg o pro perl y
=> fig. 74 -a rrow s- .
- Read an d he ed all W AR NIN GS=>
page 181, "S to wi ng
lu ggag e".
In a co llision, the laws of phys ics mean that even smal ler items tha t
are loose in the vehicle will turn into h eavy missiles that can cause
s e rious in jury . Items i n the veh icl e pick up kine tic energy which var ies
w ith the vehicle and the we ight of the item . Vehicle speed is the most
s ignifi cant factor.
For example, in a frontal coll is io n at a speed of 30 mp h (48 km/h),
t he f orces a ctin g on a 1 0-lb (4 .5 kg) o bject are about
20 times th e
normal weight o f th e ite m. This means that the weig ht of the item
woul d su dden ly be the eq uiva lent of about 200 lbs (90 kg) . One can
e asily imag ine the injuries tha t an item of that we ig ht flyi ng fre ely
throug h the passenger compartme nt can cause in a collisio n at a
s p ee d co nsidere d relati vely low.
& WARNING
Weak, damaged or improper straps used to secure items to tie
downs can fail during hard braking or in a collision and cause
serious personal injury .
• Always use suitable retaining straps and properly secure items
to the tie -downs in the luggage compartment to he lp prevent
items from shifting or flying forward.
• When the rear seat backrest is folded down, always use suit
able retaining straps and properly secure item s to the tie-downs in
the luggage compartment to help prevent items from flying
forward into the passenger compartment.
• Never attach a child safety seat tether strap to a tie-down. •
Page 94 of 368
Seats and storage
Cigarette lighter/socket
Cigarette lighter
. .
. .
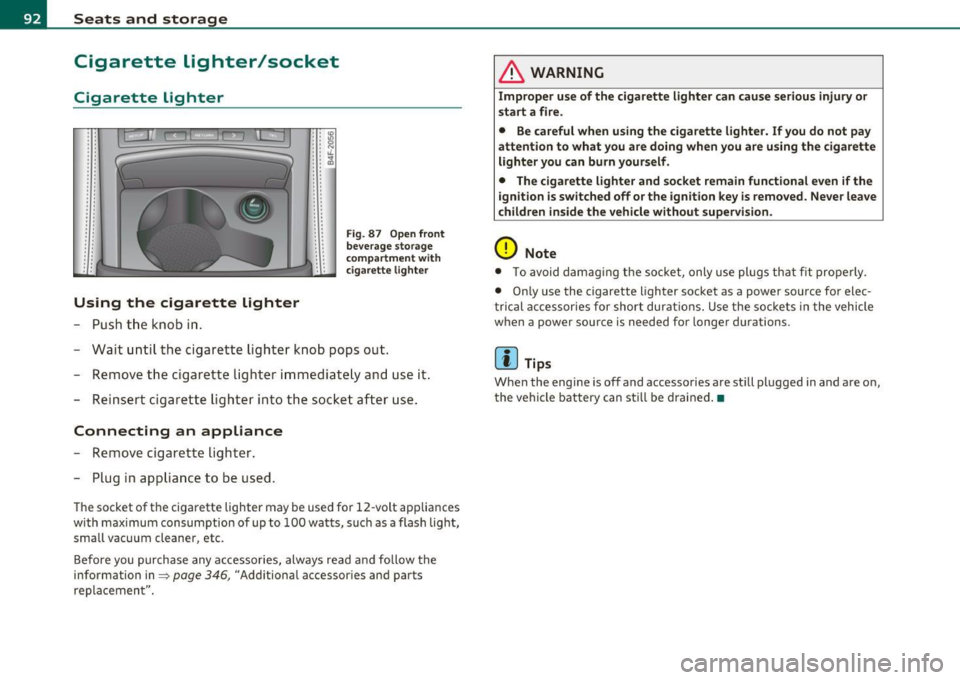
Using the cigarette lighter
- Push the knob in.
• • IO .. :g • • N : : "-.. ~ . .
.. . .
Fig . 87 Open front
beverage storage
c ompartment wit h
ciga rette lighter
-Wait until the cigarette lighter knob pops out.
- Remove the cigarette lighter immediately and use it.
- Reinsert cigarette lighter into the socket after use.
Connecting an appliance
-Remove cigarette lighter.
- Plug in appliance to be used.
The socket of the cigarette lighter may be used for 12 -volt app liances
w ith maximum consumption of up to 100 watts, such as a flash light,
small vacuum cleaner, etc.
Before you purchase any accessories, always read and follow the
information in=>
page 346, "Additional accessor ies and parts
replacemen t".
& WARNING
Improper use of the cigarette lighter can cause serious injury or
start a fire.
• Be careful when using the cigarette lighter. If you do not pay
attention to what you are doing when you are using the cigarette
lighter you can burn yourself .
• The cigarette lighter and socket remain functional even if the
i gnition is switched off or the ignition key is removed. Never leave
children inside the vehicle without supervision.
0 Note
• To avoid damag ing the socket, only use plugs that fit properly.
• Only use the cigarette lighter socket as a power source for elec
t rical accessories for short durat ions. Use the sockets in the vehicle
when a power source is needed for longer durations .
[ i ] Tips
When the engine is off and accessories are st ill plugged in and are on,
the vehicle battery can sti ll be drained. •
Page 95 of 368
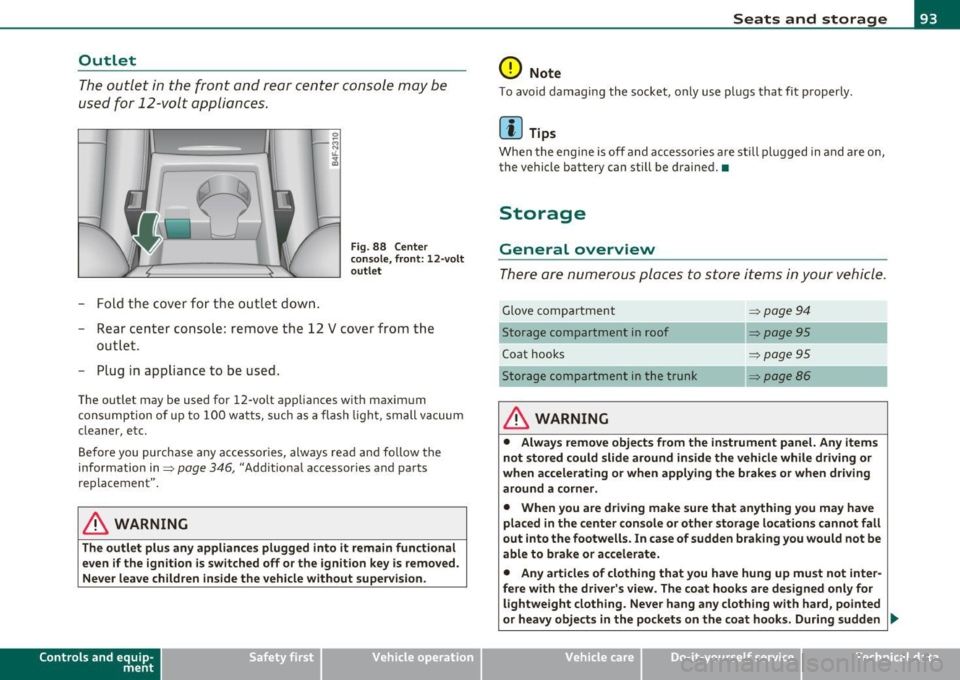
Outlet
The outlet in the front and rear center console may be
used for 12-volt appli ances .
- Fold the cover fo r the outlet down .
Fig. 88 Center
c on sole , fr ont: 12 -vol t
ou tlet
- Rear center console: remove the 12 V cover from the
out le t.
- Plug in appliance to be used.
The outlet may be used for 12-volt appliances with maxim um
consumption of up to 100 wat ts, su ch as a flash light, small vacuum
cleaner, etc.
Be fore you purchase any accessories, always read and fo llow the
information in:::::,
page 346, "Additional accessories and parts
replacement".
& WARNING
The outlet plus any applianc es plugged into it r emain functional
even if the ign ition is switched off or th e ign itio n key is remo ved.
Ne ver leave children in side the vehicle without supervi sion.
Cont rols a nd e quip
m en t Vehicle
OP-eration
Seats and storage
0 Note
To avo id damaging the socket, only use p lugs that fit p roperly.
[ i ] Tips
Whe n the engine is off and accesso ries a re st ill plugged in and a re on,
the vehicle battery can still be drained. •
Storage
General overview
There are numerous places to store items in your vehicle .
Glove compa rtment :::::, page 94
Storage compartment in roof :::::, page 95
Coat hooks :::::, page 95
Storage compartment in the trunk :::::, page 86
& WARNING
• Alwa ys rem ove objects from the in strument panel. Any items
not stor ed could slid e around in side the v ehicle while driv ing or
when a ccelerating o r whe n applying t he br ake s or whe n driv ing
around a corn er.
• When you are dri ving make sure that an ything you ma y have
placed in the center con so le or other sto rage locat ion s cannot fall
out into the footwells . In case of sudden br aking you would not be
able to b rake or acc ele rate.
• An y article s of clothing that you ha ve hung up mu st not inter
f e re with th e driver's view . The co at hooks are d esigne d only for
lightweight clothing. Ne ver ha ng any clothing with ha rd, pointed
or heavy obj ects in the pockets on th e co at hooks . During sudden
~
Vehicle care Do-it-yourselt service iTechnical data