2010 AUDI S6 lights
[x] Cancel search: lightsPage 43 of 368
Exceptions
If the ign ition has been switched on usi ng the master key, yo u can
st ill open the g love compartment .
As long as the ign it ion is switched off, you can st ill open the rear lid
using the rear lid butto n on t he
master key c::5 . The same holds tr ue
fo r using the rear lid re lease hand le in conjunction w ith the Conve
nience key *.
For this reason, be sure to only ha nd over the
valet key to the perso n
who w ill take charge of your veh icle.
[ i ] Tips
Be sure to activate the funct ion before han ding over the va let key to
someone e lse. The va let key o nly fi ts the lock in the d river's door and
the ignition lock. •
Power locking system
General description
The po wer lockin g sys tem l ocks or un locks all d oors an d
the r ear lid sim ulta neously.
The power loc king system in your vehicle incorpora tes the fo llowing
fu nction s:
• Centra l locking function
• Selective unloc k fe ature =>
page 44
• Remote cont rol featu re => page 38
• Conven ience key*=> page 47
• Anti -theft ala rm system => page 49
All the doors and the rea r lid are locked by the centra l loc king system
when you loc k the vehicle. You can set whether generally on ly the
dr ive r's door o r all doo rs and t he rea r lid sho uld be unlocked when yo u
Controls and equip
ment Safety first
Opening and closing
open the vehicle in
the MMI men u Central locking to suit you r indi
vidu al d esires =>
page 44.
Unlocking the vehicle
Yo u can unloc k the vehi cle from o utside eithe r by using the remote
control
or by inse rting and turning the key in the driver 's door lock .
Whe n you
unlock yo ur vehi cle:
• T he anti-theft alarm system is deactivated briefly .
• T he vehicle interior lights illumina te for approximate ly 30
seconds.
• All tur n sign al ligh ts will flash twice whe n the c ar is un lo cked.
• After un locking the ve hicle, you have 60 seconds to open a doo r or
t he rear lid. Afte r 60 seco nds , th e veh icle automati cally loc ks and the
anti-theft alarm system activates again.
Th e rear lid can be loc ked or unlo cked eit h e r b y using the remote
cont rol
or by inserting and t urnin g the key in the dr ive r's door lock .
U nlocking the vehicle wi th the remote con trol will on ly
unlock the
rea r lid, to
open it, t he lid hand le needs to be pressed .
Locking the vehicle
You can lock the vehicle from o utside either by using the remote
cont rol
or by inse rting and t urning the key in the drivers 's doo r lock .
Whe n you
lock the ve hicle:
• All doors and the rear lid are locked.
• All tur n signal ligh ts will flash once when t he car is locked.
• Th e anti-theft alarm system is activated. The hor n of the anti
t heft a la rm system w ill sound and t he anti-theft a larm system readi
ness lig ht, located in the upper part of the driver's door pane l, w ill
st art to blink.
• T he vehicle interior lights tu rn off.
Unlocking and locking with Convenience key*
O n vehicles wh ich are equippe d wi th the Convenience key* au th ori za
tion system, the doors are unloc ked
without a key by means of a prox-
im ity senso r in th e door h andle. T he do or s ar e sim ila rly locked ...
Vehicle care Technical data
Page 45 of 368

To lock the vehicle CT'.!
- Press button®=> & in "General description" on
page 41.
-Watch that all turn signal lights flash once.
To unlock r ear lid only c::;
- Press but ton @ for approximately one second.
PANIC Button
Push the red button @ to activate the panic function. The
horn sounds and the turn signals flash .
- Push the button @ aga in to deactivate the panic function .
On vehicles with Convenience key*, the se lector lever must be in the P
position, otherwise the vehicle cannot be locked .
& WARNING
Read and follo w all W ARNIN GS~ & in "Ge ner al d escripti on " o n
page 41 .
[ i ] Tips
• In order to make sure the locking function is working, you should
always keep your eye on the vehicle to make sure it is properly locked .
• Do not use the remote co ntro l if yo u are inside the car, otherwise
you may un intent ionally lock the veh icle, and then you would set off
the anti-theft alarm when you try to start the engine or open a door.
I n case th is happens anyhow, push the unlock button
0.
• Use the panic function on ly if you are in an emergency situation. •
Controls and equip
ment Safety first
Op
ening and closing
Op era ting lo cks with th e key
To lock and unlock the vehicle from the outside, turn the
key in the lock of the driver's door .
,,~
fl-=- -==-- OO~j @
To unlock the vehicle
Fig. 29 Key turn s fo r
opening and clos ing .
- Insert the key into the lock of the driver's door.
- Turn the key
one time to position @ to unlock the driver's
door .
- Turn the key
two times to posit ion @ => fig . 29 to unlock
all doors and the rear lid.
To lock the vehicle
- Close a ll windows and doors properly.
- Turn the key in the lock of the driver's door to the loc k
position ®=>
& in "General description" on page 41.
& WARNING
Read and foll ow all WARNING S~ & in "Gene ral de scription " on
pag e 41 . •
Vehicle care Technical data
Page 60 of 368

Clear vision
Clear vision
Lights
Switching the headlights on and off ·"ti-·
In the "AUTO" position, a light sensor automatically
switches the head- and taillights on and off in response to light condi tions.
Fi g. 46 In strument
p an el: li gh t swit ch
The ligh t switc h must not be overtur ned past t he stops in
either d irection.
Switching on automatic headlight control
- Turn the lig ht sw itch to AUTO => fig. 46 .
Switching on the side marker lights
-Turn the lig ht swi tch to ~oo~.
Switching on the headlights and high beam
- Tur n the lig ht sw itch to ~D.
- Push the high beam leve r forward tow ards the in strument
panel=>
page 62 .
Switching off the lights
- Tu rn th e lig ht swi tch to 0.
T he headlights on ly work when the ignitio n is switc hed on. Whi le
starting the engine or w hen switching off t he ignition, the headlig hts
w ill go off and o nly the s ide marke r lights will be o n.
After starting the eng ine, the headlights are automatically adjusted*
to the load and angle o f th e vehicle (for example, during acce lerat ion,
brak ing) . This prevents oncom ing traff ic from experiencing unneces
sary headlight glare from your head lig hts.
If the system is not operat ing p roperly, a warning symbol in the Auto
Check Control is displayed=>
page 31.
With the side marker lights o r headlights switc hed on, the symbol
next to the light switch illum inates
':o oc .
Daytime running lights
• USA models: On vehicles w ith xenon lights the dayt ime runn ing
lights will come on automat ica lly when the ignition is turned o n and
the light switch=> fig. 46 is i n the
O position or the AUTO position
(only i n day light conditions) . The
D aytime running light s function
can be turned on and off in the MMI menu
Exterior lighting
=> page 59. On vehicles wit h halogen lights there is no daytime
r u nning lights fu nctio n=>
& -
• Canada models: The daytime ru nning lights wi ll come o n auto
matically w hen the ignit io n is t urned on and t he light switch=> fig. 46
is in the
O p osition or the AUTO position (on ly in day light co nditions)
=> & -
Automatic headlight control
In the switch pos ition AUTO the automatic headlight control is
t u rned on. The low beams are t urned on automatically t hrough a light
sensor as soon as ambient br ight ness (e .g . when dr iving into a
t u nnel) falls below a val ue p reset at the factory . When ambient .,.
Page 61 of 368

brightness increases again, the low beams are turned off again auto
matically =>& .
In the
AUTO position the low beams are switched off automatically
when the ignition is turned off.
Light Sensor Malfunction
In the event of a light sensor ma lfunct ion, the driver is notified in the
instrument cluster display:
Automatic headlights/automatic wipers defective
For safety reasons the low beams are turned on permanently with t he
switch in
AUTO. However, you can continue to turn the lights on and
off using the light switch. Have the light sensor checked as soon as
possible at a dealership.
& WARNING
• Never use daytime running lights to see where you are going.
They are not bright enough and will not let you see far enough
ahead for safety, especially at dusk or when it is dark. Always
switch on the low beams at dusk or when it is dark.
• Automatic headlights are only intended to assist the driver .
They do not relieve the driver of his responsibility to check the
headlights and to turn them on manually according to the current
light and visibility conditions. For example, fog and rain cannot be
detected by the light sensors. So always switch on the headlights
under these weather conditions and when driving in the dark
io.
• Crashes can happen when you cannot see the road ahead and
when you cannot be seen by other motorists.
- Always turn on the headlights so that you can see ahead and
so that others can see your car from the back.
[ i ) Tips
• With the switch in AUTO front fog lights and rea r fog ligh ts cannot
be turned on in addition .
Controls and equip
ment Safety first
Clear vision
•
The light sensor for headlight control is located in the rear view
mirror mount. Do not apply any stickers to the winds hield in this area
to prevent malfunctions or failures .
• If you remove the ignition from the ignitio n lock w hile the head
lights are still on, a buzzer will sound as long as the dr iver's door is
open to remind you to turn off the lights.
• Always observe the specific loca l regulations for your area as to
when to use your lights .•
Adjusting exterior lighting
The functions are set in the MMI.
-Select: Function button [CAR]> Systems* > Exterior
lighting .
Coming home
The Coming home function ensures tha t after turning off the igni
tion and opening the driver's door
the vehicle per iphery is illum i
nated in the dark. In addition, the front fog lights, the tail lights and
the license plate light are turned on. On-time can be set for a per iod
from O (off) to 60 seconds .
Leaving home
The Leaving home function ensu res that when unlocking the vehicle
per iphery is illuminated in the dark. In addition, the front fog lights,
the tail lights and the license plate light are turned on. This function
can be turned on and off .
Daytime running lights
USA models: On vehicles with xenon lights the daytime running
lights can be turned on or off using this function . On vehicles with
halogen lights there is no daytime running lights function .
Canada models: The function cannot be turned off. It is activated
automatically each time the ignition is tur ned on. This menu item is
shown "greyed out". •
Vehicle care Technical data
Page 62 of 368
Clear vision
Front fog Lights }O
Fig. 47 Ins trume nt
p an el: li gh t s witch
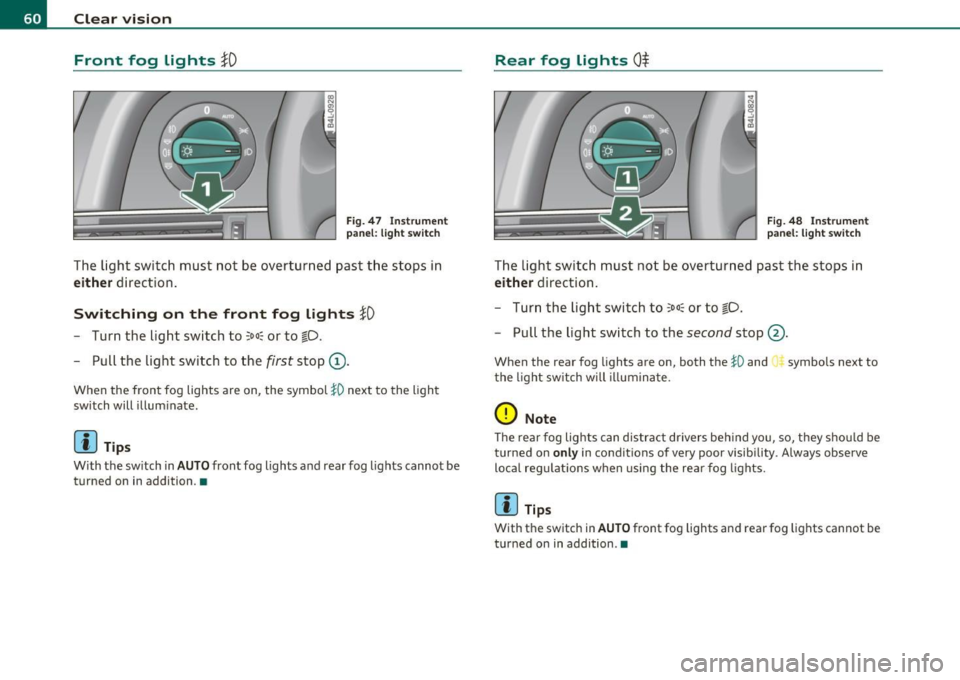
The light switch must n ot be overtu rn ed past the stops in
either d irect ion .
Switching on the front fog lights }D
Turn the light switch to ~oo: or to iD.
- Pull the light switch to the first stop (D .
When the front fog lights are on , the symbo l }0 next to the ligh t
switch will illum inate.
(I) Tips
With the sw itch in AUTO front fog lights and rear fog lights cannot be
turned on in addition .•
Rear fog Lights 0$
Fi g. 48 Ins tru men t
p an el: light sw itc h
The light switch must not be overtur ned pas t th e stops i n
either d irection .
- Tur n the light switch to
~oo: or t o iD.
- Pull the light switch to the second stop @.
When the rear fog lights are on, both the }D and symbols next to
t he light sw itch will il luminate .
0 Note
The rear fog lights can distract drivers be hind yo u, so, they shou ld be
turned on
only in condit ions of very poor visib ility . A lways observe
loca l reg ulations w hen usin g the rear fog lights .
(I) Tips
With the sw itch in AUTO front fog lights and rear fog lights cannot be
tu rned on in addition .•
Page 64 of 368
Clear vision
-Press the switch /4. => page 61, fig. SO to turn the emer-
gency flashers on or off.
When the emergency flasher is on, all four turn signals blink at the
same time. The turn signal indicator lights¢¢ in the instrument
cluster, as well as the light in the emergency flasher switch~ blink
likewise.
The emergency flashers will turn on automatically if you are in an accident where the airbag has deployed.
(I) Tips
You should turn on the emergency flashers when:
• you are the last vehicle standing in a traffic jam so that any other
vehicles coming can see you, or when
• your vehicle has broken down or you are in an emergency situa
tion, or when
• your vehicle is being towed by a tow truck or if you are towing
another vehicle behind you .•
Turn signal ¢ c> and high beam ~D lever
The lever on the left side of the steering column is used to
operate the turn signals and the high beam as well as the
headlight flasher .
i
'
-to
"' -w
"' cc
Fig. 51 Turn signal
and high beam lever
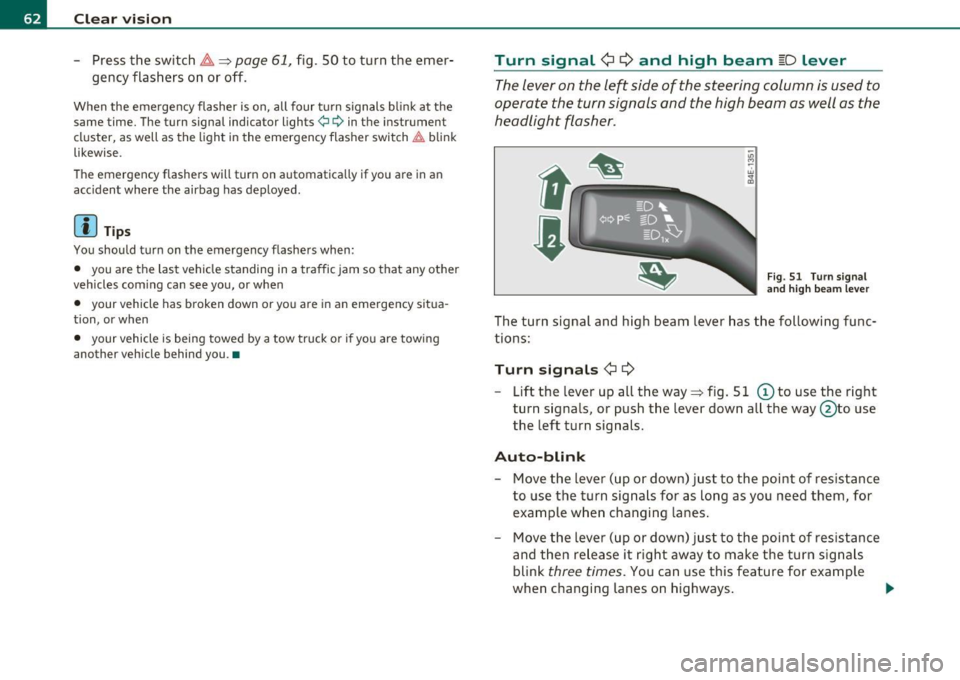
The turn signal and high beam lever has the following func
tions:
Turn signals ¢ Q
- Lift the lever up all the way=> fig. S 1 © to use the right
turn signals, or push the lever down all the way@to use
the left turn signals.
Auto-blink
-Move the lever (up or down) just to the point of resistance
to use the turn signals for as long as you need them, for
example when changing lanes.
- Move the lever (up or down) just to the point of resistance
and then release it right away to make the turn signals
blink
three times . You can use this feature for example
when changing lanes on highways.
~
Page 65 of 368
High beam l[D
-Push the lever forward ® to switch on the high beam.
- Pull the lever back towards you to switch off the high
beam.
H eadlight flasher l[D
- Pull the lever toward the steering wheel© to use the
headlight flasher.
Notes on the se fea ture s
• The turn signals only work with the ignition turned on. The indi
cato r lights ¢ or¢ in the instrument cluster=>
page 12 also blink.
• After you have turned a corner, the turn signal switches off auto
matically.
• The
high beam works only when the headlights are on. The indi
cato r light [D in the instrument cluster illuminates when the h igh
beams are on.
• T he
headlight flasher works only as long as you ho ld the lever -
even if there are no lights turned on. The indicator light~D in the
instrument cluste r illuminates when yo u use the headlight flasher.
0 Note
Do no t use the high beam or head light flasher if you know that these
could blind oncoming traffic .•
Con tro ls a nd e quip
m en t Vehicle
OP-eration
Clear vision
Interior lights
Front interior lights
The interior lights include reading lights for both the
driver and the front passenger.
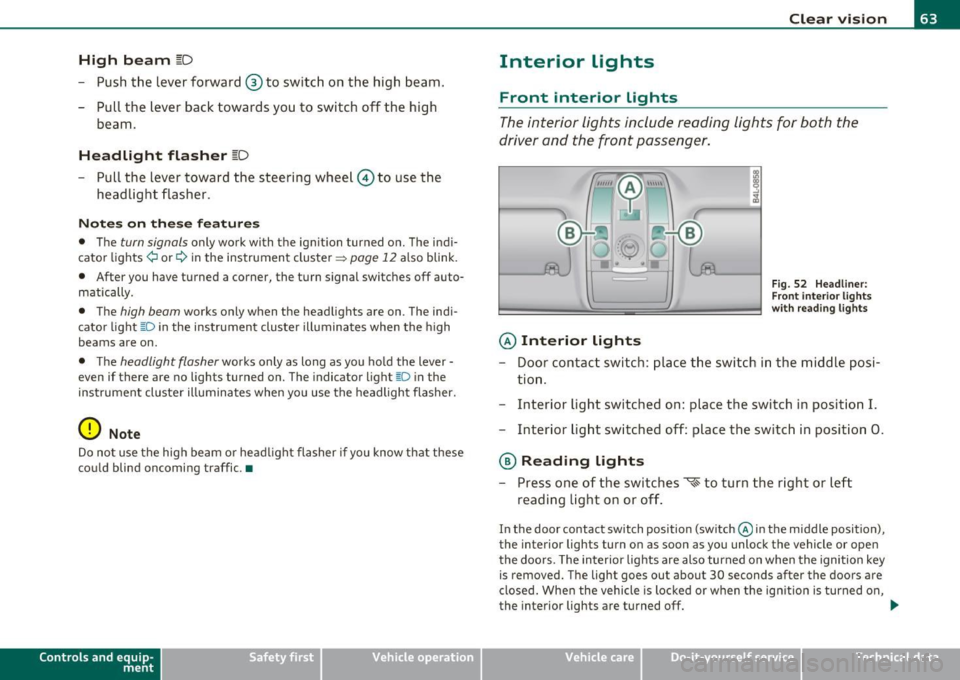
© Interior lights
Fig . 52 Headli ner:
F ron t inte rior lights
wit h rea ding lights
- Door contact switch : place the switch in the middle posi-
tion .
- Interior light switched on: place the switch in position
I.
-Interior light switched off: place the switch in position 0.
® Reading lights
- Press one of the switches '* to turn the right or left
reading light on or off .
In the door contact switch position (switch @in the middle position),
the interior lights turn on as soon as you unlock the vehicle or open
the doors. The interior lights are also turned on when the ignition key is removed. The light goes out about 30 seconds after the doors are
closed . When the vehicle is locked or when the ign ition is turned on,
the interior lights are turned off.
~
Vehicle care Do-it-yourselt service iTechnical data
Page 66 of 368
Clear vision
When a door is open, the interior lights are turned off after about 10
minutes to prevent draining the battery.
The brightness of the lights is controlled automatically by a dimmer
when they a re switched on and off .•
Rear interior Lights
There ore reading lights in the rear for the passengers.
0 '-80
Fig . 53 Headline r:
Rea r read ing lights
Press one of the switches ~to turn the right or left
reading light on or off=> fig . 53 .
[I) Tips
If the t symbol in the safety switch ~ page 50 illuminates, the
w indow regulators in the rear doors, the switches for the interior
lights and the switch for the electric s un shade* are inoperative. •
Applies to ve hic le s: wit h am bien ce ligh tin g
Ambience Lighting
The ambience lighting con be adjusted in the MMI.
-Select: Function button I CAR ]> Systems* > Ambience
lighting.
When the vehicle is unlocked, the standard lighting turns on auto matically and dims after approx . 2 minutes, and when the ignition is
turned on it sw itches off immediately.
The following interior lighting is controlled through
Ambience lighting:
• Front footwe ll
• Rear footwell
• Front door panel
• Rear door panel •
Vision
Sun visors
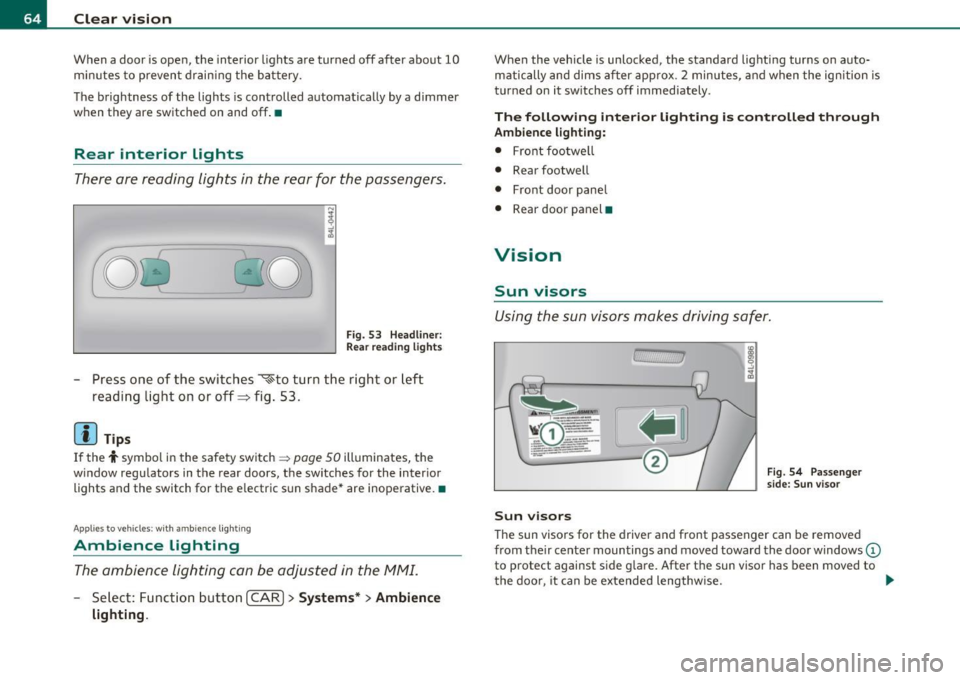
Using the sun visors makes driving safer.
Sun visors
Fig. 54 Passenger
side: Sun visor
The sun visors for the driver and front passenger can be removed
from the ir center mountings and moved toward the door w indows
(D
to protect against side glare. After the sun visor has been moved to
the door, it can be extended lengthw ise. ..