Page 246 of 551

�Î
�µ
�µ
�Î
To pause a disc, press the
corresponding number of the
current disc on the preset buttons.
To play the disc again, press the
preset button again.
If you turn the system of f while a
disc is playing, either with the
power/volume knob or by turning
of f the ignition switch, the disc will
stay in the drive. When you turn the
system back on, the disc will begin
playing where it lef t of f . To take the system out of disc mode,
press the AM/FM button, the
DISC/AUX button, or the XM button
(If equipped). The system will switch
to the function associated with the
button you pressed. If you pressed
the DISC/AUX button, any auxiliary
input device attached to the system
will be selected. To return to disc
mode, press the DISC/AUX button
again and play will continue at the
same point it lef t of f .
You can play a DVD-A disc in the
disc changer. The disc controls are
same as previously described.The changer plays MP3/WMA discs
in recorded order. Maximum
playable file layers are 8, and total
playable tracks are 255. If your disc
has a complex structure, the changer
takessometimetoreadthedisc
bef ore beginning play.
The specif ications f or compatible
MP3 f iles are:
Sampling f requency:
32/44.1/48 kHz (MPEG1)
24/22.05/16 kHz (MPEG2)
Bitrate:
32/40/48/56/64/80/96/112/128/
160/192/224/256/320 kbps
(MPEG1)
8/16/24/32/40/48/56/64/80/96/
112/128/160 kbps (MPEG2)
Compatible with variable bitrate
and multi-session
: AMorFMbuttononHawaiian
models.
CONT INUED
To Pause a Disc
To Stop Playing a Disc Playing an MP3/WMA Disc
Playing a DVD-A Disc
Audio System
Features
243
�����—�����—�����y�
�����������
�y���
�(�����������y���������y
2010 RL
Page 249 of 551

To remove a dif f erent disc f rom the
changer,firstselectitbypressing
the corresponding number on the
preset button or turning the
interf ace knob, and pressing ENTER
on the interf ace selector. When that
disc begins playing, press the eject
button.
To eject all discs, press and hold the
eject button. To eject one disc, press and release
the eject button. You can also eject discs when the
ignition switch is of f : When you press the eject button
while listening to the radio, or with
the audio system turned of f , the disc
that was last selected is ejected.
Af ter that disc is ejected, pressing
the eject button again will eject the
next disc in numerical order. By
doing this six times, you can remove
all the discs f rom the changer.
To remove the disc that is currently
playing, press and release the eject
( ) button. You will see
‘‘EJECT’’ on the upper display. When
you remove the disc f rom the slot,
the system begins the load sequence
so you can load another disc in that
position. If you do not load another
disc within 15 seconds, the system
selects the previous mode [AM, FM1,
FM2, or XM Radio (all models
except Hawaiian models)].
If you do not remove the disc f rom
the slot, the system will reload the
disc af ter 10 seconds and put the
disc changer in pause mode. To
begin playing the disc, press the
DISC/AUX button. Removing Discs f rom the
Changer
Audio System
246
�����—�����—�����y�
�������������y���
�(�����������y�������
�y
2010 RL
Page 251 of 551

This audio system can operate the
audio f iles on the iPod
with the
same controls used f or the in-dash
disc changer. To play an iPod,
connect it to the USB adapter cable
in the console compartment by using
your dock connector, then press the
DISC/AUX button. The ignition
switch must be in the ACCESSORY
(I) or ON (II) position. The iPod will
also be recharged with the ignition
switch in these positions. iPods compatible with your audio
system using the USB adapter cable
are:
The system will only play songs
stored on the iPod with iTunes.
iPod and iTunes are registered
trademarks owned by Apple Inc.
You can select the AUX mode by
using the navigation system voice
control buttons, but cannot operate
theplaymodefunctions.
Use only compatible iPods with the
latest sof tware. iPods that are not
compatible will not work in this audio
unit.
Model
iPod Classic
5 Gen.
(2005 or later)
iPod Classic
(2007 or later)
iPod nano
iPod nano 2
generation
iPod nano 3
generation
iPod touch
iPhone Sof tware
Ver. 1.2 or more
Ver. 1.0 or more
Ver. 1.2 or more
Ver. 1.1.2 or more
Ver. 1.0 or more
Ver. 1.1.1 or more
Ver. 1.1.1 or more
th
nd
rd
Audio System
To Play an iPod
Voice Cont rol Syst em
248
�����—�����—�����y�
�������������y���
�(�����������y���������y
2010 RL
Page 260 of 551

�Î
�Î
CONT INUED
This audio system can operate the
audio f iles f rom a USB f lash memory
device with the same controls used
f or the in-dash disc changer. To play
a USB f lash memory device, connect
it to the USB adapter cable in the
console compartment, then press the
DISC/AUX button. The ignition
switch must be in the ACCESSORY
(I) or ON (II) position.
The audio system reads and plays
the audio f iles on the USB f lash
memory device in MP3, WMA or
AAC f ormats. Depending on the
f ormat, the display shows MP3,
WMA or AAC when a USB flash
memory device is playing. The USB
f lash memory device limit is up to
700 f olders or up to 65535 f iles.Only AAC f ormat f iles recorded
with iTunes are playable on this
audio unit. Do not keep a USB f lash memory
device in the vehicle. Direct
sunlight and high heat will damage
it.
We recommend backing up your
data bef ore playing a USB f lash
memory device.
Depending on the type and
number of f iles, it may take some
time bef ore they begin to play.
Depending on the sof tware the
f iles were made with, it may not be
possible to play some f iles, or
displaysometextdata.
You can select the AUX mode by
using the navigation system voice
control buttons, but cannot operate
theplaymodefunctions.
The recommended USB f lash
memory devices are 256 MB or
higher. Some digital audio players
maybecompatibleaswell.
Some USB f lash memory devices
(such as devices with security lock-
out f eatures, etc.) will not work in
this audio unit.
Do not use a device such as a card
reader or hard drive as the device
or your f iles may be damaged.
Do not connect your USB f lash
memory device using a hub.
Do not use an extension cable to
the USB adapter cable equipped
with your vehicle.
:
Audio System
To Play a USB Flash Memory
Device
Voice Cont rol Syst em
Features
257
NOTE:
�����—�����—�����y�
����
��������y���
�(�����������y���������y
2010 RL
Page 286 of 551
Please read the disclaimer carefully
beforeyoucontinue.Togotothe
compass screen, select OK by
pushingintheinterfaceselector.
The f irst screen to appear is the
compass system globe screen. The
screen then changes to the
disclaimer screen:
The button does not appear
immediately. It appears af ter the
system is loaded. The OK
command cannot be activated by
voice.
Throughout the compass system
section, the icon ‘‘ ’’ is used to
indicate f eatures that are dependent
on the ‘‘Driver number’’ as displayed
on the multi-information display
‘‘Welcome’’ display.
When you turn the ignition switch to
the ON (II) position, the compass
system to boots up within a f ew
seconds.
CONT INUED
System Start-up
OK
Compass System (U.S. model without navigation system)
Features
283
NOTE:
�����—�����—�����y�
����
����
���y���
�(�����������y���������y
2010 RL
Page 292 of 551

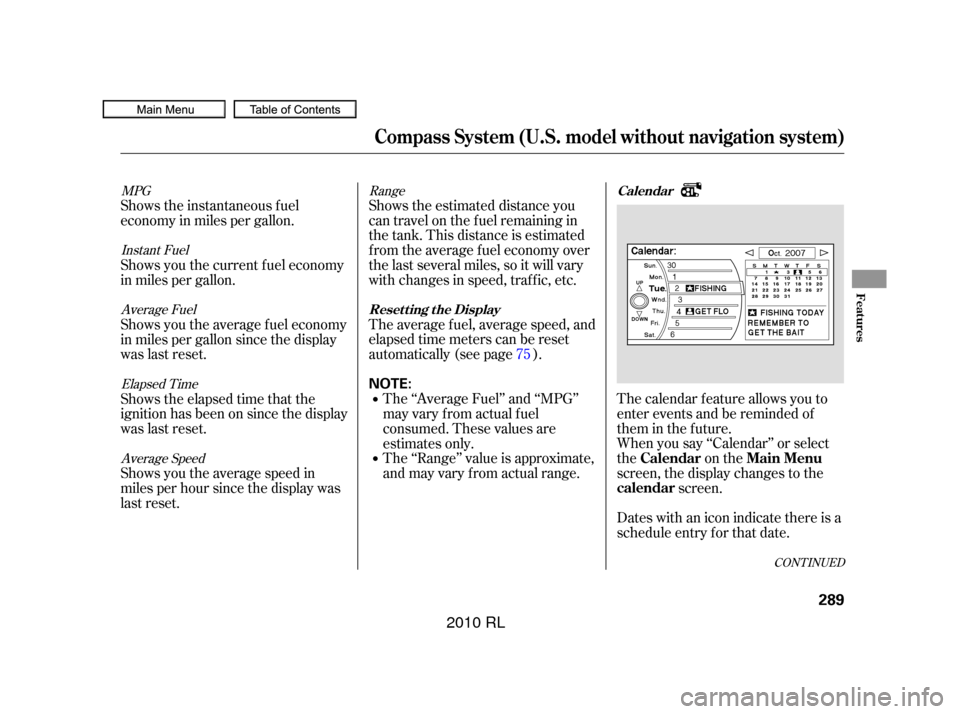
The calendar f eature allows you to
enter events and be reminded of
them in the future.
When you say ‘‘Calendar’’ or select
the on the
screen, the display changes to thescreen.
Dates with an icon indicate there is a
schedule entry f or that date.
Shows the estimated distance you
cantravelonthefuelremainingin
the tank. This distance is estimated
f rom the average f uel economy over
the last several miles, so it will vary
withchangesinspeed,traffic,etc.
The average fuel, average speed, and
elapsed time meters can be reset
automatically (see page ).
The ‘‘Range’’ value is approximate,
and may vary from actual range. The ‘‘Average Fuel’’ and ‘‘MPG’’
may vary f rom actual f uel
consumed. These values are
estimates only.
Shows the instantaneous f uel
economy in miles per gallon.
Shows you the current f uel economy
in miles per gallon.
Shows you the average f uel economy
in miles per gallon since the display
was last reset.
Shows the elapsed time that the
ignition has been on since the display
was last reset.
Shows you the average speed in
miles per hour since the display was
last reset.
75
Range
MPG
Instant FuelAverage Fuel
Elapsed TimeAverage Speed
CONT INUED
Calendar
Resetting the Display
Calendar Main Menu
calendar
Compass System (U.S. model without navigation system)
Features
289
NOTE:
�����—�����—�����y�
����
��������y���
�(�����������y���������y
2010 RL
Page 301 of 551

If the battery goes dead or is
disconnected f or any reason, you will
have to enter a security code into
both the audio system and the
compass system bef ore you can use
it again.
If f or any reason, you lose power to
the compass system (the battery was
disconnected), the system needs to
be initialized bef ore you can use it.
Initialization requires this:
Entry of the compass system 4-
digit security code to ‘‘unlock’’ the
system.
GPS initialization. This may not be
needed depending on how long the
system was without power.
Pressing the (
) button allows you to switch
display modes.
Each time you turn the ignition
switch to the ACCESSORY (I)
position, the display mode is in auto.
The screen changes between day
and night modes when you turn the
headlights on and of f .
To override the auto mode, select
either day or night mode. This can
be usef ul if you want to use the
headlights during the day. Be aware
that using day mode at night will
make the screen extremely bright.
Compass System (U.S. model without navigation system)
Entering the Security CodeSystem Initialization
Setting Display Mode
Display
mode
298
�����—�����—�����y�
����
��������y���
�(�����������y���������y
2010 RL
Page 302 of 551

Depending on the length of time the
battery was disconnected, your
system may require GPS
initialization. If it does, the above
screen appears. Follow the
instructions on the screen.
When you purchased the vehicle,
you should have received two cards
that have the audio and compass
system’s security codes and serial
numbers. Keep these cards in a saf e
placeincaseyouneedthecodes.If
you lose the cards, you must obtain
the security codes f rom your dealer.
Enter the f our-digit compass system
security code. If you have entered it
correctly, the display changes to the
. You have ten
chances to enter the correct code. If
all ten are incorrect, turn the ignition
to OFF, then back to ON (II) to have
ten more chances to enter the
correct code.
To enter the code, turn the interf ace
knob to select the number, then
press the interf ace selector to enter
it. Keep doing the same procedure to
enter all f our correct numbers. If you
need to delete the number you
entered mistakenly, move the interface selector to the right.
Follow the instructions in the audio
system section to enter the 5-digit
audiocode(seepage ).The
system voice will not operate if the
audio code is not entered
280
CONT INUED
GPS init ializat ion
Compass System (U.S. model without navigation system)
Disclaimer screen
Features
299
�����—�����—�����y�
����
��������y���
�(�����������y���������y
2010 RL