Page 33 of 88

OPERATION AND IMPORTANT RIDING POINTS
5-1
5
EAU15951
Read the Owner’s Manual carefully to
become familiar with all controls. If
there is a control or function you do not
understand, ask your Yamaha dealer.
WARNING
EWA10271
Failure to familiarize yourself with
the controls can lead to loss of con-
trol, which could cause an accidentor injury.
EAU45310
TIPThis model is equipped with a lean an-
gle sensor to stop the engine in case of
a turnover. To start the engine after a
turnover, be sure to turn the main
switch to “OFF” and then to “ON”. Fail-
ing to do so will prevent the engine from
starting even though the engine willcrank when pushing the start switch.
EAUM2322
Starting the engine In order for the ignition circuit cut-off
system to enable starting, one of the
following conditions must be met:�
The transmission is in the neutral
position.
�
The transmission is in gear with
the clutch lever pulled and the sid-
estand up.
See page 3-12 for more informa-
tion.
1. Turn the key to “ON” and make
sure that the engine stop switch is
set to“”.
The following warning lights and
indicator light should come on for a
few seconds, then go off.�
Neutral indicator light
�
Turn signal indicator light
�
High beam indicator light
�
Coolant temperature warning
light
�
Engine trouble warning light
U22BE0E0.book Page 1 Wednesday, December 17, 2008 11:00 AM
Page 68 of 88

PERIODIC MAINTENANCE AND ADJUSTMENT
6-32
6
EAU24350
Supporting the motorcycle Since this model is not equipped with a
centerstand, follow these precautions
when removing the front and rear
wheel or performing other maintenance
requiring the motorcycle to stand up-
right. Check that the motorcycle is in a
stable and level position before starting
any maintenance. A strong wooden
box can be placed under the engine for
added stability.
To service the front wheel
1. Stabilize the rear of the motorcycle
by using a motorcycle stand or, if
an additional motorcycle stand is
not available, by placing a jack un-
der the frame in front of the rear
wheel.
2. Raise the front wheel off the
ground by using a motorcycle
stand.
To service the rear wheel
Raise the rear wheel off the ground by
using a motorcycle stand or, if a motor-
cycle stand is not available, by placinga jack either under each side of the
frame in front of the rear wheel or under
each side of the swingarm.
EAU24360
Front wheel
EAUM2632
To remove the front wheel
WARNING
EWA10821
To avoid injury, securely support the
vehicle so there is no danger of itfalling over.
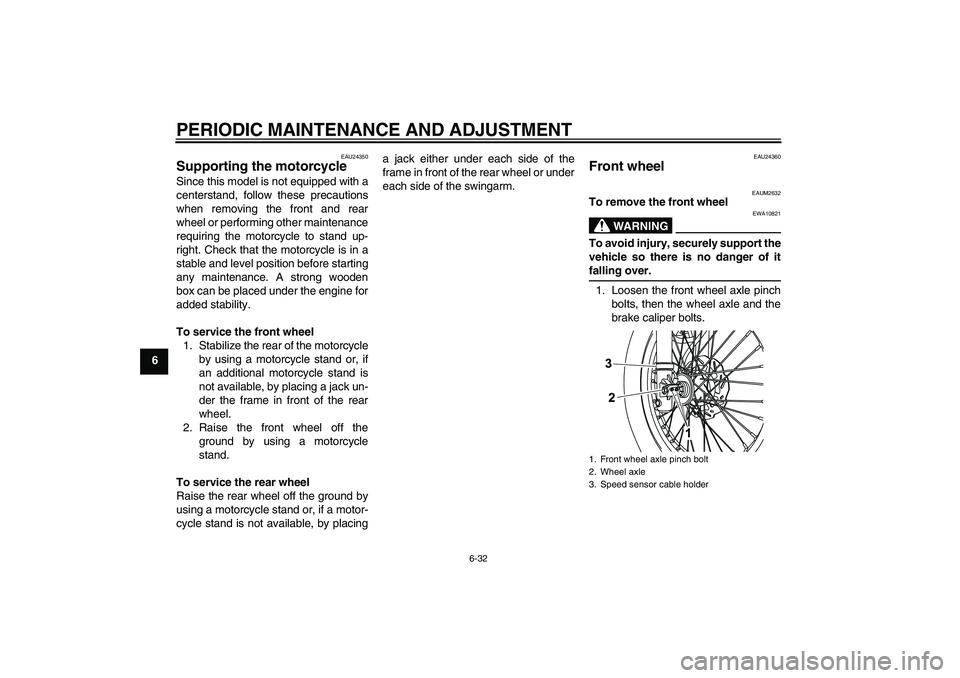
1. Loosen the front wheel axle pinch
bolts, then the wheel axle and the
brake caliper bolts.1. Front wheel axle pinch bolt
2. Wheel axle
3. Speed sensor cable holder
U22BE0E0.book Page 32 Wednesday, December 17, 2008 11:00 AM
Page 69 of 88

PERIODIC MAINTENANCE AND ADJUSTMENT
6-33
6 2. Lift the front wheel off the ground
according to the procedure on
page 6-32.
3. Remove the speed sensor lead
holder by removing the screw
(WR125R only).
4. Remove the brake caliper by re-
moving the bolts.
5. Pull the wheel axle out, remove the
speed sensor by pulling it out, and
then remove the wheel. NOTICE:
Do not apply the brake after the
brake calipers have been re-
moved, otherwise the brake
pads will be forced shut.
[ECA11051]EAUM2640
To install the front wheel
1. Lift the wheel up between the fork
legs.
2. Install the speed sensor at the
wheel hub.TIPMake sure that the projections on the
speed sensor rotor are aligned with the
notches in the wheel hub and that the
slot in the speed sensor fits over the re-tainer on the fork leg.
3. Insert the wheel axle.
4. Lower the front wheel so that it is
on the ground.5. Push down hard on the handlebar
several times to check for proper
fork operation.
6. Install the brake caliper by install-
ing the bolts.
TIPMake sure that there is enough space
between the brake pads before install-
ing the brake caliper onto the brakedisc.
7. Install the speed sensor lead hold-
er by installing the screw
(WR125R only).
8. Tighten the wheel axle, front wheel
axle pinch bolts and brake caliper
bolts to their specified torques.
1. Brake caliper
2. Brake caliper bolt
1. Speed sensor
Tightening torques:
Wheel axle:
58 Nm (5.8 m·kgf, 42 ft·lbf)
Front wheel axle pinch bolt:
9 Nm (0.9 m·kgf, 6.5 ft·lbf)
Brake caliper bolt:
30 Nm (3.0 m·kgf, 22 ft·lbf)
U22BE0E0.book Page 33 Wednesday, December 17, 2008 11:00 AM