Page 8 of 128

EBU17420
TABLE OF CONTENTS
SAFETY INFORMATION .............................. 1-1
LOCATION OF THE WARNING AND
SPECIFICATION LABELS ............................ 2-1
DESCRIPTION .............................................. 3-1
Left view ...................................................... 3-1
Right view.................................................... 3-1
Controls and instruments ............................ 3-2
INSTRUMENT AND CONTROL
FUNCTIONS .................................................. 4-1
Main switch ................................................ 4-1
Indicator lights and warning light ................ 4-2
Handlebar switches .................................... 4-3
Throttle lever .............................................. 4-4
Speed limiter .............................................. 4-4
Front brake lever ........................................ 4-5
Brake pedal and rear brake lever ............... 4-5
Parking brake ............................................. 4-6
Drive select lever ........................................ 4-7
Fuel tank cap .............................................. 4-7
Fuel ............................................................ 4-8
Fuel cock .................................................... 4-9Starter (choke) ..........................................4-10
Seat ..........................................................4-11
Storage compartment ...............................4-12
Adjusting the front shock absorber
assemblies ..............................................4-13
Adjusting the rear shock absorber
assembly .................................................4-14
PRE-OPERATION CHECKS ..........................5-1
Pre-operation check list ..............................5-1
Fuel .............................................................5-3
Engine oil ....................................................5-3
Final gear oil ...............................................5-3
Front and rear brakes .................................5-3
Throttle lever ...............................................5-4
Tires ............................................................5-4
Measuring the tire pressure ........................5-5
Tire wear limit .............................................5-6
Chassis fasteners .......................................5-6
Instruments, lights and switches .................5-6
OPERATION...................................................6-1
Starting a cold engine .................................6-1
Starting a warm engine ...............................6-3U3D563E0.book Page 1 Monday, May 12, 2008 11:12 AM
Page 13 of 128

1-3
1 hill. If you stall or roll backwards, follow the spe-
cial procedure for braking described in this man-
ual. Dismount on the uphill side or to a side if
pointed straight uphill. Turn the ATV around and
remount, following the procedure described in
this manual.
�Always check for obstacles before operating in a
new area.�Never attempt to operate over large obstacles,
such as large rocks or fallen trees. Always follow
proper procedures when operating over obsta-
cles as described in this manual.�Always be careful when skidding or sliding.
Learn to safely control skidding or sliding by
practicing at low speeds and on level, smooth
terrain. On extremely slippery surfaces, such as
ice, go slowly and be very cautious in order to re-
duce the chance of skidding or sliding out of con-
trol.�Never operate an ATV in fast flowing water or in
water deeper than that recommended in this
manual. Remember that wet brakes may have
reduced stopping ability. Test your brakes after
leaving water. If necessary, apply them several
times to let friction dry out the linings.
�Always be sure there are no obstacles or people
behind you when you operate in reverse. When
it is safe to proceed in reverse, go slowly.�Always use the size and type of tires specified in
this manual.�Always maintain proper tire pressure as de-
scribed in this manual.�Never modify an ATV through improper installa-
tion or use of accessories.�Never exceed the stated load capacity for an
ATV. Cargo should be properly distributed and
securely attached. Reduce speed and follow in-
structions in this manual for carrying cargo. Al-
low greater distance for braking.
WARNING
EWB00061�Always turn off the engine when refueling.�Do not refuel right after the engine has been
running and is still very hot.�Do not spill gasoline on the engine or ex-
haust pipe/muffler when refueling. Never re-
fuel while smoking, or in the vicinity of
sparks, open flames, or other sources of ig-
nition such as the pilot lights of water heat-
ers and clothes dryers. Gasoline can catch
fire and you could be burned.
U3D563E0.book Page 3 Monday, May 12, 2008 11:12 AM
Page 14 of 128
1-4
1
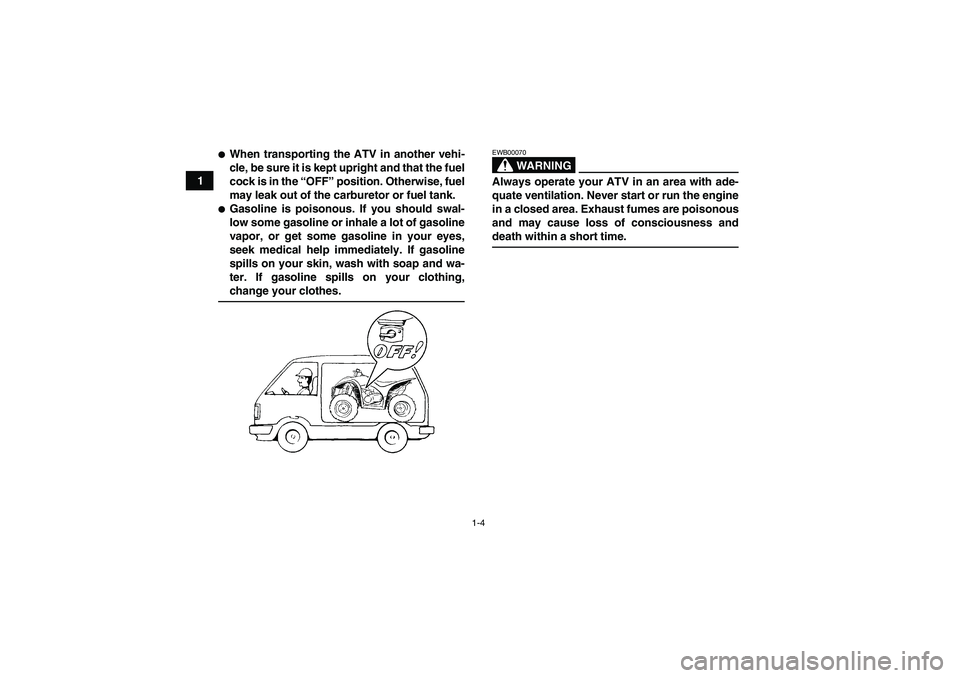
�When transporting the ATV in another vehi-
cle, be sure it is kept upright and that the fuel
cock is in the “OFF” position. Otherwise, fuel
may leak out of the carburetor or fuel tank.�Gasoline is poisonous. If you should swal-
low some gasoline or inhale a lot of gasoline
vapor, or get some gasoline in your eyes,
seek medical help immediately. If gasoline
spills on your skin, wash with soap and wa-
ter. If gasoline spills on your clothing,change your clothes.
WARNING
EWB00070Always operate your ATV in an area with ade-
quate ventilation. Never start or run the engine
in a closed area. Exhaust fumes are poisonous
and may cause loss of consciousness anddeath within a short time.
U3D563E0.book Page 4 Monday, May 12, 2008 11:12 AM
Page 18 of 128
3-1
3
EBU17680
DESCRIPTION
EBU17690Left view
EBU17700Right view
1. Front shock absorber assembly spring preload adjusting
ring
2. Fuel cock
3. Air filter case
4. Fuses
5. Storage compartment and tool kit
6. Seat lock lever
7. Rear shock absorber assembly spring preload adjusting
ring
8. Engine oil filler cap
9. Oil filter cartridge
10.V-belt cooling duct check hose
1. Spark arrester
2. Tail/brake light
3. Spark plug
4. Front shock absorber assembly spring preload adjusting
ring
5. Rear brake light switch
6. Brake pedal
7. V-belt case
U3D563E0.book Page 1 Monday, May 12, 2008 11:12 AM
Page 19 of 128
3-2
3
EBU17712Controls and instrumentsTIPThe ATV you have purchased may differ slightlyfrom the figures shown in this manual.1. Rear brake lever
2. Handlebar switches
3. Starter (choke)
4. Drive select lever
5. Main switch
6. Fuel tank cap
7. Front brake lever
8. Throttle leverU3D563E0.book Page 2 Monday, May 12, 2008 11:12 AM
Page 26 of 128
4-7
4
�Always be sure you have released the park-
ing brake before you begin to ride. The brake
could overheat if you ride the ATV without re-
leasing the parking brake. You could lose
braking performance which could cause an
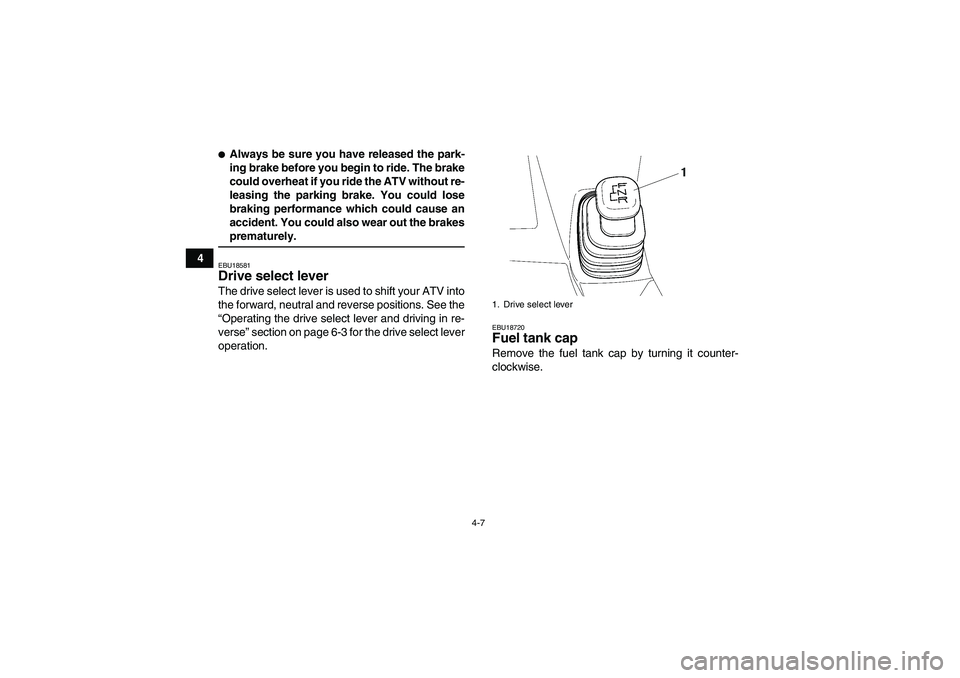
accident. You could also wear out the brakesprematurely.EBU18581Drive select lever The drive select lever is used to shift your ATV into
the forward, neutral and reverse positions. See the
“Operating the drive select lever and driving in re-
verse” section on page 6-3 for the drive select lever
operation.
EBU18720Fuel tank cap Remove the fuel tank cap by turning it counter-
clockwise.1. Drive select lever
U3D563E0.book Page 7 Monday, May 12, 2008 11:12 AM
Page 27 of 128
4-8
4
EBU18752Fuel Make sure that there is sufficient fuel in the tank.
Fill the fuel tank to the bottom of the filler tube as
shown.1. Fuel tank cap
1. Fuel level
2. Fuel tank filler tubeRecommended fuel:
UNLEADED GASOLINE ONLY
For Europe: Regular unleaded gasoline only
with a research octane number of 91 or high-
er
Fuel tank capacity:
14.5 L (3.83 US gal, 3.19 Imp.gal)
Fuel reserve amount:
4.5 L (1.19 US gal, 0.99 Imp.gal)
U3D563E0.book Page 8 Monday, May 12, 2008 11:12 AM
Page 28 of 128

4-9
4
TIPIf knocking or pinging occurs, use a different brandof gasoline or higher octane grade.NOTICEECB00070Use only unleaded gasoline. The use of leaded
gasoline will cause severe damage to internal
engine parts, such as the valves and pistonrings, as well as to the exhaust system.
WARNING
EWB00310�Do not overfill the fuel tank. Fuel expands
when it heats up. If the fuel tank is overfilled,
fuel could spill out due to heat from the en-
gine or the sun.�Be careful not to spill fuel, especially on the
engine or exhaust pipe which can cause a
fire and severe injury. Wipe up any spilled
fuel immediately.�Do not refuel right after the engine has been
running and is still very hot.�Be sure the fuel tank cap is closed securely.
EBU18820Fuel cock The fuel cock supplies fuel from the tank to the car-
buretor while also filtering it.
The fuel cock lever positions are explained as fol-
lows and shown in the illustrations.
OFF
With the fuel cock lever in this position, fuel will not
flow. Always turn the fuel cock lever to this position
when the engine is not running.1. Arrow mark positioned over “OFF”
U3D563E0.book Page 9 Monday, May 12, 2008 11:12 AM


4. Drive selec")