2009 YAMAHA TDM 900 clutch
[x] Cancel search: clutchPage 43 of 94

OPERATION AND IMPORTANT RIDING POINTS
5-2
2
3
4
56
7
8
9
tral position. (See page 5-2.) The
neutral indicator light should come
on. If not, ask a Yamaha dealer to
check the electrical circuit.
3. Start the engine by pushing the
start switch.
NOTICE:
For maxi-
mum engine life, never acceler-
ate hard when the engine is
cold!
[ECA11041]
If the engine fails to start, release
the start switch, wait a few sec-
onds, and then try again. Each
starting attempt should be as short
as possible to preserve the bat-
tery. Do not crank the engine more
than 10 seconds on any one at-
tempt.
EAU16671
Shifting
Shifting gears lets you control the
amount of engine power available for
starting off, accelerating, climbing hills,
etc.
The gear positions are shown in the il-
lustration.
TIP
To shift the transmission into the neu-
tral position, press the shift pedal down
repeatedly until it reaches the end of its
travel, and then slightly raise it.
NOTICE
ECA10260
●
Even with the transmission inthe neutral position, do not
coast for long periods of time
with the engine off, and do not
tow the motorcycle for long dis-
tances. The transmission is
properly lubricated only when
the engine is running. Inade-
quate lubrication may damage
the transmission.
●
Always use the clutch while
changing gears to avoid damag-
ing the engine, transmission,
and drive train, which are not
designed to withstand the
shock of forced shifting.
1. Shift pedal
2. Neutral position
1
1 2 3
4 5 6
N2
Page 47 of 94

PERIODIC MAINTENANCE AND ADJUSTMENT
6-2
2
3
4
5
67
8
9
EAU1770A
Periodic maintenance and lubrication chart
TIP
●
The annual checks must be performed every year, except if a kilometer-based maintenance, or for the UK, a
mileage-based maintenance, is performed instead.
●
From 50000 km (30000 mi), repeat the maintenance intervals starting from 10000 km (6000 mi).
●
Items marked with an asterisk should be performed by a Yamaha dealer as they require special tools, data and technical
skills.
NO. ITEM CHECK OR MAINTENANCE JOBODOMETER READING
ANNUAL
CHECK 1000 km
(600 mi)10000 km
(6000 mi)20000 km
(12000 mi)30000 km
(18000 mi)40000 km
(24000 mi)
1*
Fuel line
●
Check fuel hoses for cracks or
damage.
√√√√√
2*
Spark plugs
●
Check condition.
●
Clean and regap.
√√
●
Replace.
√√
3*
Valves
●
Check valve clearance.
●
Adjust.Every 40000 km (24000 mi)
4
Air filter element
●
Replace.
√
5
Clutch
●
Check operation.
●
Adjust.
√√√√√
6*
Front brake
●
Check operation, fluid level and
vehicle for fluid leakage.
√√√√√√
●
Replace brake pads. Whenever worn to the limit
7*
Rear brake
●
Check operation, fluid level and
vehicle for fluid leakage.
√√√√√√
●
Replace brake pads. Whenever worn to the limit
8*
Brake hoses
●
Check for cracks or damage.
√√√√√
●
Replace. Every 4 years
Page 48 of 94

PERIODIC MAINTENANCE AND ADJUSTMENT
6-3
1
2
3
4
5
6
7
8
9
9*
Wheels
●
Check runout and for damage.
√√√√
10
*
Tires
●
Check tread depth and for
damage.
●
Replace if necessary.
●
Check air pressure.
●
Correct if necessary.
√√√√√
11
*
Wheel bearings
●
Check bearing for looseness or
damage.
√√√√
12
*
Swingarm
●
Check operation and for
excessive play.
√√√√
●
Lubricate with lithium-soap-based
grease.
Every 50000 km (30000 mi)
13
Drive chain
●
Check chain slack, alignment and
condition.
●
Adjust and lubricate chain with a
special O-ring chain lubricant
thoroughly.Every 1000 km (600 mi) and after washing the motorcycle or riding in the rain
14
*
Steering bearings
●
Check bearing play and steering
for roughness.
√√√√√
●
Lubricate with lithium-soap-based
grease.
Every 20000 km (12000 mi)
15
*
Chassis fasteners
●
Make sure that all nuts, bolts and
screws are properly tightened.
√√√√√
16
Brake lever pivot
shaft
●
Lubricate with silicone grease.
√√√√√
17
Brake pedal pivot
shaft
●
Lubricate with lithium-soap-based
grease.
√√√√√
18
Clutch lever pivot
shaft
●
Lubricate with lithium-soap-based
grease.
√√√√√
NO. ITEM CHECK OR MAINTENANCE JOBODOMETER READING
ANNUAL
CHECK 1000 km
(600 mi)10000 km
(6000 mi)20000 km
(12000 mi)30000 km
(18000 mi)40000 km
(24000 mi)
Page 55 of 94

PERIODIC MAINTENANCE AND ADJUSTMENT
6-10
2
3
4
5
67
8
9
5. Remove the oil filter element cover
by removing the bolts.
6. Remove and replace the oil filter
element and O-rings.7. Install the oil filter element cover by
installing the bolts, then tightening
them to the specified torque.
TIP
Make sure that the O-rings are properly
seated.
8. Install the engine oil drain bolts,
and then tighten them to the spec-
ified torques.
9. Refill with the specified amount of
the recommended engine oil, and
then install and tighten the oil filler
cap.
TIP
Be sure to wipe off spilled oil on any
parts after the engine and exhaust sys-
tem have cooled down.
NOTICE
ECA11620
●
In order to prevent clutch slip-
page (since the engine oil also
lubricates the clutch), do not
mix any chemical additives. Do
not use oils with a diesel speci-
fication of “CD” or oils of a high-
er quality than specified. In
addition, do not use oils labeled
“ENERGY CONSERVING II” or
higher.
●
Make sure that no foreign mate-
rial enters the crankcase.
1. Engine oil drain bolt B
2. Oil filter element cover
3. Bolt
1. Oil filter element
2. O-ring
12
2
3
1
2
Tightening torque:
Oil filter element cover bolt:
10 Nm (1.0 m·kgf, 7.2 ft·lbf)
Tightening torques:
Engine oil drain bolt A:
35 Nm (3.5 m·kgf, 25 ft·lbf)
Engine oil drain bolt B:
30 Nm (3.0 m·kgf, 21.7 ft·lbf)
Recommended engine oil:
See page 8-1.
Oil quantity:
Without oil filter element replace-
ment:
3.80 L (4.02 US qt, 3.34 Imp.qt)
With oil filter element replacement:
3.90 L (4.12 US qt, 3.43 Imp.qt)
Page 63 of 94

PERIODIC MAINTENANCE AND ADJUSTMENT
6-18
2
3
4
5
67
8
9
EAU21960
Cast wheels
To maximize the performance, durabil-
ity, and safe operation of your vehicle,
note the following points regarding the
specified wheels.
●
The wheel rims should be checked
for cracks, bends or warpage be-
fore each ride. If any damage is
found, have a Yamaha dealer re-
place the wheel. Do not attempt
even the smallest repair to the
wheel. A deformed or cracked
wheel must be replaced.
●
The wheel should be balanced
whenever either the tire or wheel
has been changed or replaced. An
unbalanced wheel can result in
poor performance, adverse han-
dling characteristics, and a short-
ened tire life.
●
Ride at moderate speeds after
changing a tire since the tire sur-
face must first be “broken in” for it
to develop its optimal characteris-
tics.
EAU22042
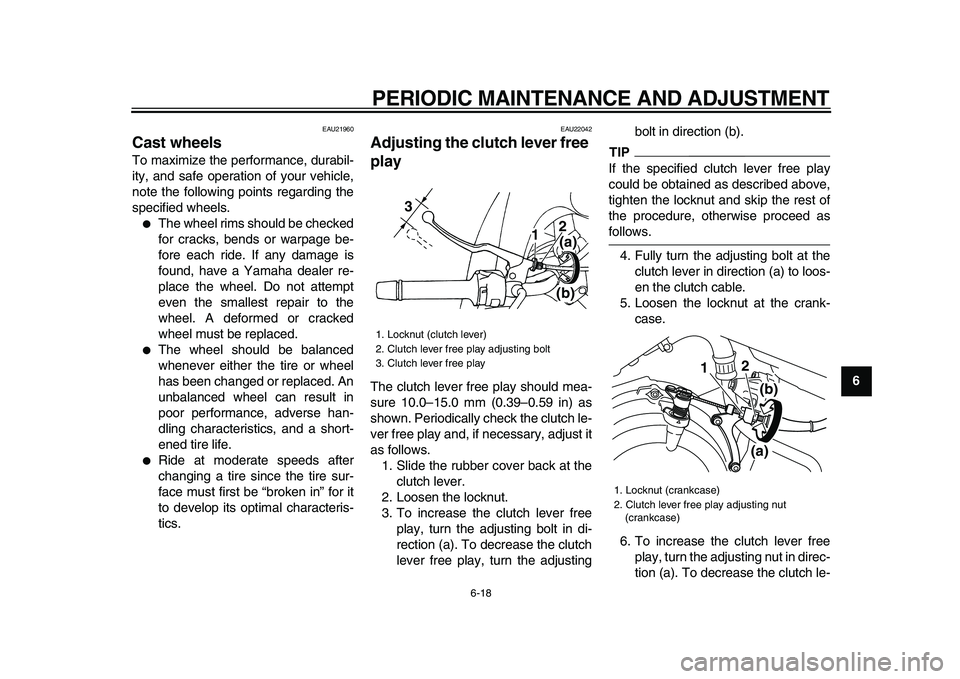
Adjusting the clutch lever free
play
The clutch lever free play should mea-
sure 10.0–15.0 mm (0.39–0.59 in) as
shown. Periodically check the clutch le-
ver free play and, if necessary, adjust it
as follows.
1. Slide the rubber cover back at the
clutch lever.
2. Loosen the locknut.
3. To increase the clutch lever free
play, turn the adjusting bolt in di-
rection (a). To decrease the clutch
lever free play, turn the adjustingbolt in direction (b).
TIP
If the specified clutch lever free play
could be obtained as described above,
tighten the locknut and skip the rest of
the procedure, otherwise proceed as
follows.
4. Fully turn the adjusting bolt at the
clutch lever in direction (a) to loos-
en the clutch cable.
5. Loosen the locknut at the crank-
case.
6. To increase the clutch lever free
play, turn the adjusting nut in direc-
tion (a). To decrease the clutch le-
1. Locknut (clutch lever)
2. Clutch lever free play adjusting bolt
3. Clutch lever free play
12
3
(a)
(b)
1. Locknut (crankcase)
2. Clutch lever free play adjusting nut
(crankcase)
12
(a)(b)
Page 64 of 94

PERIODIC MAINTENANCE AND ADJUSTMENT
6-19
1
2
3
4
5
6
7
8
9
ver free play, turn the adjusting nut
in direction (b).
7. Tighten the locknut at the clutch le-
ver and the crankcase.
8. Slide the rubber cover to its origi-
nal position.
EAU22272
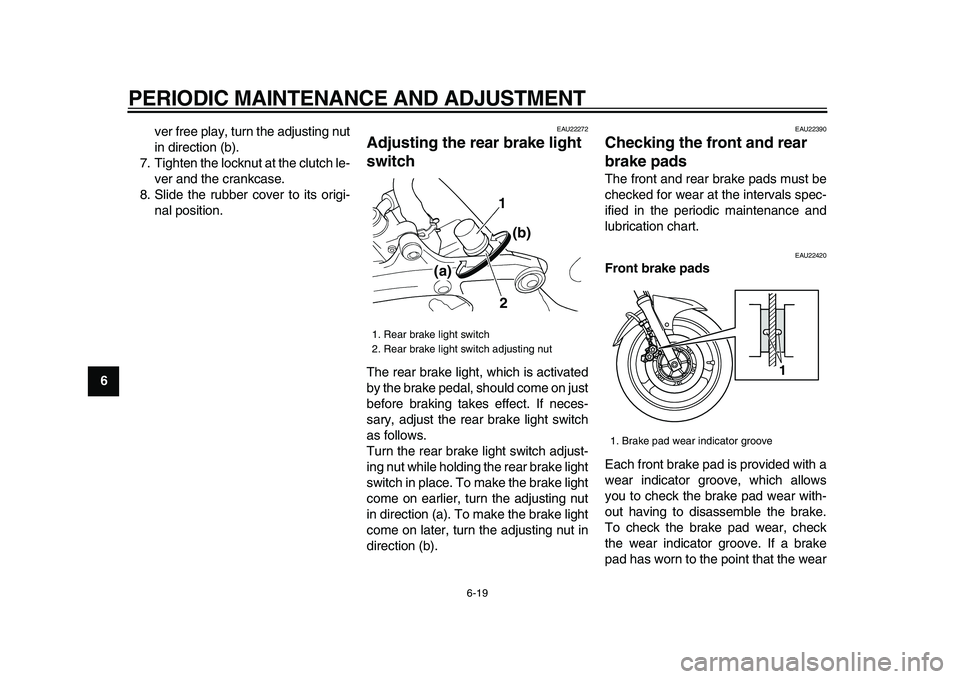
Adjusting the rear brake light
switch
The rear brake light, which is activated
by the brake pedal, should come on just
before braking takes effect. If neces-
sary, adjust the rear brake light switch
as follows.
Turn the rear brake light switch adjust-
ing nut while holding the rear brake light
switch in place. To make the brake light
come on earlier, turn the adjusting nut
in direction (a). To make the brake light
come on later, turn the adjusting nut in
direction (b).
EAU22390
Checking the front and rear
brake pads
The front and rear brake pads must be
checked for wear at the intervals spec-
ified in the periodic maintenance and
lubrication chart.
EAU22420
Front brake pads
Each front brake pad is provided with a
wear indicator groove, which allows
you to check the brake pad wear with-
out having to disassemble the brake.
To check the brake pad wear, check
the wear indicator groove. If a brake
pad has worn to the point that the wear
1. Rear brake light switch
2. Rear brake light switch adjusting nut
1
2 (a)(b)
1. Brake pad wear indicator groove
1
Page 70 of 94

PERIODIC MAINTENANCE AND ADJUSTMENT
6-25
1
2
3
4
5
6
7
8
9
EAU23142
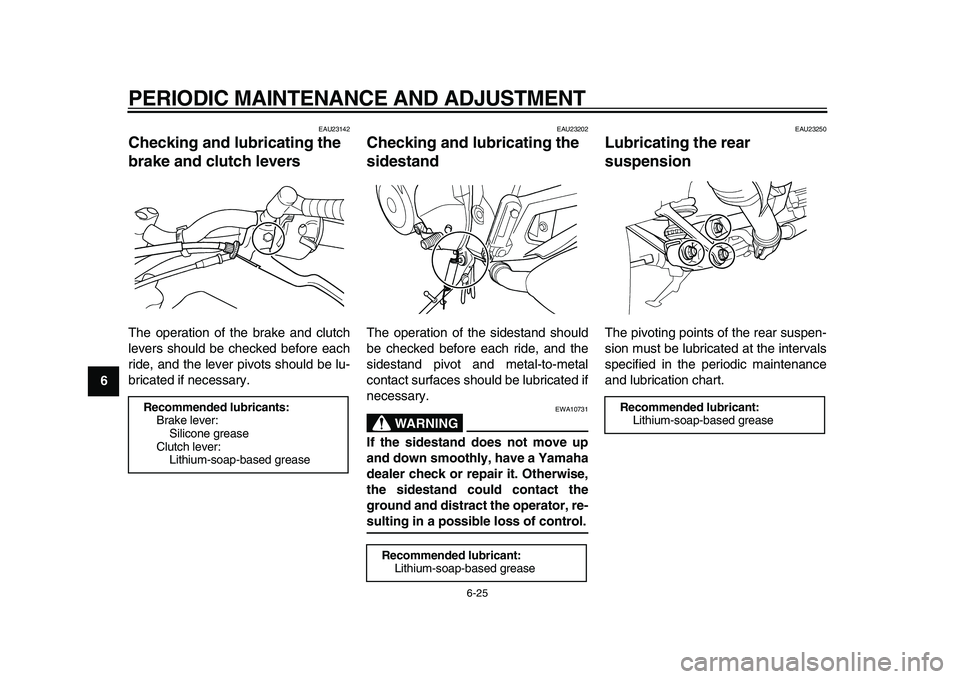
Checking and lubricating the
brake and clutch levers
The operation of the brake and clutch
levers should be checked before each
ride, and the lever pivots should be lu-
bricated if necessary.
EAU23202
Checking and lubricating the
sidestand
The operation of the sidestand should
be checked before each ride, and the
sidestand pivot and metal-to-metal
contact surfaces should be lubricated if
necessary.
WARNING
EWA10731
If the sidestand does not move up
and down smoothly, have a Yamaha
dealer check or repair it. Otherwise,
the sidestand could contact the
ground and distract the operator, re-
sulting in a possible loss of control.
EAU23250
Lubricating the rear
suspension
The pivoting points of the rear suspen-
sion must be lubricated at the intervals
specified in the periodic maintenance
and lubrication chart.
Recommended lubricants:
Brake lever:
Silicone grease
Clutch lever:
Lithium-soap-based grease
Recommended lubricant:
Lithium-soap-based grease
Recommended lubricant:
Lithium-soap-based grease
Page 85 of 94

8-1
2
3
4
5
6
7
89
SPECIFICATIONS
EAU2633P
Dimensions:
Overall length:
2180 mm (85.8 in)
Overall width:
800 mm (31.5 in)
Overall height:
1290 mm (50.8 in)
Seat height:
825 mm (32.5 in)
Wheelbase:
1485 mm (58.5 in)
Ground clearance:
160 mm (6.30 in)
Minimum turning radius:
2900 mm (114.2 in)
Weight:
With oil and fuel:
TDM900 223.0 kg (492 lb)
TDM900A 226.0 kg (498 lb)
Engine:
Engine type:
Liquid cooled 4-stroke, DOHC
Cylinder arrangement:
Forward-inclined parallel 2-cylinder
Displacement:
897.0 cm
3
Bore
×
stroke:
92.0
×
67.5 mm (3.62
×
2.66 in)
Compression ratio:
10.40 :1Starting system:
Electric starter
Lubrication system:
Dry sump
Engine oil:
Type:
SAE 10W-30, SAE 10W-40, SAE 15W-40,
SAE 20W-40 or SAE 20W-50
Recommended engine oil grade:
API service SG type or higher, JASO stan-
dard MA
Engine oil quantity:
Without oil filter element replacement:
3.80 L (4.02 US qt, 3.34 Imp.qt)
With oil filter element replacement:
3.90 L (4.12 US qt, 3.43 Imp.qt)
Cooling system:
Coolant reservoir capacity (up to the maxi-
mum level mark):
0.25 L (0.26 US qt, 0.22 Imp.qt)
Radiator capacity (including all routes):
1.75 L (1.85 US qt, 1.54 Imp.qt)
Air filter:
Air filter element:
Oil-coated paper element
Fuel:
Recommended fuel:
Regular unleaded gasoline only
Fuel tank capacity:
20.0 L (5.28 US gal, 4.40 Imp.gal)
Fuel reserve amount:
3.5 L (0.92 US gal, 0.77 Imp.gal)
Fuel injection:
Throttle body:
Type/quantity:
38EIS/2
Spark plug (s):
Manufacturer/model:
NGK/DPR8EA-9
Manufacturer/model:
DENSO/X24EPR-U9
Spark plug gap:
0.8–0.9 mm (0.031–0.035 in)
Clutch:
Clutch type:
Wet, multiple-disc
Transmission:
Primary reduction system:
Spur gear
Primary reduction ratio:
67/39 (1.718)
Secondary reduction system:
Chain drive
Secondary reduction ratio:
42/16 (2.625)
-20 -10 0
10 20 30
40
50 ˚C
SAE 10W-30
SAE 15W-40SAE 20W-40SAE 20W-50
SAE 10W-40SAE 10W-50