Page 69 of 286
02 Instruments and controls
Trip computer
0269
ACTUAL SPEED (Canadian models only)This function provides the driver with an instan-
taneous conversion of the car's current speed
from km/h to mph.
NOTE
Trip computer readings may vary slightly
depending on the circumference of the tires
on the car, tire inflation, or driving style.
Page 72 of 286

02 Instruments and controlsRight-side steering wheel lever
0272
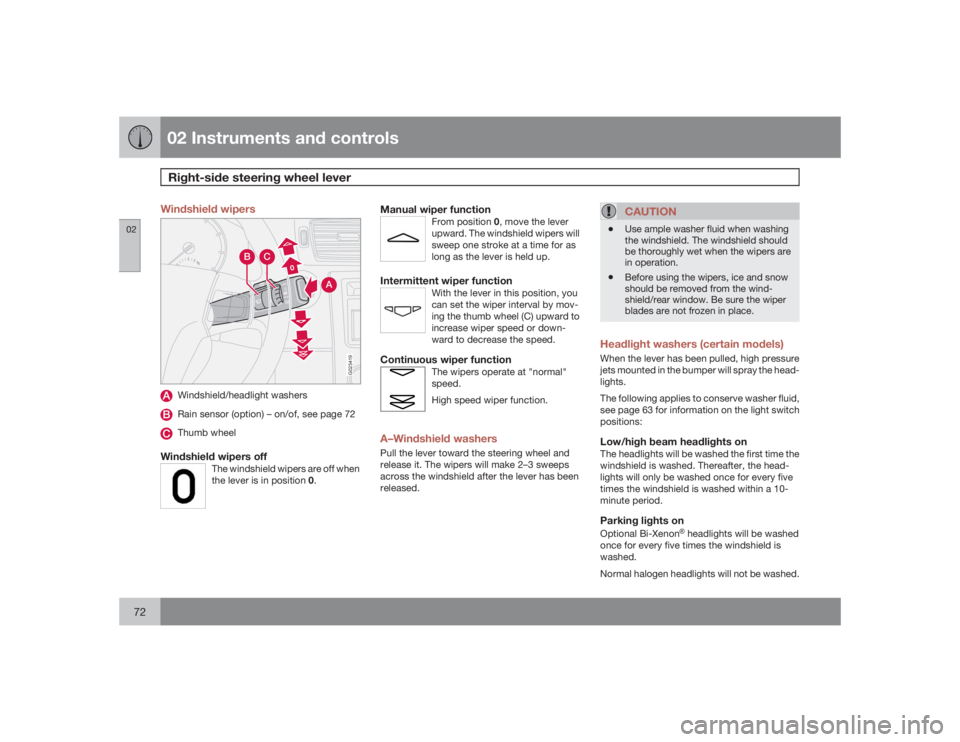
Windshield wipers
00
A
C
B
G025419
Windshield/headlight washersRain sensor (option) – on/of, see page 72Thumb wheel
Windshield wipers off
The windshield wipers are off when
the lever is in position 0.
Manual wiper function
From position 0, move the lever
upward. The windshield wipers will
sweep one stroke at a time for as
long as the lever is held up.
Intermittent wiper function
With the lever in this position, you
can set the wiper interval by mov-
ing the thumb wheel (C) upward to
increase wiper speed or down-
ward to decrease the speed.
Continuous wiper function
The wipers operate at "normal"
speed.
High speed wiper function.
A–Windshield washersPull the lever toward the steering wheel and
release it. The wipers will make 2–3 sweeps
across the windshield after the lever has been
released.
CAUTION
•
Use ample washer fluid when washing
the windshield. The windshield should
be thoroughly wet when the wipers are
in operation.
•
Before using the wipers, ice and snow
should be removed from the wind-
shield/rear window. Be sure the wiper
blades are not frozen in place.
Headlight washers (certain models)When the lever has been pulled, high pressure
jets mounted in the bumper will spray the head-
lights.
The following applies to conserve washer fluid,
see page 63 for information on the light switch
positions:Low/high beam headlights onThe headlights will be washed the first time the
windshield is washed. Thereafter, the head-
lights will only be washed once for every five
times the windshield is washed within a 10-
minute period.Parking lights onOptional Bi-Xenon
�Ÿ headlights will be washed
once for every five times the windshield is
washed.
Normal halogen headlights will not be washed.
Page 74 of 286

02 Instruments and controlsSteering wheel adjustment, Hazard warning flashers
0274
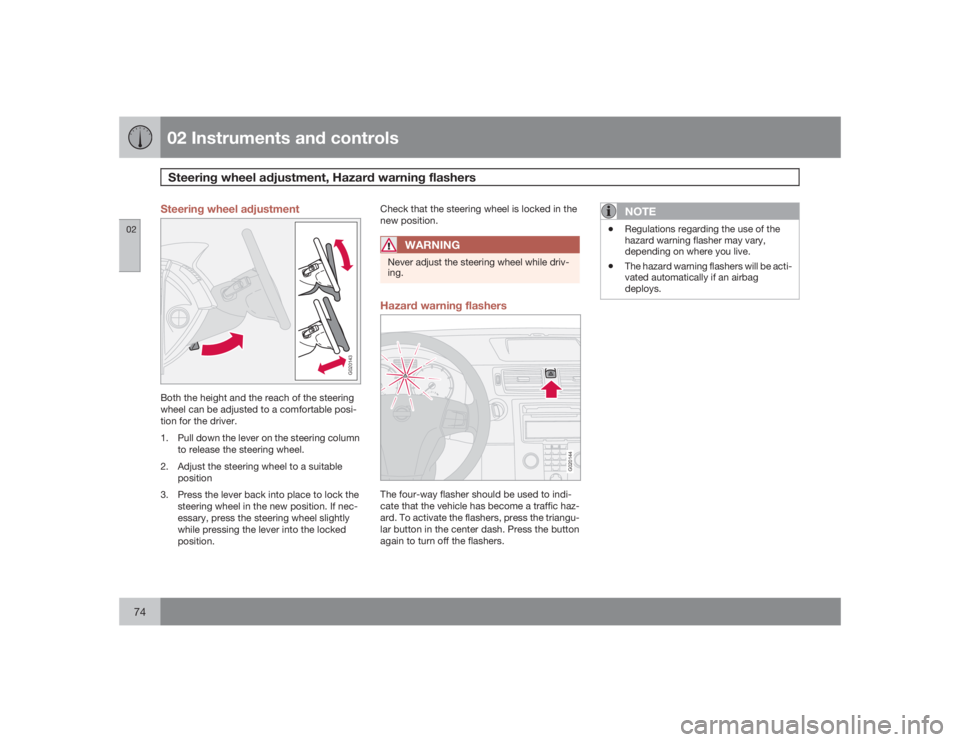
Steering wheel adjustment
G020143
Both the height and the reach of the steering
wheel can be adjusted to a comfortable posi-
tion for the driver.
1. Pull down the lever on the steering column
to release the steering wheel.
2. Adjust the steering wheel to a suitable
position
3. Press the lever back into place to lock the
steering wheel in the new position. If nec-
essary, press the steering wheel slightly
while pressing the lever into the locked
position.Check that the steering wheel is locked in the
new position.
WARNING
Never adjust the steering wheel while driv-
ing.Hazard warning flashers
G020144
The four-way flasher should be used to indi-
cate that the vehicle has become a traffic haz-
ard. To activate the flashers, press the triangu-
lar button in the center dash. Press the button
again to turn off the flashers.
NOTE
•
Regulations regarding the use of the
hazard warning flasher may vary,
depending on where you live.
•
The hazard warning flashers will be acti-
vated automatically if an airbag
deploys.
Page 75 of 286

02 Instruments and controls
Parking brake
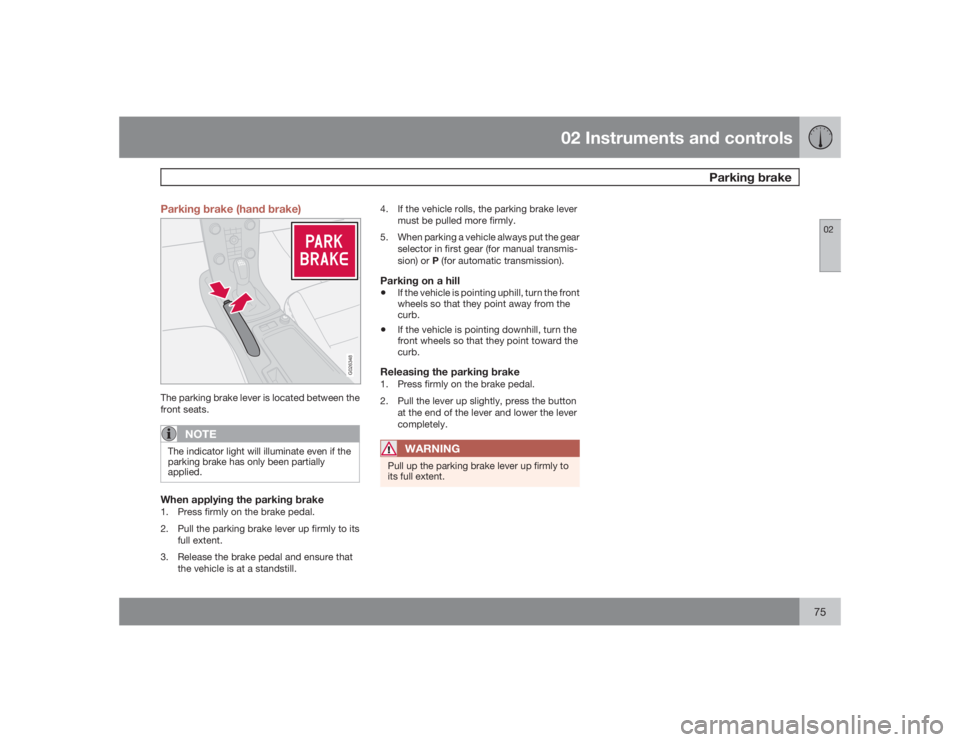
0275 Parking brake (hand brake)
G026348
The parking brake lever is located between the
front seats.
NOTE
The indicator light will illuminate even if the
parking brake has only been partially
applied.When applying the parking brake1. Press firmly on the brake pedal.
2. Pull the parking brake lever up firmly to its
full extent.
3. Release the brake pedal and ensure that
the vehicle is at a standstill.4. If the vehicle rolls, the parking brake lever
must be pulled more firmly.
5. When parking a vehicle always put the gear
selector in first gear (for manual transmis-
sion) or P (for automatic transmission).
Parking on a hill•
If the vehicle is pointing uphill, turn the front
wheels so that they point away from the
curb.
•
If the vehicle is pointing downhill, turn the
front wheels so that they point toward the
curb.
Releasing the parking brake1. Press firmly on the brake pedal.
2. Pull the lever up slightly, press the button
at the end of the lever and lower the lever
completely.
WARNING
Pull up the parking brake lever up firmly to
its full extent.
Page 76 of 286

02 Instruments and controlsPower windows
0276
Operation
G017439
Control panel in driver's door
Open/close front windowsOpen/close rear windows
The power windows are controlled by buttons
in the arm rests.
•
The ignition must be ON (ignition key in
positionI,II or the engine running) for the
power windows to function.
•
The power windows will also function after
the ignition has been switched off as long
as neither of the front doors has been
opened.
Opening a windowLightly press down the front edge of any of the
buttons (A or B) to the first detent ("stop") to
open a window to the position of your choice.
WARNING
•
Always remove the ignition key when
the vehicle is unattended.
•
Never leave children unattended in the
vehicle.
•
Make sure that the windows are com-
pletely unobstructed before they are
operated.
•
Press the front part of any of the buttons (A
or B) as far down as possible and release
to automatically open the window com-
pletely.
•
To stop the window at any time, pull the
button up.NOTE
To reduce buffeting wind noise if the rear
windows are opened, also open the front
windows slightly.Closing a window•
Lightly pull up the front edge of any of the
buttons (A or B) to the first detent ("stop")to close a window to the position of your
choice.
•
Pull the front part of any of the buttons (A
or B) up as far as possible and release to
automatically close the window com-
pletely. To stop the window at any time,
press the button down.
Lockout switch for rear windows
G017440
Lockout switchThe electrically operated rear door windows
can be disabled by a switch located on the
driver's door (see illustration).
If the light in the switch is OFF: The rear door
windows can be raised or lowered with the
Page 77 of 286
02 Instruments and controls
Power windows
0277
buttons on the rear door armrests or with the
buttons on the driver's door armrest.
If the light in the switch is ON: The rear door
windows can only be raised or lowered with the
buttons on the driver's door.Power window control – front
passenger's side
G019511
The control for the power window in the front
passenger's door operates that window only.
Power window controls – rear doors
G028208
The rear door windows can be operated with
the control on each door and with the switch
on the driver's door.
Page 78 of 286

02 Instruments and controlsMirrors
0278
Rearview mirror
G020146
Day/night controlNormal positionNight position, reduces glare from follow-
ing traffic
Night positionTo reduce glare from the headlights of follow-
ing vehicles, use control (1) to switch between
the normal and night-driving positions.Auto-dim function (option)An optional integrated sensor reacts to head-
lights from following traffic and automatically
reduces glare.
Rearview mirror with compass (option)
G029930
The upper right-hand corner of the rearview
mirror has an integrated display that shows the
compass direction toward which the car is
pointing. Eight different directions can be dis-
played:
N,NE
,E,SE
,S,SW
,W and
NW
. The
display shows your car's orientation with
respect to true north.
Calibrating the compass
G031045
The earth is divided into 15 magnetic zones.
The compass is initially set for the zone to
which the car was delivered, and should
always be adjusted if the car is driven to a new
magnetic zone. A "
C" will be displayed if cali-
bration becomes necessary.
To calibrate the compass:
1. Stop the car in a large, open area, away
from traffic.
2. Using a pen or similar object, hold the but-
ton (1) depressed for at least 6 seconds.
"
C" will be displayed.
Page 79 of 286

02 Instruments and controls
Mirrors
02�`�`79
G026409
Magnetic zones3. Press button (1) for at least 3 seconds to
display the number of the current magnetic
zone.
4. Press button (1) repeatedly until the num-
ber for the required geographical area
(
1 – 15) is displayed. "
C" will be displayed
again.
5. Drive slowly in a circle at a maximum speed
of 6 mph (10 km/h) until a compass direc-
tion is displayed.
Calibration is complete.
Power door mirrors
G018252
The mirror control switches are located on the
driver's door armrest.The mirror control switches are located on the
driver's door armrest.Adjusting the mirrors
WARNING
•
The mirrors should always be adjusted
prior to driving.
•
Objects seen in the passenger's side
wide-angle door mirror are closer than
they appear to be.
Driver's door mirror:�±
Press the L button (a light in the switch will
go on) to activate the adjustment control.
Use this control to adjust the driver's door
mirror.Passenger's door mirror:1.
Press the R switch (a light in the switch will
go on) to activate the adjustment control.
Use this control to adjust the passenger's
door mirror.
2. After you have adjusted the mirror(s), press
theL or R switch again (the LED will go out)
to deactivate the adjustment control.Storing the mirrors' positionThe position of the door mirrors is stored when
the vehicle is locked. The next time the driver's
door is unlocked with the same remote control
and that door is opened within 2 minutes, the
optional power driver's seat and side door mir-
rors will automatically move to the position that
they were in when the doors were most
recently locked with the same remote control.Folding power door mirrors (option on
certain markets only)The mirrors can be folded in for parking/driving
in narrow spaces.